
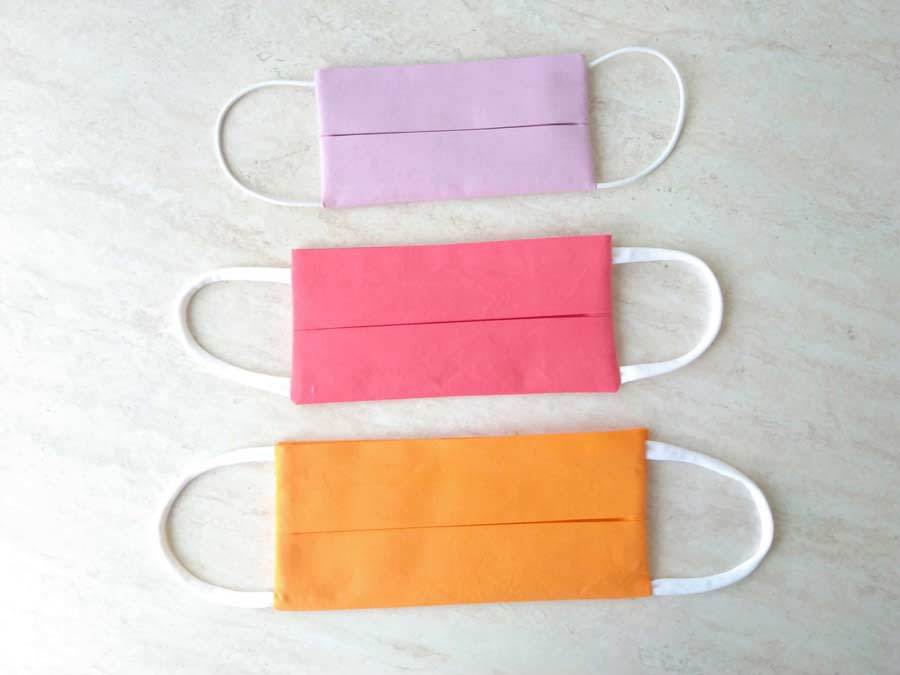
DIY Face Mask | NO Sewing Machine | Hand stitch guide for beginners
Want to make a mask but you don’t have a sewing machine? No worries! Get ready to work those fingers with a needle and a thread, old school style. That’s right, it’s time for some hand sewing fun! This DIY face mask no sewing machine project will give you the chance to enjoy some hand sewing action.
Since this face mask is so simple and fun to make, you can even do it together with your little ones. Teach them how to sew and how to be socially responsible all at once! If you think this all sounds appealing, check out this homemade face mask tutorial. Follow the instructions and you’ll learn how to make face mask without sewing machine before you know it!
Below you will find my step by step written tutorial with VIDEO instructions for all the visual learners.
We occasionally link to goods offered by vendors to help the reader find relevant products. Some of the links may be affiliate meaning we earn a small commission if an item is purchased.
Table of Contents
- 1 How to make face mask without sewing machine
- 2 Supplies and tools
- 3 How to hand sew a DIY face mask | NO sewing machine
- 3.1 DIY face mask NO sewing machine VIDEO TUTORIAL
- 3.2 INSTRUCTIONS:
- 3.3 STEP 1: Prepare the fabric
- 3.4 STEP 2: Fold edges
- 3.5 STEP 3: Making the box pleats
- 3.6 STEP 4: Pivot and repeat
- 3.7 STEP 5: Pin the elastic
- 3.8 STEP 6: Fold the face mask
- 3.9 STEP 7: Hand sew the face mask
- 3.10 STEP 8: Turn right side out
- 3.11 STEP 9: (Optional) Adding nose stay
How to make face mask without sewing machine
Supplies and tools
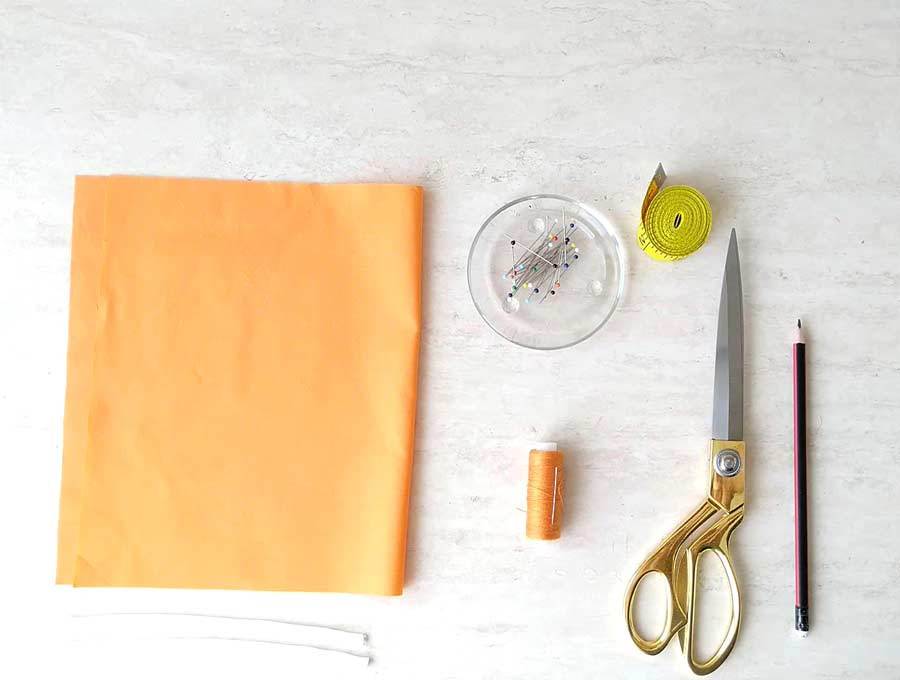
- fabric – 100% tightly woven cotton (8″ x 15″)
- matching thread thread
- 1/16″ round elastic (preferable) or 1/8″ flat elastic – 2 x 5-8″ long or t-shirt ties
- scissors (or rotary cutter and a cutting mat)
- ruler or measuring tape
- iron and ironing board
- sewing clips or pins and a needle
- nose wire (optional)
DOWNLOAD: face mask without a sewing machine pattern sizes (Free PDF file)
NOTE: If you like the pattern but you want to use your sewing machine you can certainly do that! It will be even faster
Follow us for free patterns & tutorials! [easy-profiles]
How to hand sew a DIY face mask | NO sewing machine
Watch the handmade face mask video first and then follow the written step by step instructions below.
Please enjoy and don’t forget to Like and SUBSCRIBE over on YouTube to be kept up to date with new videos as they come out.
DIY face mask NO sewing machine VIDEO TUTORIAL
INSTRUCTIONS:
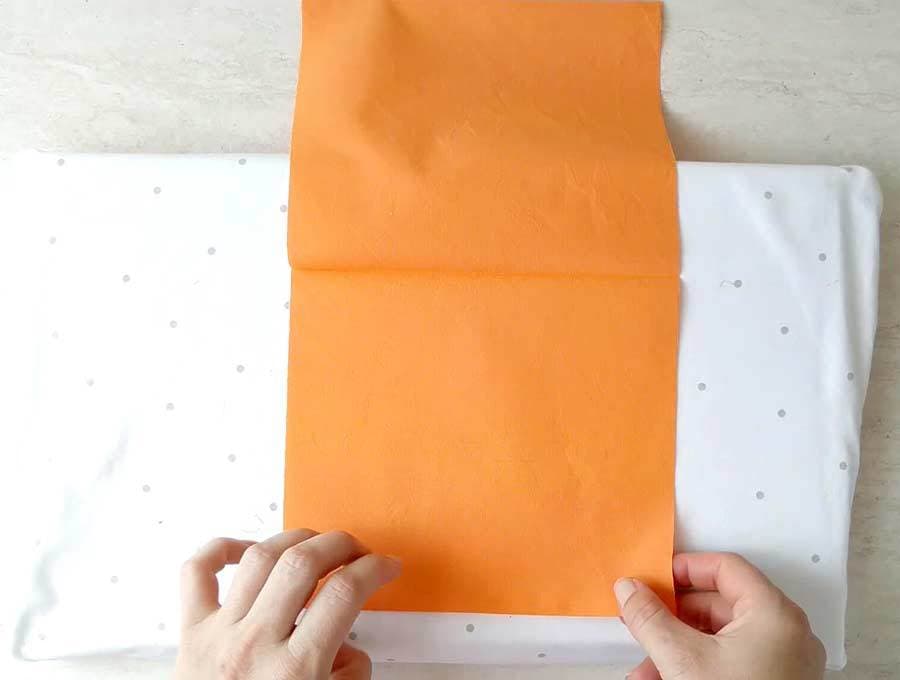
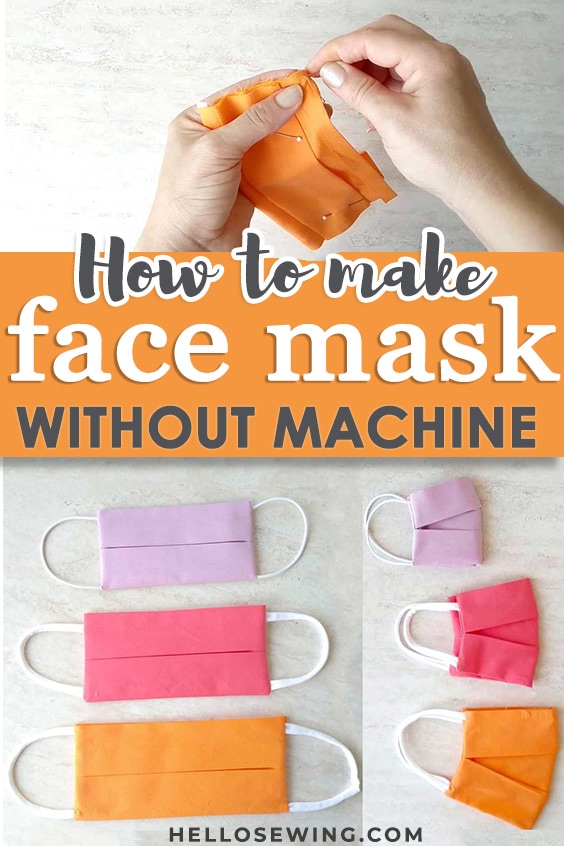
STEP 1: Prepare the fabric
The first thing you should do when starring any kind of sewing project is to wash the fabric thoroughly. Then take it to the board and iron it well. This will prevent any unwanted shrinkage or deformation of the material later on.
Once you have done that, place the fabric with the right side up on a flat surface. Fold the fabric piece in half so that the short edges are aligned with each other and press to create a crease in the middle
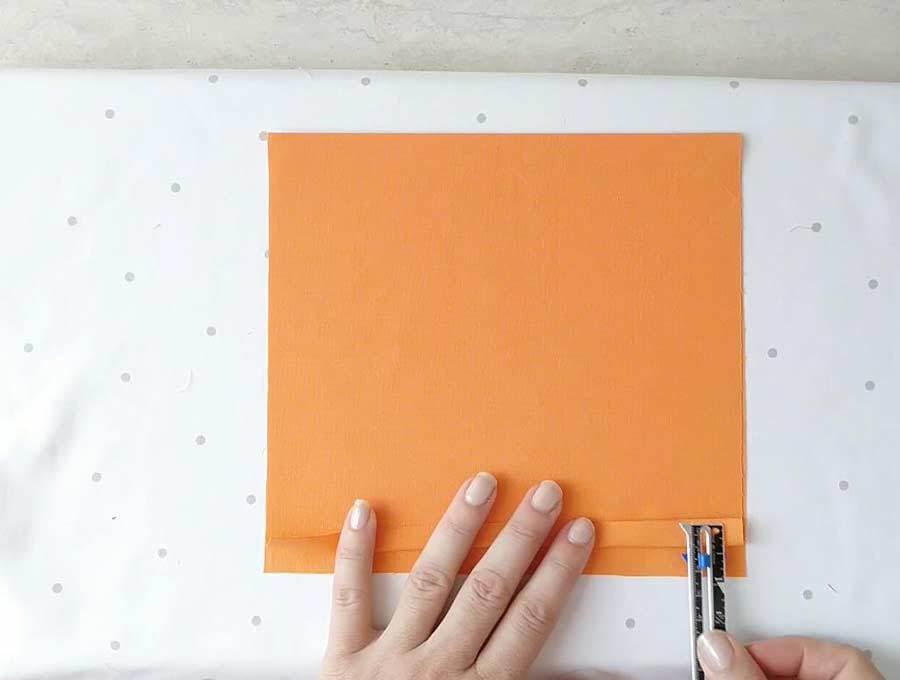
STEP 2: Fold edges
There’s quite some folding work to be done in this project, so stay focused. It’s not complicated but you need to do it right..
Lay the fabric so that the open edge is facing down. Grab one layer of that edge and fold it about half-inch upward. Repeat on the other layer of the open edge. Press everything flat on the ironing board.
Unfold the fabric, keeping the right sides up and the longer edges on the sides.
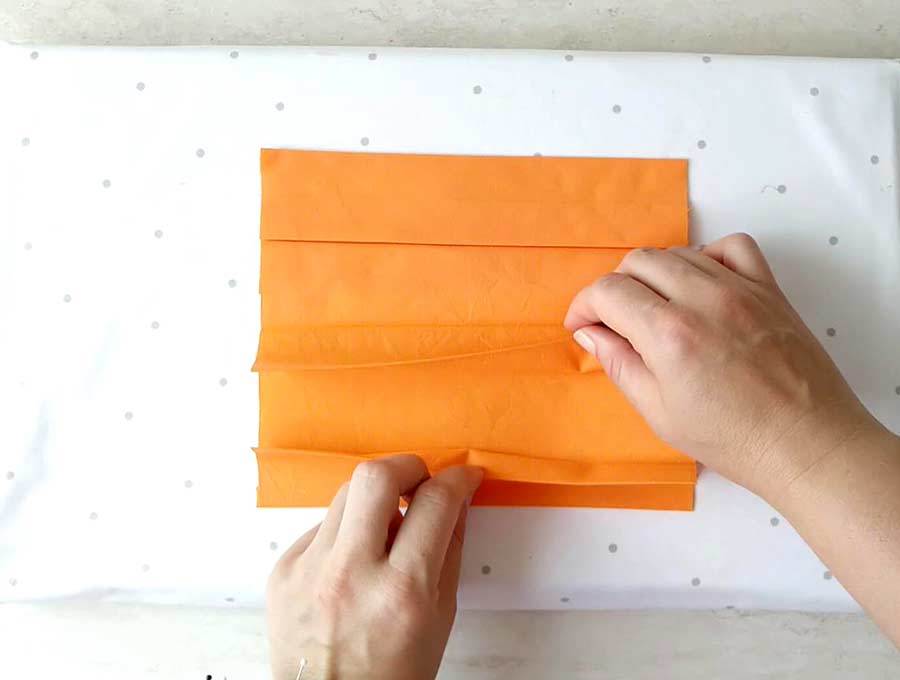
STEP 3: Making the box pleats
Grab the bottom edge and fold it upwards to meet the crease along the middle of the fabric. Do that one more time. Unfold the fabric piece.
The lower half of the fabric should now be divided into four horizontal sections by folding creases. If the creases aren’t clear enough, you can use a washable pen or sewist chalk to mark them.
Next comes the tricky part.
Using both of your hands, pinch the lowest crease and pull it upwards. Align it with the first crease above and press the fabric well with your iron.
In the same manner, pinch the first crease above the new fold, and pull it down. Align it with the top edge of the new fold and press everything flat.
STEP 4: Pivot and repeat
Pivot the entire fabric piece so that the top and bottom edges change places.
Now repeat the entire previous step on the bottom side, the one without any creases or folds yet.
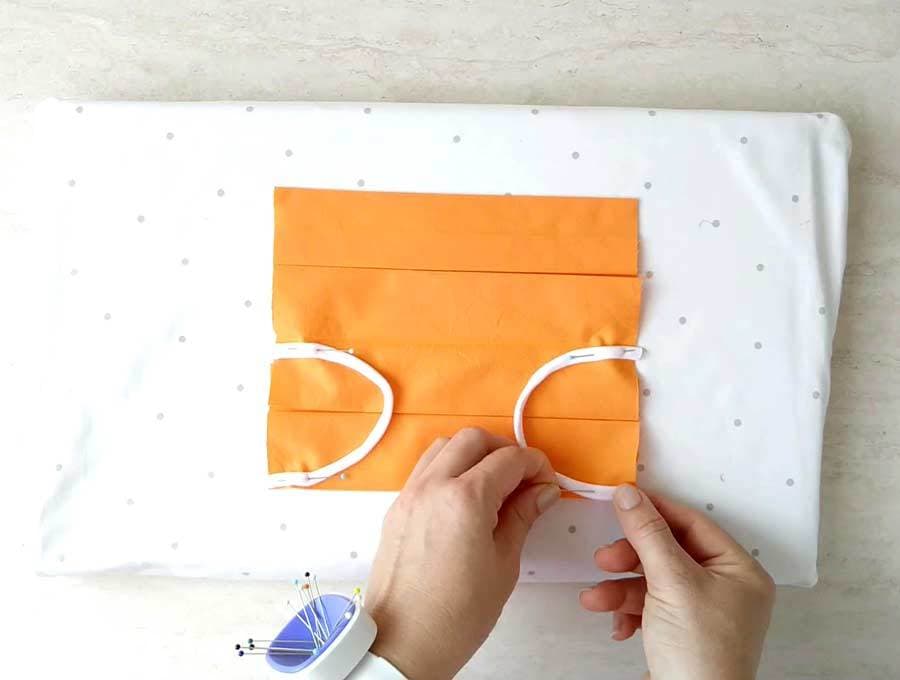
STEP 5: Pin the elastic
Put one end of the elastic in the bottom left corner of the fabric and pin it in place. Put its other end where the center crease meets the left edge of the fabric. Pin in place, making sure that the elastic is forming a shape of a semicircle that is sitting on the fabric.
Repeat the same process on the right side. Just do everything as if it were a mirrored image.
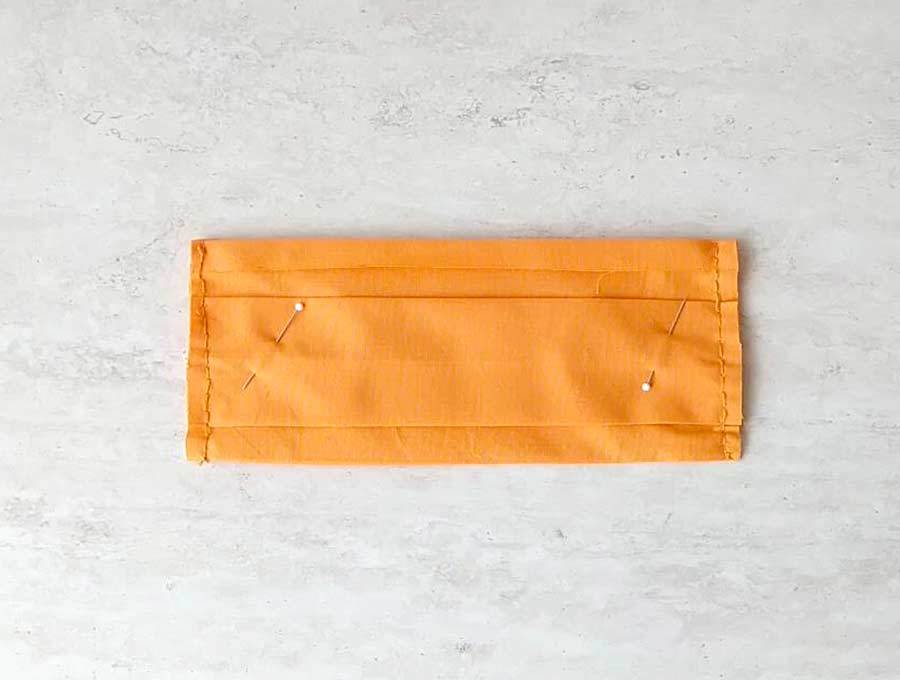
STEP 6: Fold the face mask
Grab the top edge of the fabric and bring it down, folding the entire mask in half. The wrong sides should be facing outwards.
Align the edges, make sure the folds are aligned properly and secure everything in place with pins.
STEP 7: Hand sew the face mask
Thread your needle and knot the ends. Sew across one of the shorter edge of the mask using a backstitch. Make sure to go through the elastic piece ends as well. Do the same on the other short edge of the mask.
STEP 8: Turn right side out
Remove all pins. Turn the entire mask inside-out through the opening on one of the long edges which doubles as a filter pocket. Straighten everything up, check the corners, and press the mask flat on your ironing board.
Take the filter and insert it into the opening on the top side of the mask.
STEP 9: (Optional) Adding nose stay
Let me show you the easiest way to add a nose wire to your face mask. While you can certainly sew it in place, by inserting the wire under the top fold, I suggest you make your life a little easier and try this new no-sew method.

Take a piece of fusible tape slightly larger than your nose stay, but smaller than the fold and insert it in the middle under the fold. Place the nose wire on top of it and fold back the top fold. Press with a hot iron to fuse. that’s it! No sewing involved!
That’s it your DIY face mask without sewing machine is ready!
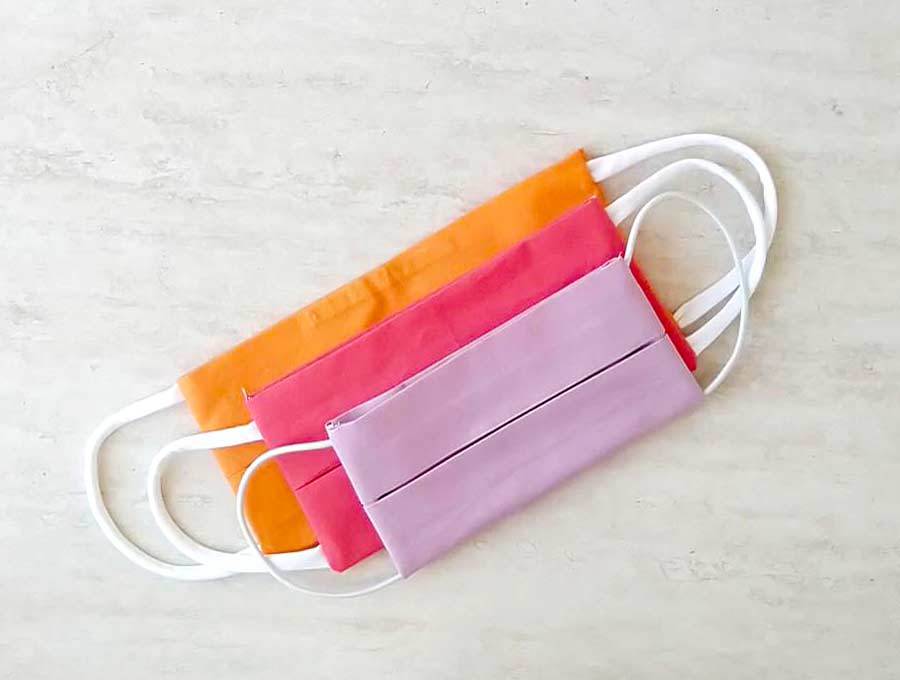
I hope you had fun learning how to make a mask without sewing machine. Try making a few of these on your own. Then let us all know how they turned out. If you have some suggestions on how to make this mask even better, share them with us in the comment section below. Stay safe, stay responsible, and have fun sewing!
Do you like this? Pin for later:
Wanna be friends? Click HERE and follow me on Pinterest
RELATED: