
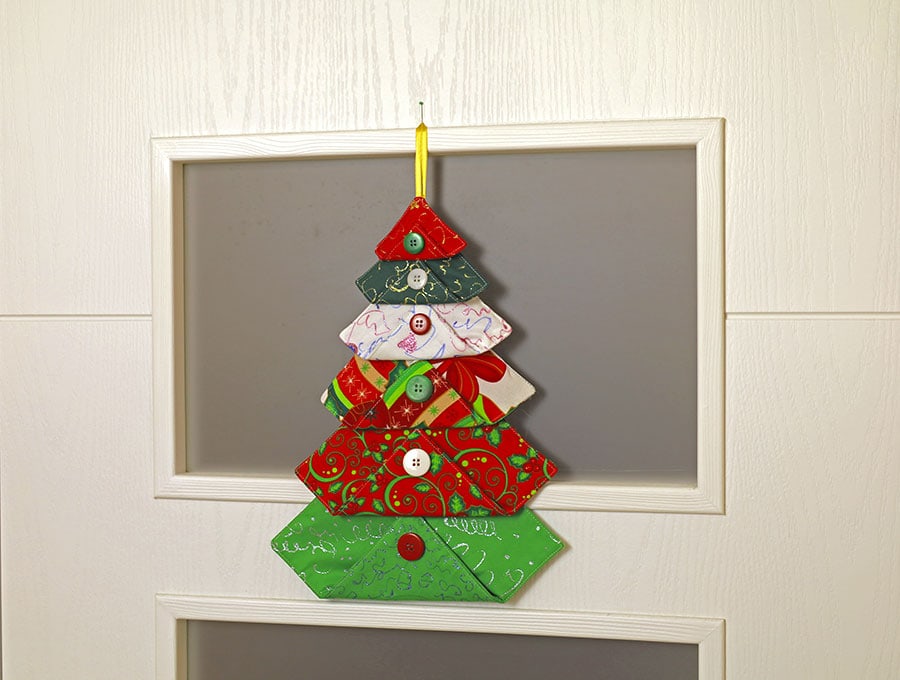
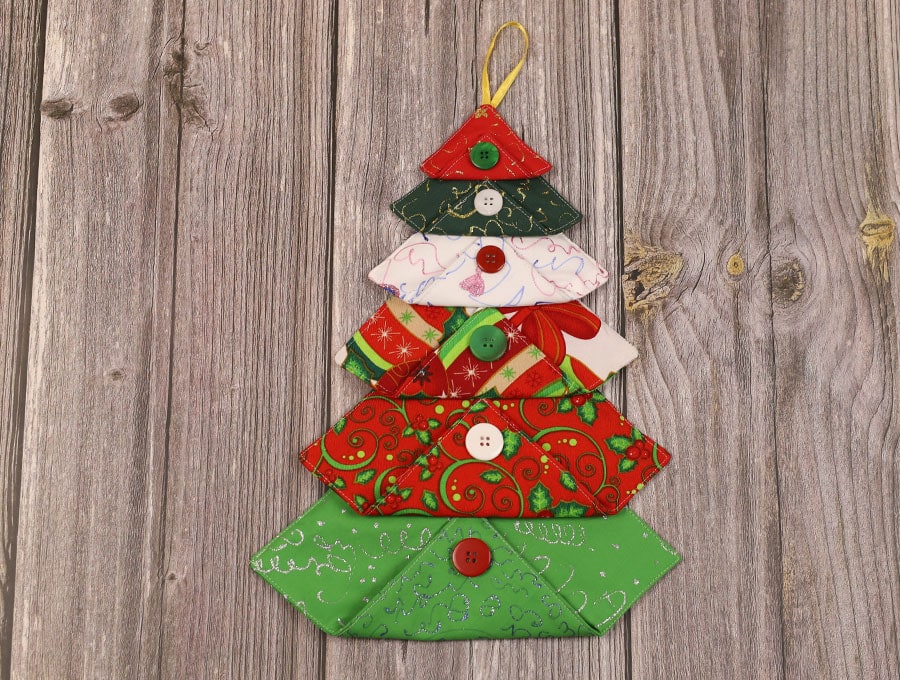
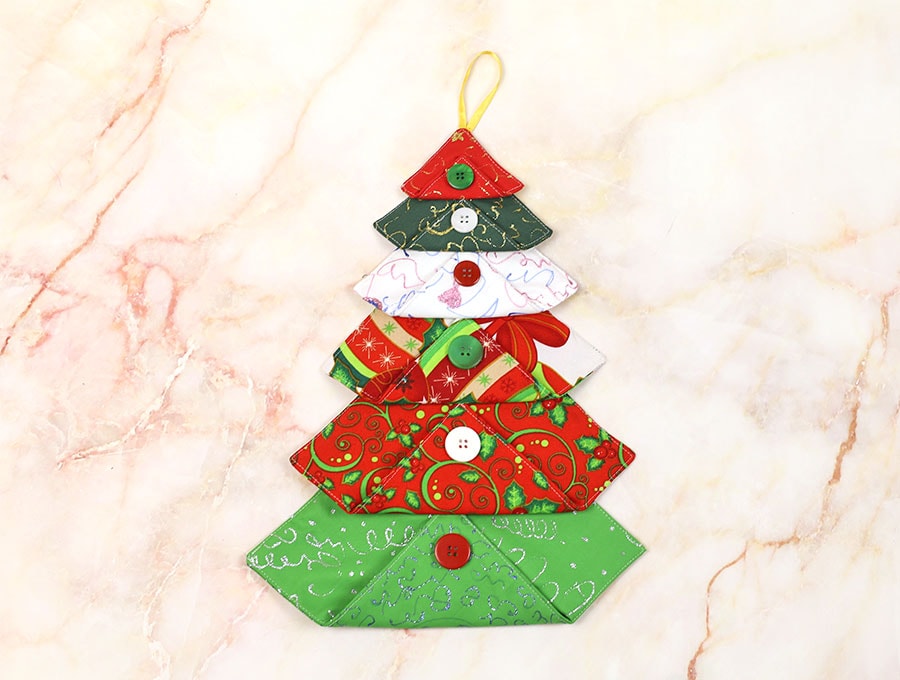
Festive Fabric Christmas Tree Door Ornament [Christmas Tree Decoration out of Scraps and Buttons]
I love coming up with ideas for festive ornaments and researching early American, German and Scandinavian Christmas ornaments. This tree was one I was determined to make and share with you. It can teach kids measuring skills as well as how to sew on a button – a life skill many people don’t have anymore – and all in a fun and purposeful way. It would also bring us together in preparing for the festive season.
I love, love, love this festive fabric Christmas tree door ornament for several reasons:
- It uses up those small scraps of festive fabric
- Finally, you have a use for those odd buttons
- It’s great for to hang on doors to give a festive feel
- It teaches kids math and sewing skills if you get them to help you with measuring, cutting, and hand-sewing
- It’s stunning
The tree looks complicated, but all it consists of is a series of different-sized squares that have some batting in them, have a corner folded up with a decorative button, and are then assembled to look like a fir tree.
Before you start:
- Assemble all your bits of fabric and test which pieces look good together before cutting the squares.
- Check the contrast formed between the front and back of the fabrics when you fold them up.
- Assemble your buttons.
I suggest using the same button type, but the sizes and colors can vary. For example, wooden buttons in various colors and sizes, or metal, but not a mix of wood, metal, and plastic – try to keep it looking organized.
Below you will find my step by step written tutorial with VIDEO instructions for all the visual learners.
We occasionally link to goods offered by vendors to help the reader find relevant products. Some of the links may be affiliate meaning we earn a small commission if an item is purchased.
Table of Contents
- 1 How to make a DIY Christmas Tree Decoration out of Leftovers
- 2 DIY Christmas Tree Decoration Supplies and tools
- 3 How to Sew a Festive Fabric Christmas Tree Door Ornament
- 4 In the middle of one side of each square, place pins on either side to create a gap of 1.5 inches (4 cm) for the smaller pieces and 2 inches (5 cm) for the larger pieces. This is to enable you to turn the fabric right way out.
How to make a DIY Christmas Tree Decoration out of Leftovers
DIY Christmas Tree Decoration Supplies and tools
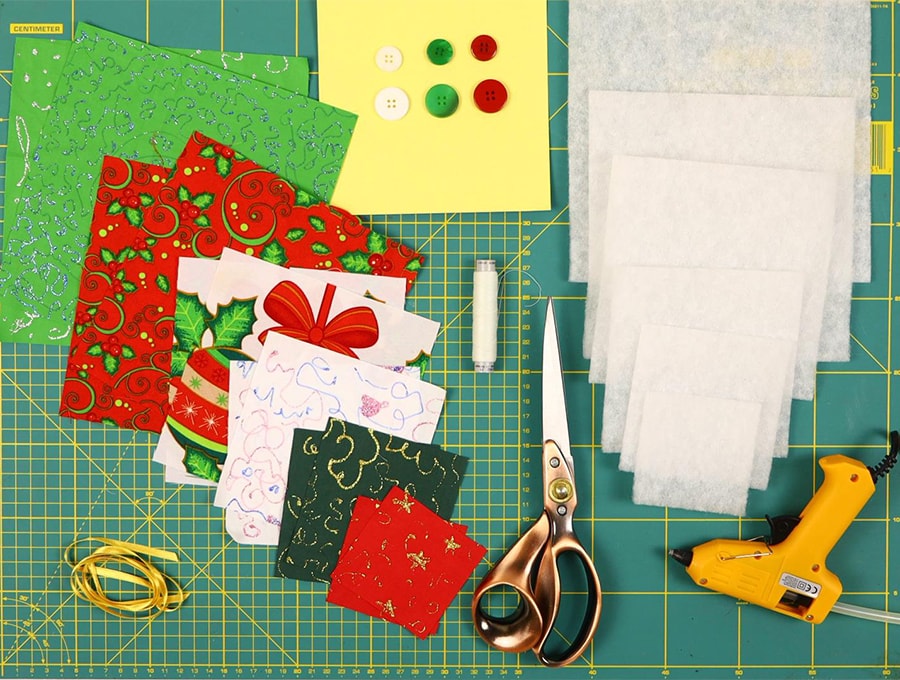
- fabric – 6 pairs of squares in Christmas prints
- fusible interfacing or batting
- matching thread
- Six buttons – they can be various colors and can vary from small to large
- Piece of ribbon 10 inches (25.4 cm)
- turning tool or chopstick
- scissors (or rotary cutter and a cutting mat)
- ruler or measuring tape
- iron and ironing board
- sewing clips or pins
- glue gun OR hand sewing needle and thread
Follow us for free patterns & tutorials! [easy-profiles]
How to Sew a Festive Fabric Christmas Tree Door Ornament
Watch the diy Christmas Tree Decoration out of fabric scraps video first and then follow the written step by step instructions below.
Please enjoy and don’t forget to Like and SUBSCRIBE over on YouTube to be kept up to date with new videos as they come out.
INSTRUCTIONS:
What you will need:
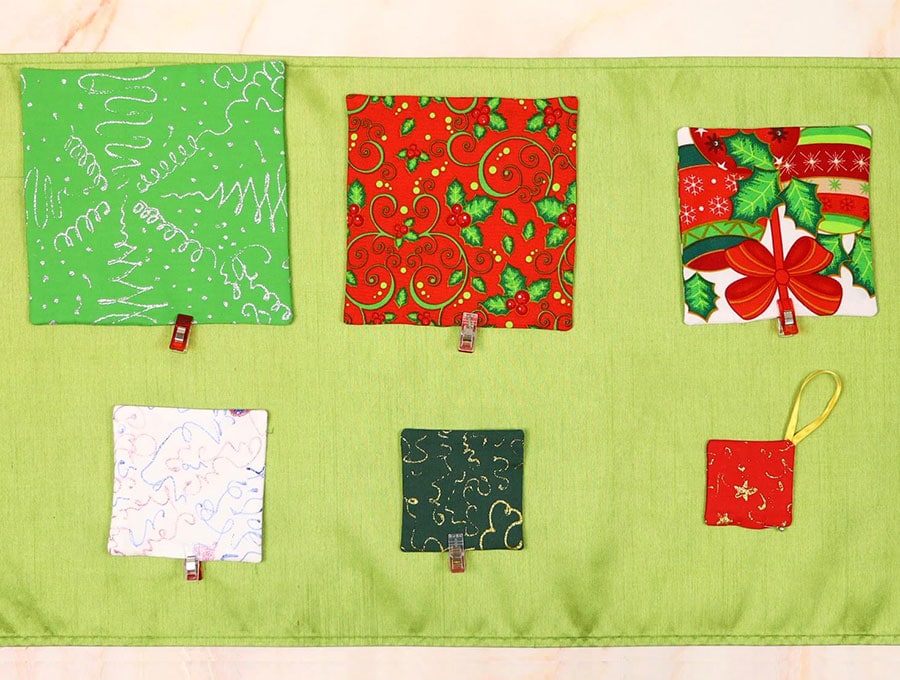
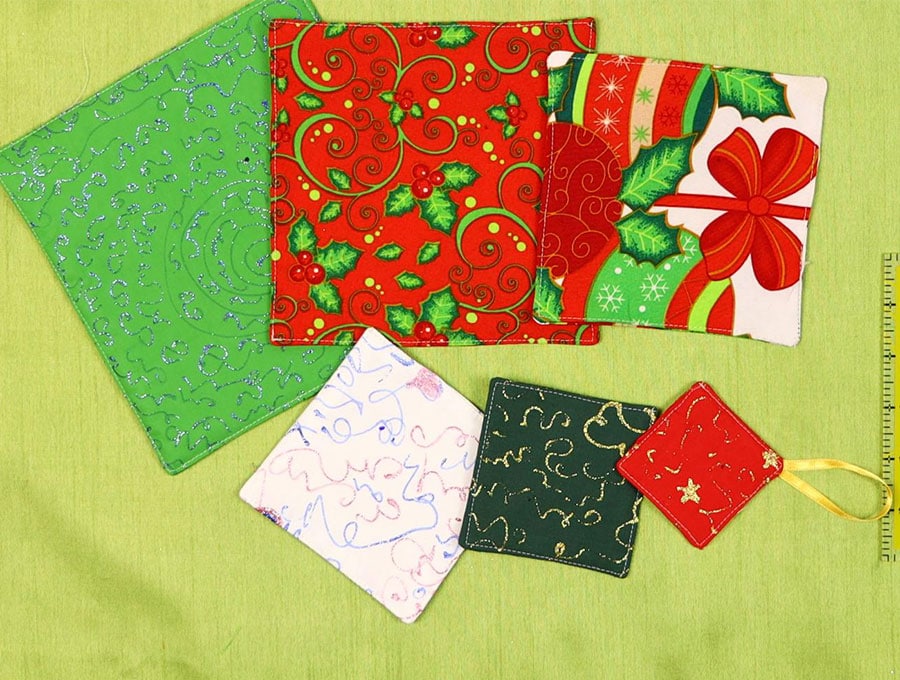
Squares of fabric cut to the following sizes. The 2 pieces for each square do not have to be of the same fabric – an ideal opportunity to use up those scraps! I made this Christmas tree ornament using the following sizes of the fabric squares, but you can adjust the sizes if you need to make it larger or smaller
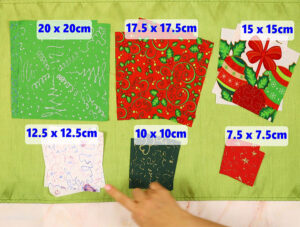
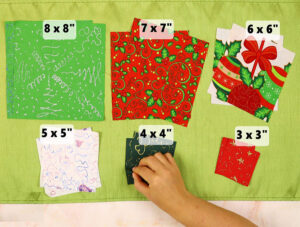
- two 3 inch (7.5 cm) squares of fabric + 1 square of batting
- two 4 inch (10 cm) squares of fabric + 1 square of batting
- two 5 inch (12.5 cm) squares of fabric + 1 square of batting
- two 6 inch (15 cm) squares of fabric + 1 square of batting
- two 7 inch (17.5 cm) squares of fabric + 1 square of batting
- two 8 inch(20 cm) squares of fabric + 1 square of batting
to make it larger I suggest the following sizes:
- two 3 inch (7.5 cm) squares
- two 4.5 inch (11.5 cm) squares
- two 6 inch (15 cm) squares
- two 7.5 inch (19 cm) squares
- two 9 inch (23 cm) squares
- two 10.5 inch(26.5 cm) squares
STEP 1:

First, fuse the batting of the correct size to the wrong side of one piece from each set of fabric squares. Use your iron to fuse the batting and follow the manufacturer’s instructions, ensuring you have the fusible side facing the wrong side of the fabric.
TIP: you can use sew in batting if that’s what you have on hand
STEP 2:

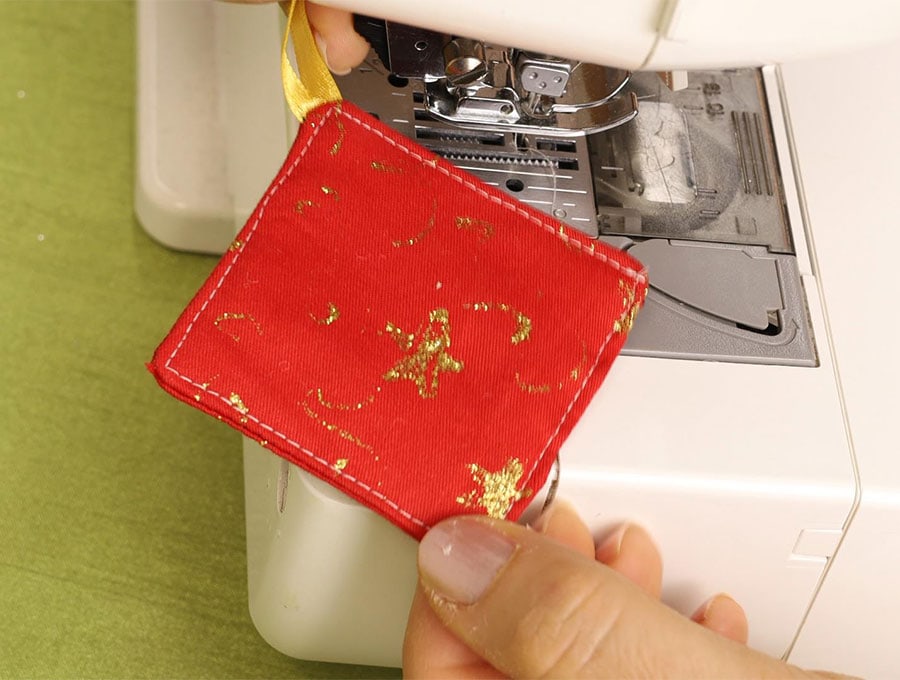
Set each piece that has been fused together with the matching size piece of fabric, laying each set with the right sides facing towards each other and clip or pin together. This makes it a production line, so when you get to sewing, you can do it all quite quickly. The only one that will be a bit different is the smallest square, where you will pin the strip of ribbon folded in half to one corner of the square, with the ribbon facing inward. Stitch across the ends of the ribbon to hold it in place.
STEP 3:
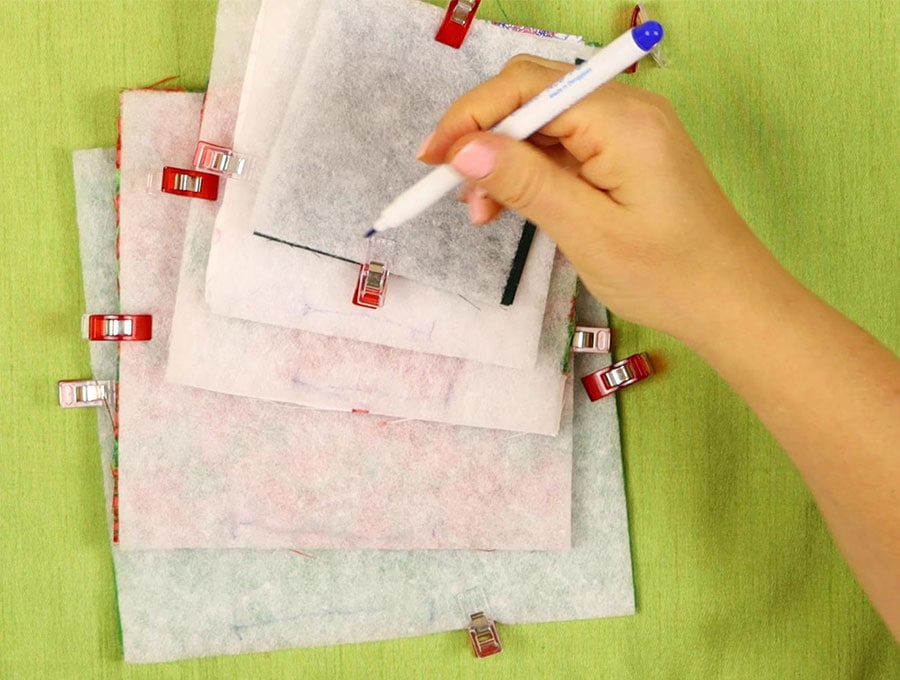
In the middle of one side of each square, place pins on either side to create a gap of 1.5 inches (4 cm) for the smaller pieces and 2 inches (5 cm) for the larger pieces. This is to enable you to turn the fabric right way out.
STEP 4:
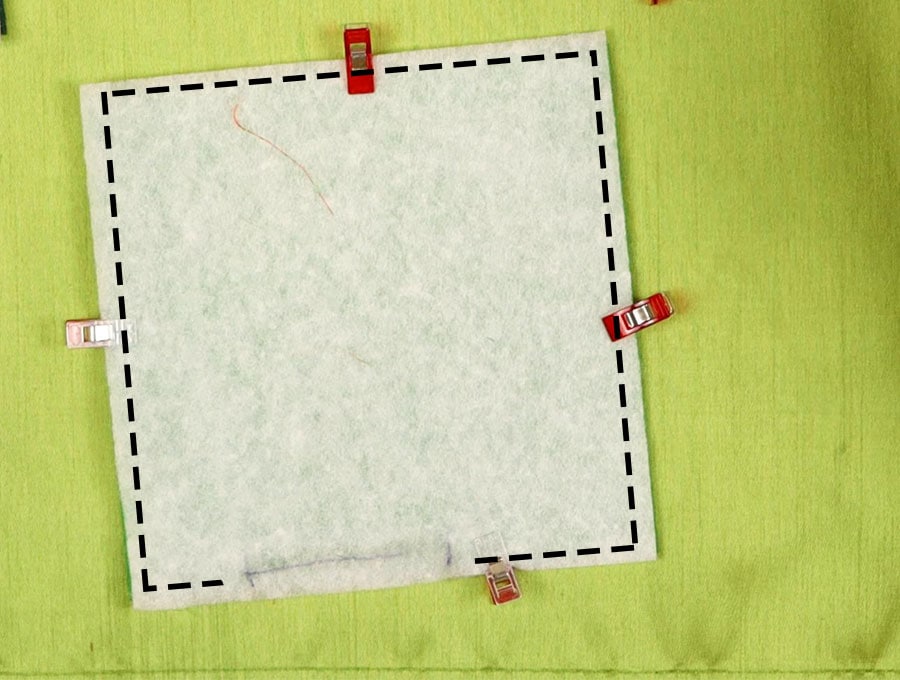
Starting at one side of the gap, stitch around the edge of the square ¼ inch (6mm) from the edge, making sure you are catching both fabrics and the batting. When you come to a corner, leave the needle in the machine, lift the pressure foot of the machine, gently swing the fabric at 90 degrees, depress the pressure foot, and carry on sewing. When you come to the pin indicating the gap, stop and back-tack.
STEP 5:
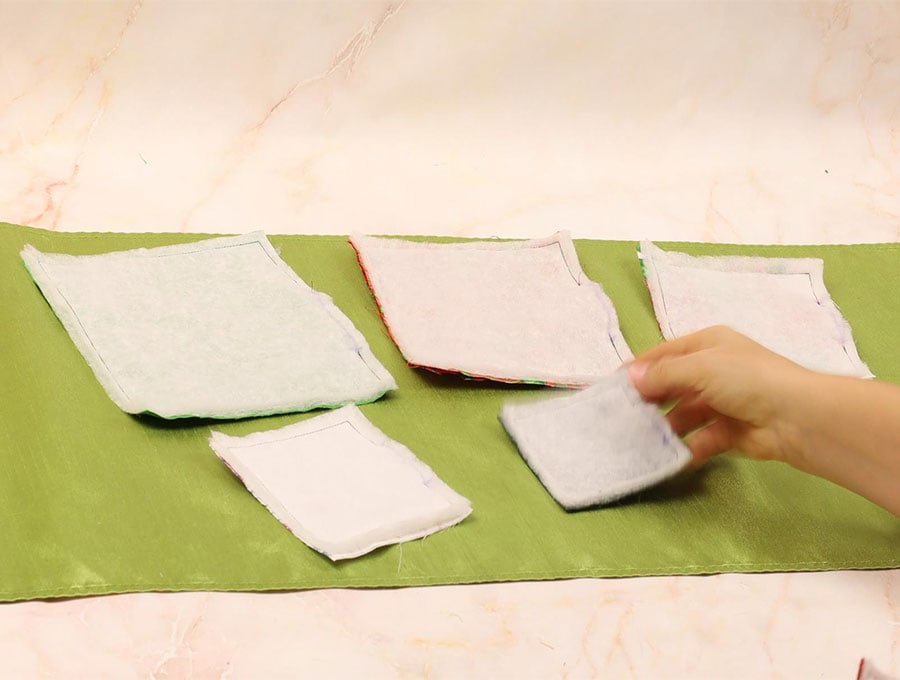
Work your way through the six squares until they are all stitched, then clip off the corners to reduce bulk, taking care not to go too close to the stitch line.
STEP 6:
Turn all the squares the right way out by pulling the fabric gently through the gap. Use your turning tool or chopstick to press out the corners so they lie flat and are neat. The smallest square has the ribbon from which to hang the tree, so pull out the ribbon loop.
STEP 7:
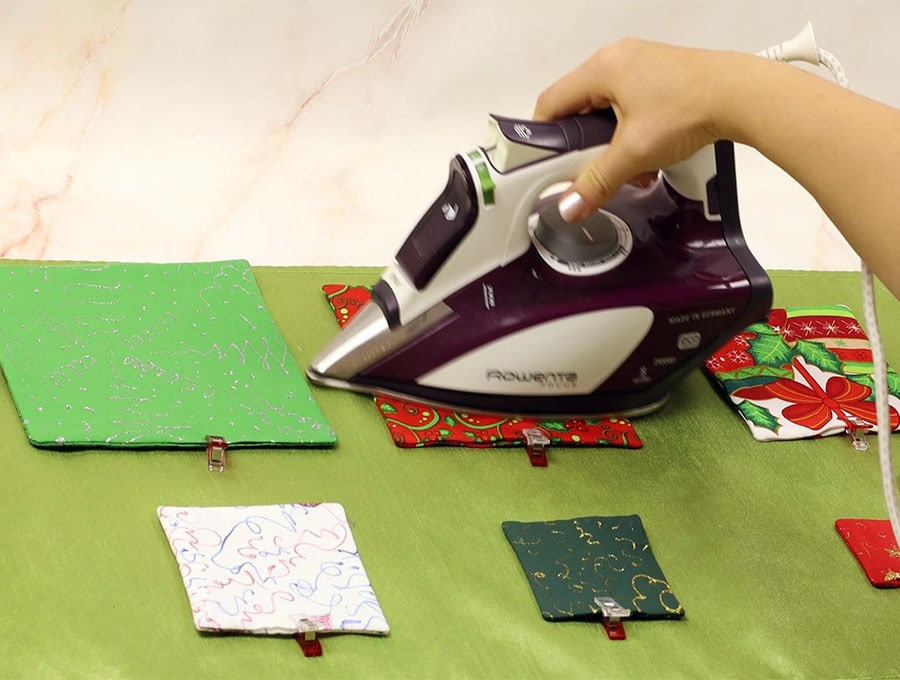
Press the squares, taking care to turn in the seam allowance across the gap so it lines up neatly with the seam, and press then clip or pin across the gap.
STEP 8:
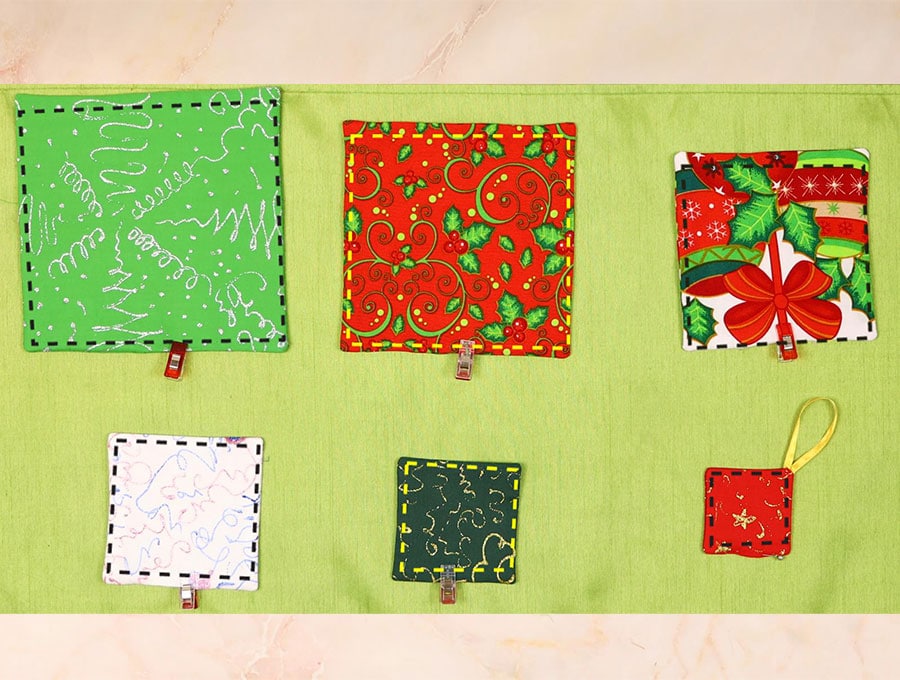
Run a row of topstitching around the edge of each square 1/8 inch (3mm) in from the edge, creating neat corners by leaving the needle in the machine, lifting the pressure foot, turning, lowering the pressure foot, then carrying on. Stitch across the turned-in edge of the gap to create a complete square. Clip off any loose threads.
STEP 9:
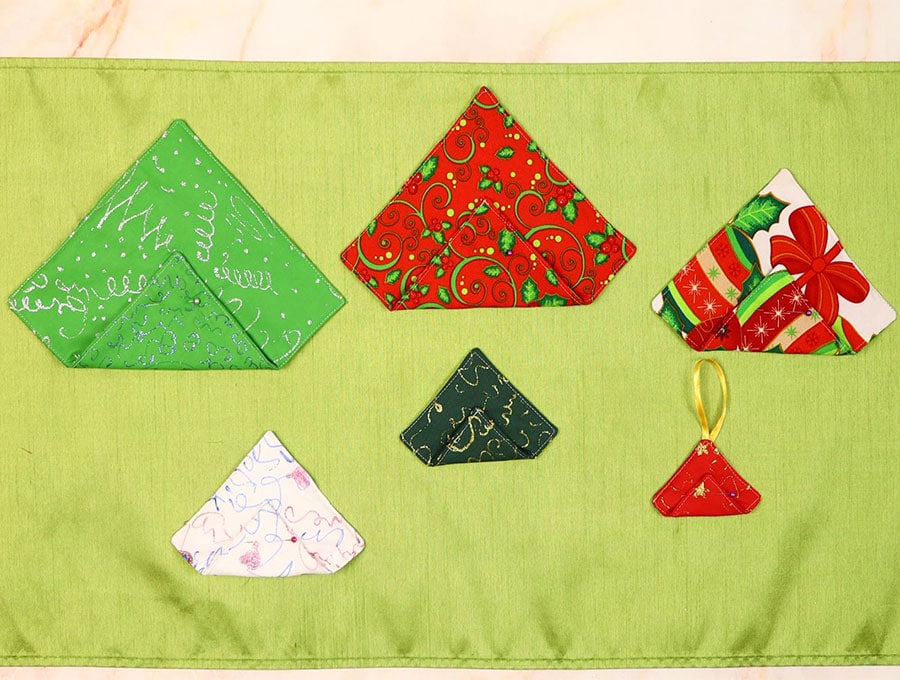
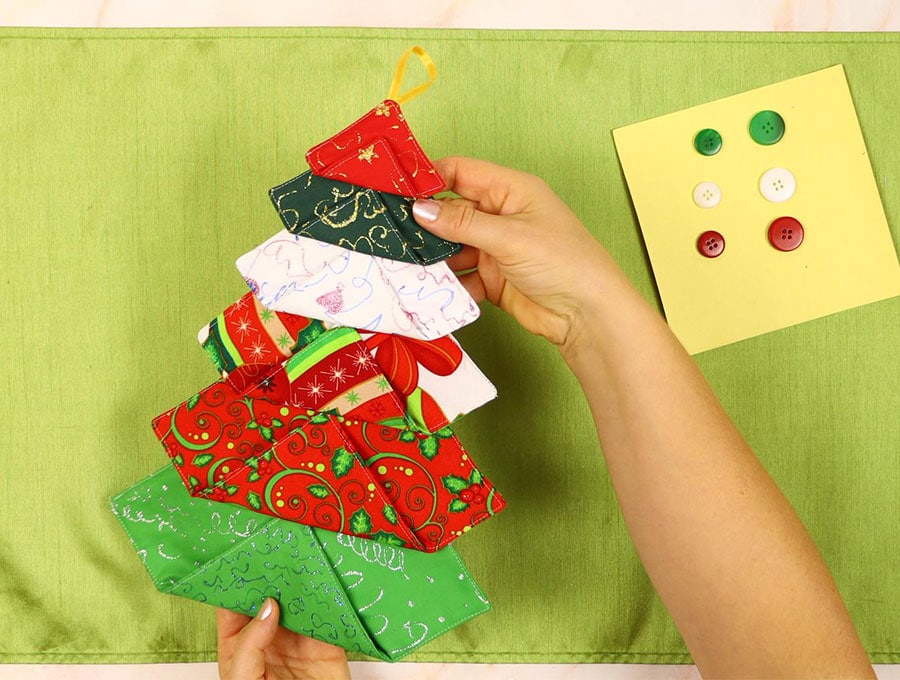
Lay your complete set of squares in size order on a worktop, starting with the largest one at the bottom, then laying the squares diagonally, working up to the top of the tree.
Check you are happy with the fabric combinations and contrast by turning over to the other side of the square if you think that will work better.
STEP 10:
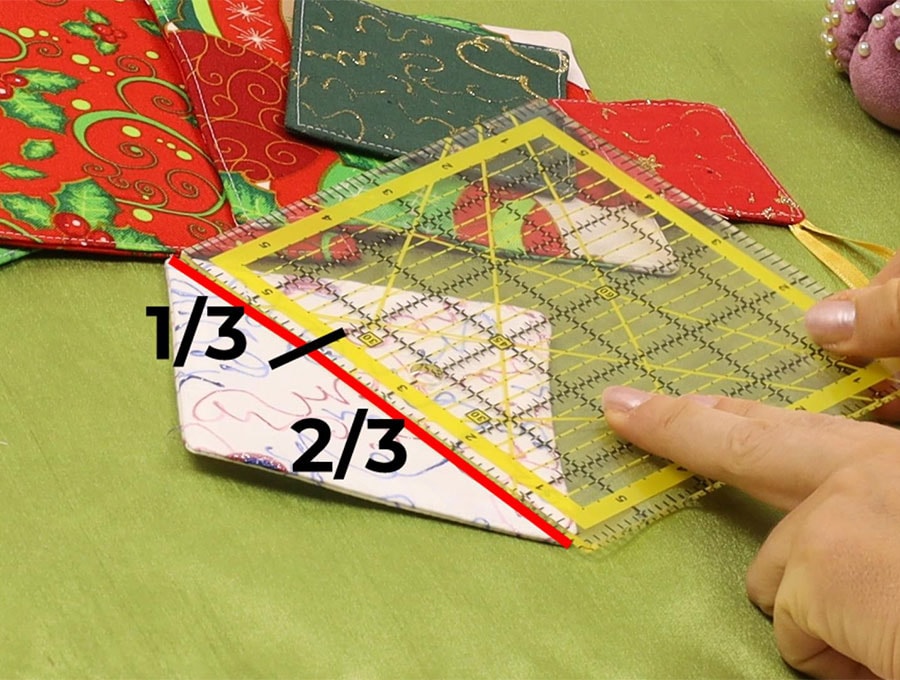
With the largest square placed on the diagonal, like a diamond, fold up the bottom corner so the point is around 2/3 of the way up the square and secure with a pin.
Repeat with the other five squares.
STEP 11:
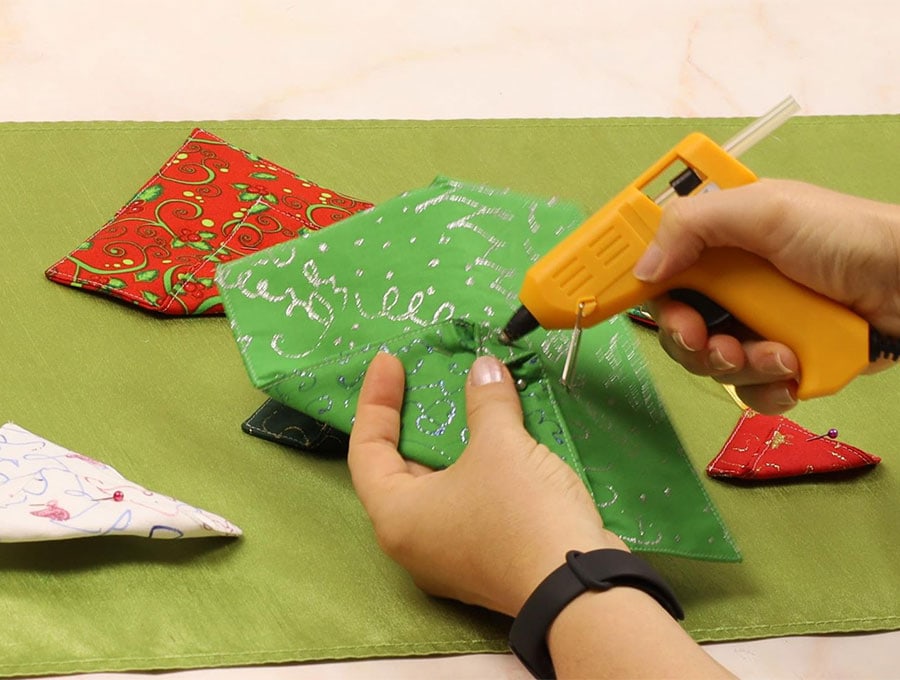
Handsew or glue on the tip of the corners.
STEP 12:
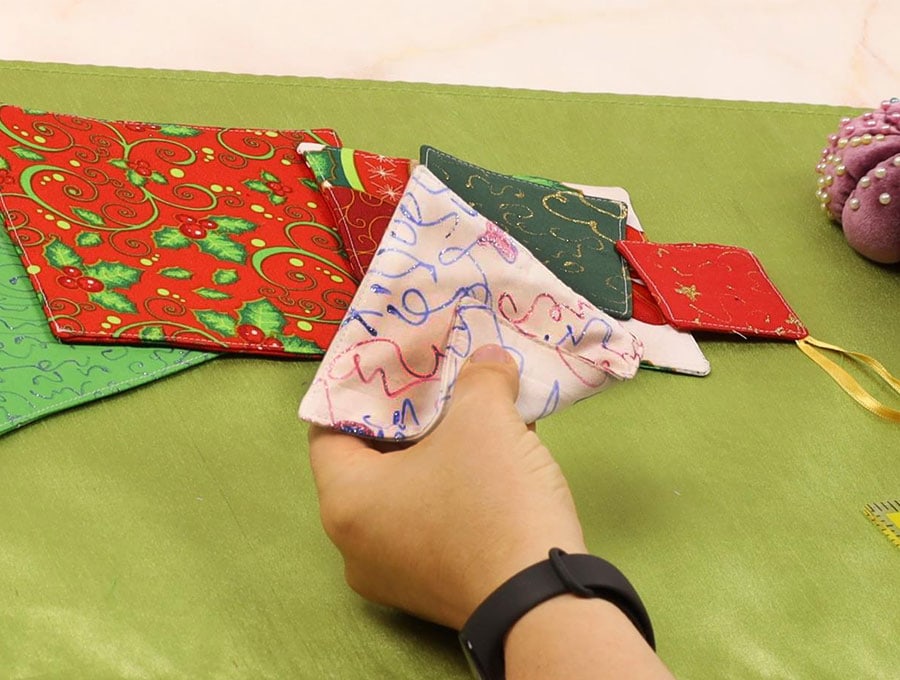
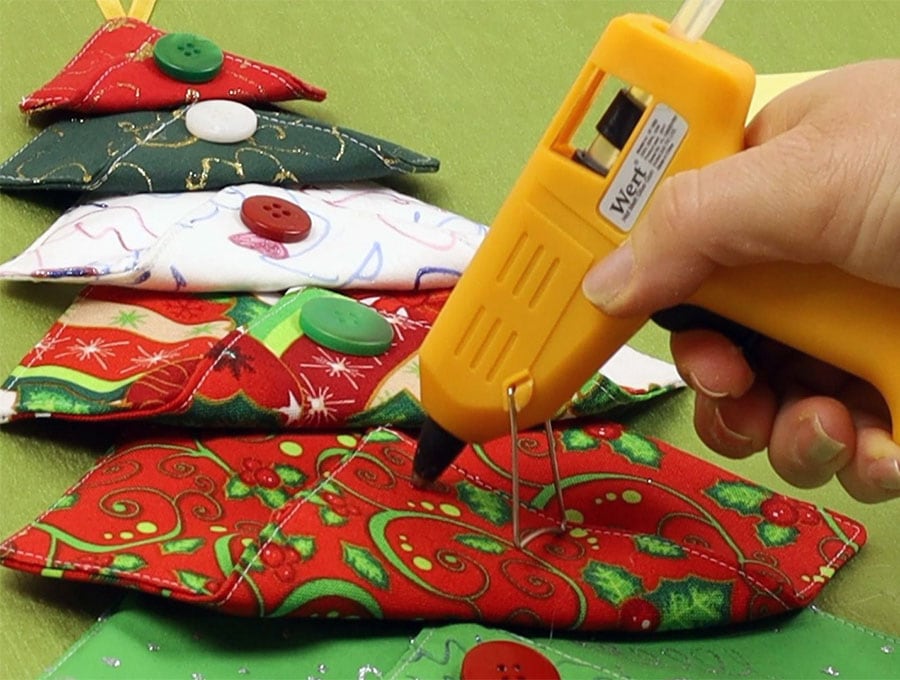
Lay out your pieces, starting with the largest, overlapping each one slightly so you don’t see the tips of the turned-up corners.
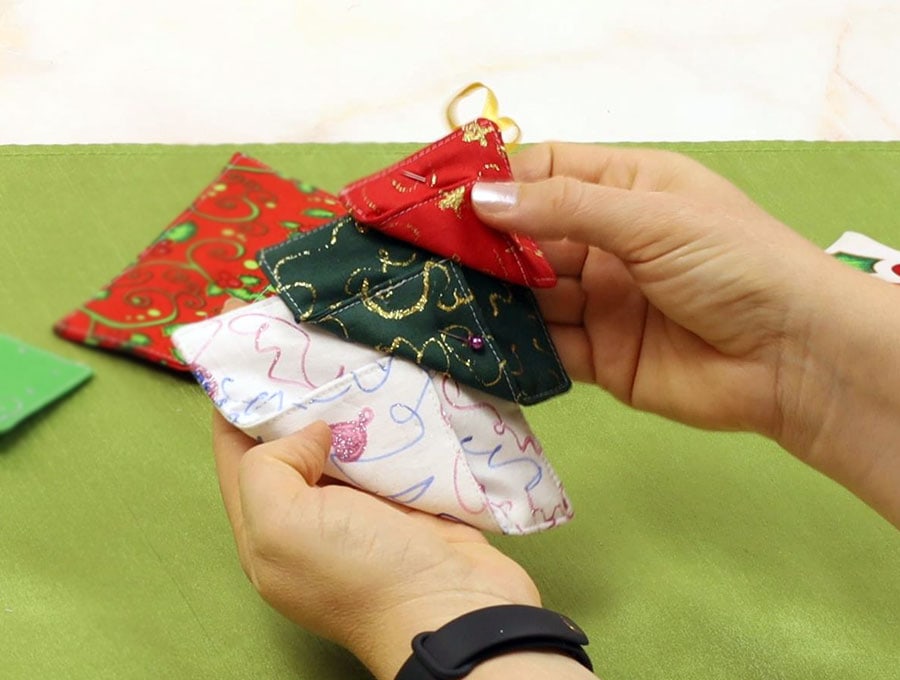
Once you know the positioning, mark with a fabric pen where the buttons should go, measuring so they are equidistant from the sides.
STEP 13:
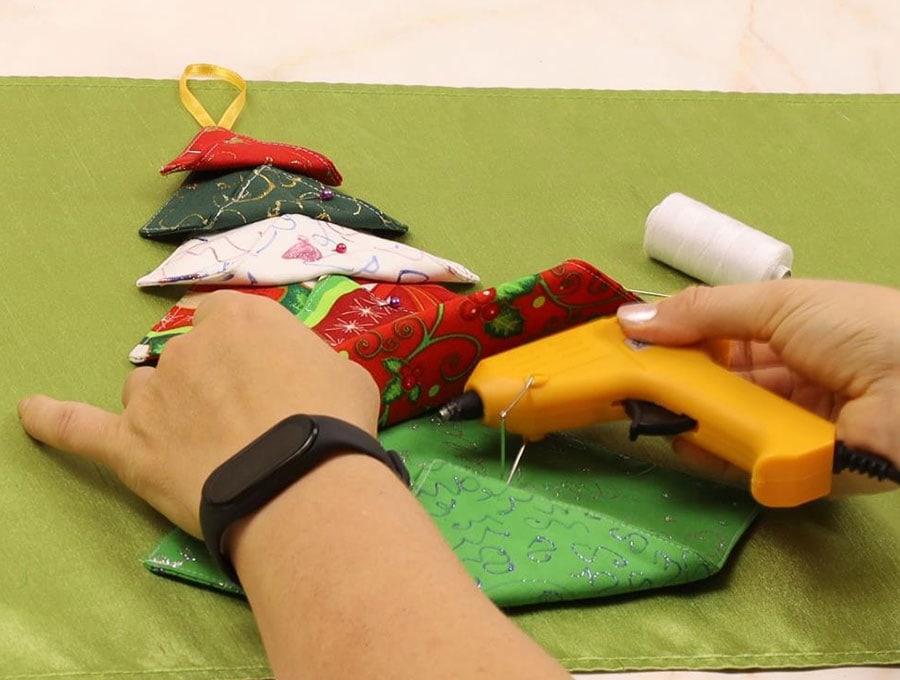
Once everything is done, lay out your tree and adjust the position of the squares so they line up. Each folded corner overlaps the square beneath it, just above the button. Finally, either use a glue gun to glue the squares together, lift the fabric, and add a dab of glue to create the tree. If you don’t have a glue gun, use hand stitches to hold the tree together.
STEP 14:
Handsew or glue on the buttons.
I recommend stitching on the buttons by hand – this
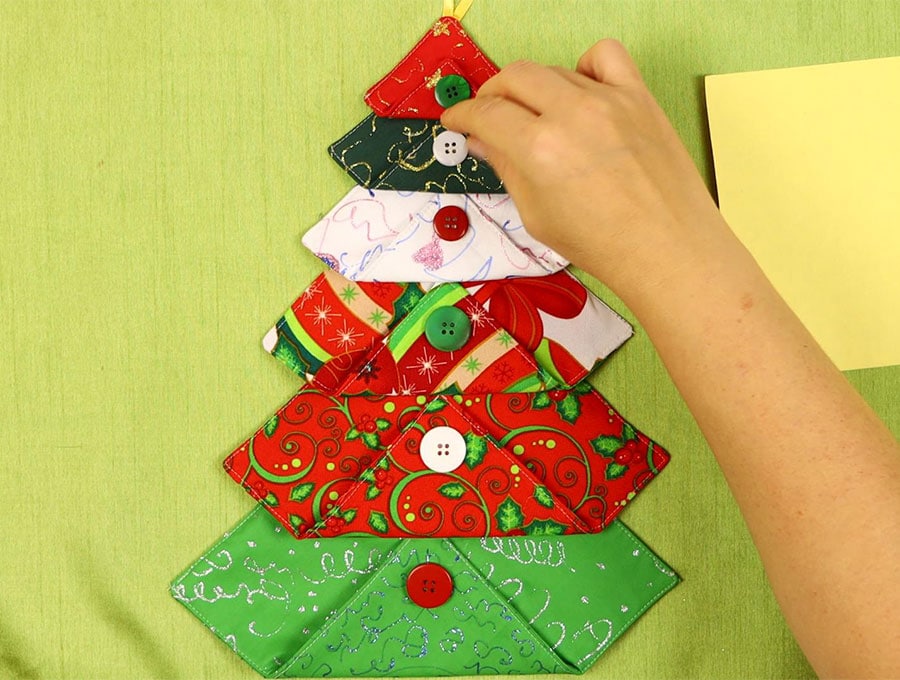
is an excellent way to get kids involved. If they have no idea of how to stitch on a button, then consult our tutorial How to Stitch on a Button (link to tutorial)
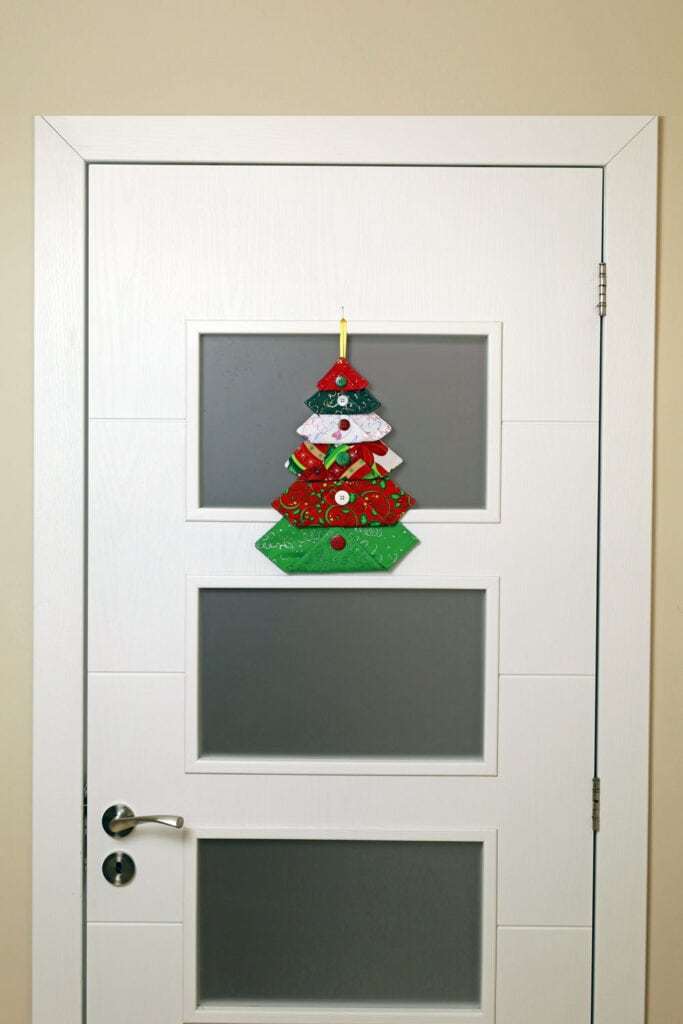
You now have a beautiful tree ornament with a ribbon to hang it from. These can be made in the sizes given in this tutorial, or they can be made a smaller or a little larger – it just depends on where you want to place them. If you loved this tutorial then hit the like button and subscribe to have our festive projects delivered straight to your inbox. We would love to see photos of how your Festive Fabric Christmas Tree Door Ornament turned out – you can post them in the comment section.
Do you like this? Pin for later:
Wanna be friends? Click HERE and follow me on Pinterest
RELATED: