

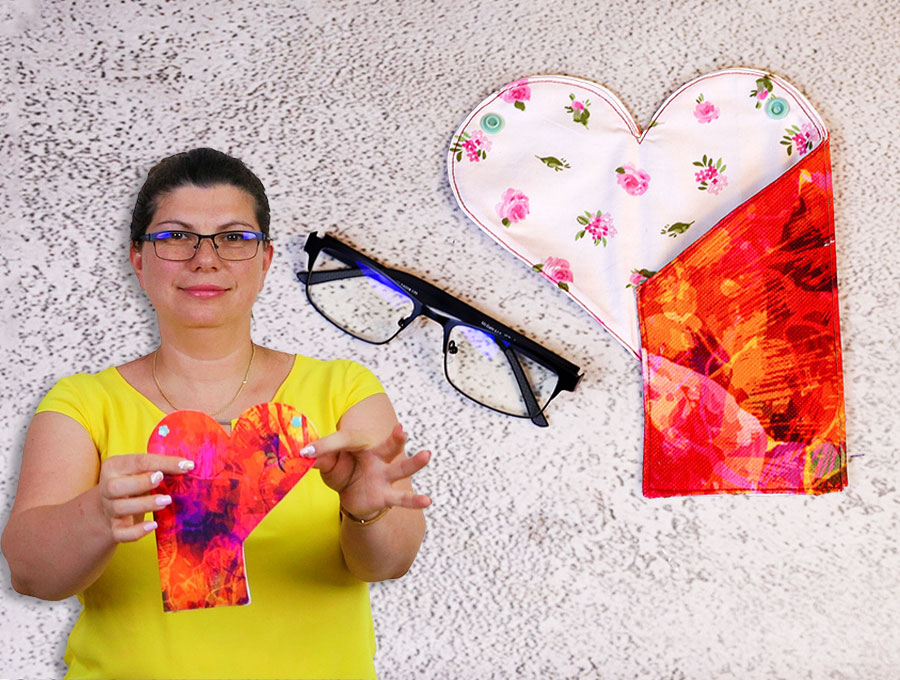
DIY Heart Glasses Pouch // Heart Glasses or Sunglasses Case Sewing Pattern
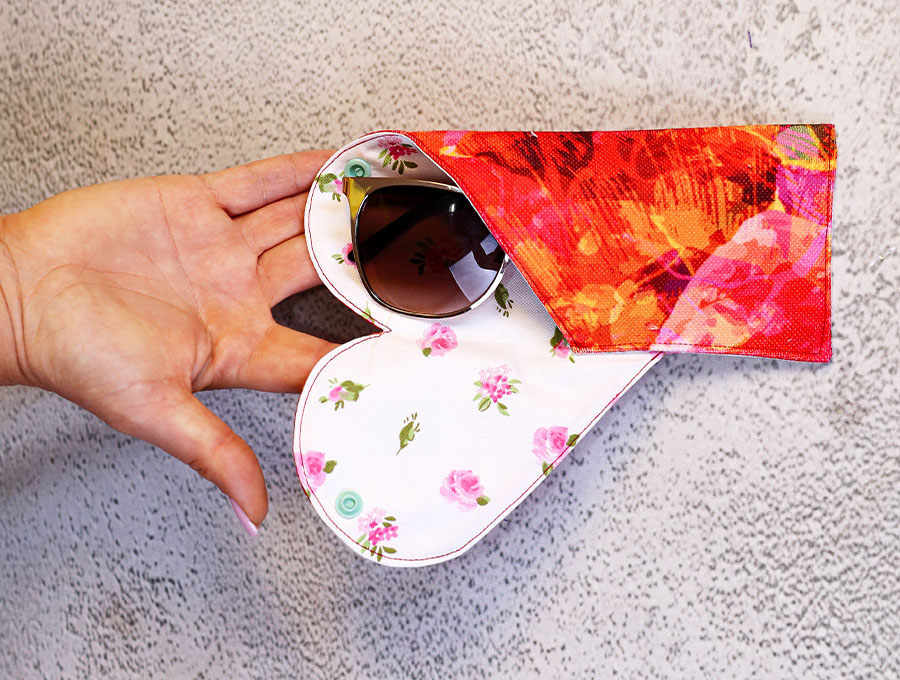
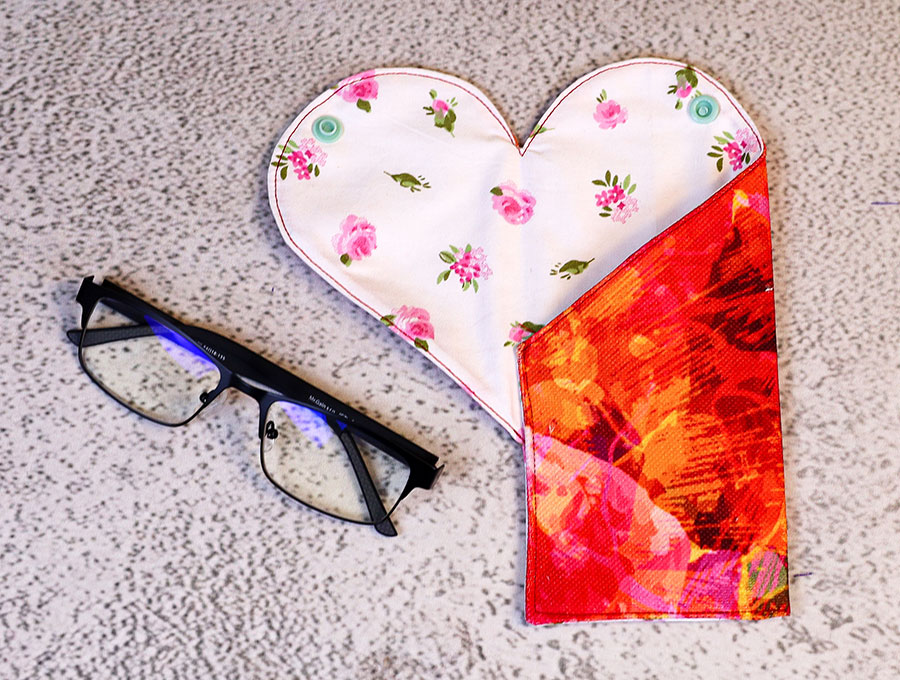
The heart glasses pouch is such a sweet idea because when you flap the top open to extract your glasses it forms a heart, reminding the person you gift it to of how much they are loved. When it is closed it looks like any other glasses pouch.
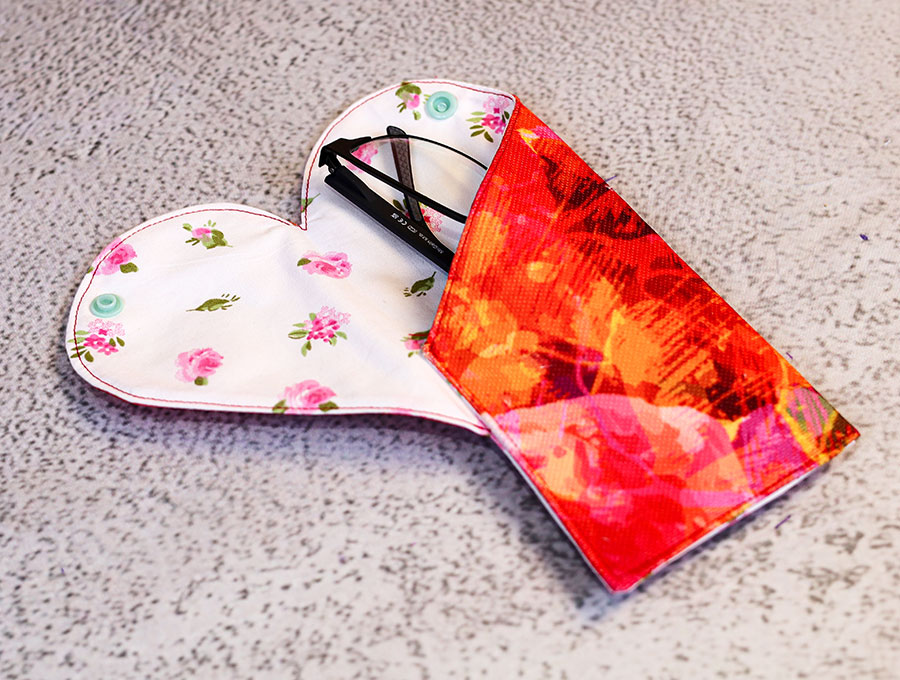
The perfect gift for friends and family. Made from a firm cotton fabric – either a light décor fabric or a quilting cotton with a cotton lining and fusible batting to give the glasses protection, this heart glasses pouch can be customised to suit a person’s interests. Think flower prints for gardeners, music print for musicians, a favorite animal print, or a bold geometric print, even artsy style Monet type prints for those who love impressionist art – the possibilities are endless.
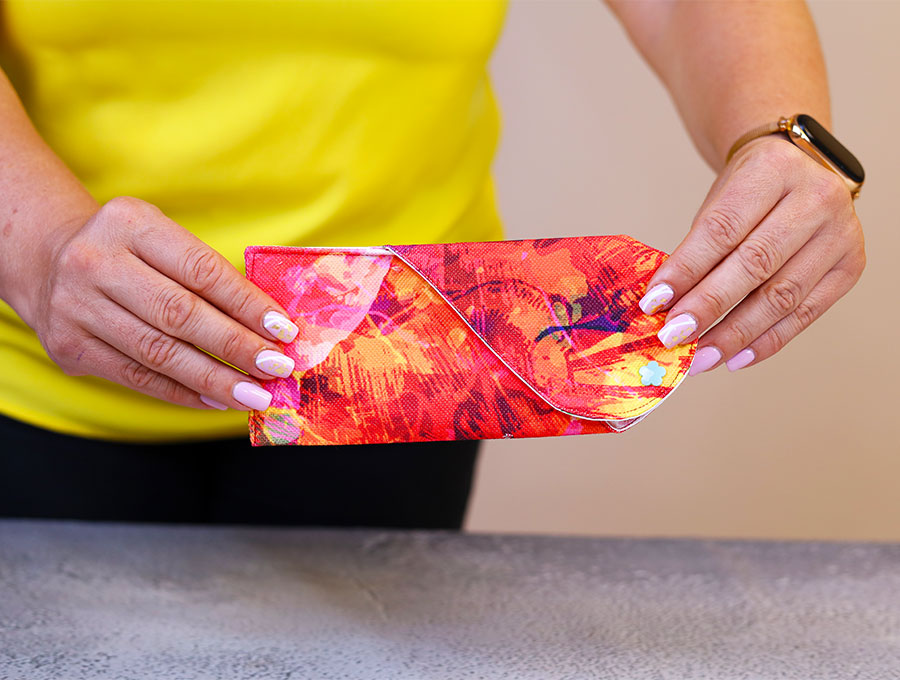
Sew this quick and easy heart shaped glasses or sunglasses soft case. Made entirely out of fabric, it closes securely with a snap button.
Below you will find my step by step written tutorial with VIDEO instructions for all the visual learners.
We occasionally link to goods offered by vendors to help the reader find relevant products. Some of the links may be affiliate meaning we earn a small commission if an item is purchased.
How to make the heart glasses pouch
Supplies and tools
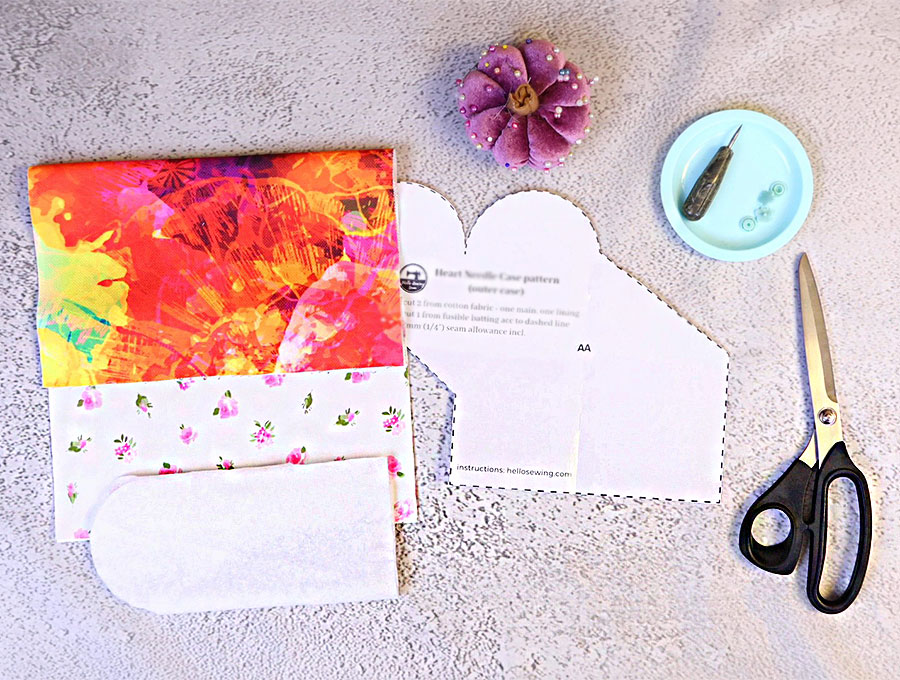
- fabric – 2 pieces of 100% tightly woven cotton (one main, one lining)
- fusible batting
- matching thread
- scissors (or rotary cutter and a cutting mat)
- ruler or measuring tape
- iron and ironing board
- sewing clips or pins
- plastic snaps (you will need a sewing awl and snap pliers
- press studs
DOWNLOAD: Heart Glasses pouch pattern [Free pdf file]
Follow us for free patterns & tutorials! [easy-profiles]
How to Sew a heart sunglasses case
Watch the diy heart glasses pouch video first and then follow the written step by step instructions below.
Please enjoy and don’t forget to Like and SUBSCRIBE over on YouTube to be kept up to date with new videos as they come out.
Heart Sunglasses Case VIDEO TUTORIAL
INSTRUCTIONS:
STEP 1:
Download and print out the one piece pattern from HelloSewing.com.
If you don’t have a printer, don’t worry – in STEP 2 we show you how to construct the pattern with a piece of paper, a ruler, pencil and a mathematical compass.
STEP 2:
If you have printed and cut out your pattern piece proceed straight to Step 3 now.
- To construct the pattern piece take a piece of paper and cut to 10 ½ x 8” (27 x 20 cm)
- Divide the long side into three equal divisions of 3 ½” (9 cm) each, measuring along the top and bottom and making marks, then joining with a ruler.
- With the paper placed vertically, measure 1 3/8” (3.5 cm) in from the left at the top and make a mark, then the same distance at the bottom and join the marks with a ruler.
- Use a compass to create a circle on a separate piece of paper with a 3 ½” (9 cm) diameter. Cut out the shape.
- Swing the paper horizontally and measure down 1 3/8” (3.5 cm) from the line you created in point c. and make a mark.
- Move your ruler across to the first line of the three division running vertically and measure 2 3/8” (6 cm) up from the bottom and make a mark.
- Join the mark made in e. to the one made f. with a ruler.
- Move the ruler to the right hand edge of the paper and measure 4” (10 cm) up from the bottom and make a mark.
- Join the mark made in point h. to the point where the second vertical line intersects with the horizontal line across the paper, using your ruler.
- To create the heart shape top, place the circle you cut from paper on the left hand edge of the paper at the top of the diagonal line and draw around the curve of the circle to the point where the first vertical line intersects with the horizontal line.
- Move the circle again and place where the first curve ended then fit into place and draw the curve to the second vertical line.
- Cut away the paper above the curves in the first two sections, above the diagonal line in the third section, and below the first diagonal line in the first section. Your pattern piece will now look like the one in the free printable pattern.
STEP 3:
Choose an outer fabric, a lining fabric and a fusible batting fabric to accommodate the pattern piece – 12 x 8” (30 x 24 cm) pieces will be adequate.
STEP 4:
Place the pattern piece over the fusible batting, pin and cut out the shape.
STEP 5:
Place the fusible batting, sticky (fusible side down on the wrong side of the outer fabric. Iron to fuse.
STEP 6:
Turn the outer right side up and over it pin the lining – right side to right side.
STEP 7:
Flip over and stitch on the fused batting side, tracing your stitching around the edge of the batting, but leaving a gap in the middle of the base through which to pull the fabric to turn it later. Backtack on either side of the gap which should be around 2 ½ ” (7 cm).
STEP 8:
Cut away the excess fabric from around the stitching – cut ¼” (6 mm) from the stitching.
STEP 9:
Cut small V notches in the curved areas of the heart to ease the fabric when turned, then cut off small triangles at the corners. Turn up the edges of the gap in line with the seam and finger press.
STEP 10:
Turn the fabric the right way out by pulling it carefully thought the gap. Use a turning tool to press out the heart curves neatly and make sure all the seam are turned out and flat.
STEP 11:
Turn in the raw edges of the gap in line with the seam, then give the item a press. Clip the gap.
STEP 12:
Top stitch all the way around the shape 1/8” (3 mm) from the edge, including across the gap. End with a backtack.
STEP 13:
With the heart shape on the left fold the right side over to meet up with the straight edge on the left. Clip in place once the edges are lined up.
STEP 14:
Stitch in an L shape down the left side and across the bottom, backtacking at the start and finish.
STEP 15:
Fold the open heart piece across to the right – it will create a glasses pouch with a curved top. Pin in position.
STEP 16:
Use a fabric marking pen to indicate where the snap fastener will go. The printable pattern piece will have a mark you can transfer. If you made the paper pattern yourself then choose a point about 1” (2.5 cm) above the right hand side fold and ½” (1.3 cm) from the side. Mark the top and bottom layers to position the snap fastener.
STEP 17:
Use an awl to make a hole in the fabric and fasten the snap fastener using the snap fastening tool.
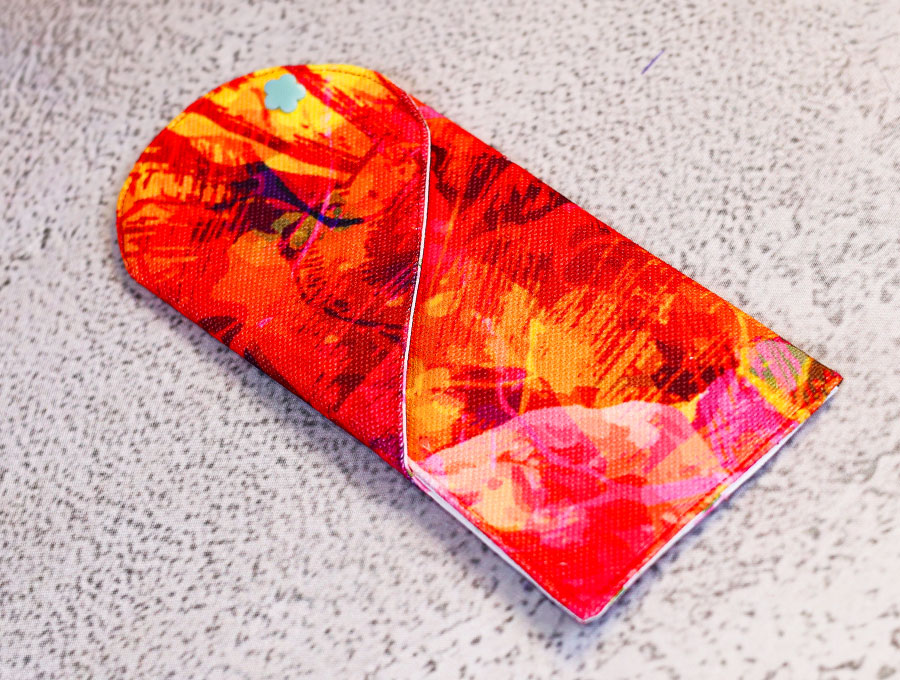
The heart glasses pouch is now ready to use. Please share this project with people you know who like to keep their sunglasses and reading glasses clean and scratch-free. Like and subscribe and remember, subscribers get the newest projects as they are published, putting you ahead of everyone else. Time to get sewing those festive season presents!
Do you like this? Pin for later:
Wanna be friends? Click HERE and follow me on Pinterest
RELATED: