
Heart-shaped Pot Holder [FREE Heart Pot Holder Pattern]
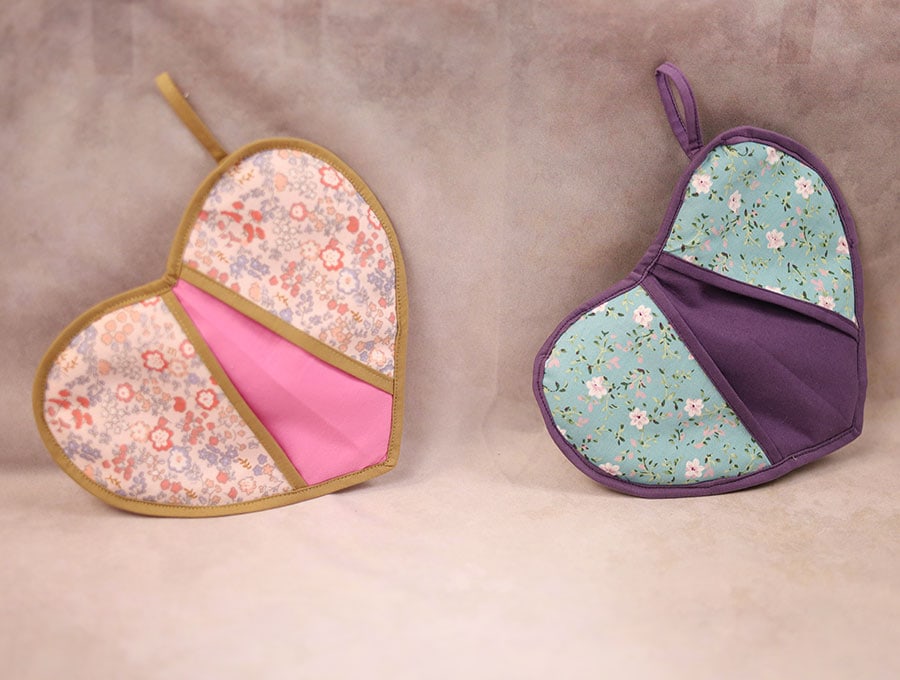
A set of heart-shaped potholders is a fun way to introduce the Valentine theme to your kitchen this year. They are easy to make and, oh, so practical. Make sure no one is left out on Valentine’s Day with a functional and decorative gift that will last long after the flowers have wilted and the chocolates are eaten.
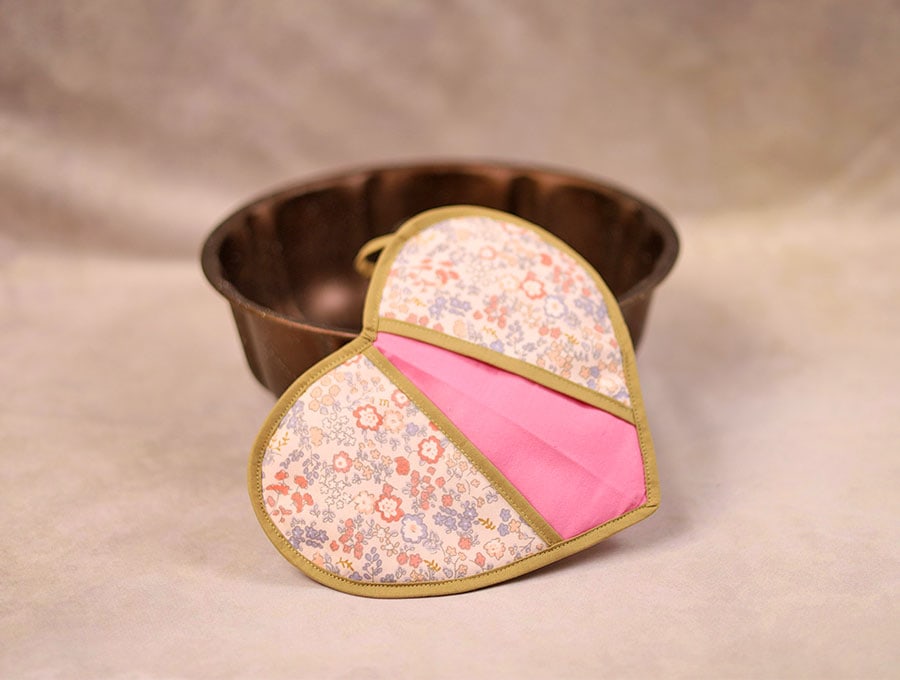
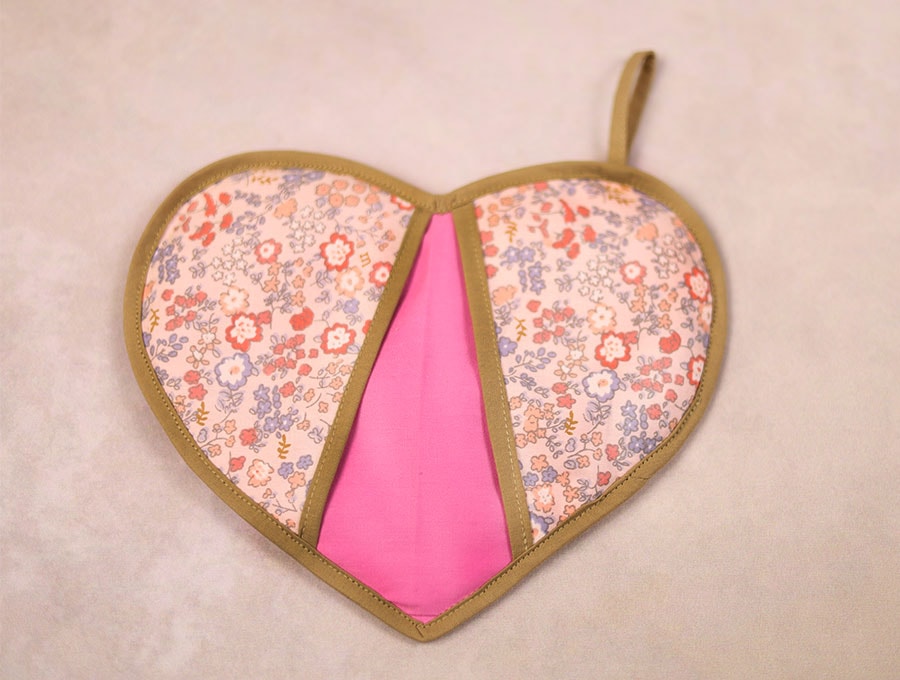
We even provide you with a free printable pattern and step-by-step instructions. With angled pockets, slipping your fingers in for a better hold on a hot pot is easy.
Use red and white fabric if you are going with traditional colors for Valentine’s, but hey, there is nothing to stop you from getting ready early for Christmas and using up your festive print fabrics. I know it’s super early, but you can start planning now if you felt overwhelmed last year when trying to complete all your handmade gifts in time.
Below you will find my step by step written tutorial with VIDEO instructions for all the visual learners.
We occasionally link to goods offered by vendors to help the reader find relevant products. Some of the links may be affiliate meaning we earn a small commission if an item is purchased.
Table of Contents
How to make a Heart Shaped pot holder
Heart shaped pot holder Supplies and tools
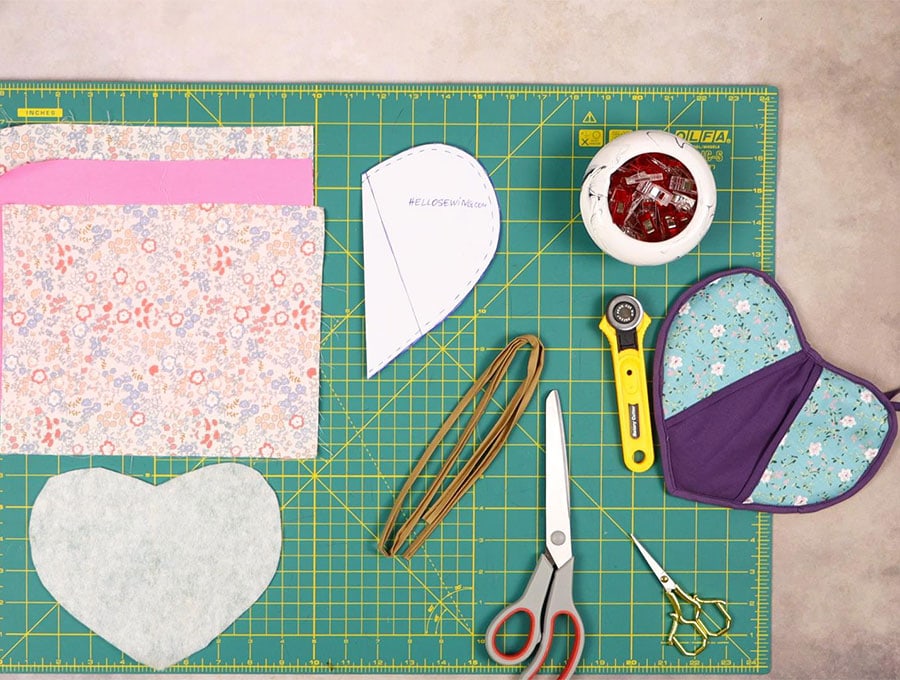
- Printout of our free pattern, cut along the solid line (below)
- fabric – 2 pieces of 100% tightly woven cotton (one main, one lining) use either ½ yard of 36inch (45 x 90 cm) fabric – you can use smaller mix-and-match pieces of 12 x 12 inches (30 x 30 cm
- batting
- 1/2″ wide bias binding
- matching thread
- scissors (or rotary cutter and a cutting mat)
- ruler or measuring tape
- iron and ironing board
- sewing clips or pins
DOWNLOAD: heart-shaped pot holders pattern [Free pdf file]
Follow us for free patterns & tutorials! [easy-profiles]
How to Sew a Heart pot holder
Watch the diy heart shaped pot holder video first and then follow the written step by step instructions below.
Please enjoy and don’t forget to Like and SUBSCRIBE over on YouTube to be kept up to date with new videos as they come out.
heart pot holder VIDEO TUTORIAL
DIY heart pot holder INSTRUCTIONS:
STEP 1:
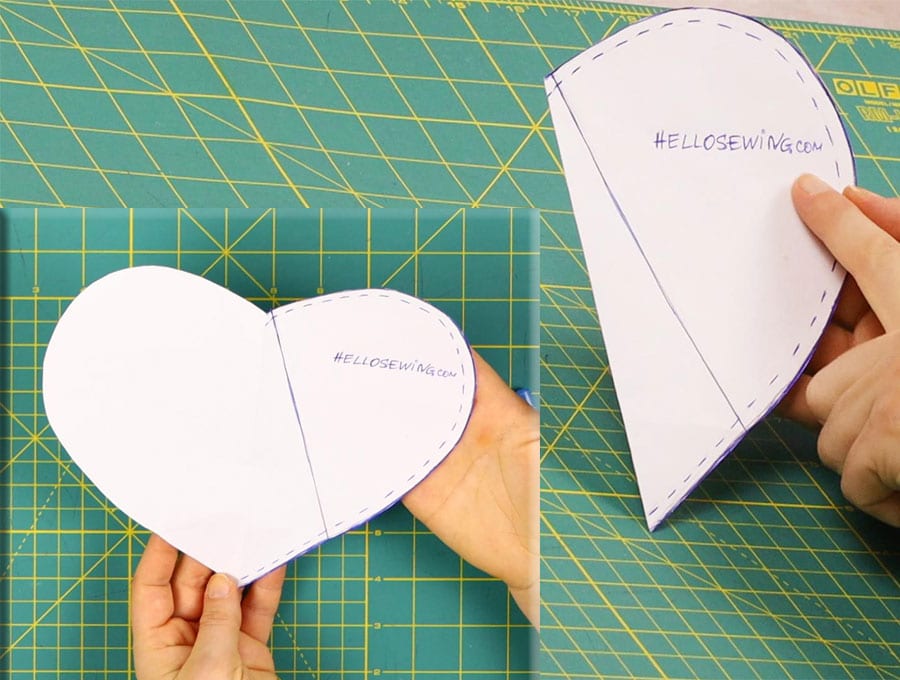
Download the heart pot holder pattern, print it at 100% and trim the excess paper.
Alternatively, draw your own heart shaped pattern as I show in the video above. Make sure your hand fits in the pocket, though.
STEP 2:
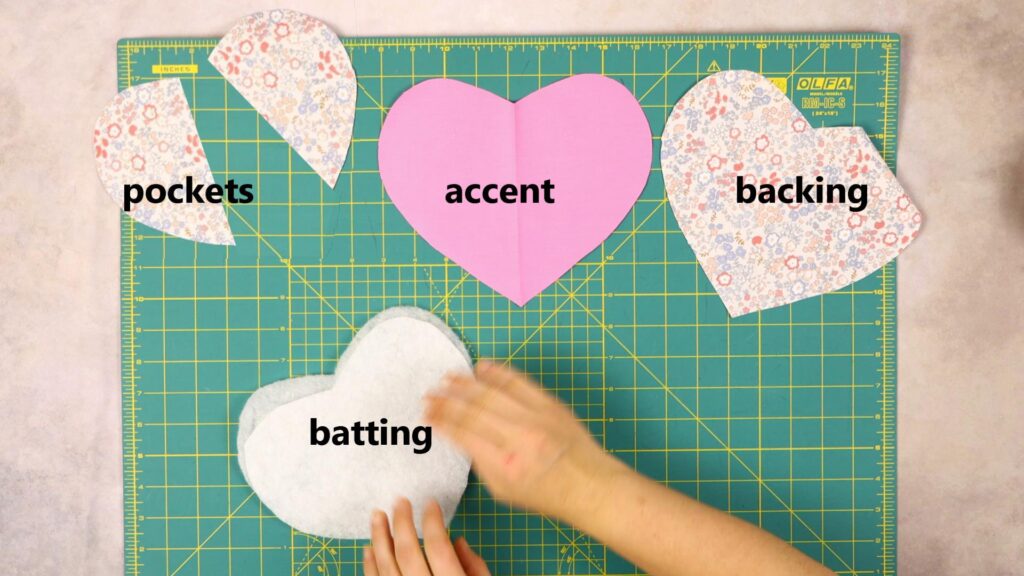
Cut out the pieces as per the heat shaped pot holder pattern with the right sides facing inside on all folds:
- 2 x heart-shaped pieces with the pattern aligned on the fold line of the printed fabric along the solid line indicated. (one out of main fabric and one out of backing fabric
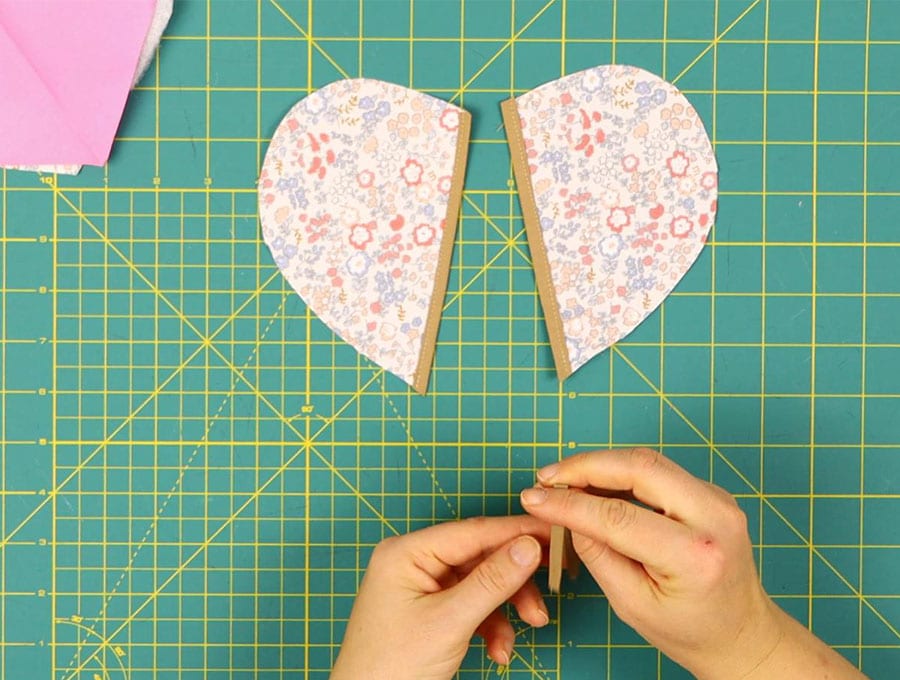
- 2 x pocket pieces cut on the fold along the diagonal line indicated in the pattern piece (out of main fabric)
- 2 or 3 x heart-shaped pieces of batting aligned on the fold line, depending on the thickness of the batting. Cut along the dotted line indicated on the pattern.
- 1 x hanging loop rectangle

Fold the fabrics in half and place the pattern along the fold, then cut out the fabrics and the batting
STEP 3:

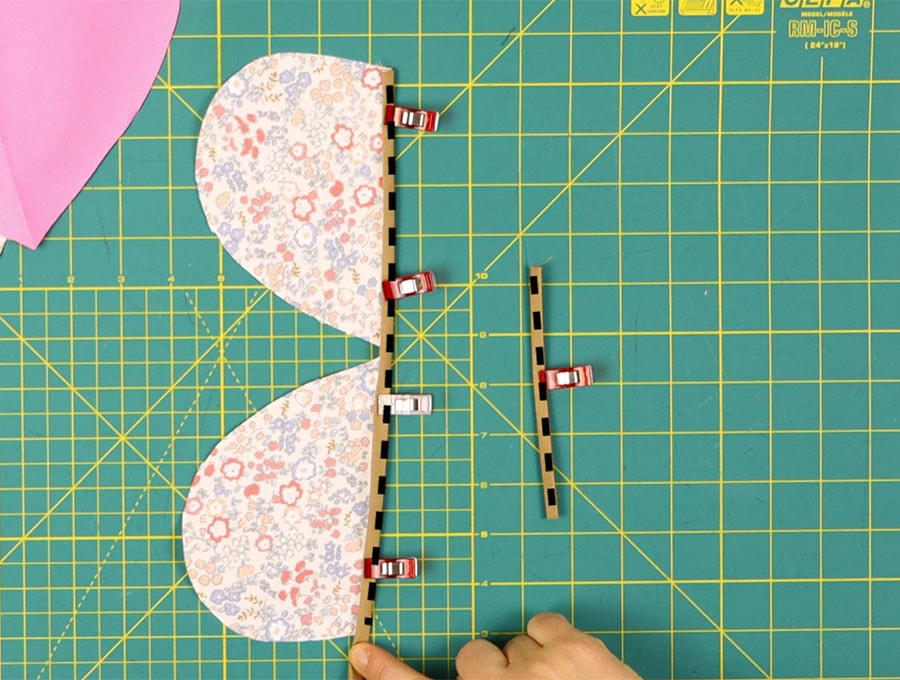
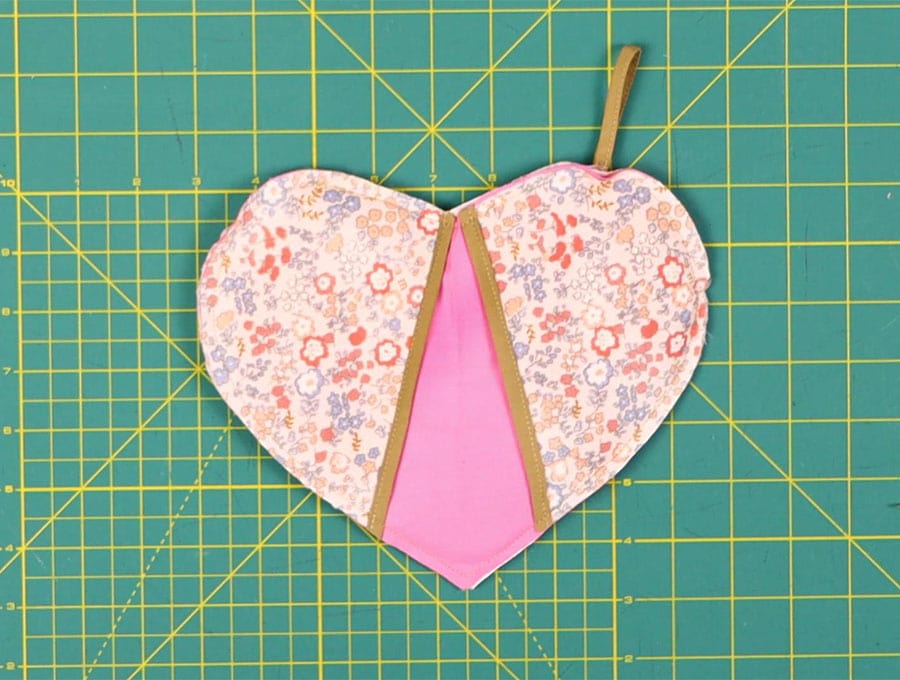
Insert the straight edges of the pocket pieces in the fold of the bias binding, line it up and pin or clip in place.
Ensure you have the two halves lined up on your worktop with the curve of the heart facing outward so you don’t accidentally attach binding to the front and back of the other.
STEP 4:
Top stitch as close to the folded edge of the binding as possible so you have a nice, neat finish on the front of the two pockets. It should be just under 6mm (¼ of an inch) from the edge.
Making a fold where the binding starts and finishes is unnecessary. The raw edges will be hidden under the binding around the heart potholder.
Step 5:
Line up the fabric layers, basting each piece with fabric glue to hold it all in place because when you start stitching, you don’t want the multiple layers to move.
First, the heart-shaped backing piece goes down wrong side upwards.
Second, on top of that will be all layers of batting, each with a bit of fabric glue to hold them in place and ensure they are equidistant from the backing piece all the way around – they were cut a little smaller to make it easier for stitching, so your machine needle doesn’t have to go through so many layers.
Third, place the second piece of heart-shaped fabric (main fabric) on top with right side up.
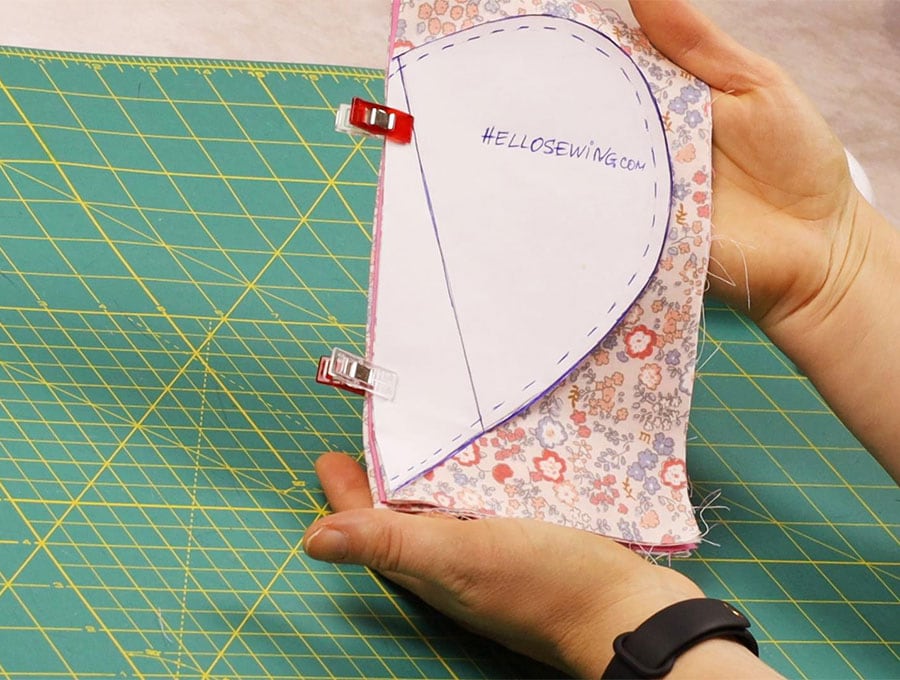
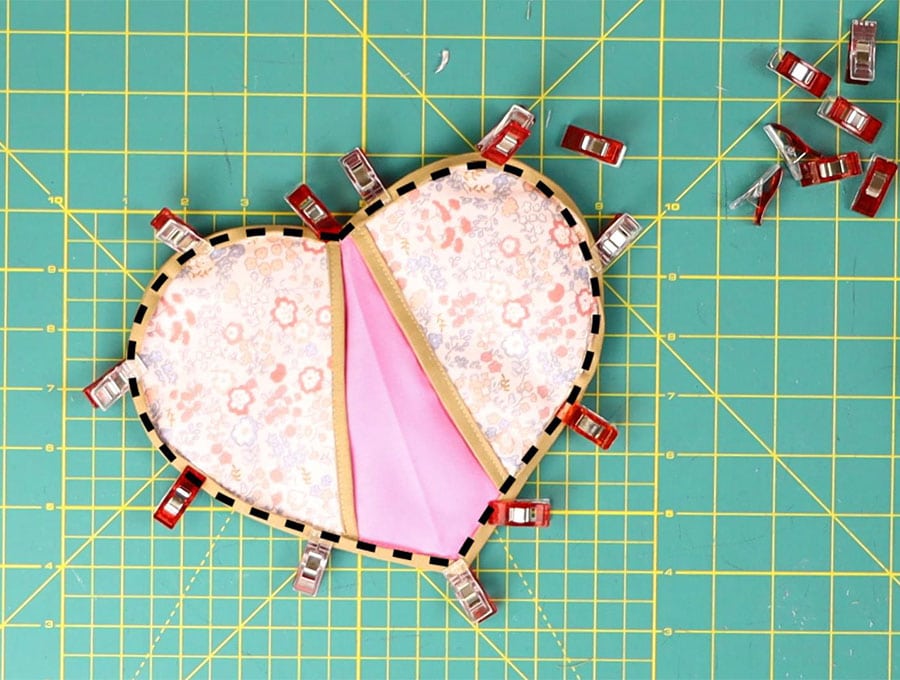
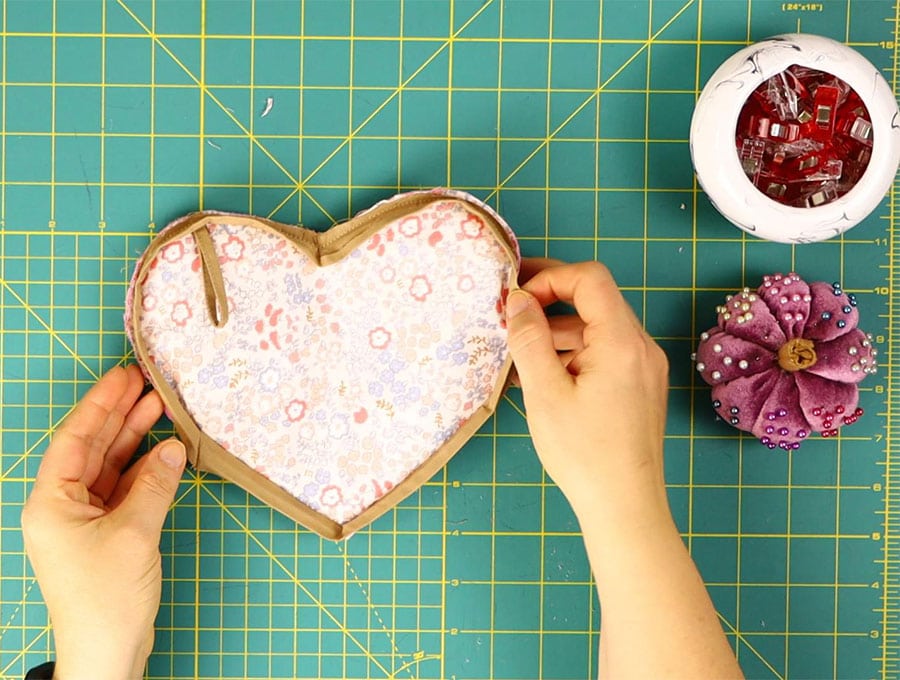
Fourth, place the two pocket pieces in position, right sides up, lining up the curves with those on each side of the heart, and clip them in place – you can’t put glue on these as they need to allow your hand to go into them.
Step 6:
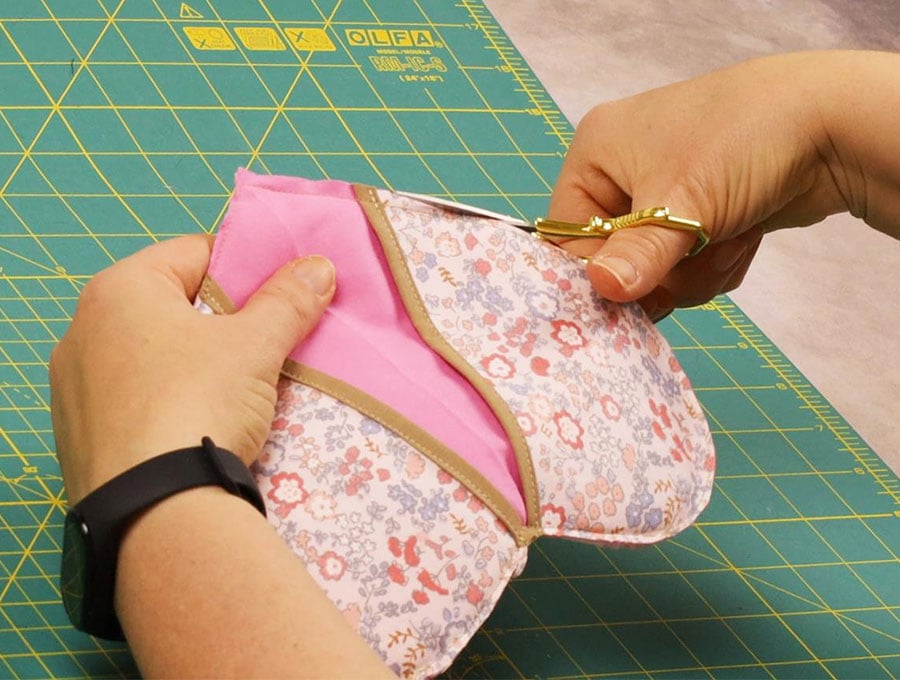
Stitch all around the edge of the heart-shaped potholder ¼ of an inch – 6 mm from the edge. After you finish, trim excess fabric down to approximately 1/8″(3mm), but don’t cut too close to the stitch line.
Step 7:
Create the potholder hanging loop by folding the rectangle in half along the long edge and pressing with your iron. Open out the fabric and turn in each long side to the center fold, then press. Fold over along the length again so no raw edges show, and give a final press.
Step 8:
To complete the hanging loop top stitch along the length of each side of the narrow rectangle. Don’t worry about the ends; the raw edges will be hidden.
Step 9:
Pin or clip the hanging loop in place after folding it in half, short end to short end, to create the loop. It can be placed halfway along the top half of the curve of the heart. Ensure the raw edges touch the raw edges of the heart, and the loop is facing inwards towards the main body of the fabric.
Step 10:
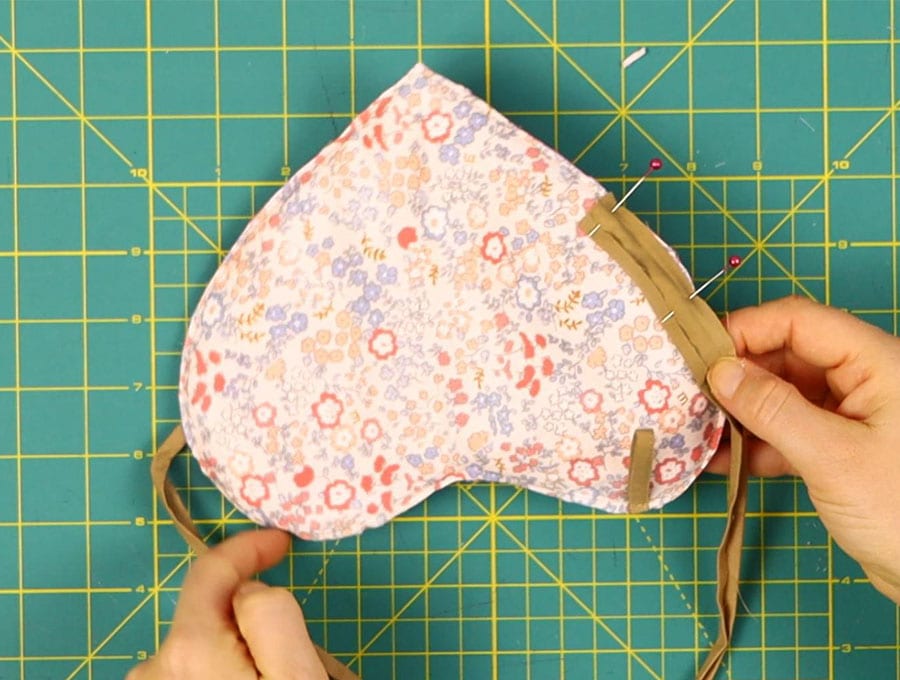
Open out one fold of your bias binding, and with the main part of the binding facing into the body of the heart, pin it to the edge of the heart, attaching from the back of the heart – not the front with the pockets. When you start at the base point of the heart, there is no need to fold over the end where you begin. When you reach the end point of the heart, leave an extra under ½ inch (1.3mm) at the end of the binding to tuck under when you sew.
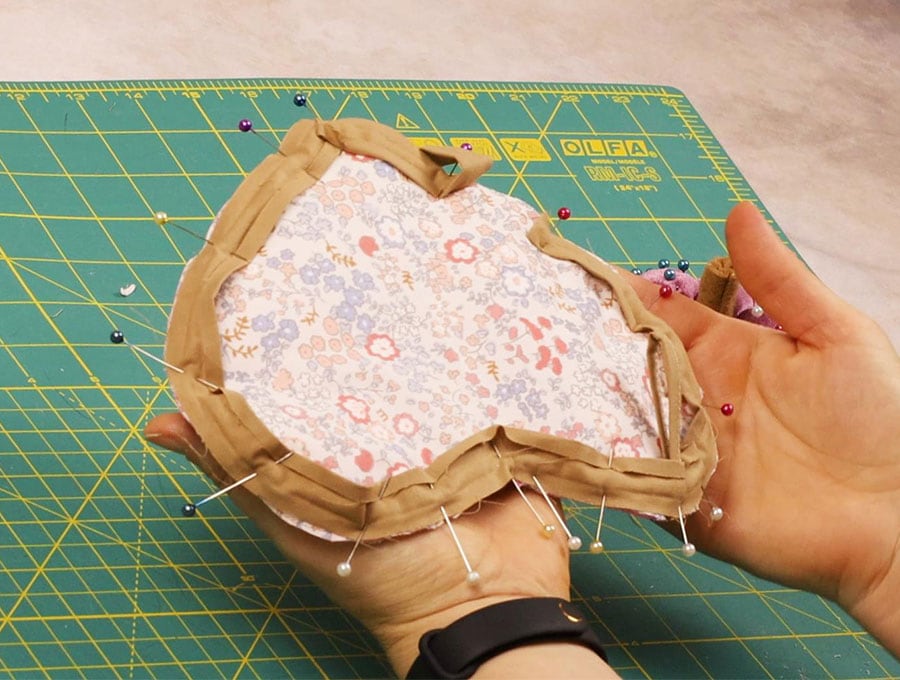
If you start at the point where the hanging loop is attached, fold over ¼ inch (6mm) when you start and take the binding ½ inch (1.3cm) beyond the fold for a neat finish.
The hanging loop will disguise the point where the binding joins.
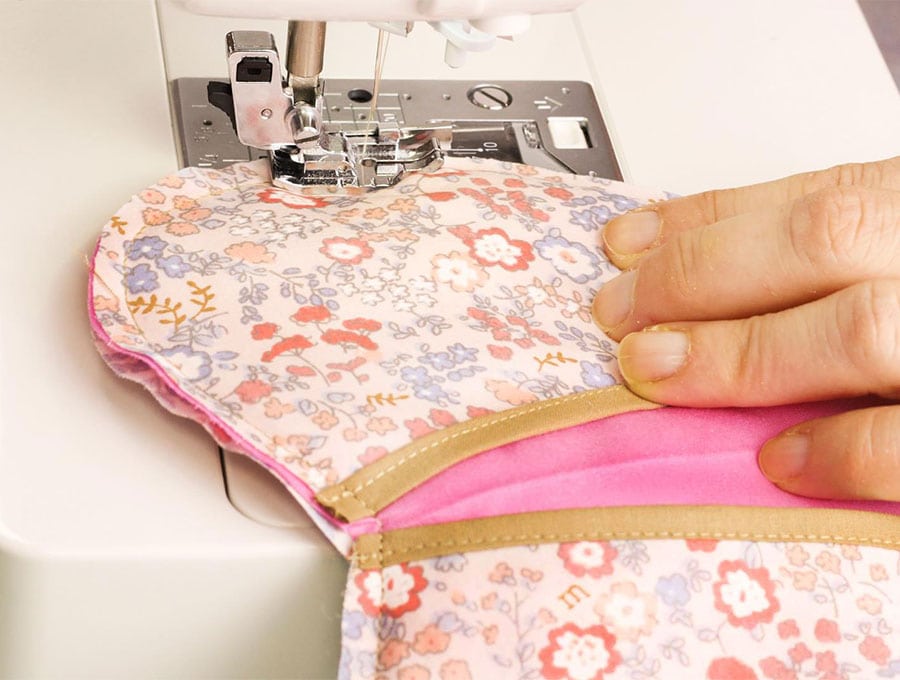
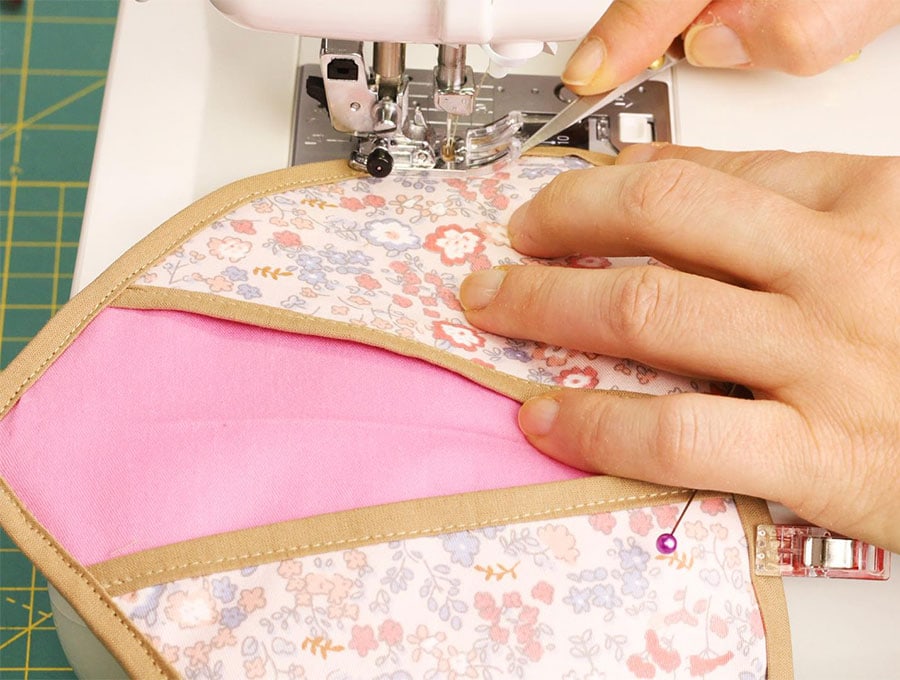
Step 11:
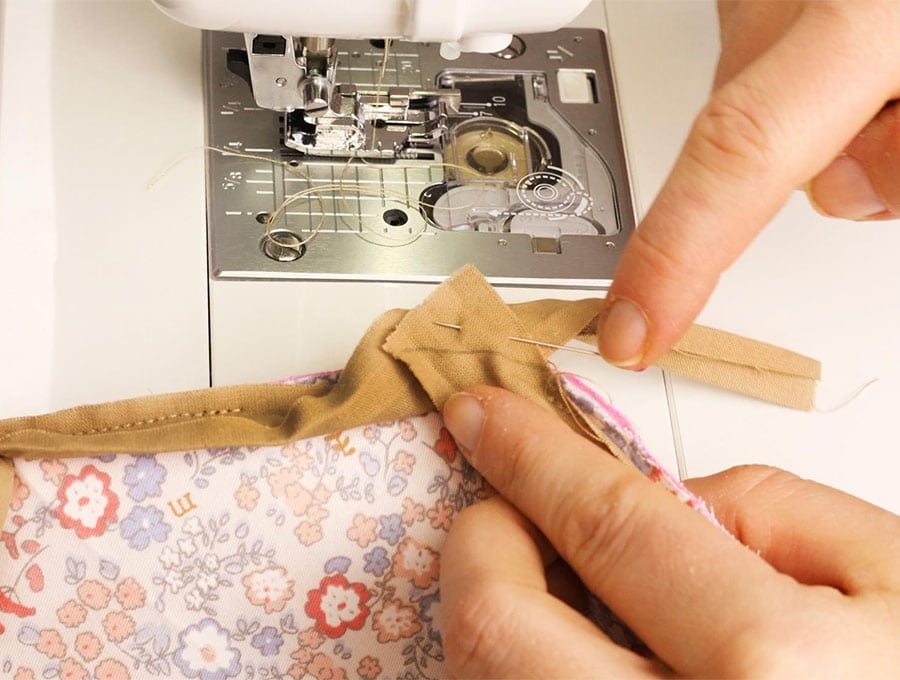
Ease the binding over to the front where the pockets are and top stitch as close to the edge of the binding, starting and finishing with a back tack.
Step 12:
Give your final heart-shaped potholder a final press, pressing the hanging loop outwards so it’s easy to hang.
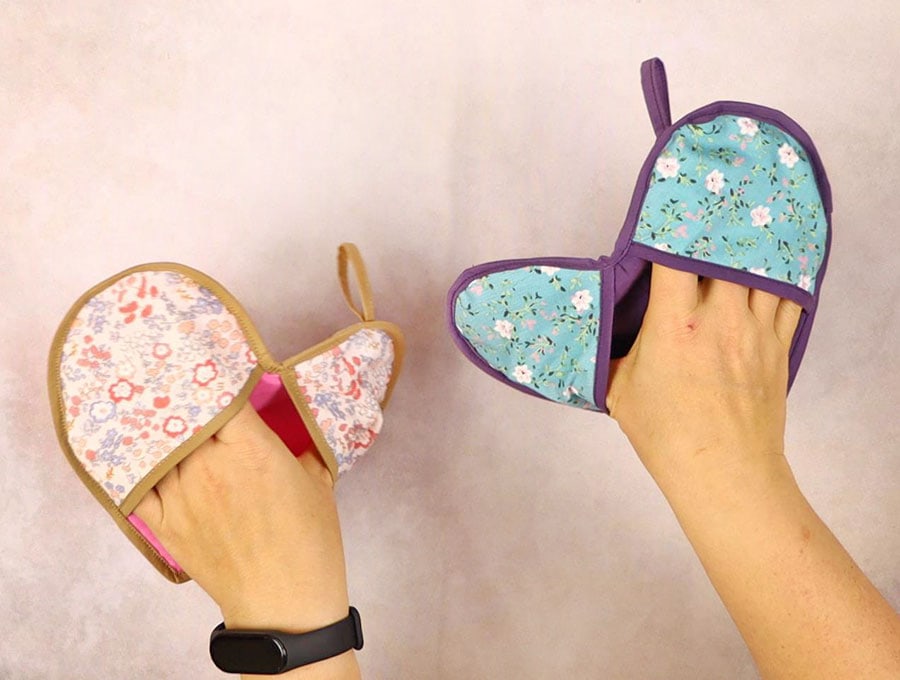
Now that you have one potholder, you will want to make more of these delightful and useful items for your home, friends, and family.
Try matching the fabrics you choose to the personal style of the gift receiver – I can see the Boho style in purples and dark greens being popular with some people; others may prefer black and a pop of color. Sticking to the traditional Valentine colors of red and white is not essential. Pinks and blues or greens all work equally well.
If you enjoyed this tutorial, please share photos of your heart-shaped potholders. We love seeing the results from our talented subscribers. If you still need to subscribe, please click like and subscribe, and remember to share if you know someone who would enjoy this tutorial with its visuals and step-by-step instructions.
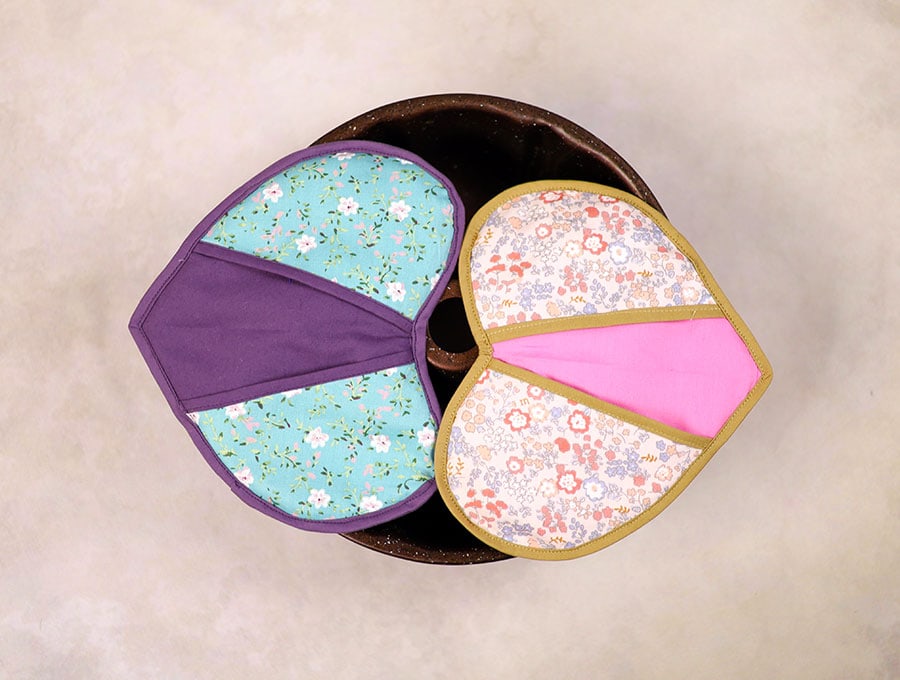
Complete this delightful heart-shaped potholder for Valentine’s Day. It’s so easy, with minimal sewing, to create a practical gift that brings a touch of romance to your kitchen. The heart-shaped potholder can also be made in various other prints to suit any seasonal theme in your kitchen – Christmas, Halloween, or spring. They can also be made to suit multiple kitchen color schemes. We have included all the pattern pieces to print out to make it even easier. Have fun creating!
Do you like this? Pin for later:
Wanna be friends? Click HERE and follow me on Pinterest
RELATED: