
How to Finish Zipper Ends – Three Easy Methods [VIDEO]
Want to finish your zipper ends for a professional look? We show you how to finish the raw end of zipper tape in three different ways so you never risk having a slider slip off the end of a zipper that you have shortened. Finishing zipper ends neatly is important for a good look, especially if they show on an item such as a make-up or toiletry bag.
The old saying goes that a picture is worth a thousand words. We have a video post on shortening zippers and ending them off so they look professional. In fact we have three methods, all illustrated with easy-to-follow visuals. If you prefer to supplement with the step-by-step instructions then we have those too. Shortening a zipper is a skill sewists need more often than they think. When making purses, garments, cushions and garments you’ll be confident in adding the zipper tab or finishing off a zipper neatly so it works perfectly every time.
How to finish zipper Ends – VIDEO
Table of Contents
Method 1 – contrasting or matching tape
- For closed end zippers that you may have had to shorten
- Suitable for coil and plastic teeth zippers that do not have a large tooth size.
- Not suitable for metal zippers – you will break the machine needle.
Step1
Choose a piece of tape or light weight braid. If you have shortened the zipper you can remove some of the tape from the side alongside the zipper teeth to get the exact match of color.
Depending on the item you may want to go for a contrasting fabric to the zipper to add a pop of colour, or if you don’t want to draw attention to the zipper end you will try to choose a fabric that is closest in colour to the zipper tape.
Step 2
Place a small piece of the tape or braid around the end of the zipper to get the right length and allow for an overlap of ½ inch then cut.
Step 3
Take the tape and put the ends together, wrong sides facing outwards. On your machine stitch across the raw ends ¼ inch (6mm) from the edge, back tacking at start and finish – because this is a relatively short length you will basically have a double stitch across the end.
Step 4
Open up the seam and give it a press, if you want, before turning the right way out. You will have a ring of tape.
Step 5
Slip it over the end of the zipper so the end of the zipper is concealed and flatten as you clip or pin it in place with the seam at the middle of the back of the zipper .
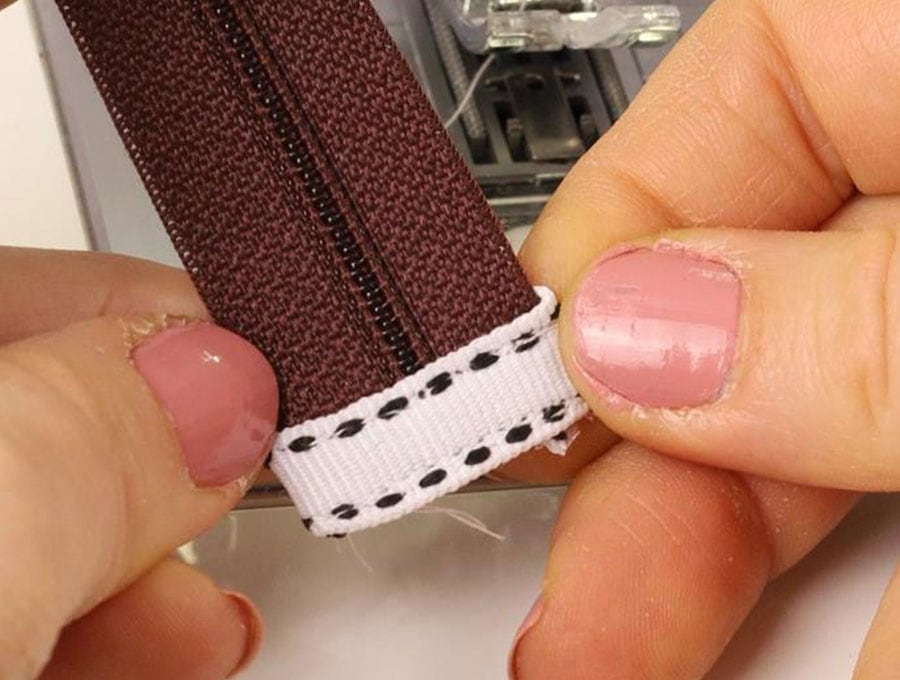
Step 6
Stitch over the top part of the tab, back tacking and going carefully and slowly over the teeth part of the zipper. You want your stitches to be as close to the edge of the tape/braid as possible. At the end leave the needle down in the fabric, lift the pressure foot and swing at right angles, depress the pressure foot so you sew down the side neatly, then repeat to sew across the bottom of the tape and up the other side, back tacking at the finish. You now have the end of the zipper safely encased in its little pull tab. No raw edges, no fuss about folding under a seam allowance.
Method 2: The printed fabric sleeve zipper end
Suitable for coil and plastic teeth zippers that do not have a large tooth size.
- Not suitable for metal zippers – you will break the machine needle.
- Creates a solid tab to grab onto when pulling up the slider.
Step 1
Pick a printed fabric you like with one color in the print that will match the zipper.
Measure the width of your zipper, double it and add ½ an inch (1.27 cm)
So, if your zipper is 1 inch wide x 2 = 2 inches + ½ inch = 2 ½ inches in length.
Cut the fabric 2 ½ inches (6 cm) wide.
Step 2
Fold your fabric in half across the length and mark ¼ inch (6mm) seam allowance.
Stitch the fabric down the open side, back tacking at the start and finish.
Step 3
Slip the inside out fabric over the end of the zipper and slide it up so the bottom of the fabric tube is just above where you want to end the zipper.
Step 4
Stitch across the fabric 1/8 of an inch (3mm) from the edge, back tacking at the start and finish and going carefully over the area with the teeth.
Step 5
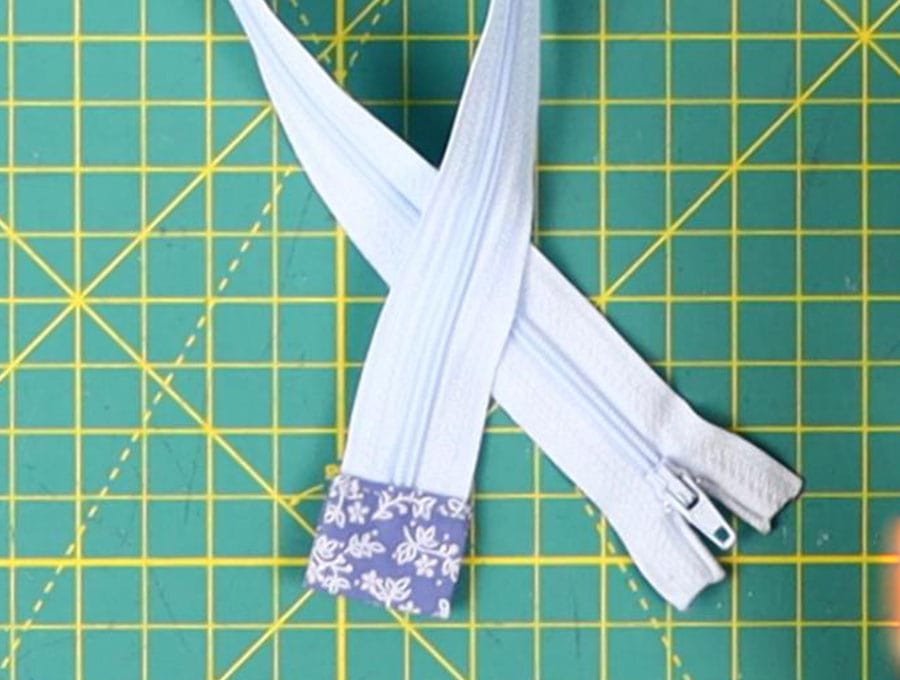
Flip the fabric tube down so the right side is showing. It will be quite long, so turn the raw edge in about 1/8 of an inch (3mm) then turn up again and line up the edge with the end of the zipper where you attached the fabric tube..
Step 6
Carefully stitch along the top where the fabric meets the zipper as close to the edge as possible, then, down the sides, along the bottom fold of the fabric and up the other side. Remember to back tack at the start and finish. This creates a firm end to the zipper.
Method 3 – The Triangle
This is the simplest method and can be used on all zippers including metal toothed zippers because you are not stitching over the teeth but just below where they end.
Step 1
When you shorten the zipper allow an extra 3/4 of an inch (2 cm) at the bottom end beyond the actual length you need for the zipper.
Step 2
Cut up 3/4 of an inch (2 cm) alongside the teeth, making sure the tape is intact, then remove the zipper teeth carefully.
Step 3
Use a lighter to seal the ends of the zipper tape – be careful not to burn the tape, just enough heat to melt the ends so they don’t fray out.
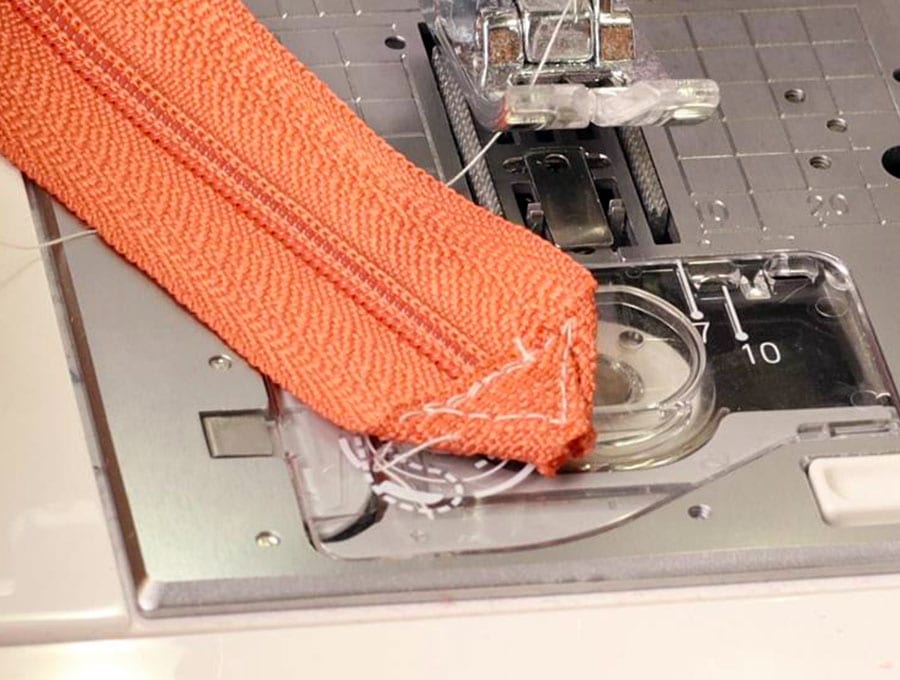
Step 4
Fold the left hand side piece of tape up and across, then fold the right hand side tape up and across to form what looks like a triangle with the pointy bit chopped off – if you remember high school geometry this is called a trapezium.
Step 5
You can fold over the end of the right hand side and tuck it in so there is no raw edge.
Once you have the triangle of fabric neatly lined up stitch across the edges so you have a neat triangle, well trapezium, end to the zipper.
So, there you have it – three ways to end off a zipper you have cut down to size as neat as you like. If you enjoyed this tutorial with its step-by-step instructions how to finish the raw end of zipper tape then please give us a like and subscribe for more sewing content to be delivered straight to your inbox. If you know of a sewist who is nervous about cutting zippers to size then please share – this article will be mighty helpful to those who are starting out on their sewing journey.