
How to Make Fabric Letters with FREE Fabric Alphabet Letters Pattern
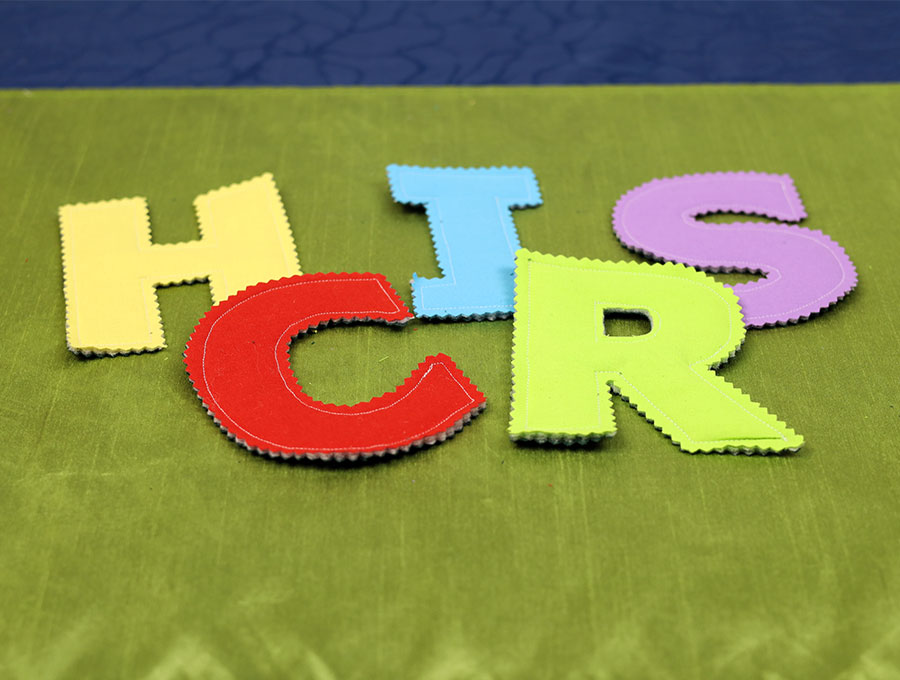
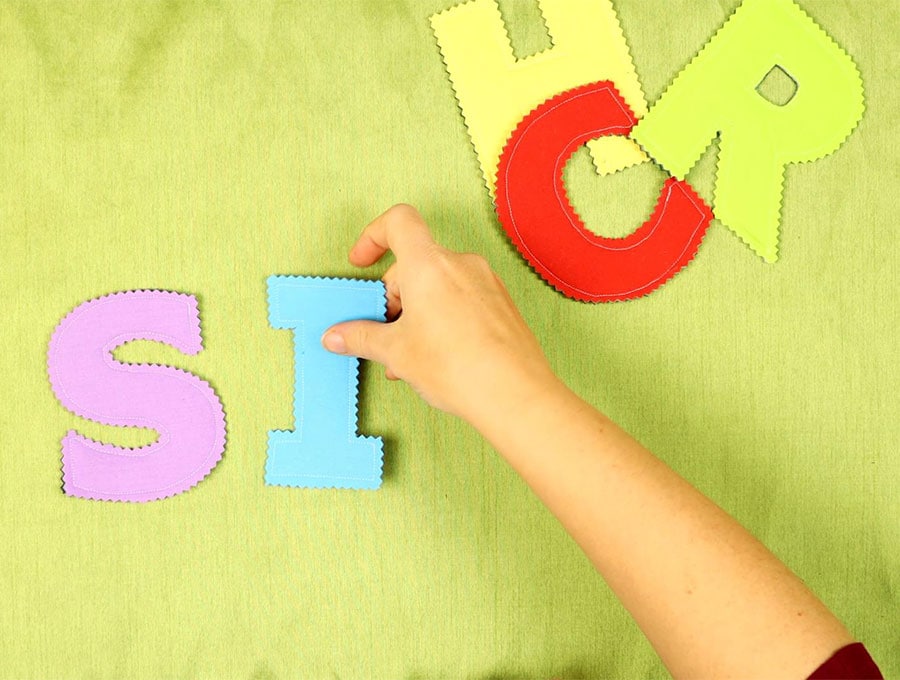
I love, love, love these large fabric letters. The possibilities for using them are almost endless. There is so much you can teach kids with regards to spelling, using these easy to make cloth letters. We have provided the alphabet in printable patterns, as well as the numbers 0 to 9, the &, as well as the plus and minus and equals signs.
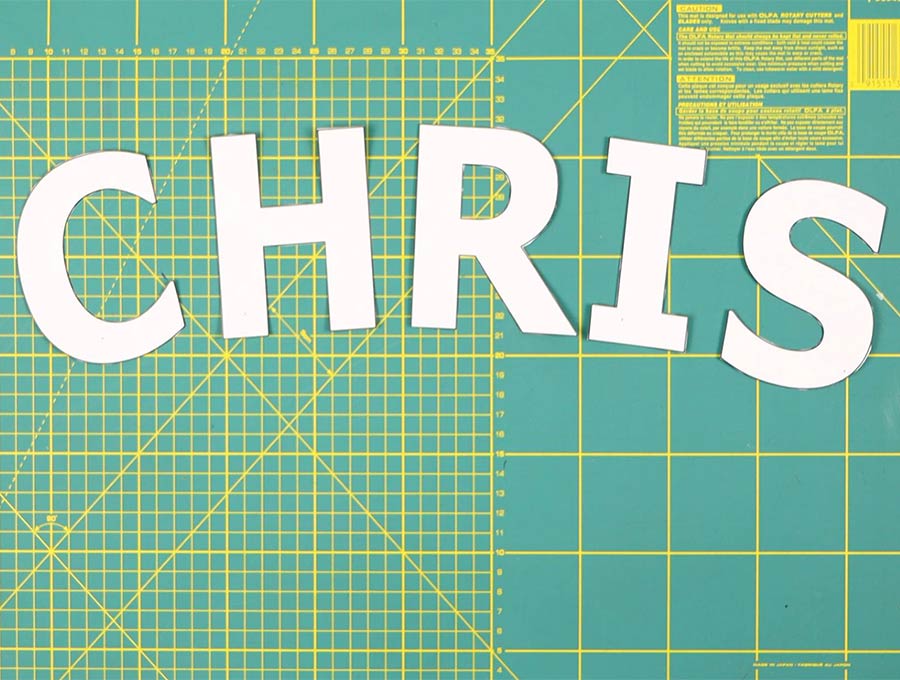
You can make the fabric letters in various colors – maybe a black for the vowels, a, e, I, o, and u, and different colors for the other letters, so kids learn to differentiate between vowels and consonants. If you want to teach the rainbow sequence you could make the letters that start the rainbow in the correct color – Red, Orange, Yellow, Green, Blue, Indigo, Violet. If you are making a child’s name remember you may need more of one letter, for example CLARA will need two A’s and Brittany two T’s.
The numbers are great for teaching addition and subtraction when used in conjunction with countable objects such as jelly beans, or plastic bottle tops.
You can also use these cloth letters to create banners for special occasions, like Happy Birthday, Merry Christmas, Happy Halloween, and so much more. What is so nice rather than buying ready-made banners is that you can personalize the banner with the person’s name. This is great especially for country style weddings with the name of the bride and groom. To create a banner simply use bias tape or some hessian string and use small decorative pegs to fasten on the letters.
The fabric letters can be washed and reused time and time again. So much better than plastic letters that can take between up to 1000 years to decompose once they reach landfill.
You’ll need a five- inch square for the front of each letter and number, and yardage for the backing. The backings are made all the same so kids don’t get mixed up between the front and back of a letter as they learn their alphabet using the fabric letters.

Below you will find my step by step written tutorial How to Make Fabric Alphabet Letters with VIDEO instructions for all the visual learners.
We occasionally link to goods offered by vendors to help the reader find relevant products. Some of the links may be affiliate meaning we earn a small commission if an item is purchased.
Table of Contents
- 1 How to make Fabric Letters
- 2 Fabric Letters Supplies and tools
- 3 How to Sew Letters on Fabric
- 3.1 SEWING LETTERS VIDEO TUTORIAL
- 3.2 Fabric Letters Sewing INSTRUCTIONS:
- 3.3 STEP 1: Prepare the paper fabric alphabet templates
- 3.4 Step 2 Trace the letters on the fabric
- 3.5 Step 3 Layer the materials
- 3.6 Step 4: Prepare the quilt sandwich
- 3.7 Step 5: Pin and cut out the blocks
- 3.8 Step 5: Sew around
- 3.9 Step 7: Press
- 3.10 Step 6: Cut out the fabric letters
- 4 Fabric Alphabet Letters FAQs and tips:
How to make Fabric Letters
Fabric Letters Supplies and tools
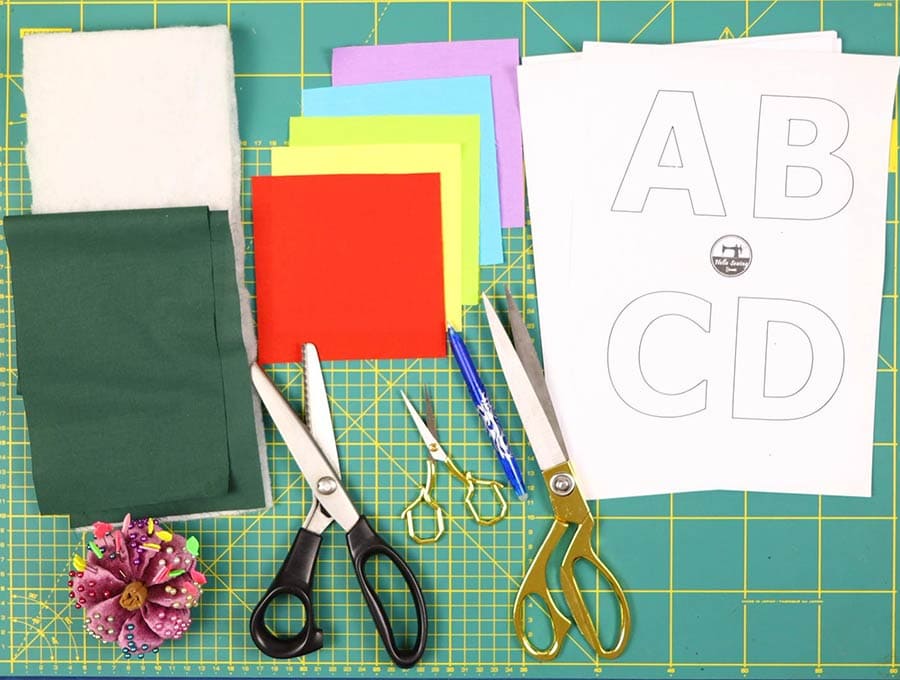
- fabric – 5-inch squares – one for each letter you plan on making. You can use cotton charm packs. For a rainbow alphabet
- use this
- 1 yard (1 meter) of fabric for the backing
- 1 yard (1 meter) of fusible foam or quilting batting
- Erasable pen
- Pinking shears
- matching thread
- scissors (or rotary cutter and a cutting mat)
- ruler or measuring tape
- iron and ironing board
- sewing clips or pins
- An inexpensive Light pad) (optional) will save you the work of cutting out all the paper alphabet letter templates
PRINTABLE DOWNLOADS:
- alphabet letter templates – STANDARD (3.2 in / 8cm letters) [Free pdf file]
- fabric alphabet letters pattern – LARGE (4 1/3″ / 11cm letters) [Free pdf file]
Follow us for free patterns & tutorials! [easy-profiles]
How to Sew Letters on Fabric
Watch the diy cloth letters video first and then follow the written step by step instructions below.
Please enjoy and don’t forget to Like and SUBSCRIBE over on YouTube to be kept up to date with new videos as they come out.
SEWING LETTERS VIDEO TUTORIAL
Fabric Letters Sewing INSTRUCTIONS:
STEP 1: Prepare the paper fabric alphabet templates
Print your letters and numbers from the paper alphabet letter patterns provided in our free printable template sheets.
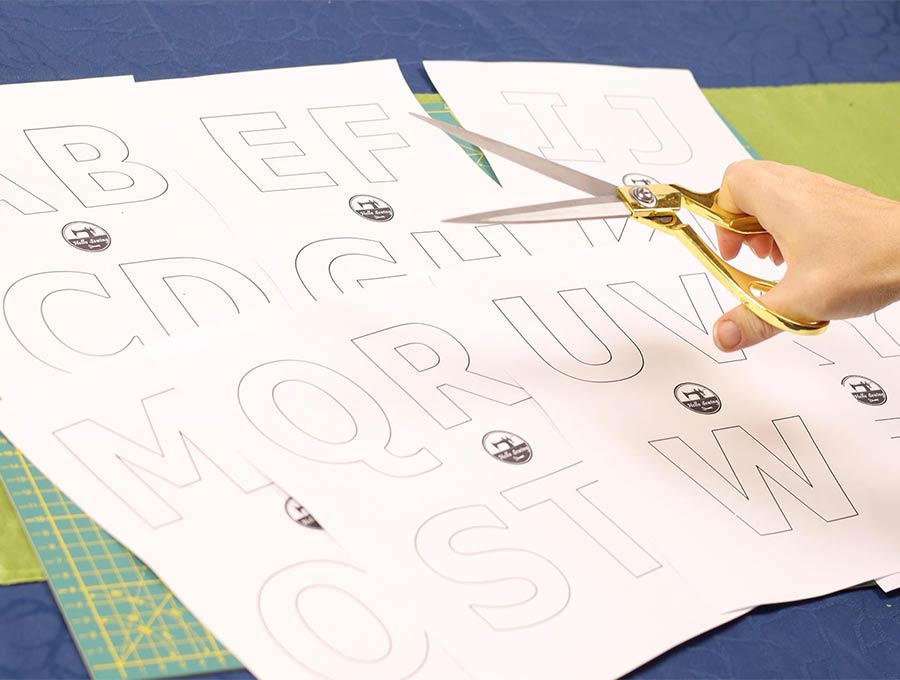
Trim the excess paper around the letters if you are going to trace around it. If you are not making the whole alphabet, you can only cut the letters you need.
TIP: To skip all the paper cutting, you trace the letters onto the fabric either by using a well lit window or by using a light pad.
Step 2 Trace the letters on the fabric
You can cut out each letter from the paper pattern, place it on top of the fabric square and trace around it.
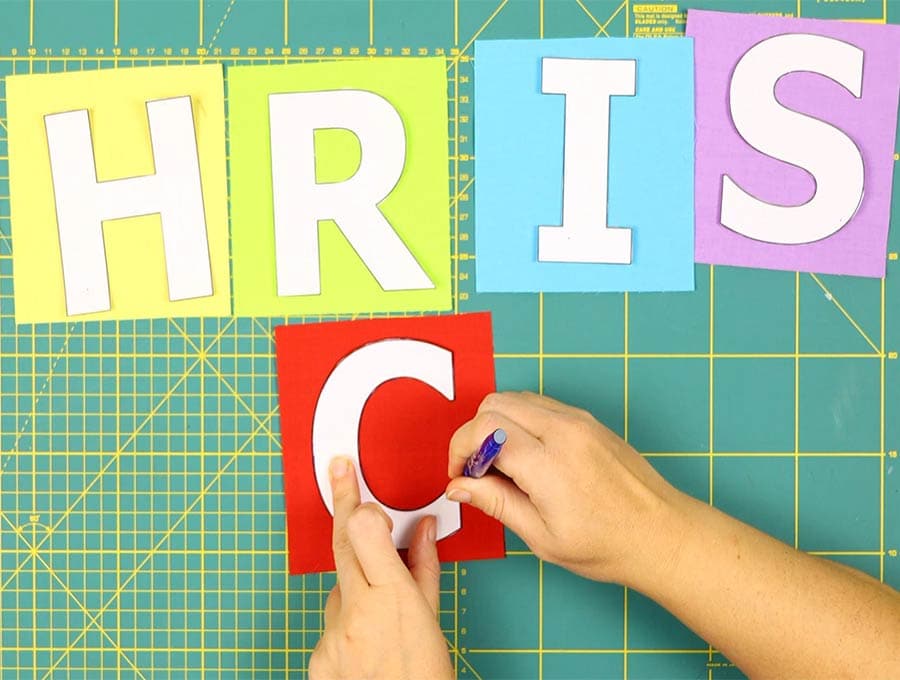
If you have a light pad all you need to do is place the right side of the 5-inch fabric square for the letter over the printed letter and trace using an erasable fabric pen. If you don’t have a light pad you can using a piece of masking tape to stick the printable pattern to a window and place the fabric over, hold in place, and trace. Repeat for all the letters you want to use.

Step 3 Layer the materials
Fuse the yardage for the back of the letters to the fusible foam (OR simply place the quilting batting over the yardage). I’m using quilting batting here.
If you are using fusible foam, find the side of the foam that has the glue on it run your fingers over each side – the side that is a little rough will be the one with the glue side and that needs to be placed facing upwards with the right side of the yardage facing upward placed over it. Working from the middle of the fabric outward, iron according to the manufacturer’s instructions to fuse the yardage to the fusible foam.
Step 4: Prepare the quilt sandwich
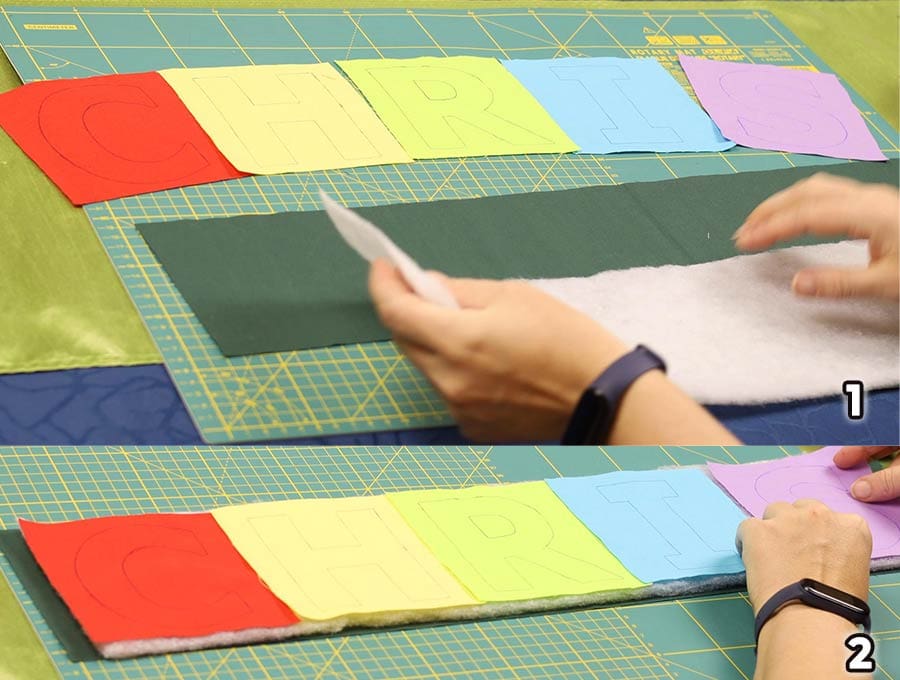
Place the right side of the 5-inch squares over the wrong side of the fused foam yardage. Cut the yardage fused to the foam into 5-inch strips to make it easier to work with.
Step 5: Pin and cut out the blocks
Pin everything together so that the letters won’t shuffle.
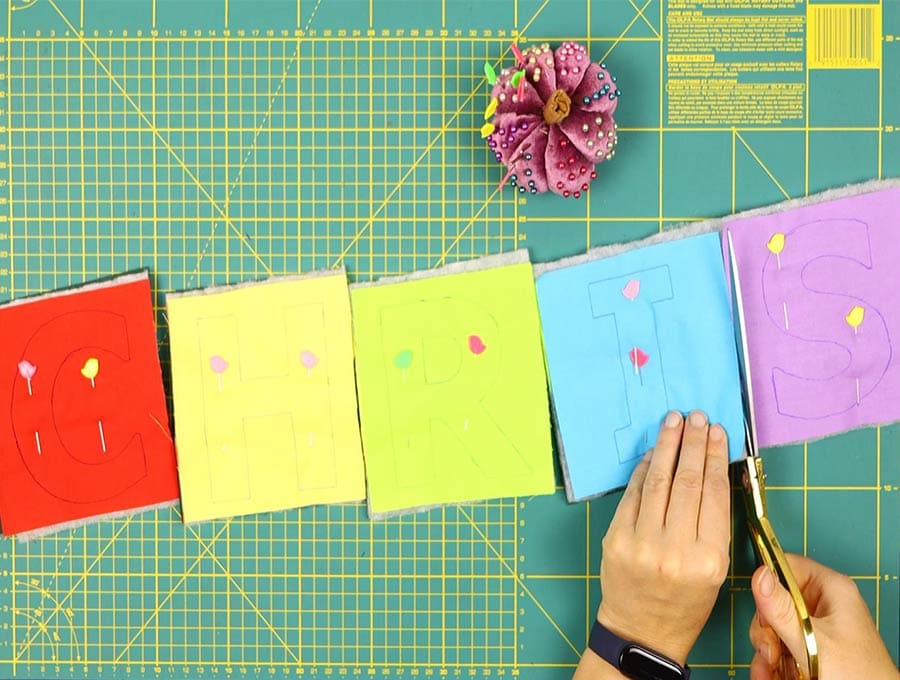
You have the choice to cut the fused foam yardage to five inches, or simply tuck the extra fabric out of the way as you stitch, or cut it the 5-inch size of the front.
Step 5: Sew around
Stitch around the letter carefully on your sewing machine. You can use a stitch length setting 2.5 for most parts, but if you have lot of curves or tight edges I recommend using 2 or even 1.5.
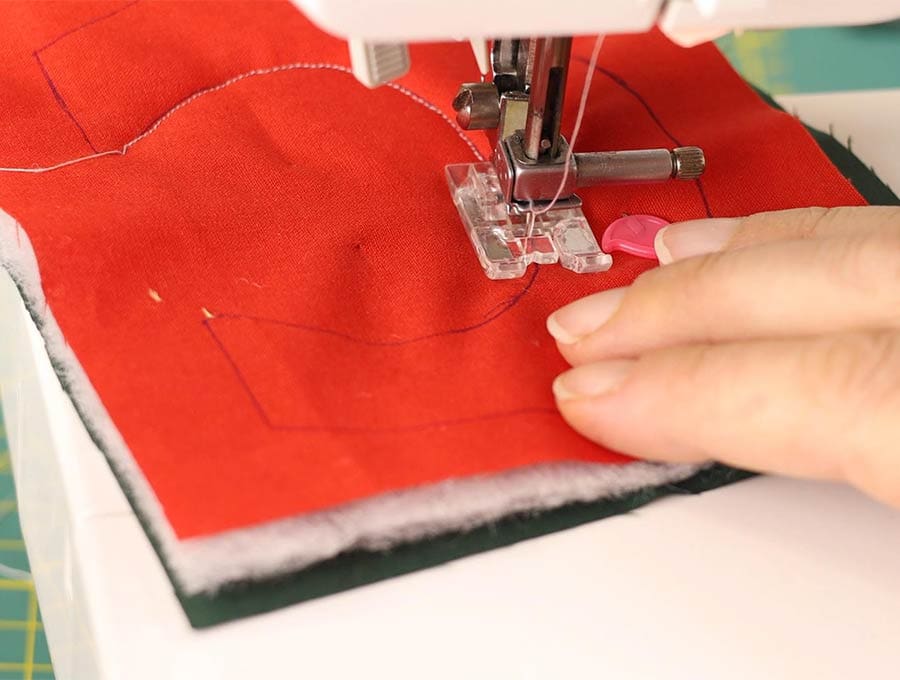
When you comes to a turn in the letter stitch right to the corner of the letter, leave the needle down in the fabric and lift the presser foot, turn the fabric, depress the foot and carry on stitching. Back tack at the start and finish of each letter. For straight letters like an M or a K it is easy. When stitching curved letters, like an S, you’ll need to stop and ease the fabric around the curve – it can be a bit slow but it makes for a well finished letter. Try to start on the straight edge, for example on a U, then work towards the curve.
TIP: I prefer to use white thread so that is shows, but if you prefer a color that will blend, you can thread the bobbin with the color that matches the yardages at the back of the letter and use a cotton for the top matching the color of the letter. If you prefer you can use grey as it tends to blend with most colors.
Step 7: Press
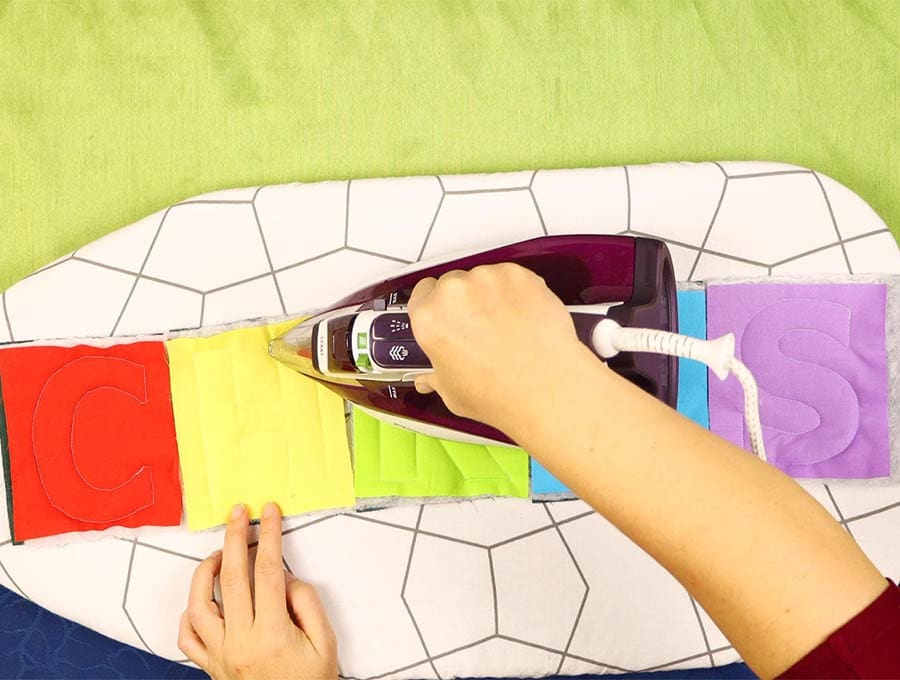
Press to remove the heat erasable marker and make the letters pop
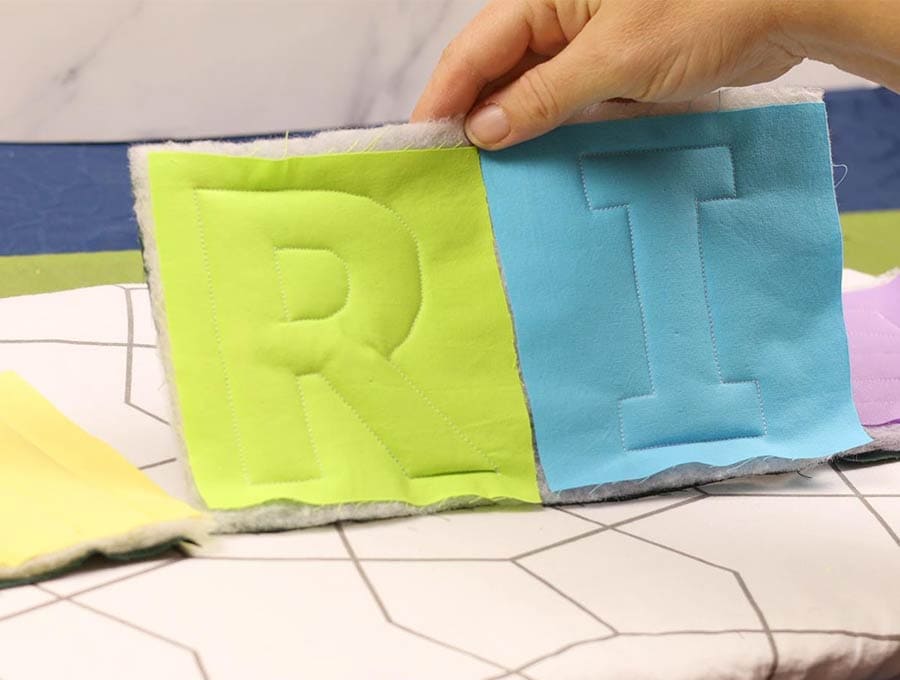
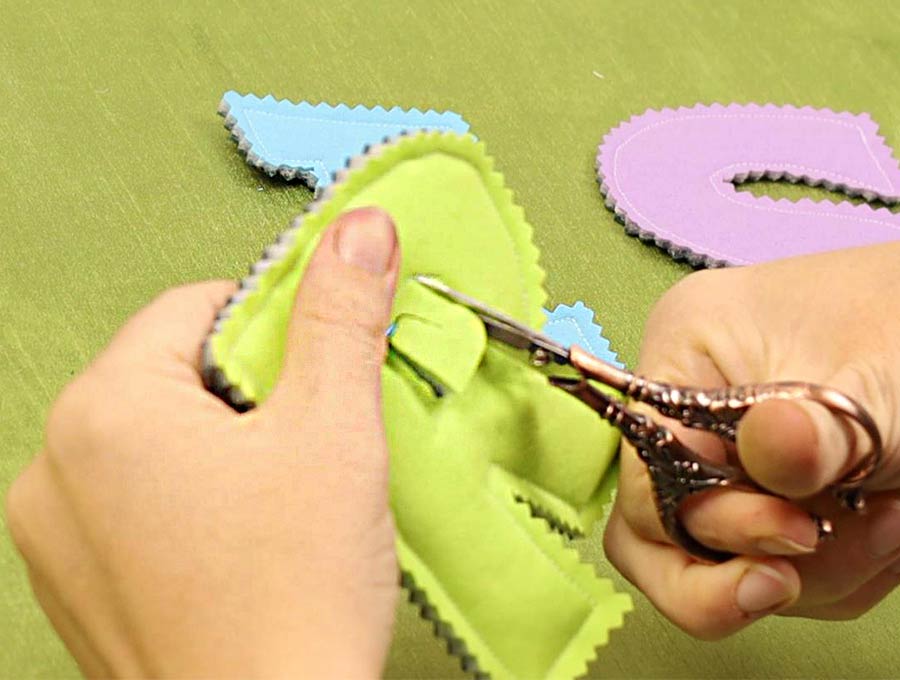
Step 6: Cut out the fabric letters
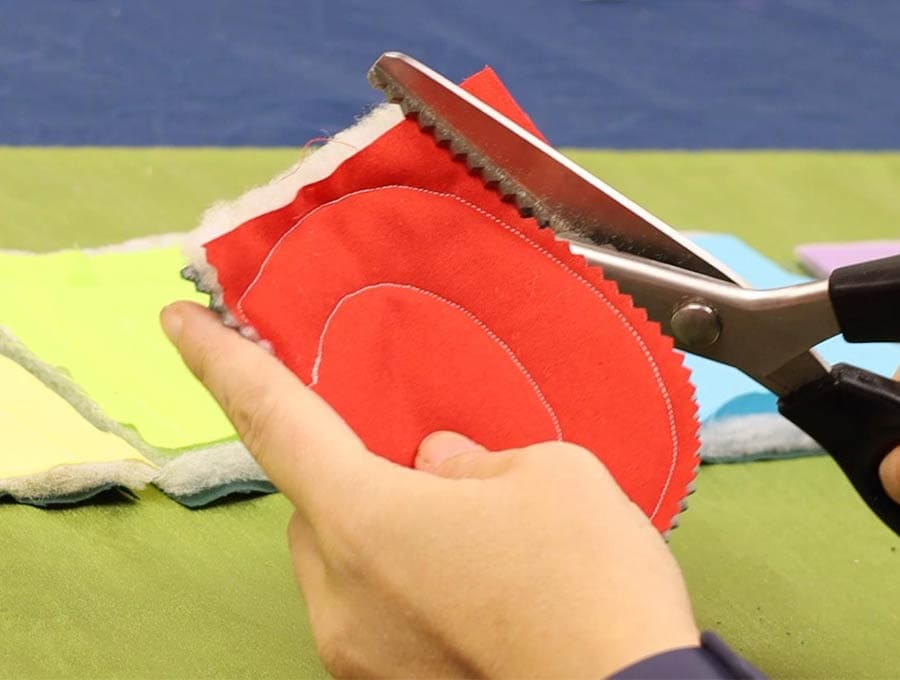
Cut out the letters using pinking shears, ¼ inch (5mm) from the sewn edge. You’ll need to work carefully to ease the pinking shears around curves.
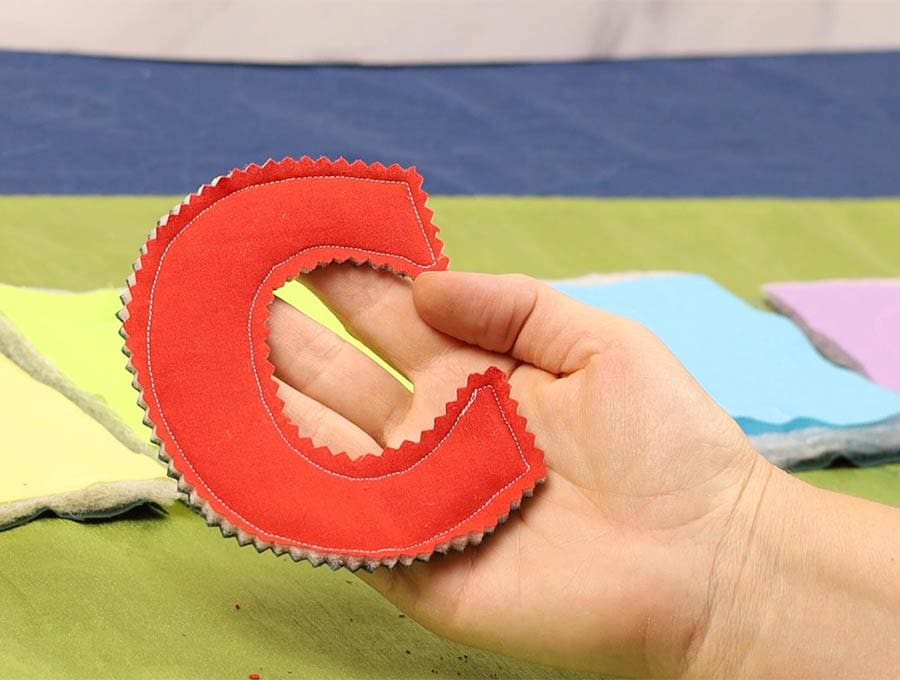
Be careful to stay away from the stitch lines – you can always re-trim off a little extra afterwards, but can’t put fabric back!
If you need to cut out inside the letters (like on R, A, B etc) use a pair of small scissors
One last press and your DIY fabric alphabet letters are done!

Once your handmade fabric letters are all done you are ready to use them in various ways. If you enjoyed this step-by-step tutorial then please hit the like button and subscribe for more fun and educational projects.
Fabric Alphabet Letters FAQs and tips:

Fabric Alphabet Tips from Our Readers and Friends:
- Before you sew up the letter pop a little magnet inside the layers, so it can be used on a whiteboard or on the fridge
- Skip the batting /foam and use felt or flannel as backing so the letters can be used on a felt board
- Use the help of an older child to create this lovely fabric letter set for a younger sibling or a cousin. They can play together and have hours of fun using these
- Use the same color for the backing fabric so the child can tell the front from the back
Q: Can I create my own template? (e.g. if you’d like to use a different font, print just several letters or have lowercase letters)
A: Sure you can! Here are the instructions for creating your own letters template:
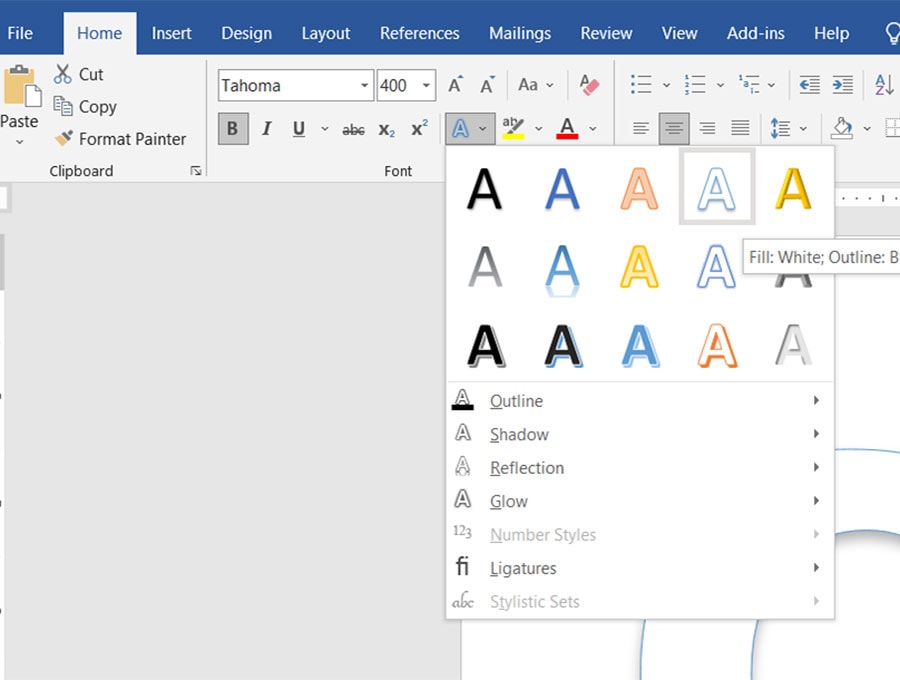
- Open up Microsoft word and type the letters and/or signs you will use using your favorite font
- Select all of the letters (CTRL+A), and then click the Text Effects tool. Look for the blue A icon
(In Microsoft Word 2010 and 2003, the Text Effects tool is located in the toolbox under Home, on the left of the highlighting tool.) - Choose No shadow from the dropdown menu Shadow
- Choose your favorite outline from the dropdown menu Outline
- Click save and then print. Boom! You are ready
Q: Can I decorate the letters?
A: By all means feel free to add sequins, glitter fabric glue, braid or beads to add some sparkle to the letters if using them for banners. If you are using the letters for toddlers it is best to stay away from stuff that can be pulled off and swallowed!
Fabric letters are a great way to teach youngsters as they are large enough for tiny fingers to trace the shape and get to recognize the letters of the alphabet. Use them to create banners for special occasions, spell out a child’s name for their bedroom door, or to teach vowels and consonants. The fabric letters are simple to make using our free printable fabric alphabet letters pattern, and you can make as many as you need. Our visuals and step-by-step instructions how to sew letters on fabric make it easy to follow along. The numbers are also great for teaching addition and subtraction when used in conjunction with countable objects such as jelly beans, or plastic bottle tops.
Another idea is to print just one letter to applique a monogram on a t-shirt, hoodie or any clothing you want to make unique. If you wonder how to sew a letter on fabric – most of the times it is as easy as using a medium zig zag stitch around the edges of the letter
Do you like this? Pin for later:
Wanna be friends? Click HERE and follow me on Pinterest
RELATED: