")
How to Sew a Lined Vest (Fur Lined Vest Tutorial)
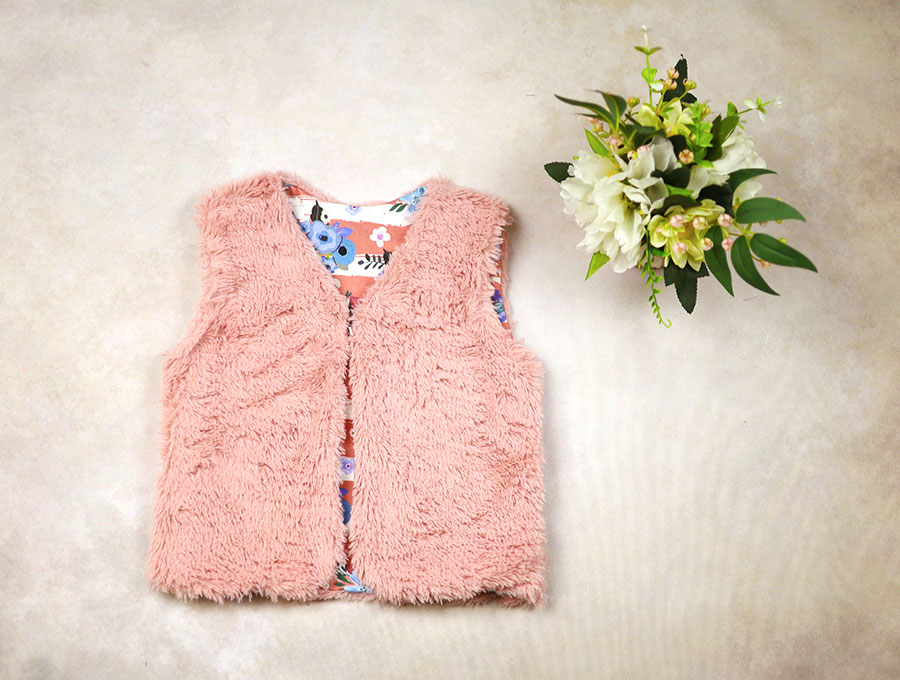
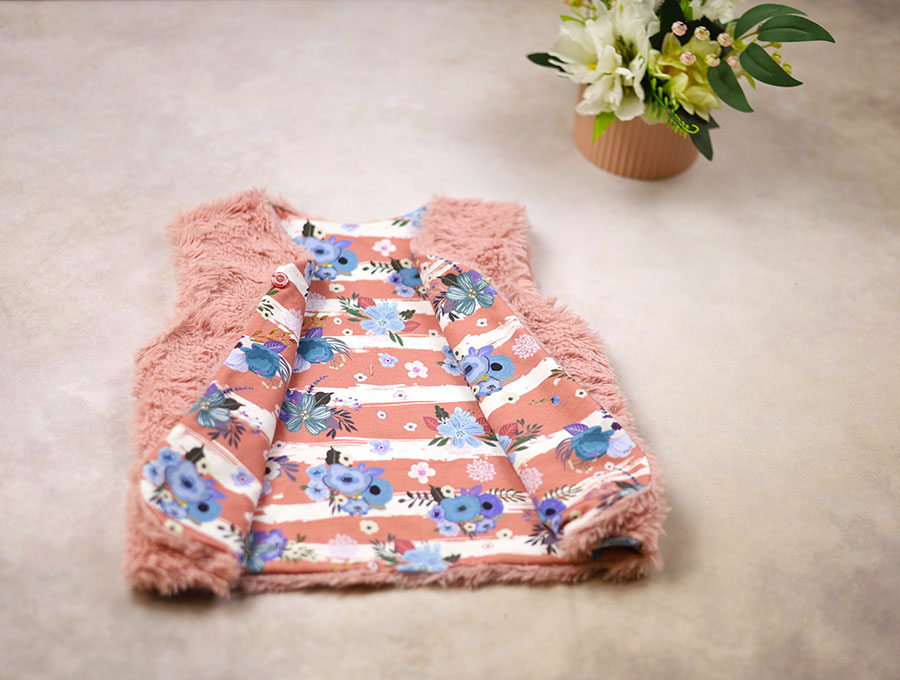
Have you ever wanted to change up an outfit with a little edge-to-edge vest to add a pop of color or simply to add a bit of contrast? Well, we have the easiest lined vest that you’ll be able to sew within a hour. Whether the vest is for kids or adults, it’s a breeze to make. Simply follow our step-by-step instructions and soon you’ll be showing off your new creation. The fully lined vest is reversible giving you two fashion options for the effort of making one garment.
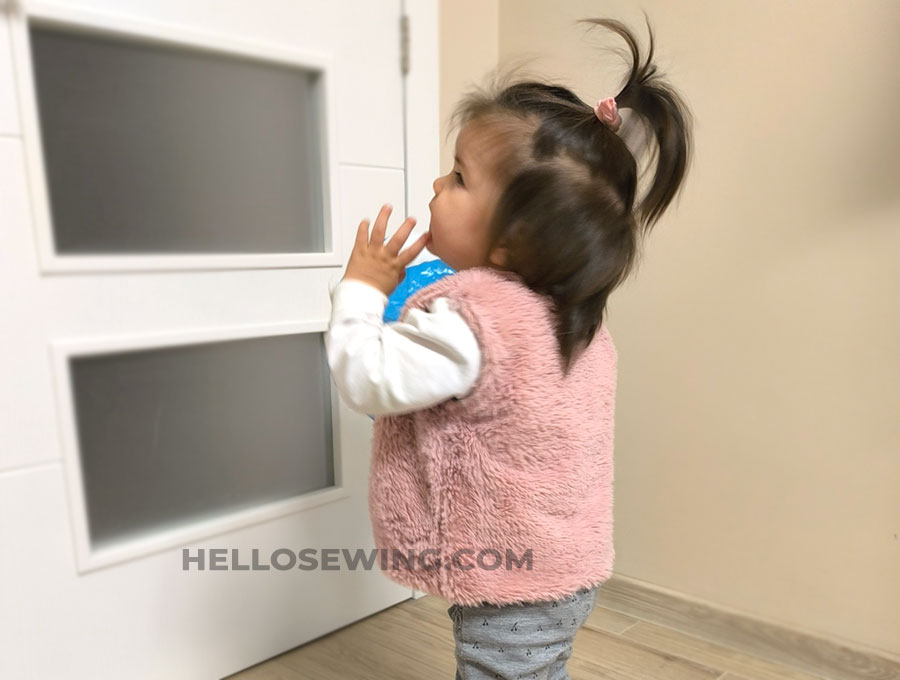
If you want to change up an outfit with a little edge-to-edge vest then this post is just for you. You’ll be able to sew this within an hour. Our visuals accompanied by the step-by-step instructions make understanding the steps clear. Why not create an item that will keep your core warm on those in-between days when you don’t need a heavy jacket, but a long sleeve blouse is just not enough. The vest is fully lined and you can make it using two outer fabrics if you like, so it is reversible, giving you two options for the effort of making one garment.
Below you will find my step by step written Lined vest tutorial with VIDEO instructions for all the visual learners. Do you know my favorite thing about this vest? It’s reversible!

We occasionally link to goods offered by vendors to help the reader find relevant products. Some of the links may be affiliate meaning we earn a small commission if an item is purchased.
Table of Contents
How to make a Lined Vest
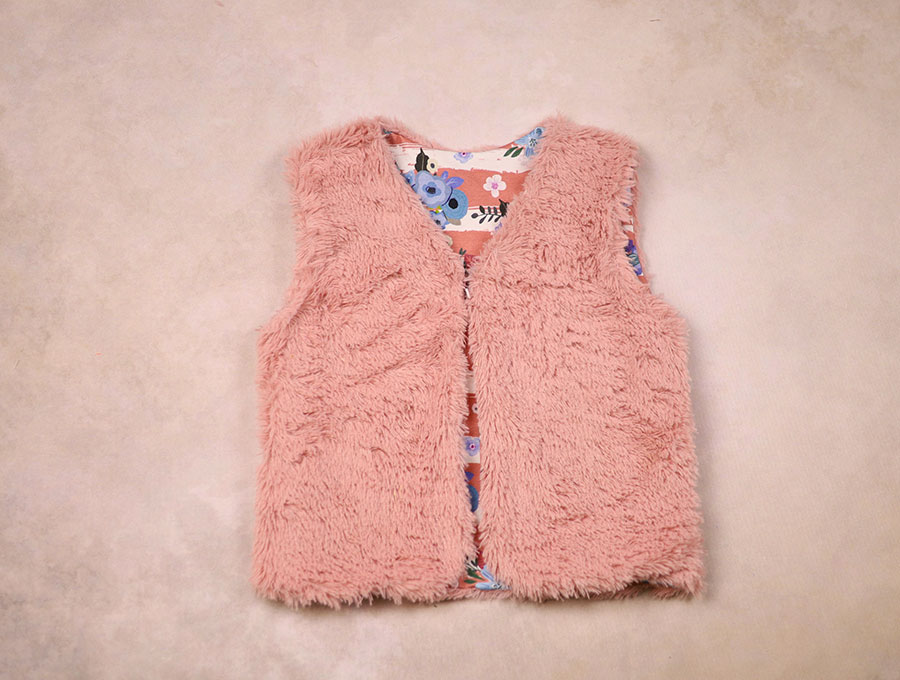
I’m making a lined fur vest here, but you can make it using only cotton fabrics. If you are making the fur version, you need to skip the optional steps
Lined Fur Vest Supplies and tools
- main fabric – fur or sherpa
- lining fabric – jersey knit fabric
Make sure you have sufficient fabric for the size you are making – for kids sizes up to 10 years you’ll need one yard (91.4 cm) of outer fabric and one yard of lining fabric. For toddlers you can get away with less fabric. For adult sizes Small Medium and Large you’ll need up to 1 ½ yards (140 cm)
- Our free pattern printed out to your size
- matching thread
- scissors (or rotary cutter and a cutting mat)
- ruler or measuring tape
- iron and ironing board
- sewing clips or pins
- optional button and thin elastic
Follow us for free patterns & tutorials! [easy-profiles]
How to Sew a Lined Vest
Watch the diy lined Vest video first and then follow the written step by step instructions below.
Please enjoy and don’t forget to Like and SUBSCRIBE over on YouTube to be kept up to date with new videos as they come out.
Lined Vest VIDEO TUTORIAL
Lined Vest INSTRUCTIONS:
STEP 1:
Cut the pattern pieces.
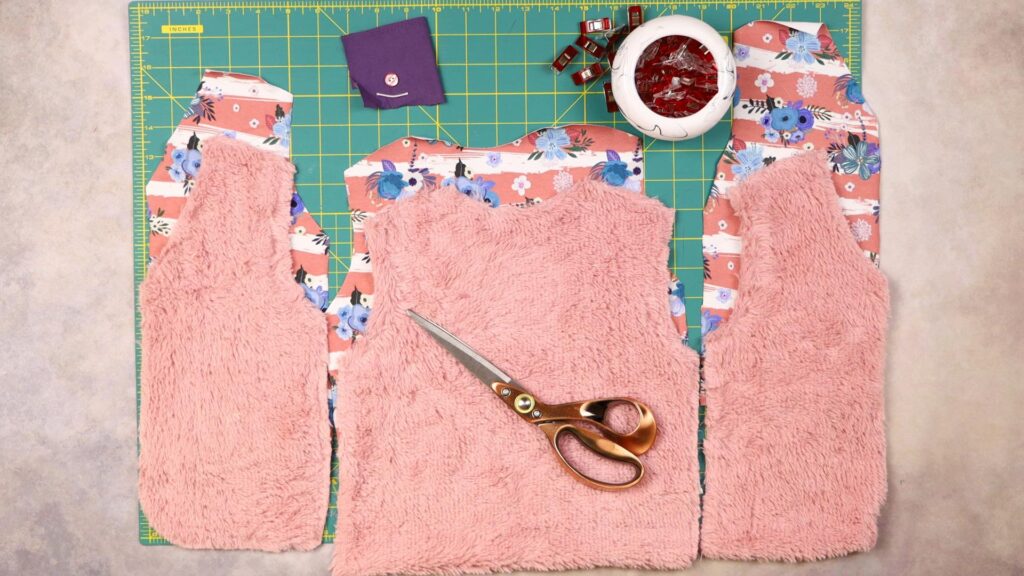
You will need one back piece cut on the fold of the fabric and two front pieces from the outer fabric. Make sure when cutting you place your fabric right side to right side before cutting or you may end with two left sides if you cut them singly!
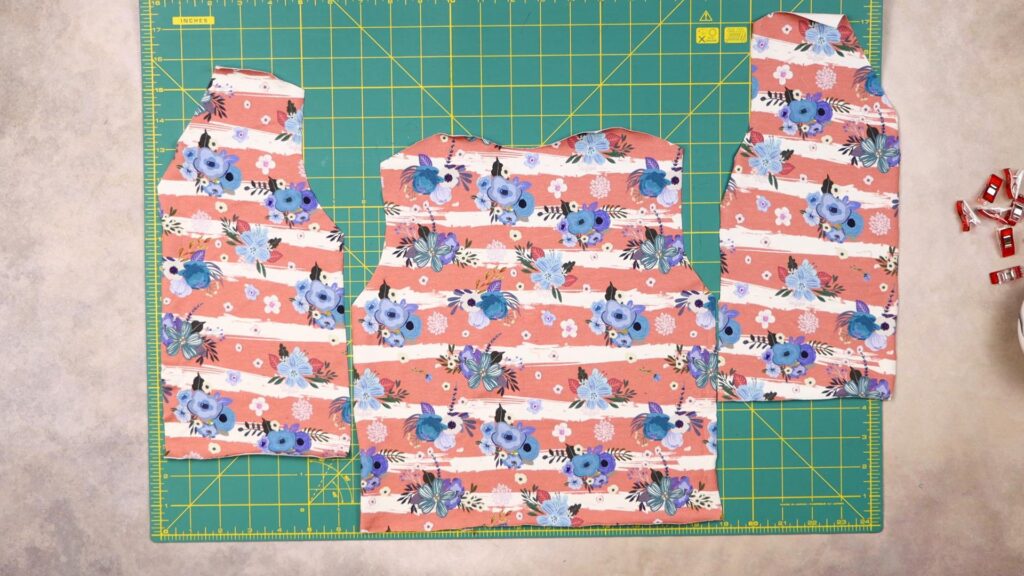
Cut the same from the lining fabric.
STEP 2:
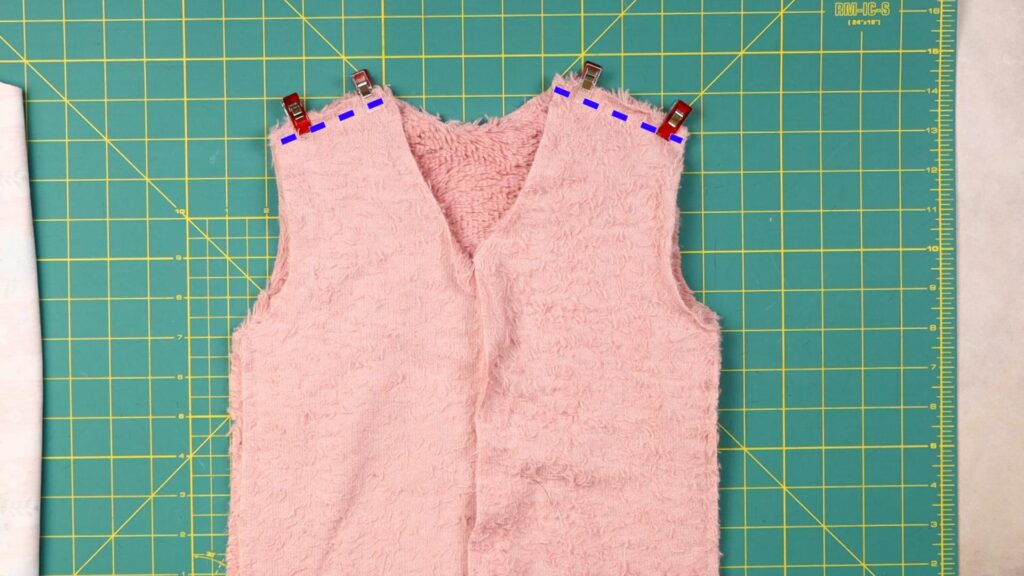
Place the right side of the back, cut from the outer fabric, on your worktop and over it, with the right sides facing down, the front pieces, lining up the shoulders and pinning in place.
Repeat for the lining pieces.
STEP 3:
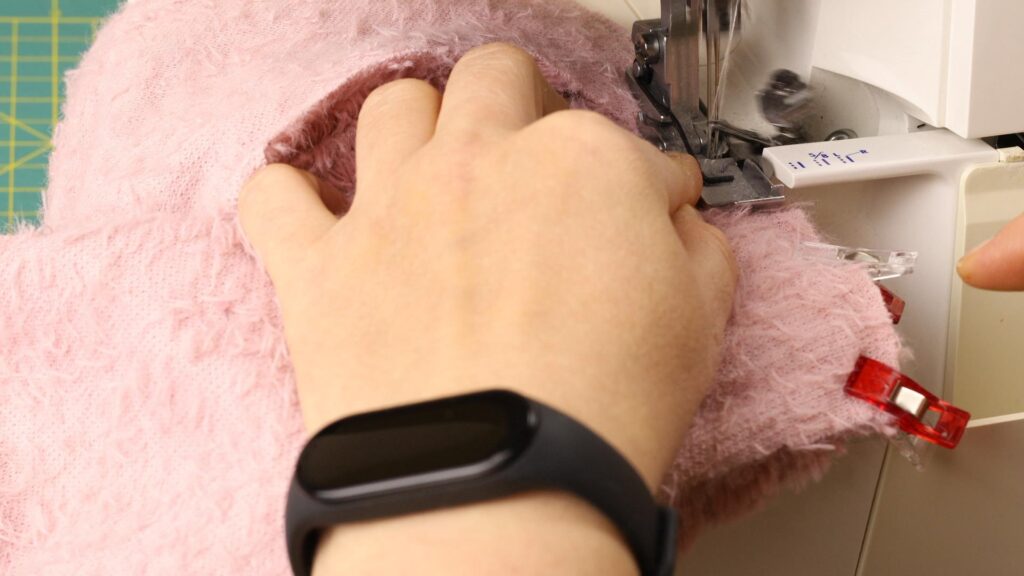
Stitch across the shoulders ¼ inch (6mm) from the edge, back tacking at the start and finish.
STEP 4:
Open up the stitched outer and inner part of the vest so you can press the shoulder seams open and flat.
STEP 5:
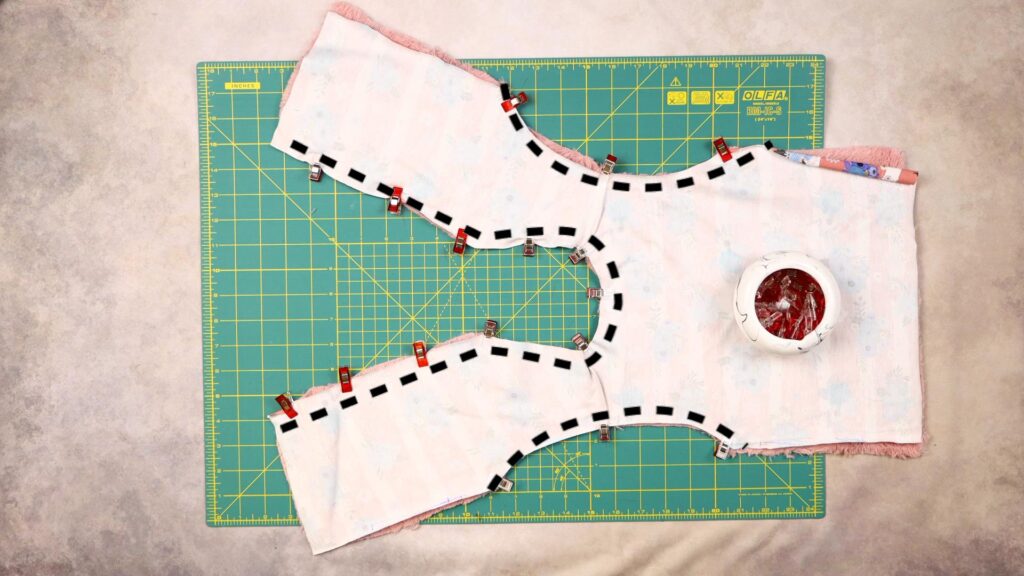
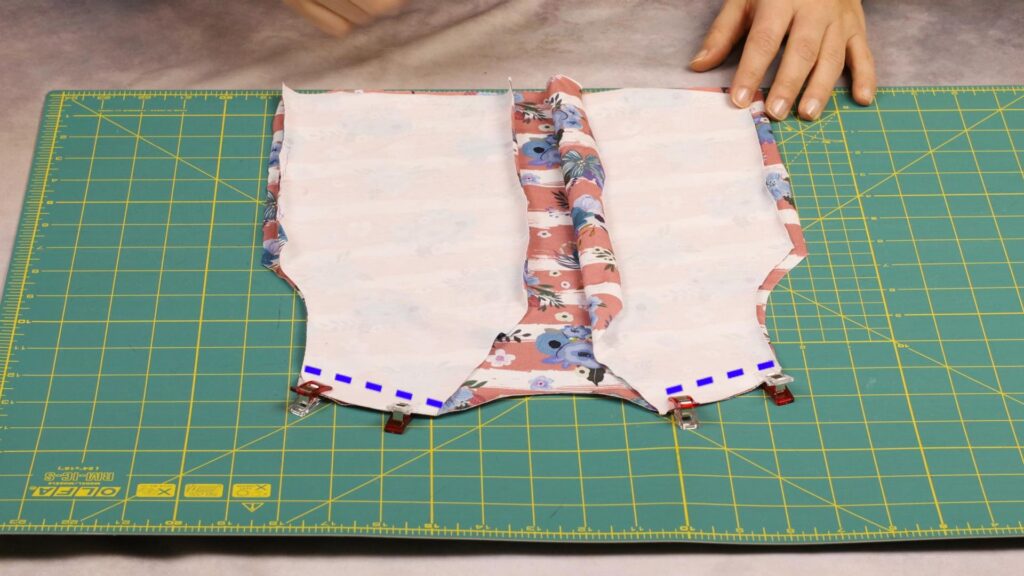
Carefully line up the outer and the inner of the vest right side facing right side and pin around the edges. Also pin across the neck area.
STEP 6:
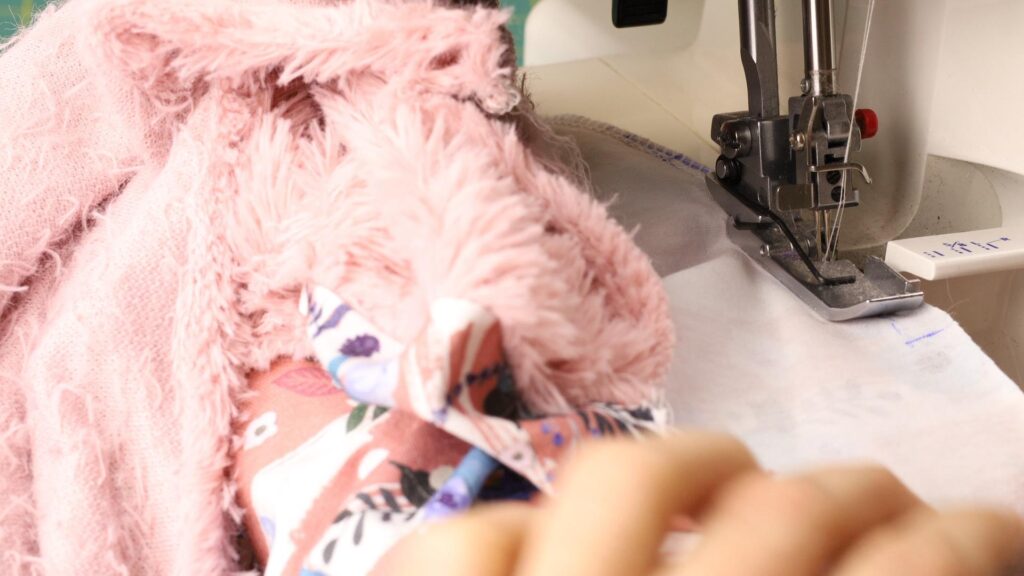
Stitch around the edge ¼ inch (6mm) starting from the bottom of the front of the vest and going up the front, around the neck, and down the other side of the front. Back tack at the start and finish.
Stitch around the armhole areas ¼ inch (6mm) from the edge. DO NOT stitch down the sides.
STEP 7:
Clip around the curves so the fabric lies flat when you turn it, taking care not to clip too close to the stitching.
STEP 8:
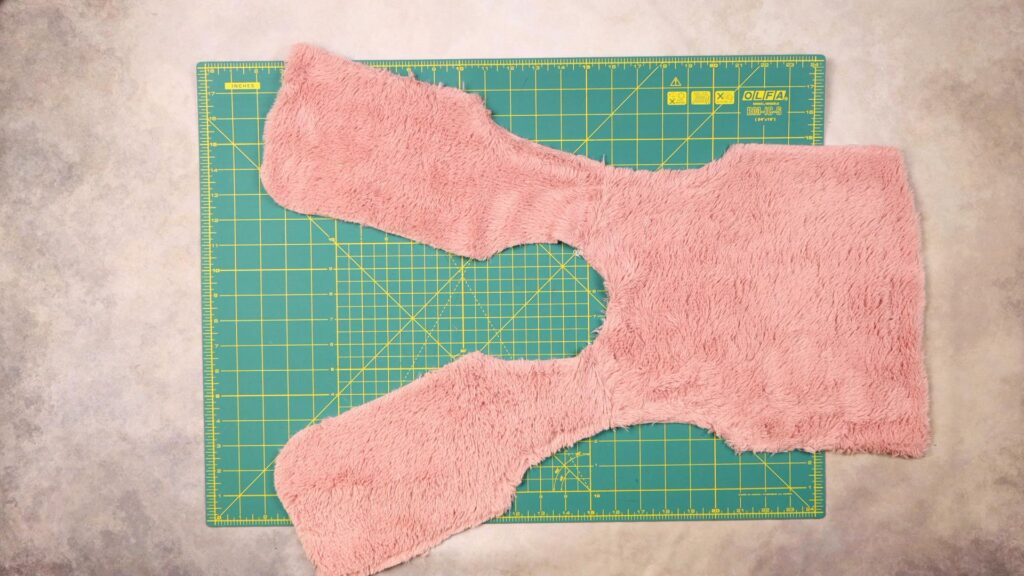
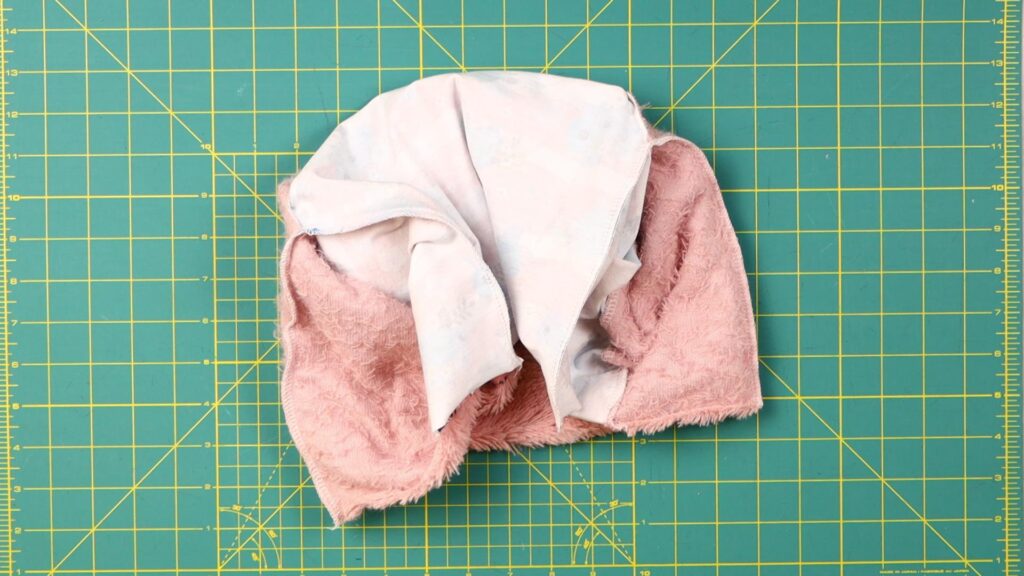
Turn the vest the right way out, pulling the fabric through the shoulders.
STEP 9:
Once the right way out, stitch the side seams of the outer fabric together on the wrong side. Do this on either side of the vest ¼ inch (6mm) from the edge, back tacking at the start and finish.
Stitch the side seams for the lining together on the wrong side of the fabric ¼ inch (6mm) from the edge, back tacking at the start and finish.
STEP 10:
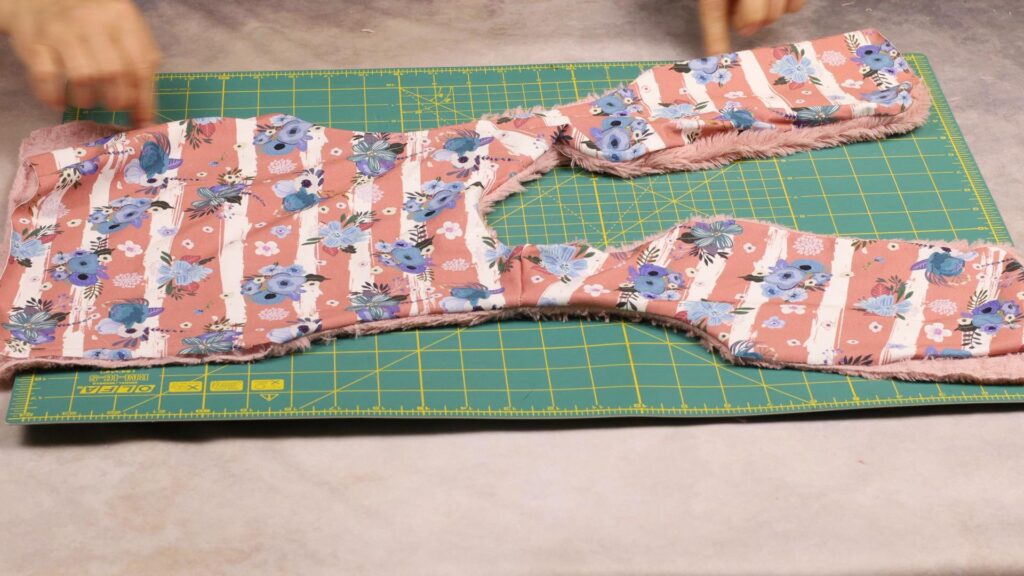
Turn the vest right side out to so you can see how it turned out so far
Now turn the vest inside out
(optional) press the side seams open if you are making non-fur version.
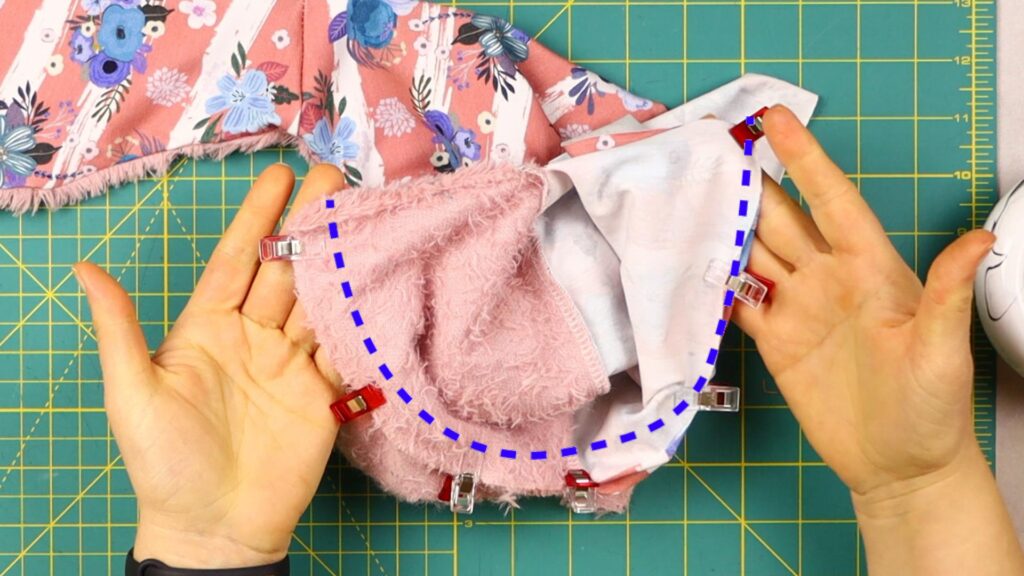
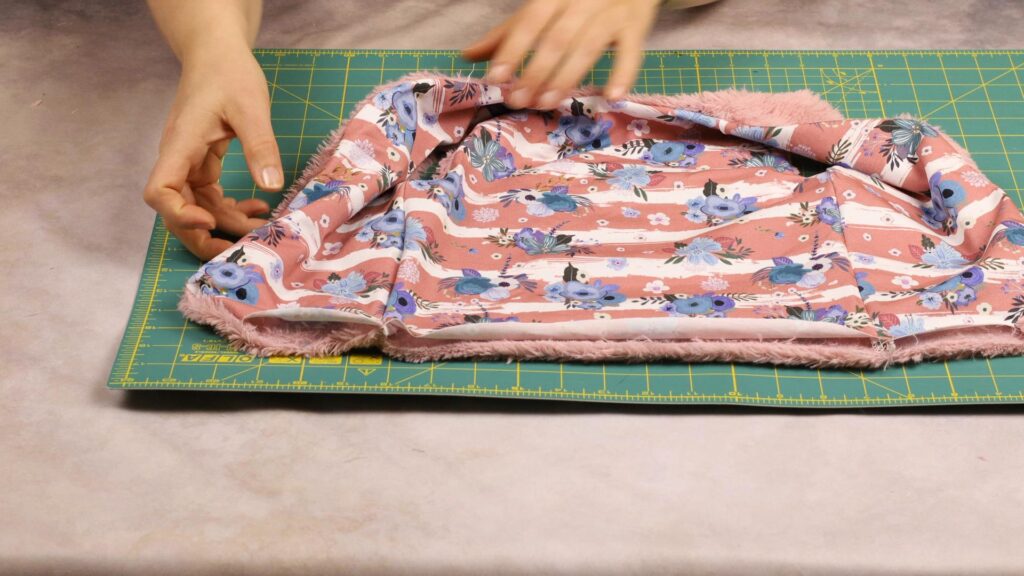
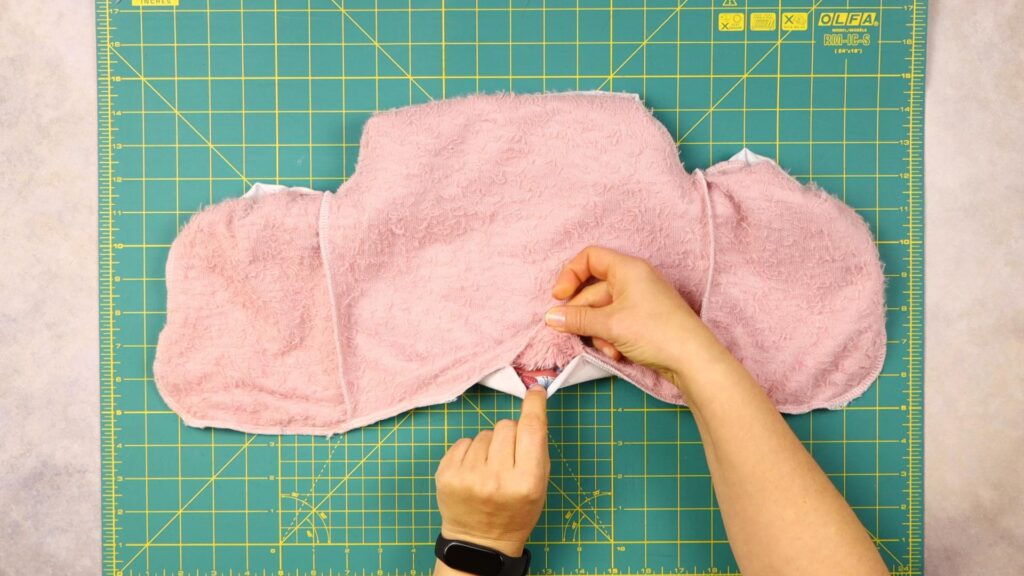
STEP 11:
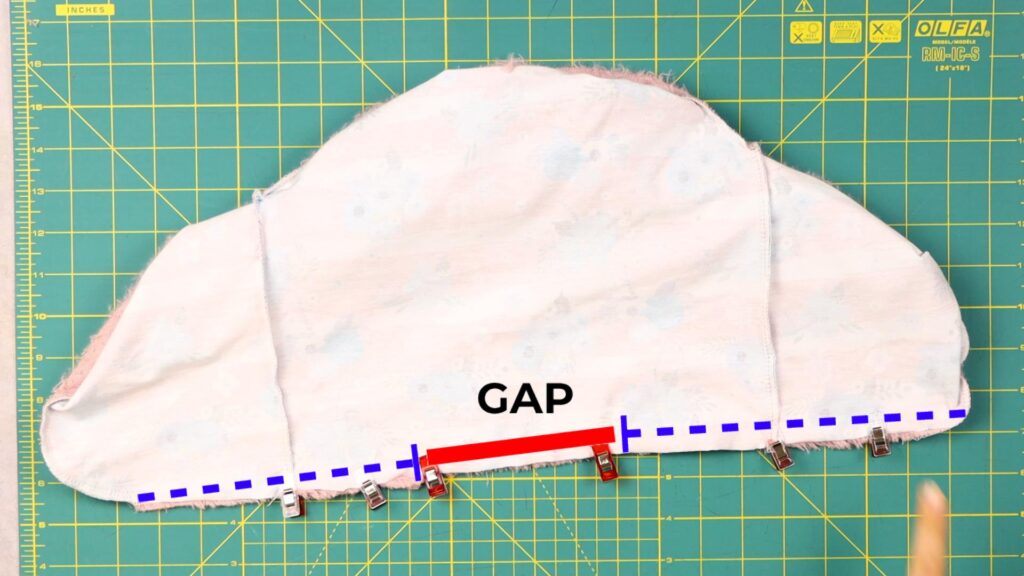
The bottom of the vest outer and lining can now be stitched after lining up the edges and pinning in place. Do remember to leave a gap of around 3 inches (8cm) in the middle part of the back of the vest so you can pull the fabric through the gap to turn it the right way out.
STEP 12:
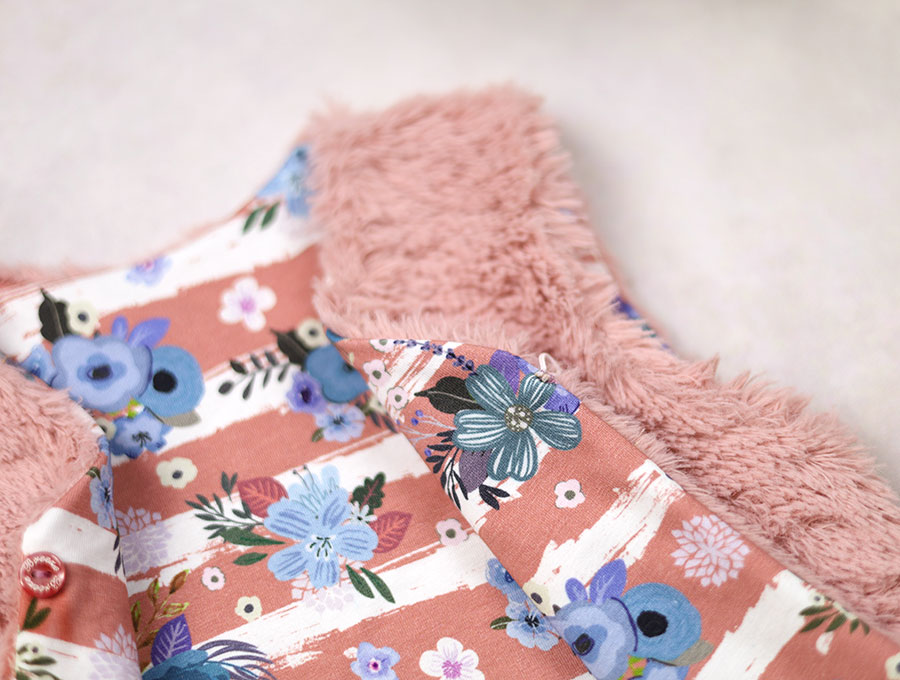
Turn the vest the right way out and press the edges for the non-fur vesion, taking care to make sure the seams are pushed out so the there is no overlap of fabric. When you get to the bottom of the vest, turn in the raw edges of the gap in line with the rest of the fabric so you have a smooth edge and press.
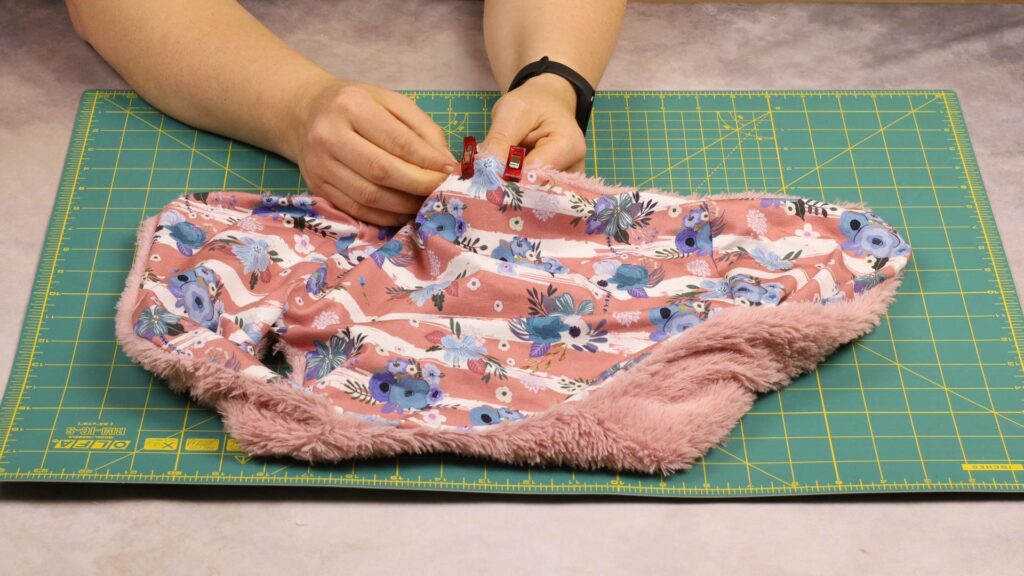
STEP 13:
Close the gap either by slip stitch so the stitches are invisible, or you can choose to machine stitch the gap closed.
STEP 14: (optional) add closures
You vest is now ready to wear but you can add closures if you wish.
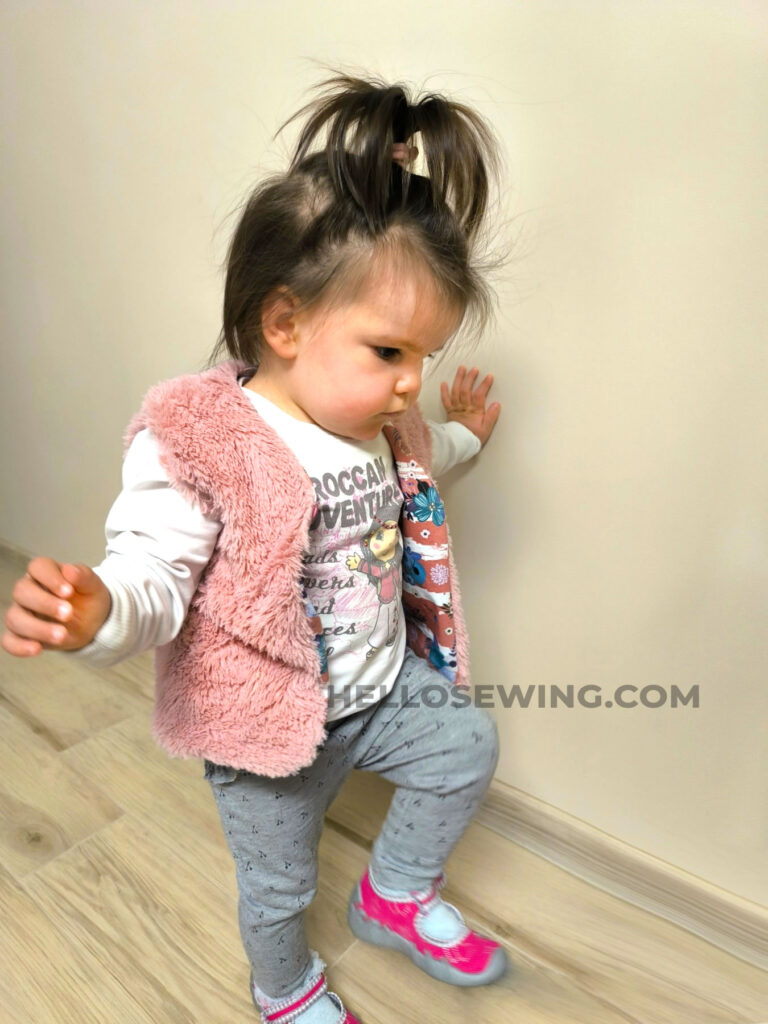
I attached a button and a rubber loop on the inside
Lined Vest FAQs and tips:
Q: Can I add closures?
A: This was designed as an edge-to-edge vest so it does not accommodate extra room for adding button and button holes, however you can use a button or toggle and loop closure. It would look good with wooden buttons and leather loops on a denim or corduroy vest, carrying through the natural theme. Stitch the leather loops and buttons on after you have finished the vest.
Q: Can I topstitch the vest?
A: Of course you can, but only if you used cotton fabrics (do not topstitch fur or sherpa) – it would look good if you used a thicker thread to make the top-stitching a feature around the edge of the vest.
Q: Can I add braid or fur around the edges of the vest?
A: This would give the vest something of a Scandinavian look and would be perfect for mild winter days. When you add a fur trim first pin it in place to ensure the fur bends around the curves neatly and only cut when you are sure the ends meet up perfectly. If using braid try to use a narrow braid that will bend around the curves. I stitch braid by machine but for fur trims I prefer to do it by hand as I don’t want to flatten the fur pile. Whichever way you choose is up to you.
Now that you see how easy it is to make the vest you may be inspired to create a few. I find they are great for kids, providing that little extra warmth around the core when worn with a long sleeve blouse or sweatshirt. They are also great for adults if you have a monochrome outfit and want to break it up – a black skirt and blouse can be enlivened with a gorgeous paisley print vest in jewel colours. If you enjoyed this tutorial please share your photos of your lined vest in the comments section. We would love to see how they turned out. And please don’t forget to hit the like button and subscribe. If you have friends or family members who love sewing and think they will enjoy this tutorial then please share this post.
Do you like this? Pin for later:
Wanna be friends? Click HERE and follow me on Pinterest
RELATED: