
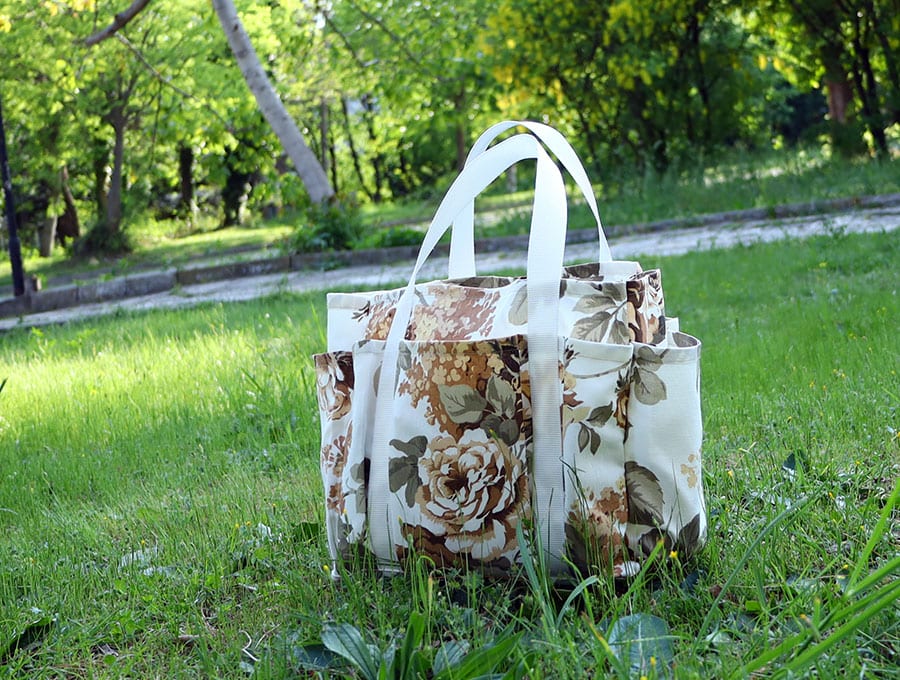
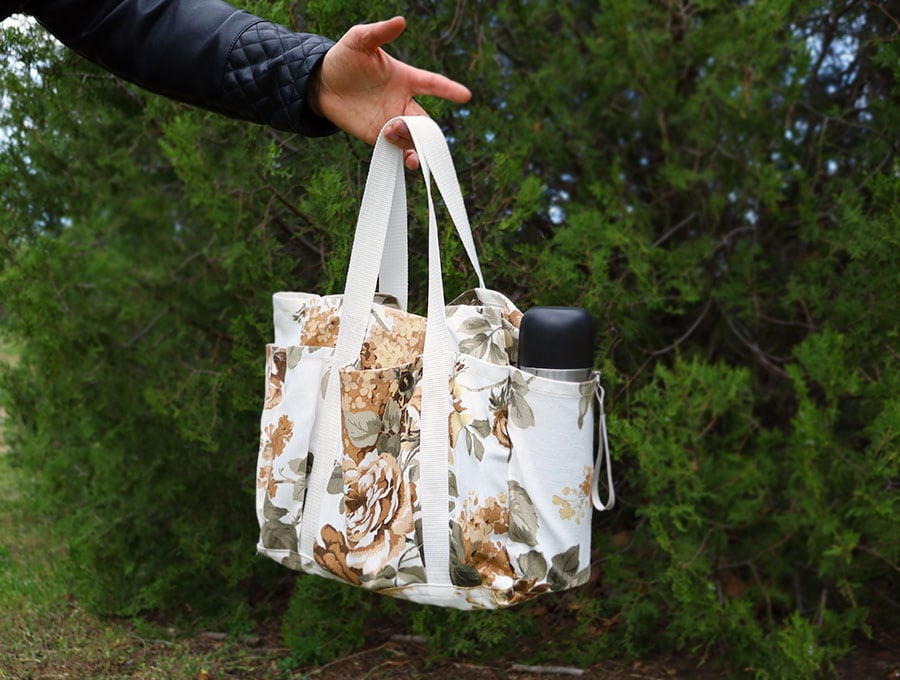
Multi-pocket Canvas Tote Bag
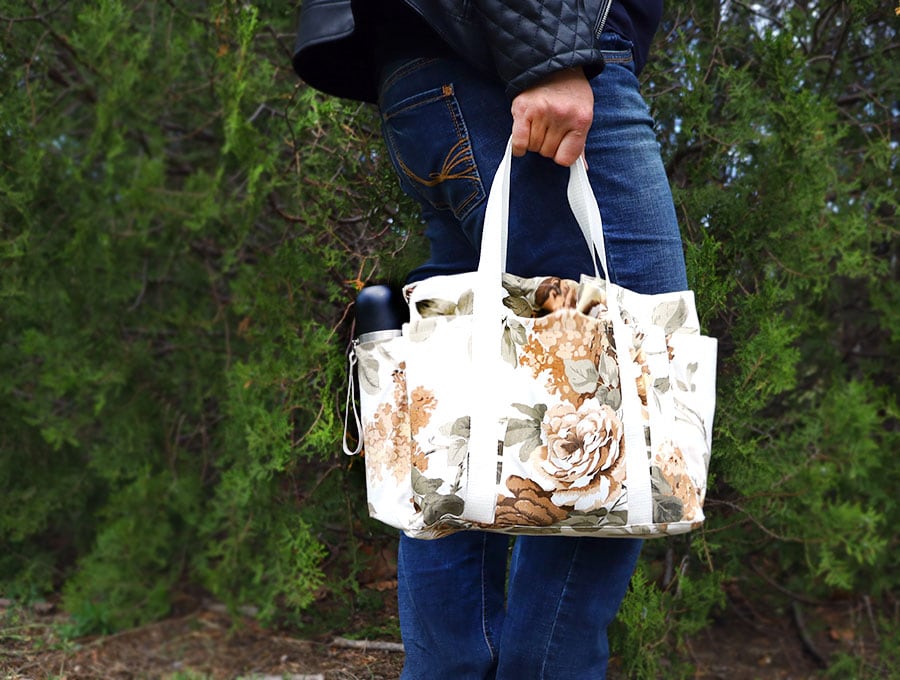
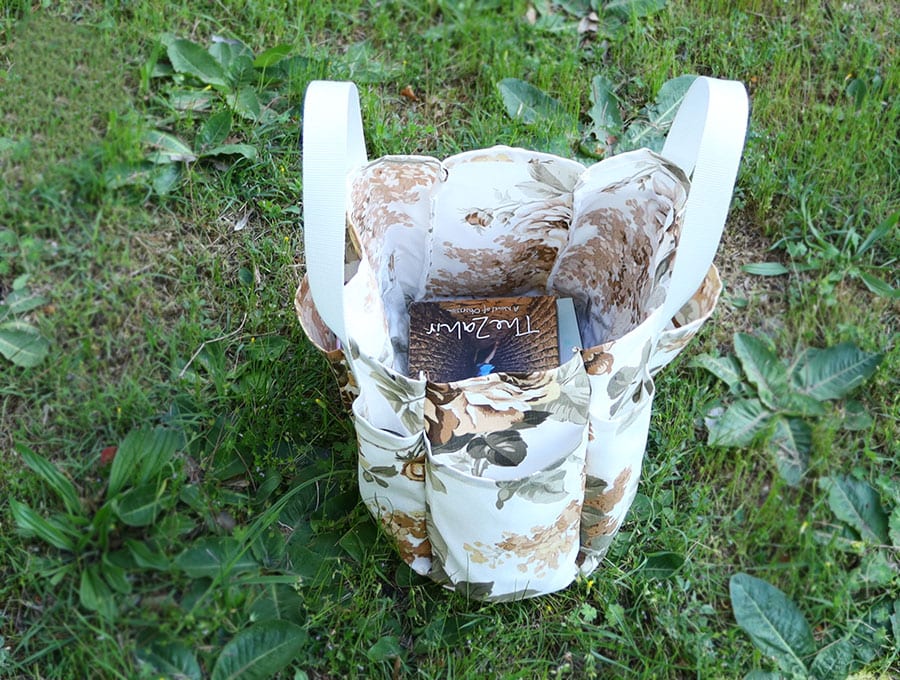
Multi-purpose, quick drying and durable: this multi-pocket tote bag is the perfect bag to take when grocery shopping, going to the beach, picnic, or even traveling. With 8 pockets of different sizes and one large compartment, it will store your items securely, and you will grab whatever you need with ease, without having to take everything out.
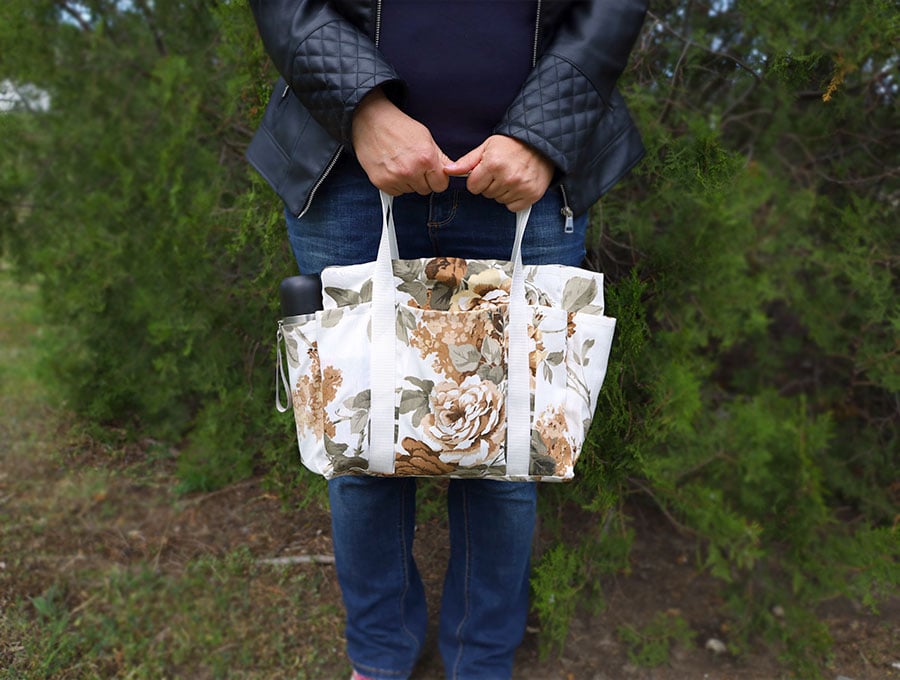
Store fragile items securely, without breaking or squishing them under all the other items. No more broken jars or eggs, no more squished bread or tomatoes. If you carry a water bottle or two – pop them in the side pockets and they won’t clash with the items in the main compartment.
The constructions is really durable, featuring double layered bottom and sturdy French seams. This comfy tote bag is just the right size and shape for a comfortable fit
Below you will find my step by step written tutorial with VIDEO instructions for all the visual learners.
We occasionally link to goods offered by vendors to help the reader find relevant products. Some of the links may be affiliate meaning we earn a small commission if an item is purchased.
Table of Contents
- 1 How to make a multi-pocket canvas tote bag
- 2 Supplies and tools
- 3 How to Sew a multi-pocket canvas tote
- 3.1 Multi-pocket tote bag VIDEO TUTORIAL
- 3.2 INSTRUCTIONS:
- 3.3 STEP 1: Cut the fabric pieces
- 3.4 STEP 2:
- 3.5 STEP 3:
- 3.6 STEP 4:
- 3.7 STEP 5:
- 3.8 STEP 6:
- 3.9 STEP 7:
- 3.10 STEP 8:
- 3.11 STEP 9:
- 3.12 STEP 10:
- 3.13 STEP 11:
- 3.14 STEP 12:
- 3.15 STEP 13:
- 3.16 STEP 14:
- 3.17 STEP 15:
- 3.18 STEP 16:
- 3.19 STEP 17:
- 3.20 STEP 18:
- 3.21 STEP 19:
- 3.22 STEP 20:
- 3.23 STEP 21:
- 3.24 STEP 22:
- 3.25 STEP 23:
- 3.26 STEP 24:
How to make a multi-pocket canvas tote bag
Supplies and tools
- fabric – canvas or medium weight home decor fabric 75 x 110cm (44 x 30″)
- matching thread
- scissors (or rotary cutter and a cutting mat)
- ruler or measuring tape
- iron and ironing board
- sewing clips or pins
Follow us for free patterns & tutorials! [easy-profiles]
How to Sew a multi-pocket canvas tote
Watch the diy multi pocket tote bag video first and then follow the written step by step instructions below.
Please enjoy and don’t forget to Like and SUBSCRIBE over on YouTube to be kept up to date with new videos as they come out.
Multi-pocket tote bag VIDEO TUTORIAL
INSTRUCTIONS:
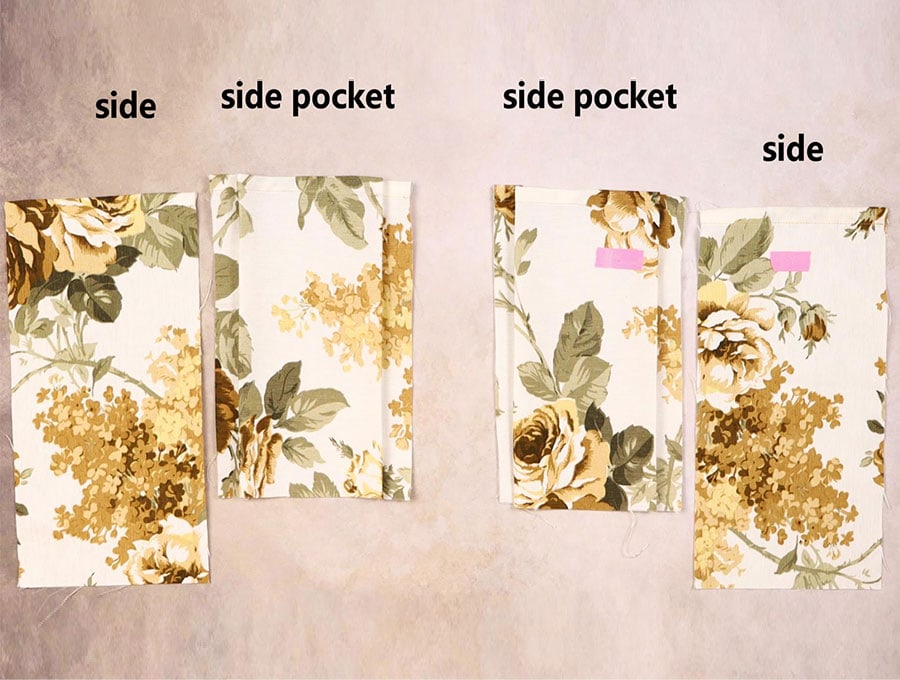
STEP 1: Cut the fabric pieces
Finished size of the tote bag: 33 x 28 x 13cm (13 x 11 x 5 1/8”)
Metric measurements (for imperial, scroll down)
MAIN – 76 x 36 cm
BASE – 36 x 18 cm
SIDES (2) 16 x 29 cm
FRONT POCKETS (2) 25 x 44
SIDE POCKETS (2) 20 x 27
Handles (2) 94 x 3cm wide – polypropylene webbing
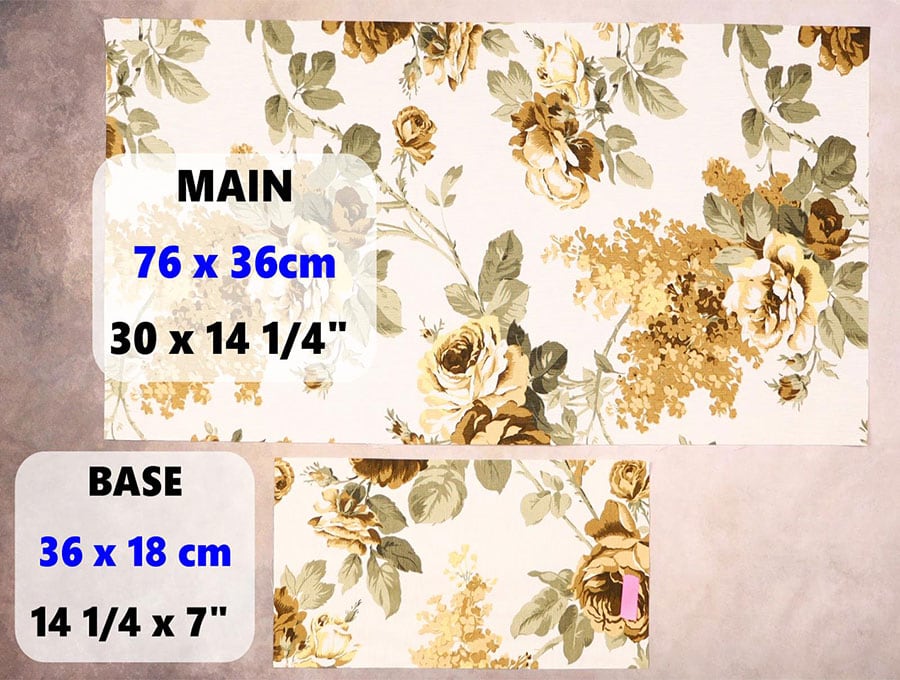
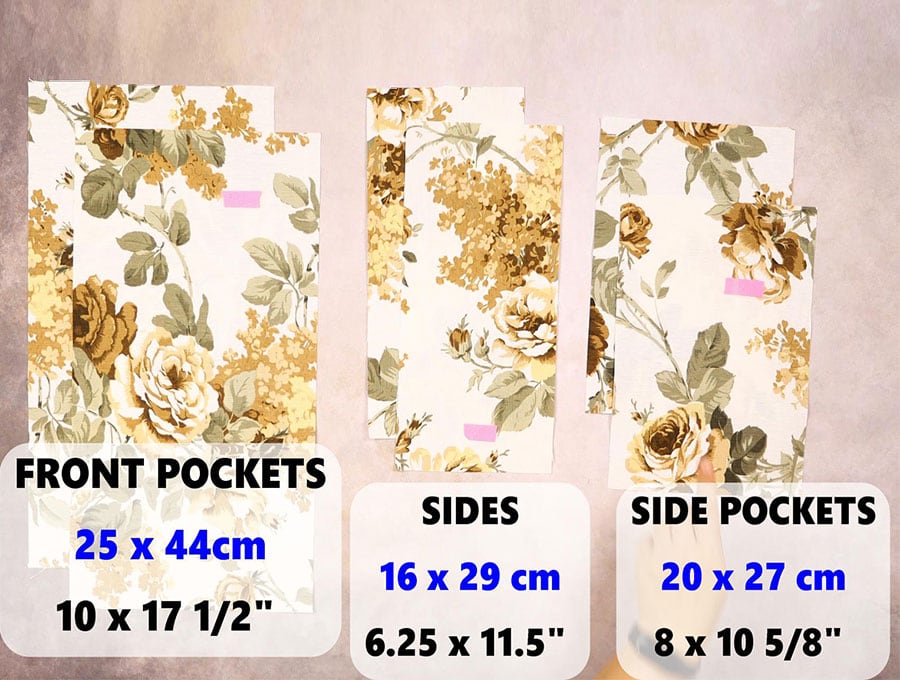
IMPERIAL measurements
MAIN – 30 x 14 1/4”
BASE – 14 1/4 x 7”
SIDES (2) 6 1/4 x 11 1/2 “
FRONT POCKETS (2) 10 x 17 1/2
SIDE POCKETS (2) 8 x 10 5/8
Handles (2) 37 x 1 ¼” wide polypropylene webbing
STEP 2:
Fold the long sides of the base 1cm towards the wrong side, press. Pin and set aside
STEP 3:
Fold the short sides of the MAIN 1cm and press. Fold again 1cm. Press, pin.
Sew along the inner fold
STEP 4:
Fold the top long edge of the FRONT pockets 1cm, press, fold 1cm again, press and pin
Sew along the inner fold
STEP 5:

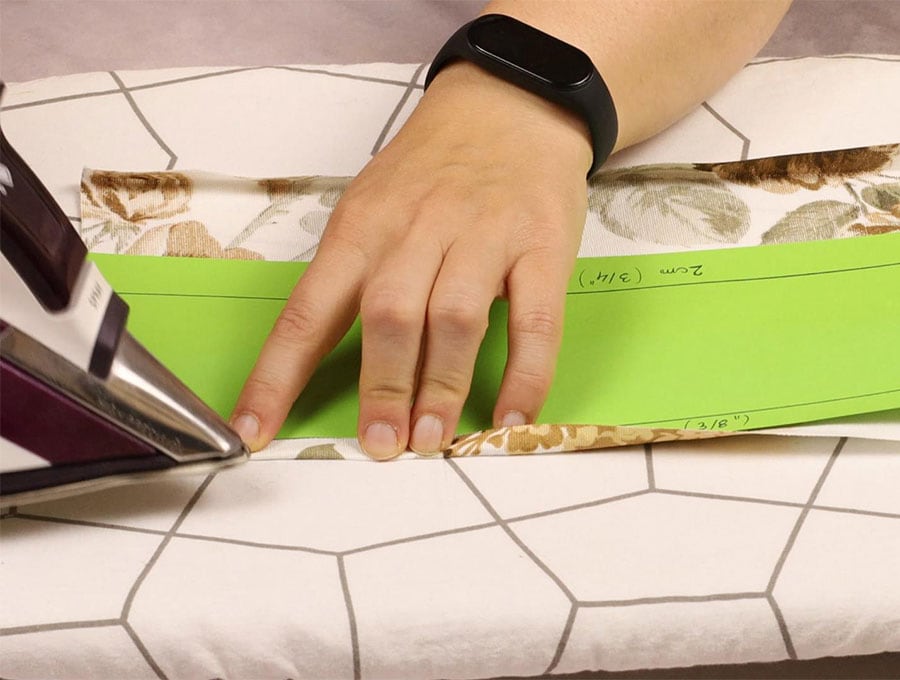
Fold the top short edge of the SIDES 1cm, press, fold 1cm again, press and pin
Sew along the inner fold
STEP 6:
Fold the top short edge of the SIDE POCKETS 1cm, press, fold 1cm again, press and pin
Sew along the inner fold
STEP 7:
SIDE POCKETS: place on worktop with right side (RS) facing up, fold in the side 1” (2.5cm) and press
Turn the piece wrong side (WS) up, fold 1cm and press. Measure to make sure the short edge is 16cm (6.5”)
Repeat for the other side of the pocket
STEP 8:
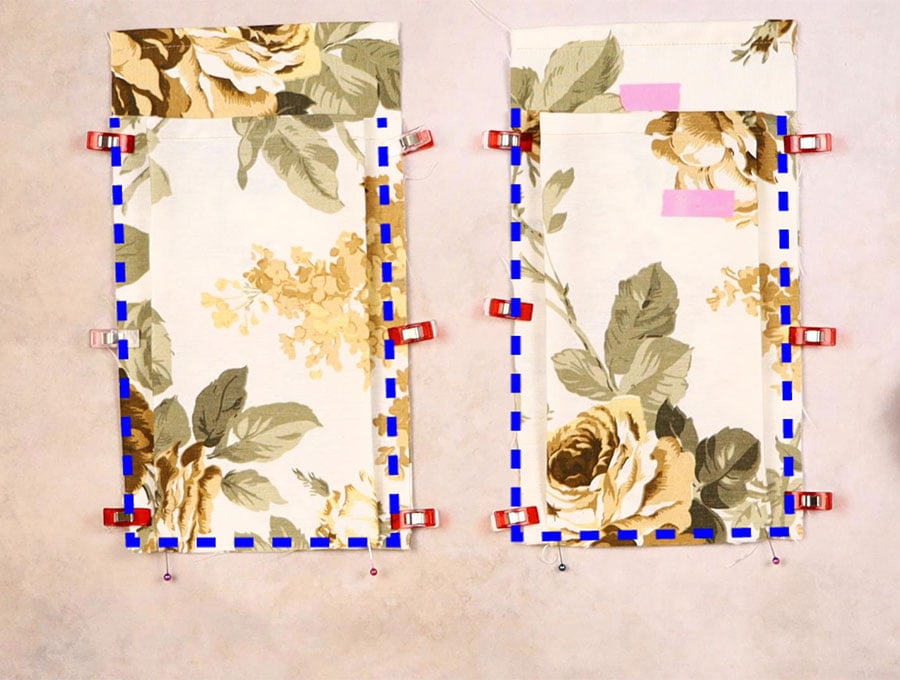
Take one side pocket and place it on top of the side piece. Right sides facing up on both pieces. Align bottom and the sides. Pin. Sew ¼” SA along sides and bottom
STEP 9:
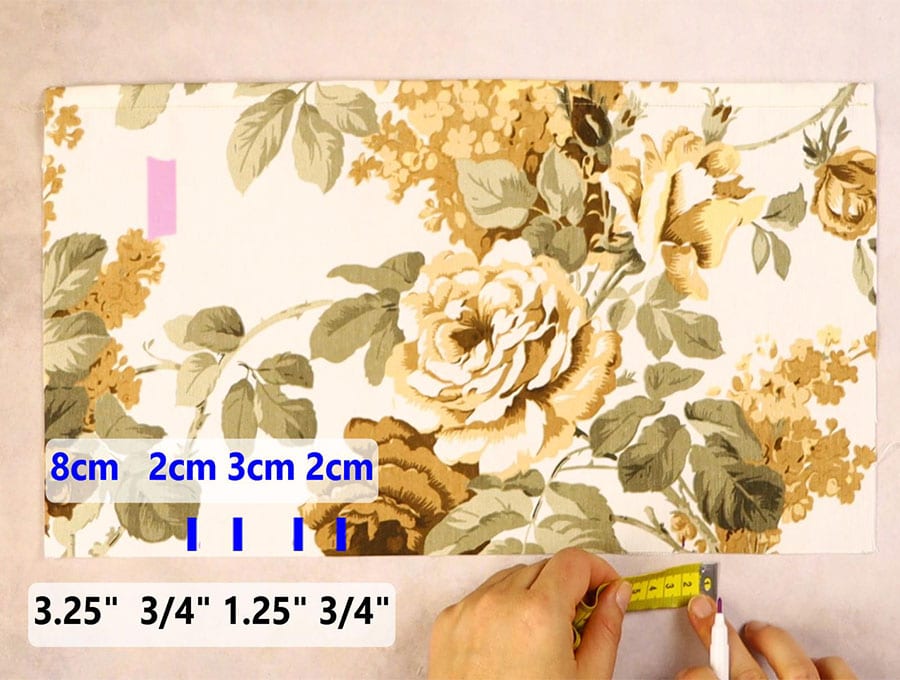
FRONT POCKETS
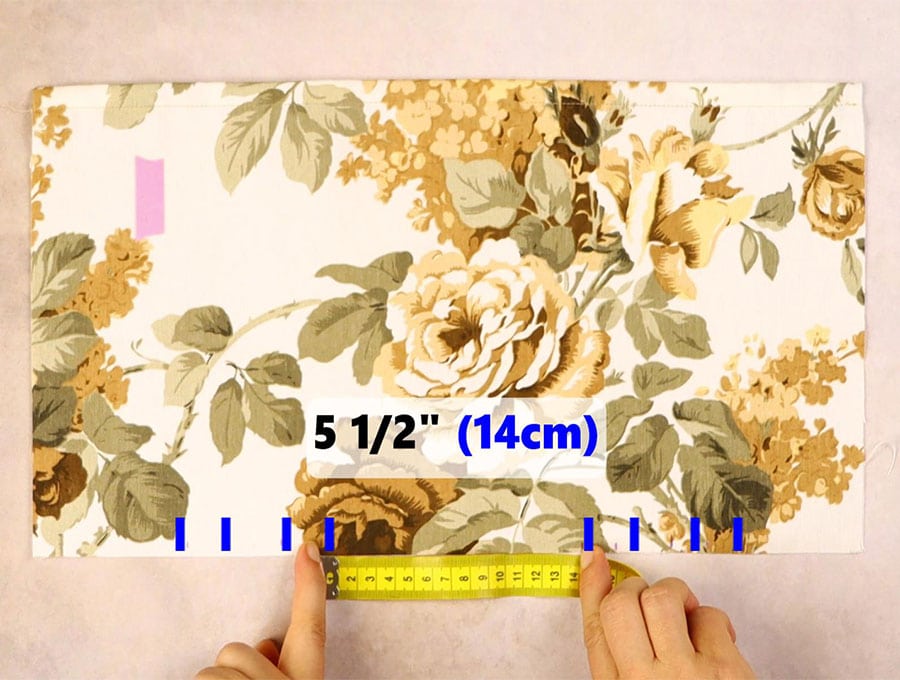
mark along the bottom long edge: mark 10cm in from each short edge
On the left side of the front pocket, mark 2 cm on the left from the first mark, then 3cm to the right, and then 2 more cm to the right.
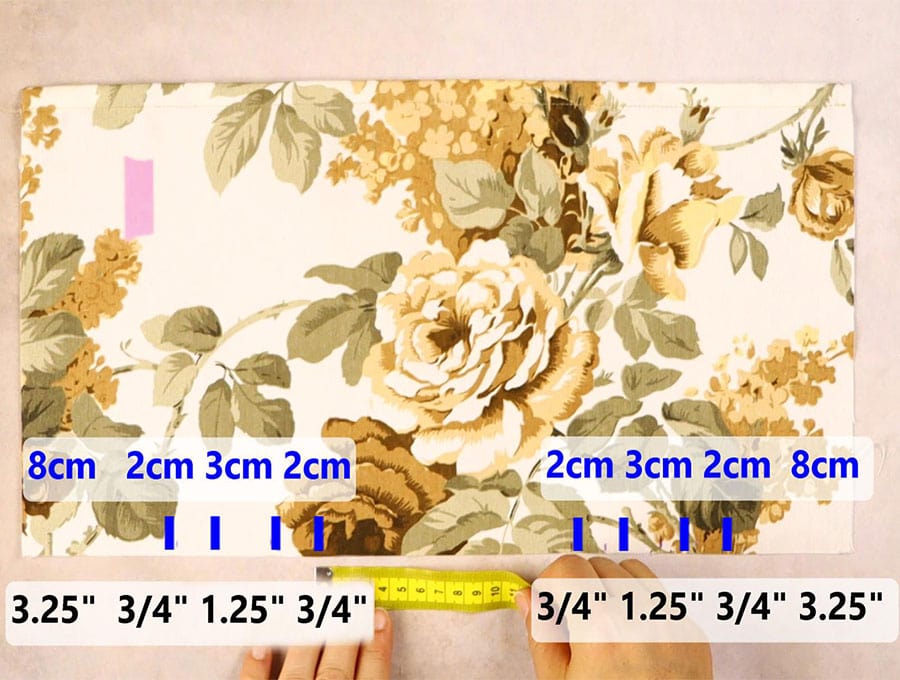
Mirror the markings on the right side of the front pocket
STEP 10:
Place RED pins on both the innermost marks
Insert BLUE pins on both outermost marks
STEP 11:
Turn the front pocket with WS up, fold the right short edge along the pin mark and press
Open up and fold along the second pin mark and press to create creases
Repeat for the left side of the front pocket
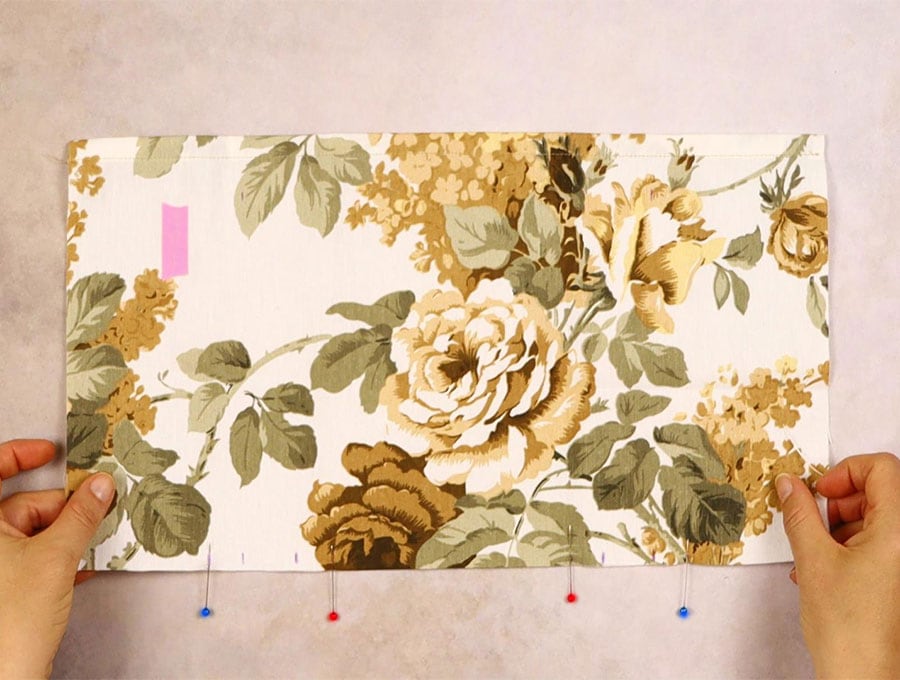
STEP 12:
Turn the front pocket with RS up
Fold the right blue pin mark to the mark on the left and create a pleat. Pin top and bottom
Fold the left blue pin mark to the mark on the right. Create a pleat, pin top and bottom
Fold the right red pin mark to the mark on the right, pleat pin top and bottom
Fold the left red pin mark to the mark on the left. Pleat, pin top and bottom
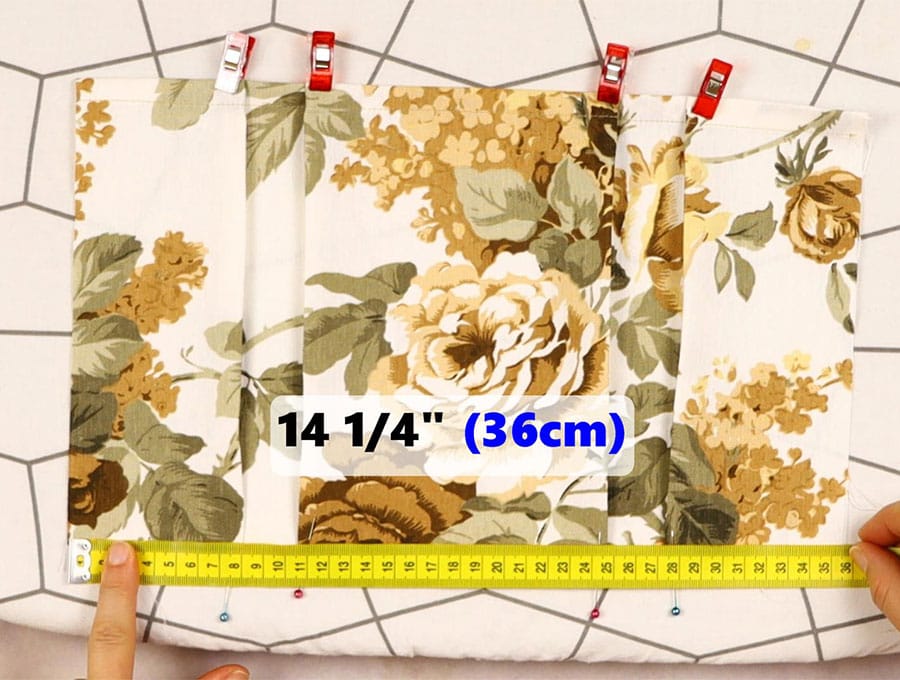
Measure along the long side, it should be 36cm (14 ¼”). PRESS, repeat for the other front pocket
STEP 13:
Take the MAIN piece RS up, fold to meet the short sides and create a crease along the middle. Open up
STEP 14:
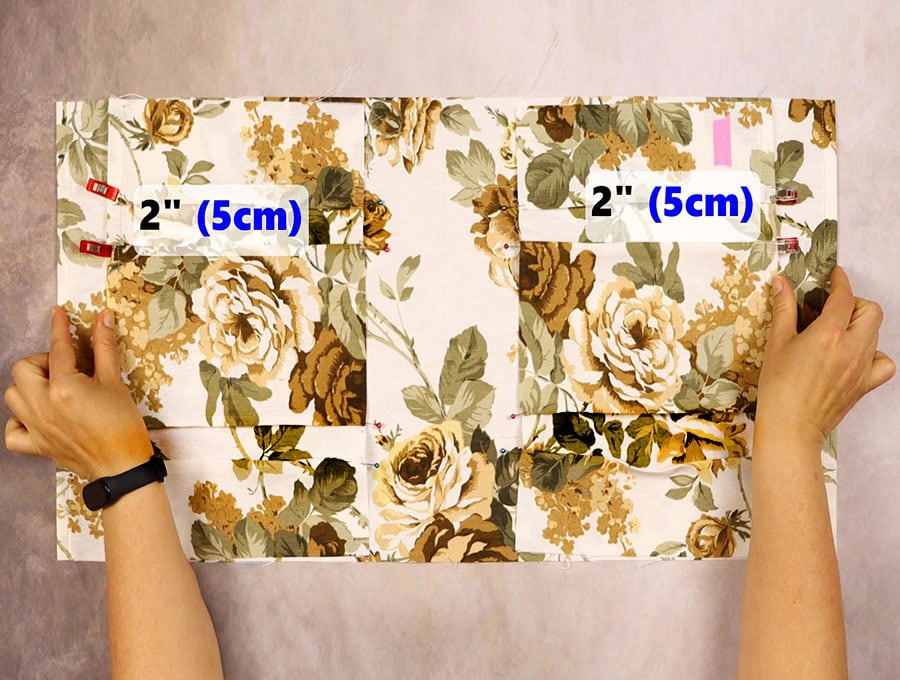
Place the FRONT POCKETS on top (RS up), 5cm (2”) in from the short sides of the MAIN piece
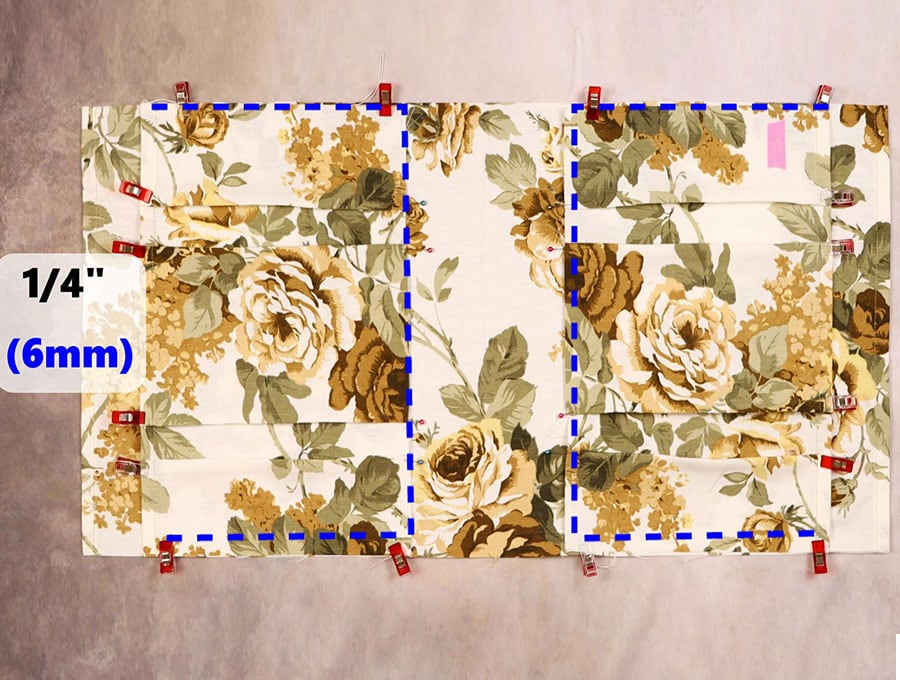
Pin and sew along the sides and the bottom of the front pockets using ¼”SA
STEP 15:
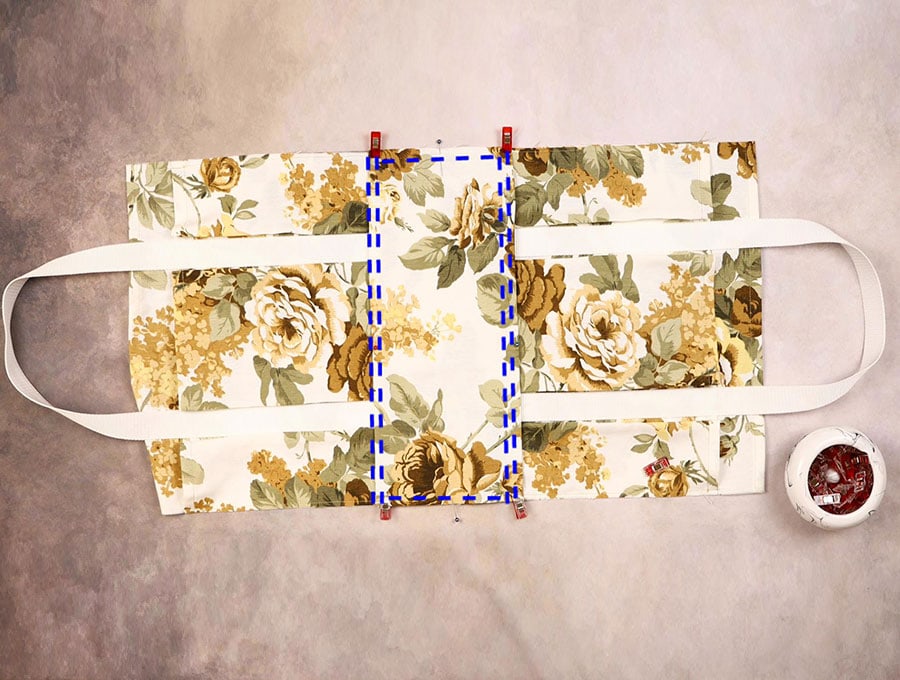
Attach the handles, placing them in the grooves that we created. Align the handles with the bottom of each front pocket

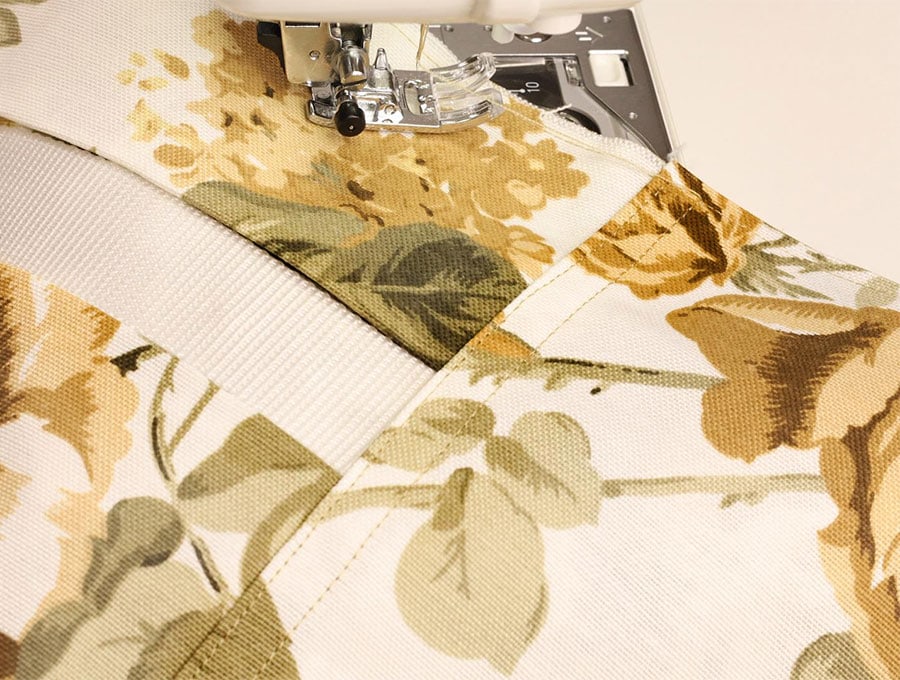
STEP 16:
sew the handles
STEP 17:
Fold the short edge of the base to find the midpoints.
Align base and the main middles. Pin base to main
STEP 18:
Sew along the base ¼”SA, then make a second seam 1cm in from each long side of the base
STEP 19:
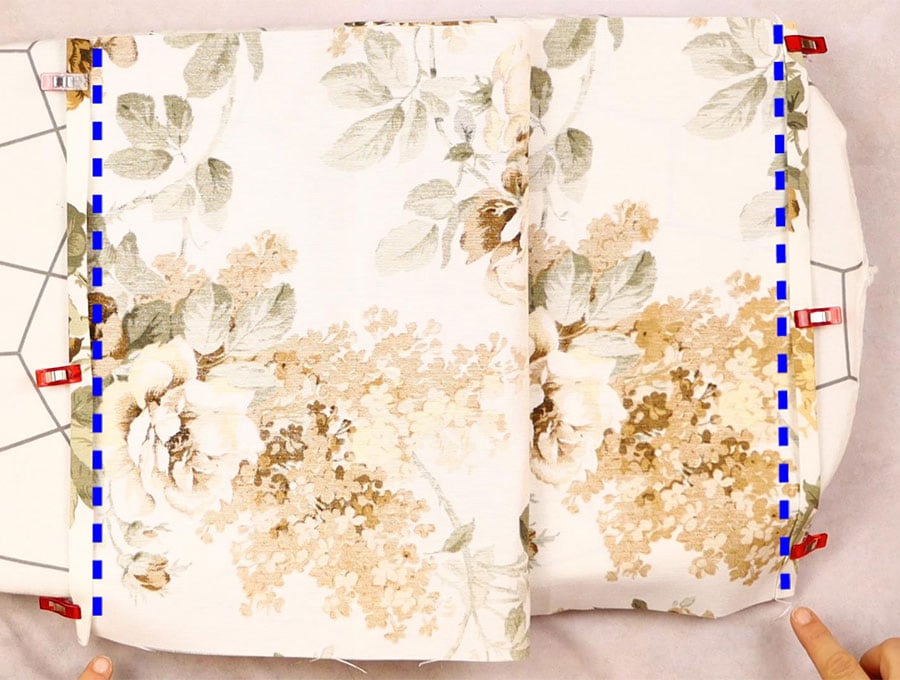
Take the side pieces (sides with the attached side pockets) and pin to the long raw edge of the main piece (WRONG sides together).
STEP 20:
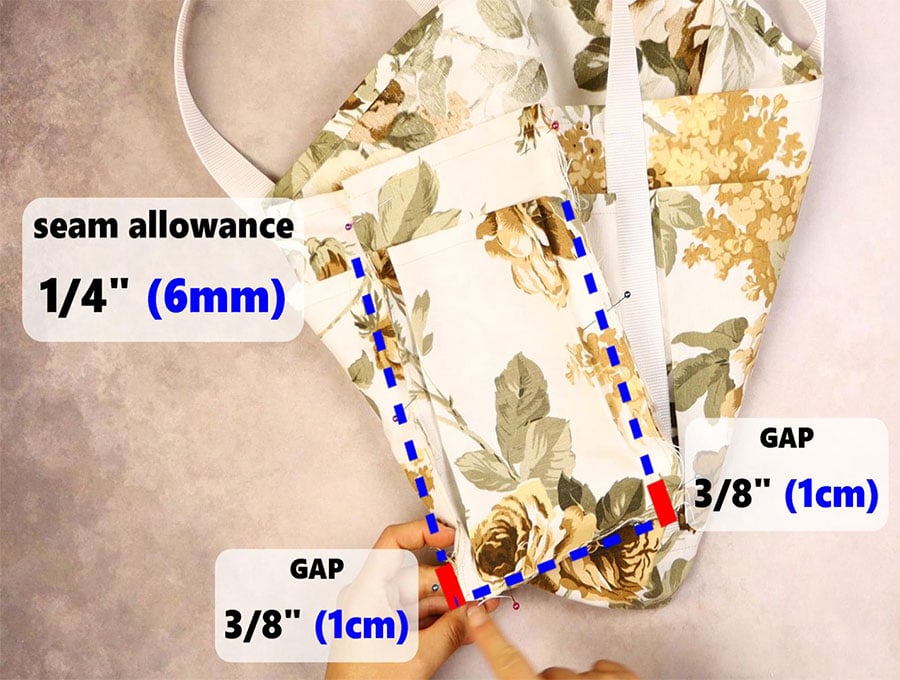
Sew along sides and bottom ¼”SA, leaving 1cm gap on each side seam (we are making French seams here)
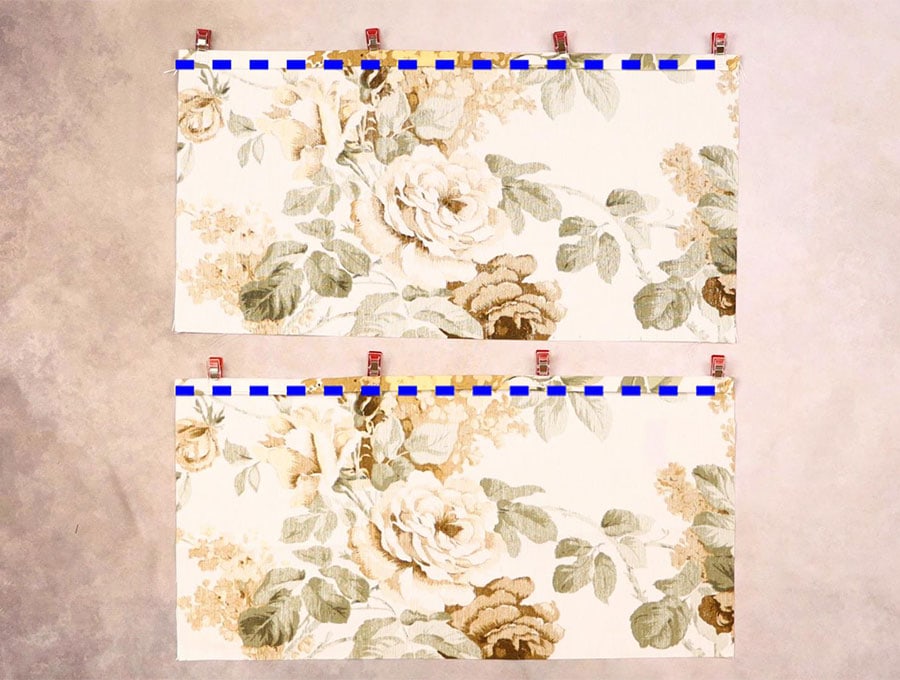
STEP 21:
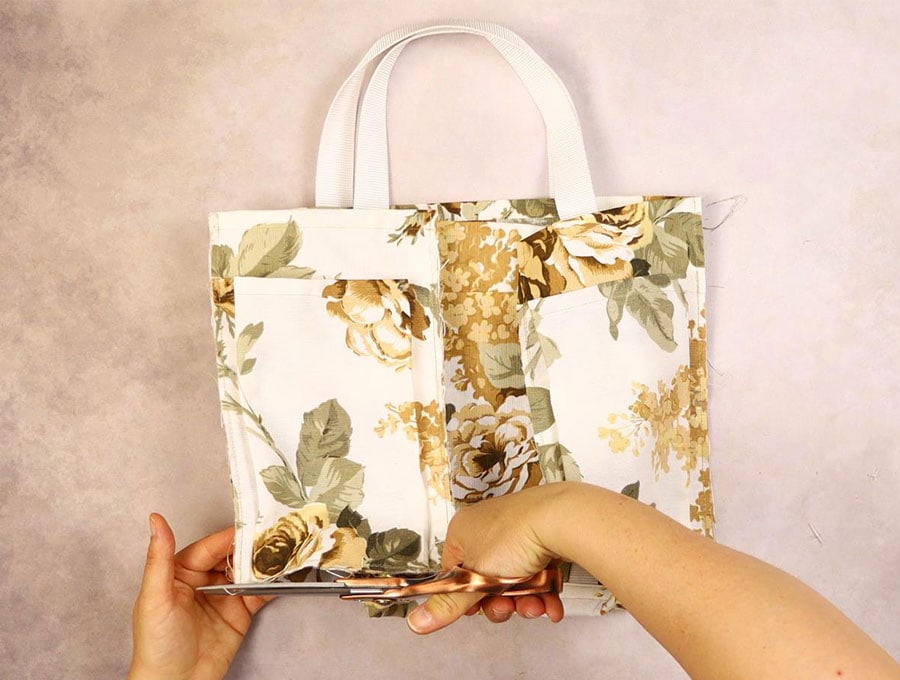
Trim seam to 5mm, turn the bag inside out
STEP 22:
Roll the seams to push then out. Pin along the side seams
STEP 23:
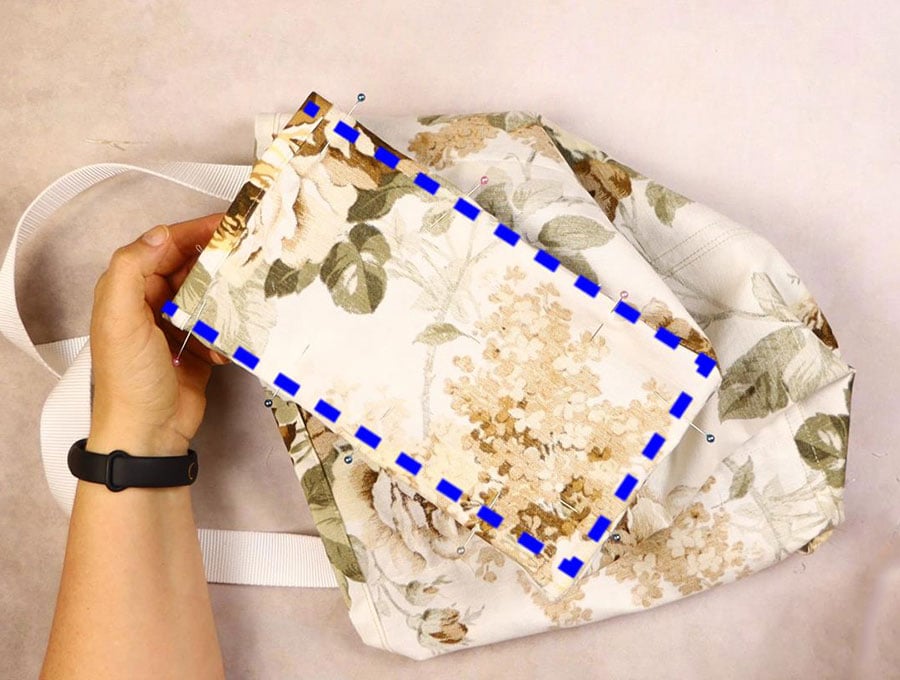
Sew along the sides 1cm (3/8”) SA
STEP 24:
Turn the bag around, give it a quick press and it’s finished
Do you like this? Pin for later:
Wanna be friends? Click HERE and follow me on Pinterest
RELATED: