
Quilt As You Go Scrappy Christmas Ornaments Tutorial
These little quilted Christmas tree ornaments are quick and easy to make. They will bring a festive feel to the Christmas tree and for decorating presents. It is perfect way to use up all those little strips of fabric to create beautiful Christmas decorations.
This is an all-in-one operation, so you won’t be stitching the strips together first then attaching them to the base, although you could do it that way if you are more comfortable with creating a patchwork of strips first then attaching them to the base. See our FAQ section for the alternative method of stitching your strips together.
Below you will find my step by step written tutorial with VIDEO instructions for all the visual learners.
We occasionally link to goods offered by vendors to help the reader find relevant products. Some of the links may be affiliate meaning we earn a small commission if an item is purchased.
Table of Contents
- 1 How to make scrappy Christmas Ornaments
- 2 Supplies and tools
- 3 How to Sew Quilted Christmas Tree ornaments
- 3.1 Quilted Christmas Tree ornaments VIDEO TUTORIAL
- 3.2 INSTRUCTIONS:
- 3.3 STEP 1: Cut out the tree template
- 3.4 STEP 2: Prepare your fabric strips
- 3.5 STEP 3: Layer fabrics
- 3.6 STEP 4: Start quilting the strips
- 3.7 STEP 5:
- 3.8 STEP 6: Stitch the strips together
- 3.9 STEP 7: Quilt as you go
- 3.10 STEP 8: Trim
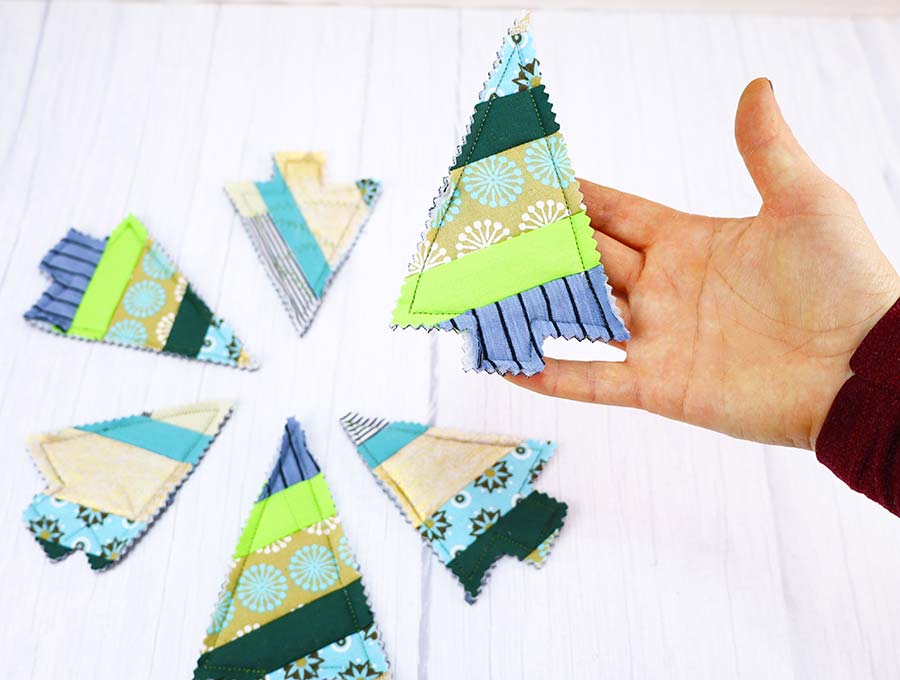
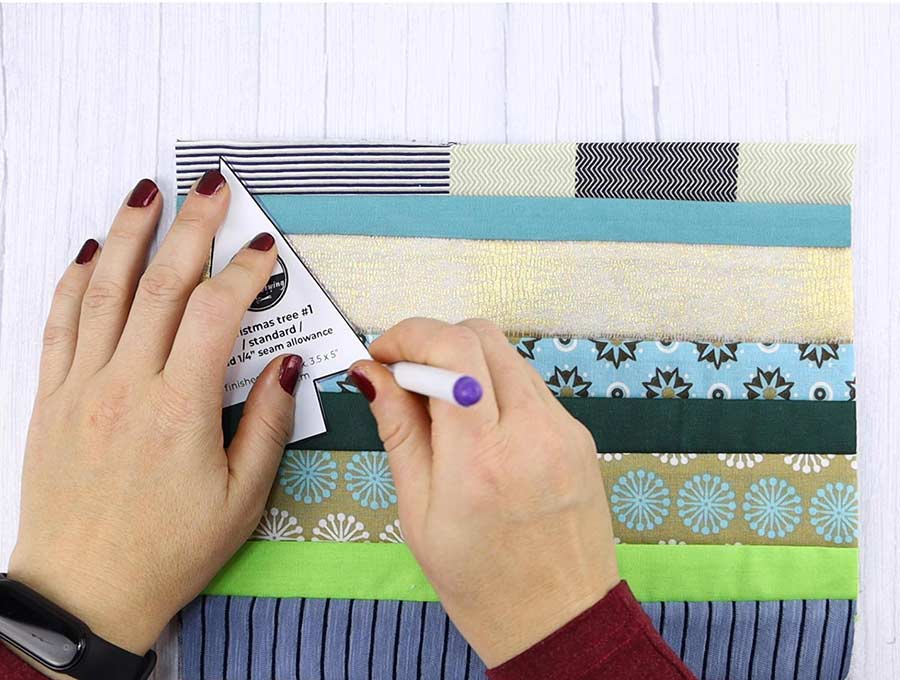
- 3.11 STEP 9: Trace your template on the patchwork
- 3.12 STEP 10: Stitch around
- 3.13 STEP 11: Cut out
- 3.14 STEP 12: Rinse and repeat
- 3.15 STEP 13: (Optional) Add hanging loop
- 3.16 STEP 14: (Optional) Decorate
- 4 Mini Quilted Tree Templates FAQ:
How to make scrappy Christmas Ornaments
Supplies and tools
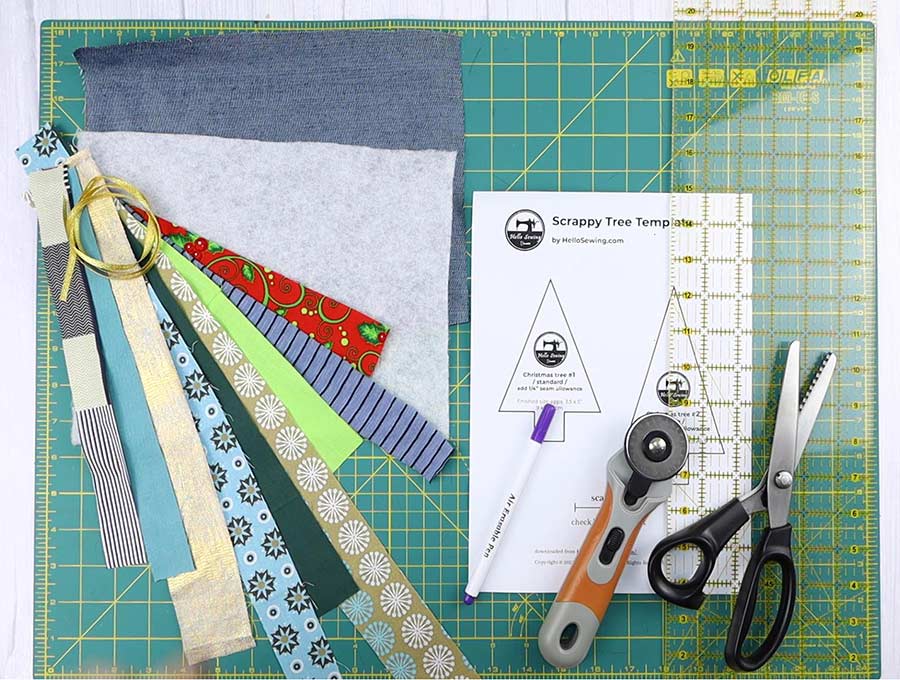
- main fabric – an assortment of 2.5 – 5cm (1-2″) long strips of woven cotton
- Back fabric – cotton
- Batting
- thin ribbon for the hanging loop
- matching thread
- scissors (or rotary cutter and a cutting mat)
- ruler or measuring tape
- pinking shears
- iron and ironing board
- sewing clips or pins
- sewing machine
DOWNLOAD: mini quilted tree pattern (Free PDF file)
Follow us for free patterns & tutorials! [easy-profiles]
How to Sew Quilted Christmas Tree ornaments
Watch the diy scrap fabric Christmas ornaments video first and then follow the written step by step instructions below.
Please enjoy and don’t forget to Like and SUBSCRIBE over on YouTube to be kept up to date with new videos as they come out.
Quilted Christmas Tree ornaments VIDEO TUTORIAL
INSTRUCTIONS:
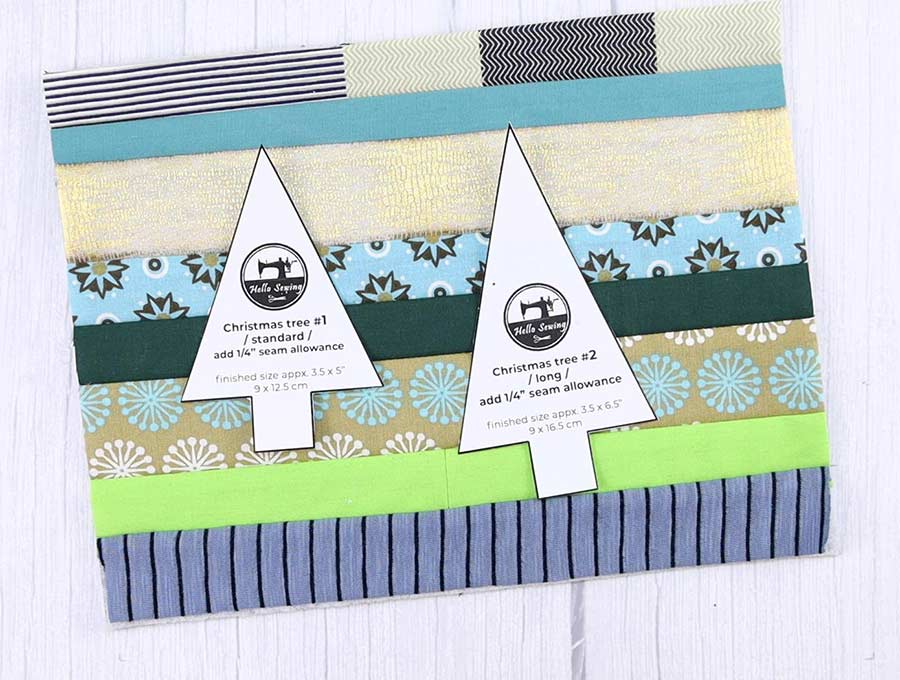
STEP 1: Cut out the tree template
Cut out our Christmas tree template from our free pattern. Use paper through which you can slide a pin easily as you are going to need to keep it in place when you sew.
STEP 2: Prepare your fabric strips
Collect and collate your scrap cotton fabric strips – you may want to make predominantly green trees, or choose reds – just arrange your strips in colors. It doesn’t matter if they are short or long or different widths – as long as they are cut straight and square. A good width for this project is around 3 to 5cm (1 1/4 to 2 inches) – if they are too wide you won’t get sufficient bands of color in your final quilted Christmas tree ornament.
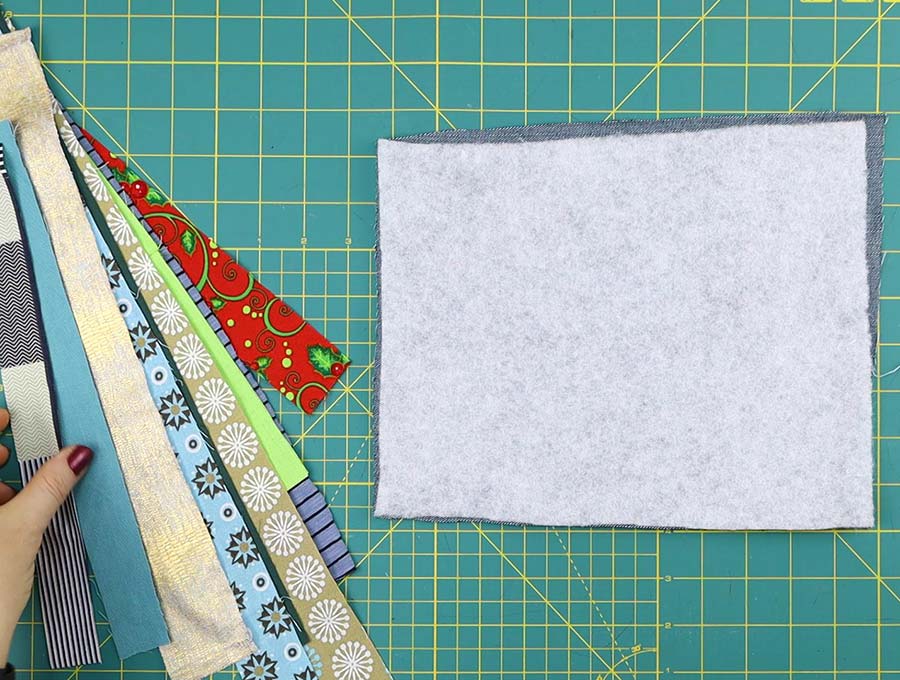
STEP 3: Layer fabrics
Now lay down your base on your worktop right side facing downwards. You can pick any size that suits you – as long as you can fit quite a few of the Christmas tree templates onto the base.
On top of this lay your batting fabric or felt and pin it into place around the edges and put some pins in the center, to stop it moving when you add the strips.
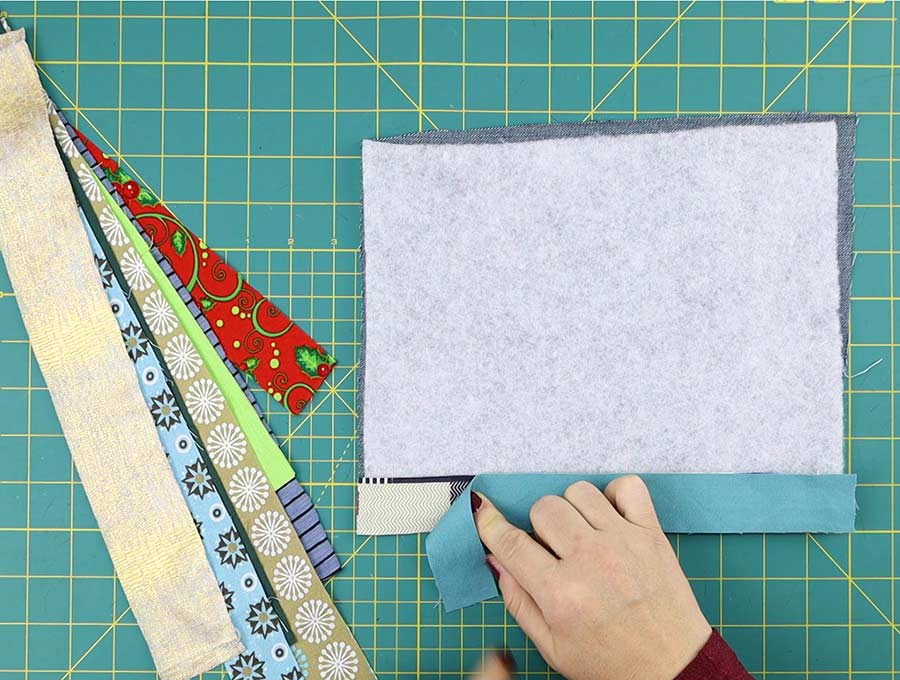
STEP 4: Start quilting the strips
Time to start stitching the strips onto the base. Pick the first strip and pin it right side up at the bottom edge of the base fabrics.
STEP 5:
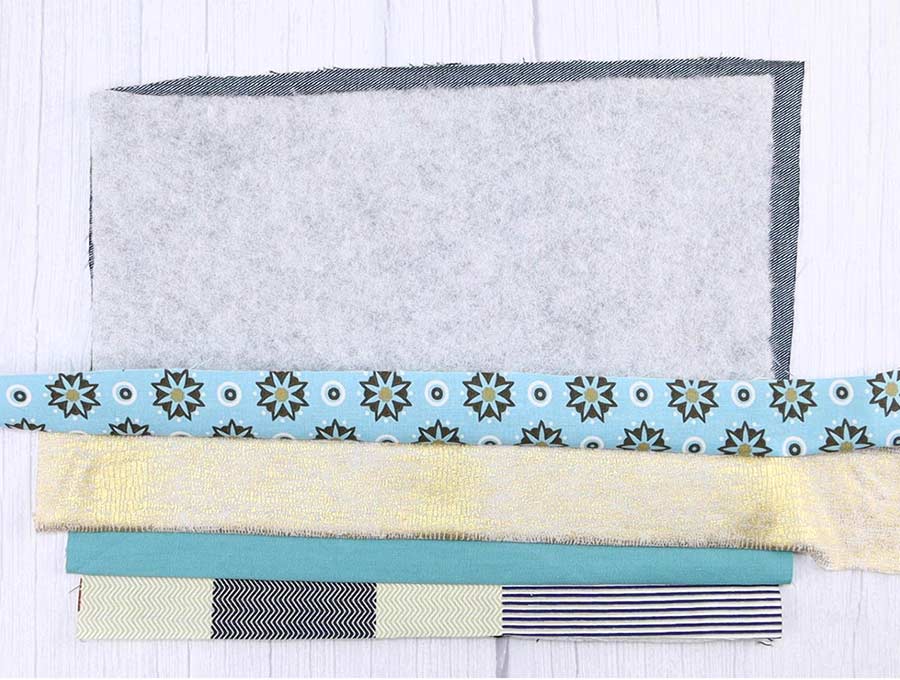
Now place your second strip right side facing the right side of the first strip, and pin in place leaving a ¼ in seam allowance.
STEP 6: Stitch the strips together
Stitch the strips together, ¼ of an inch (6mm) in from the edge, through the batting and base. Open out and press lightly so the two strips lie flat before pinning the next strip in place. The heat from the iron could melt the batting or felt, so make sure to keep the iron away from the unprotected batting as you work, and use on a low setting. Alternatively, you can finger press the seams open.
STEP 7: Quilt as you go
Repeat the previous two steps, pinning, stitching and pressing open, until you have reached the top of the base and it is completely covered in strips. If some strips are too short join them before pinning to the strip below

STEP 8: Trim
Trim all raw edges and batting or felt that may have protruded from the base.

STEP 9: Trace your template on the patchwork
Place your Christmas tree template near any corner of the front of the competed quilted fabric and pin in place, allowing ½ an inch from any edges of the fabric and the tree template. You can choose to place the template at an angle, vertically or horizontally over the lines of strips. It is your choice – play around first and see what looks best.
I’d like to trace around the template using a fabric marker, but you can stitch directly around the template.
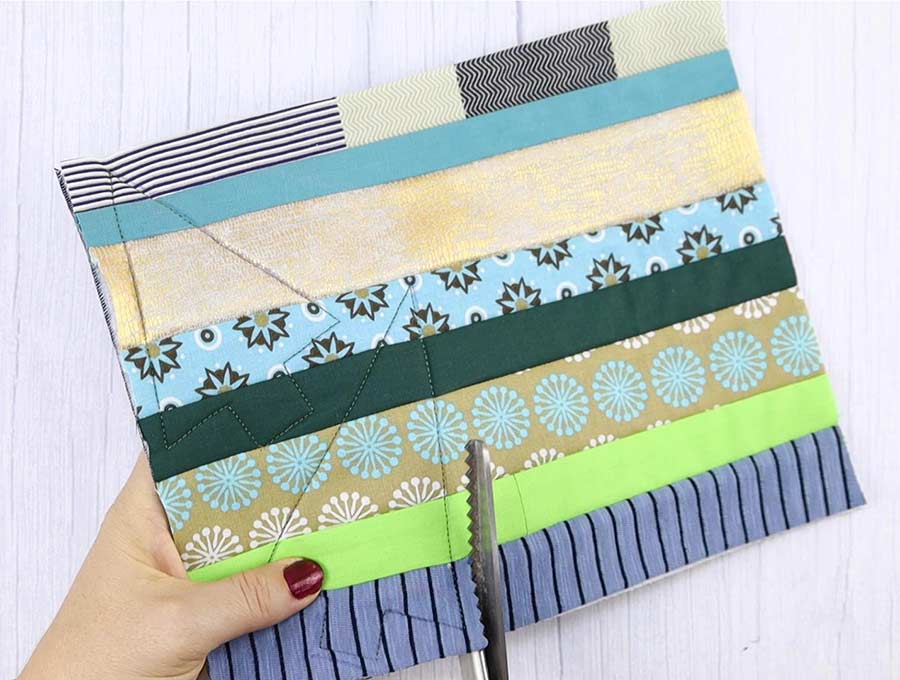
STEP 10: Stitch around
Carefully stitch around the tree template as close to the paper as possible without catching it. When you come to corners leave the needle down, lift the pressure foot and swing around the fabric before putting down the pressure foot and continuing stitching. This makes for a neat outline.
When your tree is finished back tack and trim the threads, then remove the paper template.
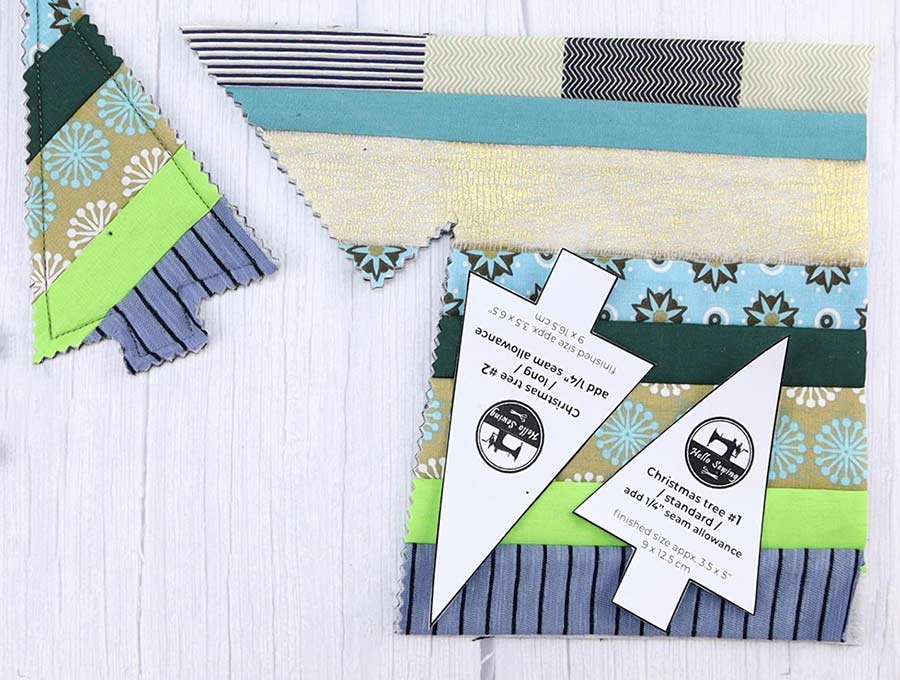
STEP 11: Cut out
Cut out the tree using pinking shears or a pinking tool about 6mm (¼ inch) from the stitch line.
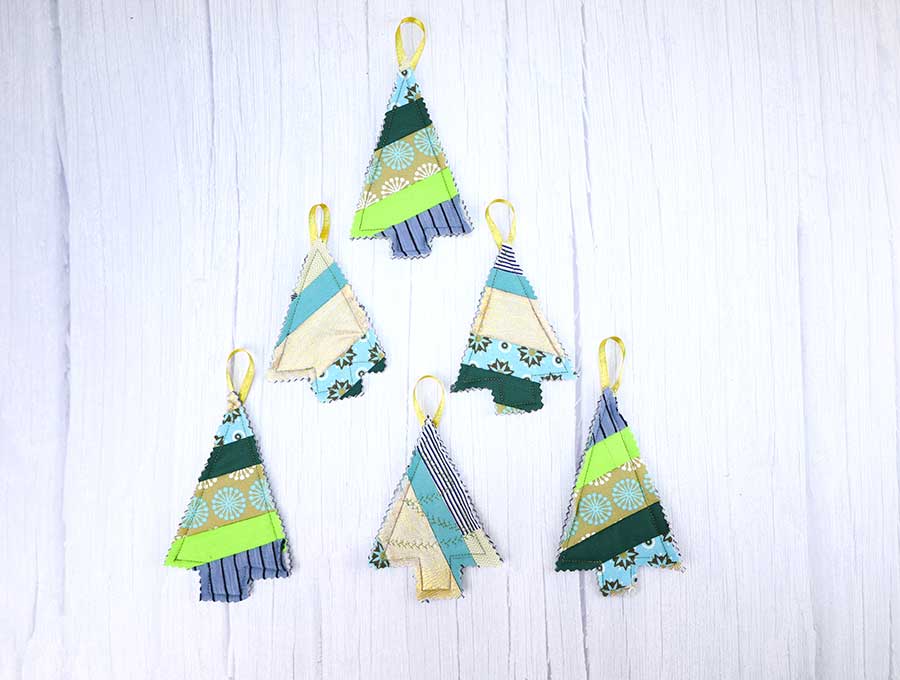
STEP 12: Rinse and repeat
Repeat the last three steps to create more DIY quilted Christmas tree ornaments until you have used up all your quilted fabric.
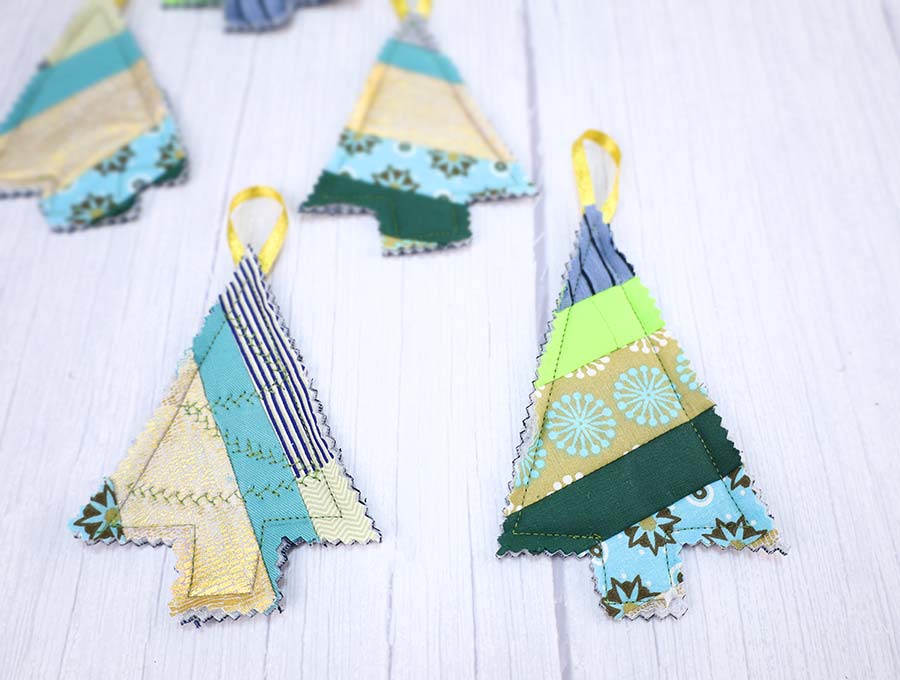
STEP 13: (Optional) Add hanging loop
You can use colored ribbon, or a natural fiber ribbon to attach to the ornaments so they can be hung up. Cut the ribbon about 15 cm (6 inches) long, fold over, and stitch the raw ends of the ribbon to the back of the quilted Christmas tree ornament, near to the top. If you have a glue gun you can use this to attach the ribbon.
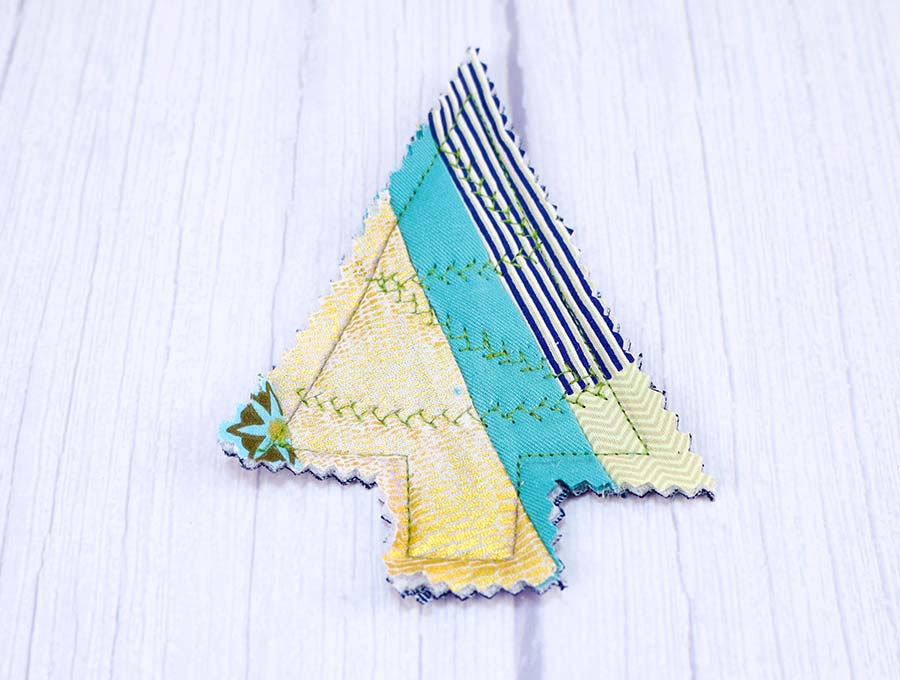
STEP 14: (Optional) Decorate
Use the one of the fancy stitches of your machine to stitch a cute decoration on top of the trees
Mini Quilted Tree Templates FAQ:
Q: How can I decorate the quilted tree ornament?
A: There are a number of possibilities:
- Outline the tree along the stitch line with fabric glitter glue
- Stitch a tiny sprig of holly to the middle of the tree
- Attach a couple of small shiny beads or sequins to the tree, either by stitching or gluing
- Attach a star bead to the top of the tree.
Q: Should I only use Christmas themed fabric for this project?
A: While a few strips of Christmas themed fabric will certainly add to the festive feel it is not necessary to only use themed fabric. Any plain color, silver or gold will fit in well as will fabric with smallish leaf prints, swirls or dots that suit the color scheme of your quilted Christmas tree ornament. You may have chosen a purple and silver theme or a blue and white theme – there are numerous color schemes. Just ensure the prints you use fit the theme.
Q Can I use these ornaments to decorate a wreath?
A: If you leave off the ribbon, you can easily use a glue gun to attach the quilted mini Christmas tree ornaments to wreaths. They can also be attached to gifts wrapping paper. With many people moving to using brown paper which is easily compostable these days, a mini quilted tree with a sprig of spruce will brighten up the present.
Once you start with these you’ll want to make a whole lot – if not this year then start early for next year. Send out cards with the mini quilted Christmas trees on them, ribbon attached, so that people can re-use the ornament on their own trees. Load up your tree with these cute ornaments and have a very merry Christmas.
If you liked this quilted Christmas tree ornament then do subscribe to have sewing projects that use up the small awesome bits of fabric in your stash, delivered straight to your inbox, and never miss out on another fun project.
Wanna be friends? Click HERE and follow me on Pinterest
RELATED: