
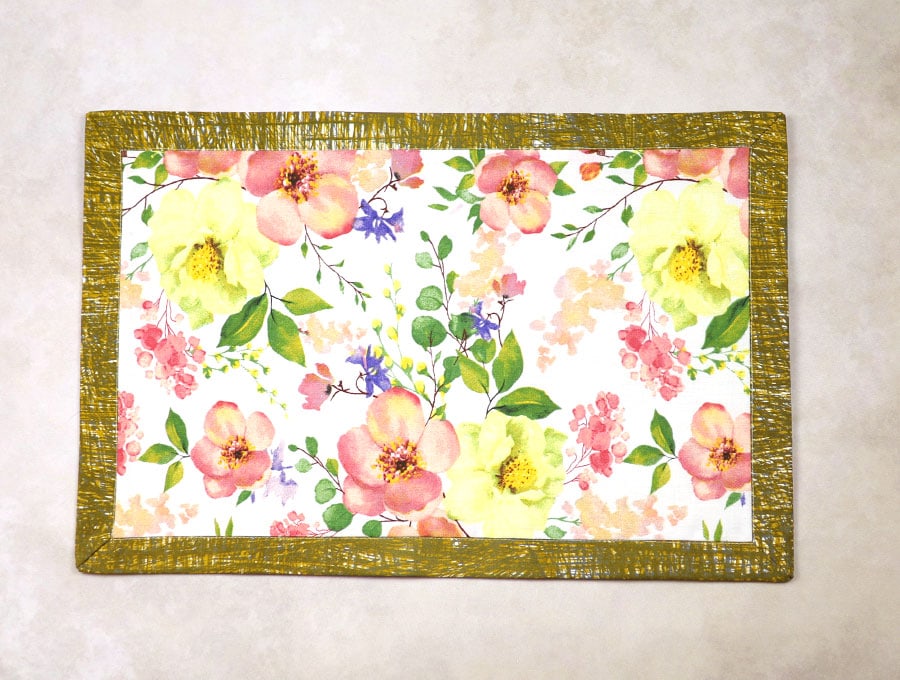
How to Sew Self-binding Placemats [the Easiest Way]
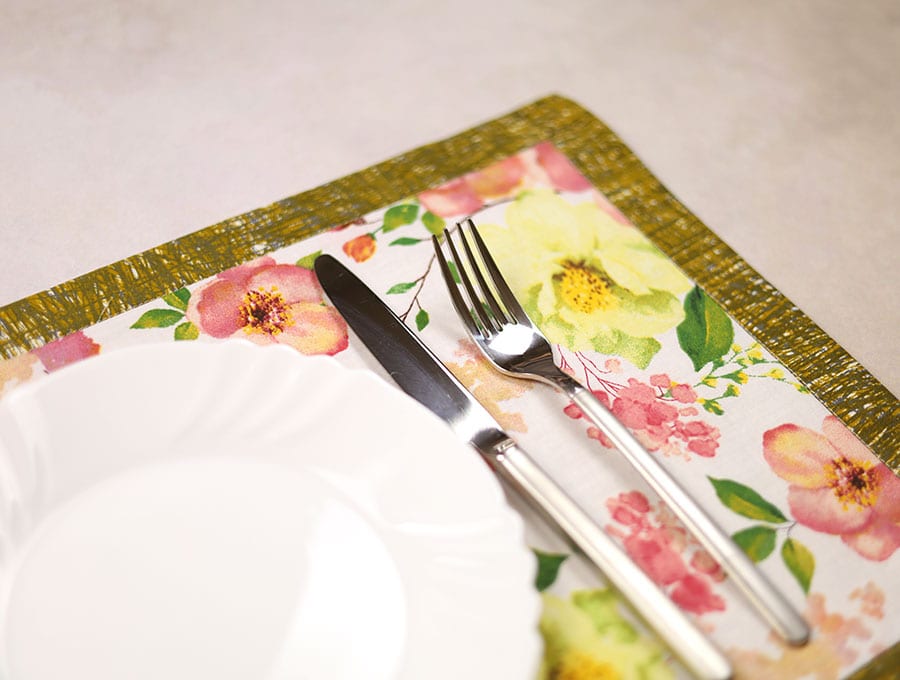
I love self-binding placemats. You can make sets for various occasions – choosing the colors and prints to fit the theme – Christmas, a special anniversary, birthdays, and other cultural events. This way of making them is really easy when you follow the step-by-step instructions. There is no fiddling around with binding – all you need is two rectangles of fabric cut to the specified sizes and you will see they become self-binding with mitered corners. Find some pretty prints in your fabric stash and get sewing on this set of four – or you expand to a set of six or eight, or make a set of two for grandparents, so they have something seasonal to cheer up their table at meal times.
For a quick and inexpensive way to jazz up your dinner table consider making a set of placemats. They can be themed to any event you can imagine – Easter, Halloween, Christmas, special birthdays, anniversaries. They are so easy to make using our visuals (we believe in the saying that a picture is worth a thousand words), and our step-by-step instructions. You can use fabric from your stash or buy some stunning fabric for the fronts – you only need one yard or 1 meter to make the front of four placemats and the same amount of plain fabric for the backing and self-binding. Let’s get creative together!

Below you will find my step by step written tutorial with VIDEO instructions for all the visual learners.
We occasionally link to goods offered by vendors to help the reader find relevant products. Some of the links may be affiliate meaning we earn a small commission if an item is purchased.
Table of Contents
How to make self-binding placemats
DIY self-binding placemats – supplies and tools
- 1 yard (1 meter) print fabric
- 1 yard (1 meter) plain fabric for backing and binding
- matching thread
- scissors (or rotary cutter and a cutting mat)
- ruler or measuring tape
- iron and ironing board
- sewing clips or pins
- turning tool (optional)
Follow us for free patterns & tutorials! [easy-profiles]
How to Sew Self-binding placemats
Watch the diy self-binding placemat video first and then follow the written step by step instructions below.
Please enjoy and don’t forget to Like and SUBSCRIBE over on YouTube to be kept up to date with new videos as they come out.
Self-binding placemat VIDEO TUTORIAL
DIY self-binding placemat INSTRUCTIONS:
STEP 1: Cut the fabric
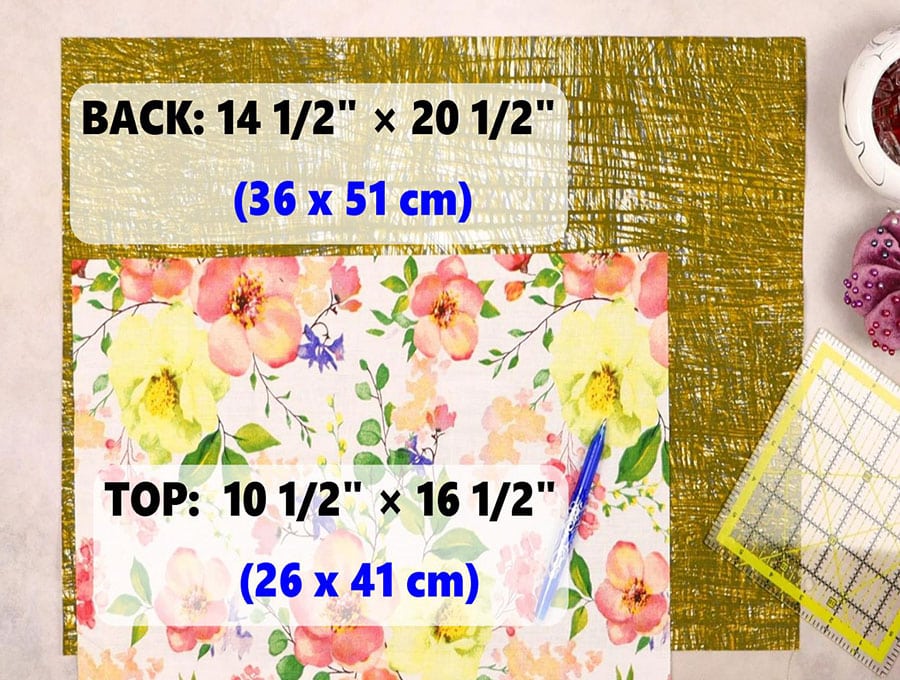
To make a set of 4 placemats, cut your fabric as follows. If you want to start with just 1 placemat, cut one rectangle of each fabric.
(4) rectangles of 10 ½ inch × 16 1/2 inch (27 x 42 cm) pieces of the print fabric for the front of the placemats
(4) rectangles of 14 ½ inches × 20 ½ inch (37 x 52 cm) for placemat backs.
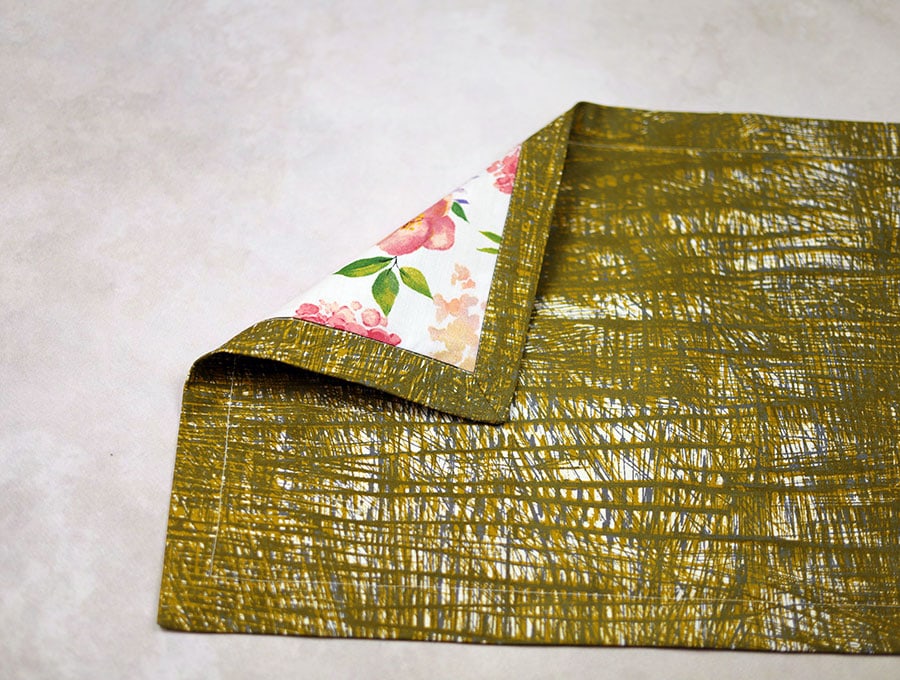
Finished mat measures:
12 x 18″ (30 x 45 cm)
STEP 2:
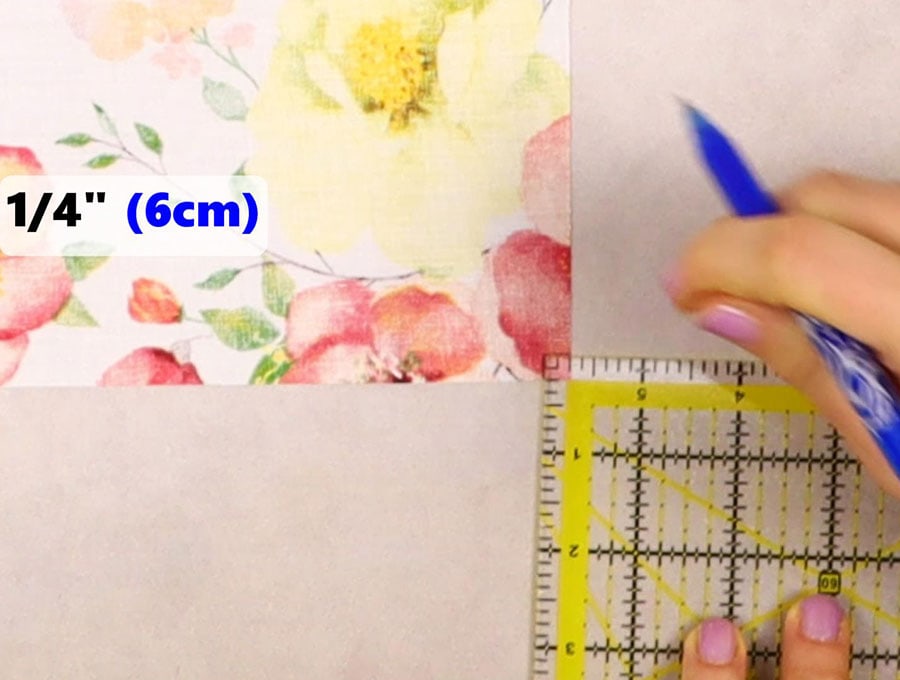
Place the fabric for the front of the placemat wrong side up on your worktop and mark a square ¼ inch (6mm) on each corner using your quilting ruler and pen. This gives you the mark for your seam allowance.
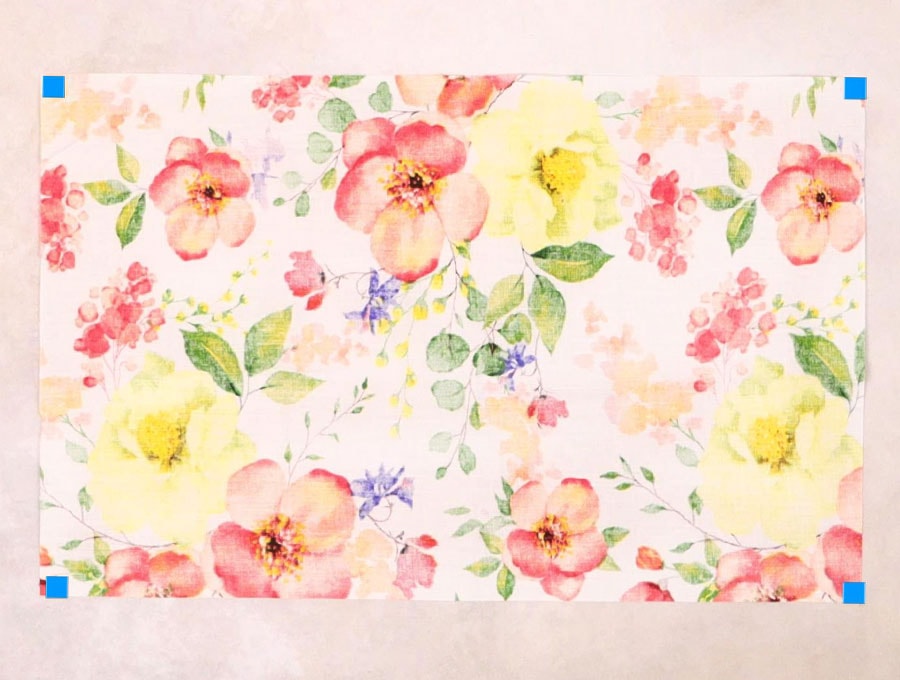
All seams are ¼ inch (6mm).
STEP 3:
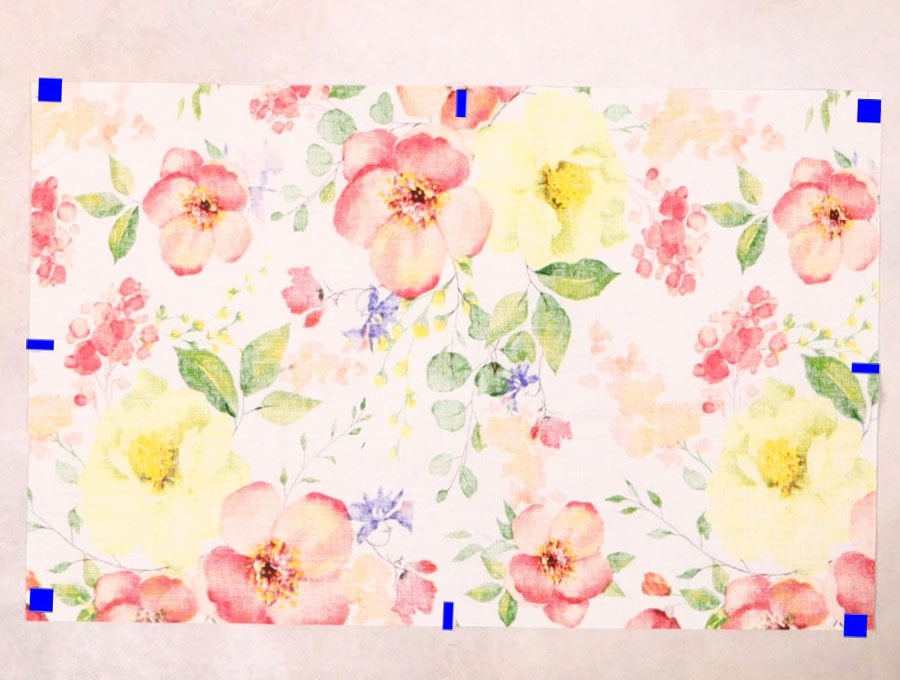
Fold the fabric in half and finger press to get the middle of the short sides and mark on the WRONG side with a fabric pen. Next fold the other way so you have the middle of the long sides and mark with a fabric pen.
STEP 4:
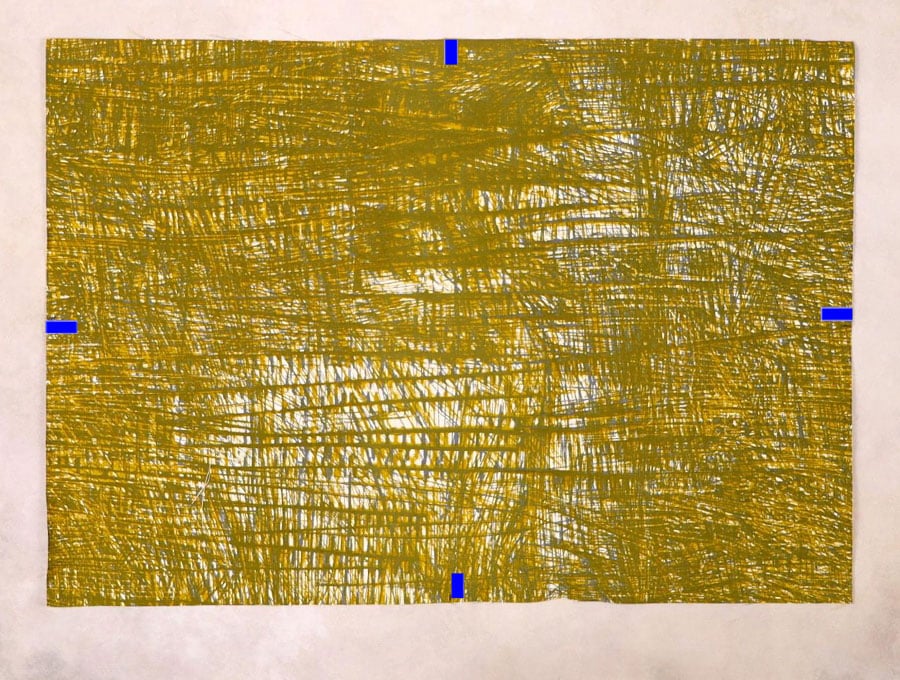
Take the backing fabric and fold along the short sides to find the middle, finger press then open up and make a mark. Do the same with the long sides so you have 4 marks which you will later line up with the marks on the printed fabric for the front. Make sure your marks are on the RIGHT side of the backing fabric.
STEP 5:
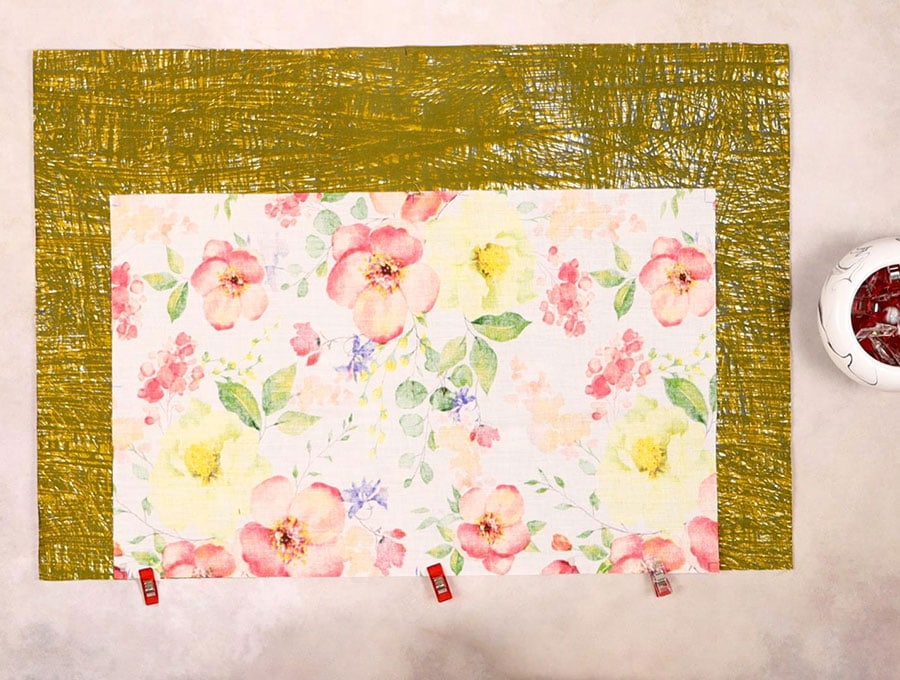
Place the backing fabric right side up on the worktop. Over it, place the printed facing right side down. Line up the middle of the long side of the backing fabric with the front piece at the top of your workbench and pin in place.
STEP 6:
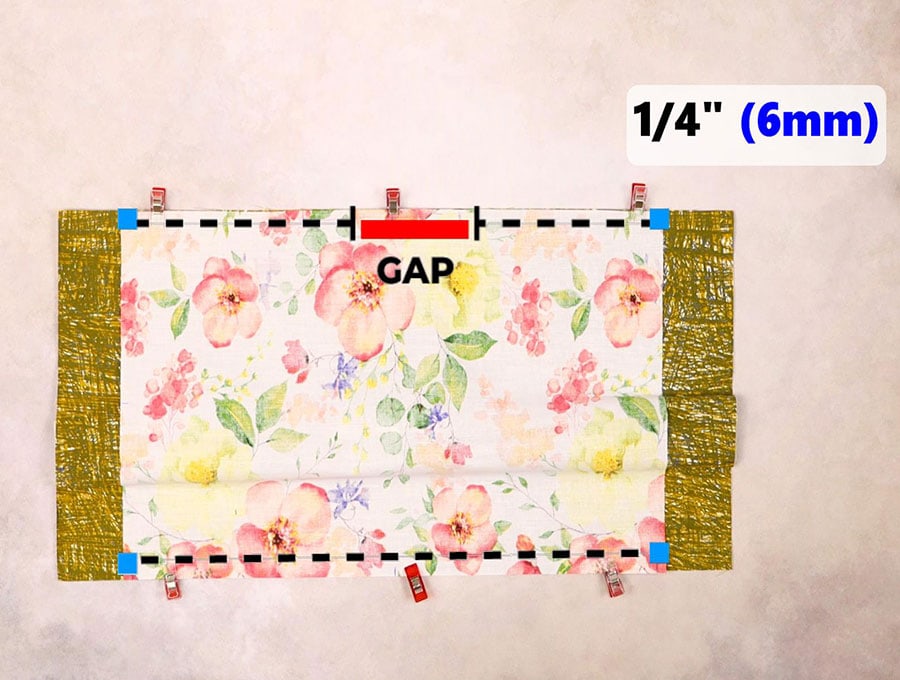
Next, line up the opposite long side of the front fabric with the backing fabric, matching up the middle marks. Pin, but leave a gap of 3 inches (7 cm) in the middle.
This is where you will pull the fabric through later to turn the placemat the right way out.
STEP 7:

Stitch down the long side starting from the bottom of the small ¼ inch (6mm) square you marked – this gives you an accurate ¼ inch (6mm) seam allowance guide. Backtack at the start and finish.
Stitch on the other long edge, leaving the gap open and back tacking at the start and finish and where the gap starts and ends
STEP 8:
Line up the middle of the short side of the front with the middle of the short side of the backing fabric and fold the extra backing fabric away at the ends (it will make a triangular shape) as you don’t want to accidentally stitch this piece. Pin in place
Repeat with the other short side.
STEP 9:
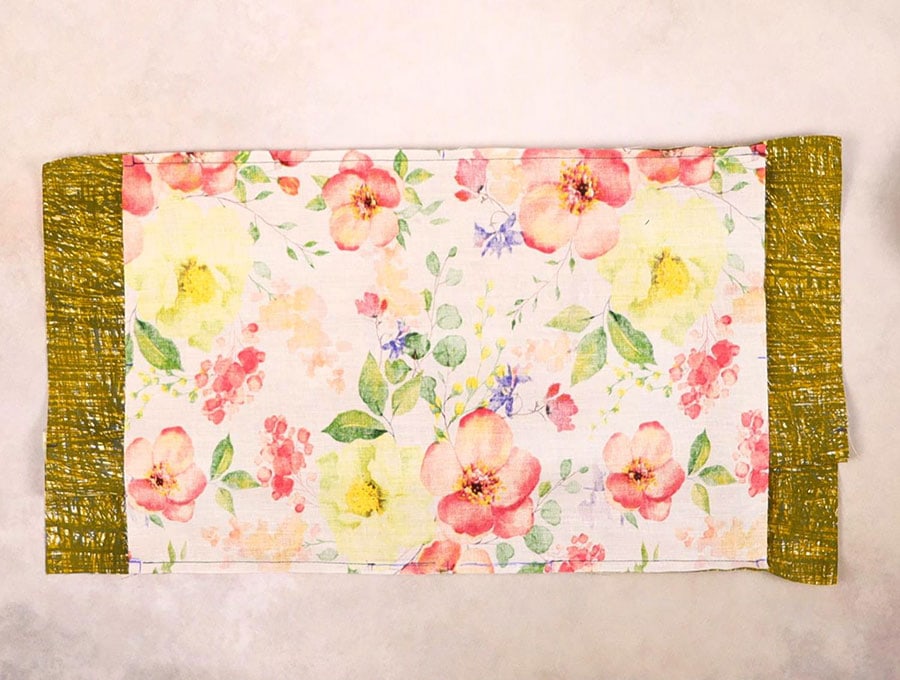
Stitch both short sides using the ¼ inch (6mm) guideline you marked on both sides of each seam to get a neat even seam.
STEP 10:
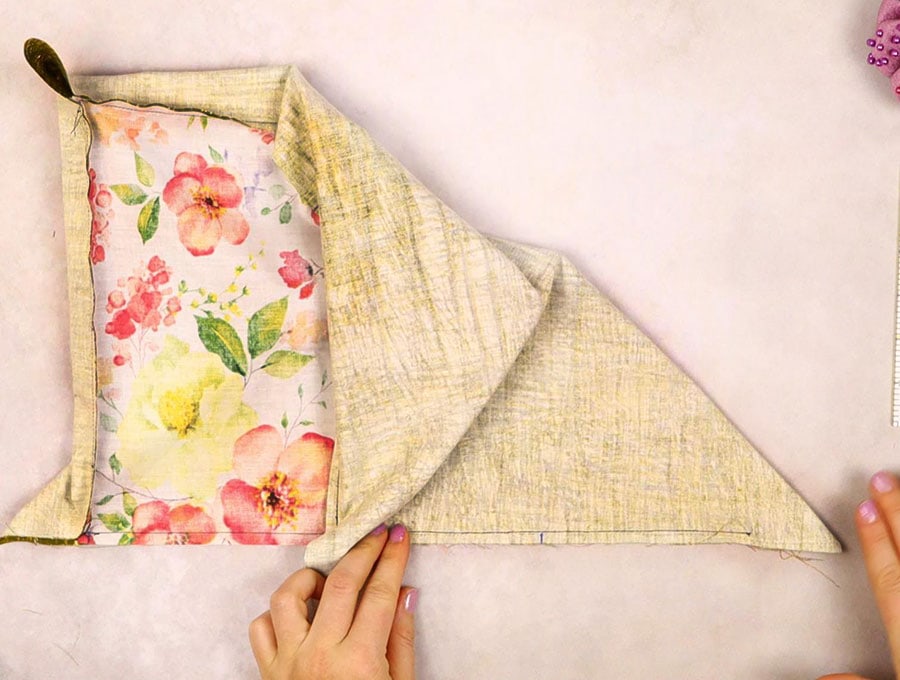
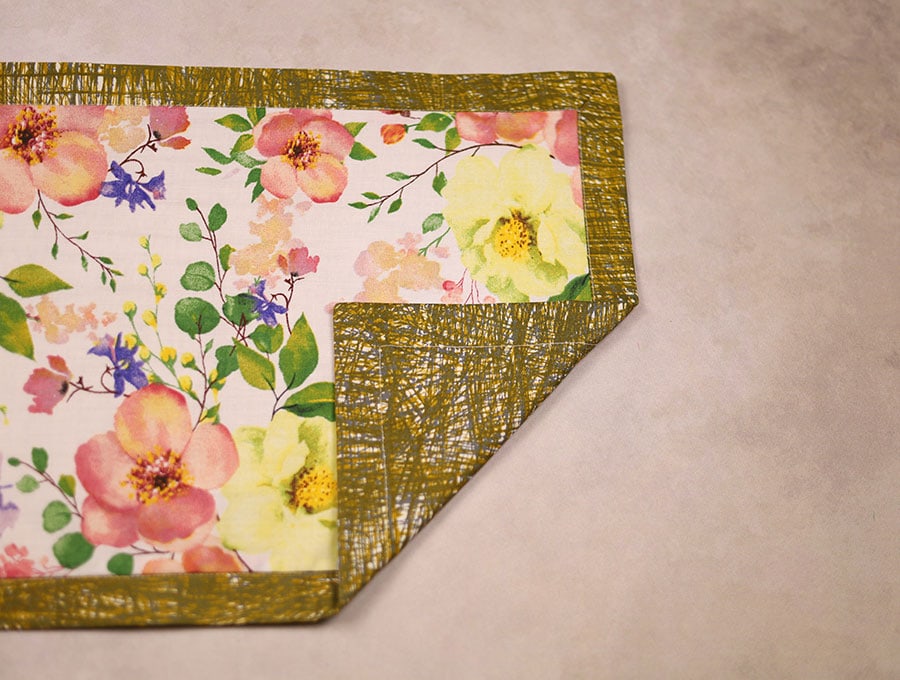
Fold one corner of the placemat up on the backing side so that the raw edge of one short side is in line with the raw edge of its neighboring long side. The fold should be facing your tummy on the worktop.
Line up your quilting ruler parallel to the fold, and just touching the end of your seam – remember where you marked the little squares? Draw a line from the end of the stitch line to the edge – the material on the right of the line will form a triangular shape – this is how the corners are mitered. Pin inside of the marked line. Repeat this step 3 more times until you have all four corners marked and pinned.
STEP 11:
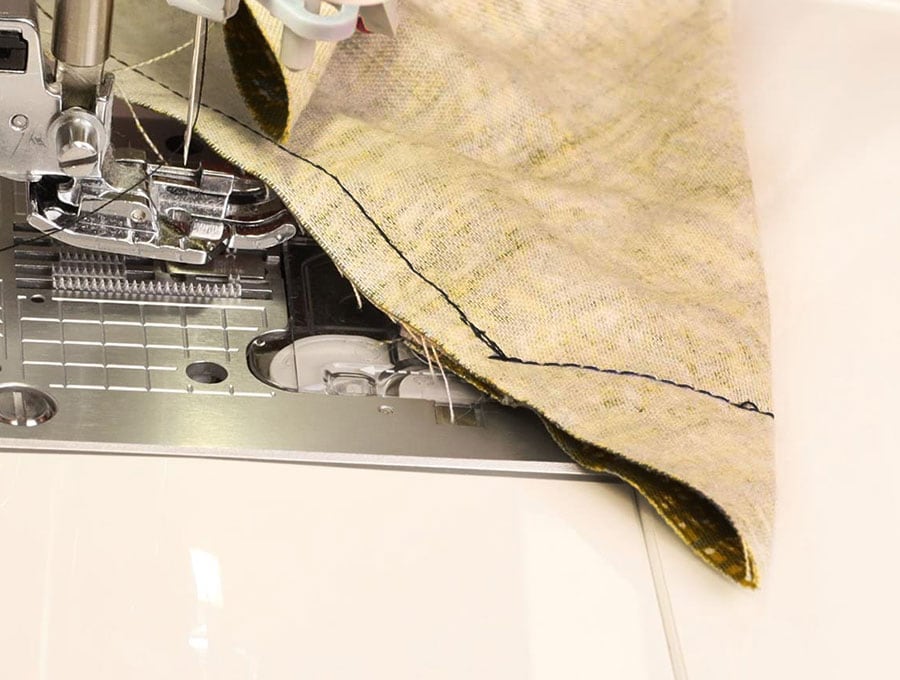
Stitch down each marked line, taking care to start exactly from the corner of the ¼ inch (6mm) square you marked and stitch to the fold line back tacking at the start and finish.
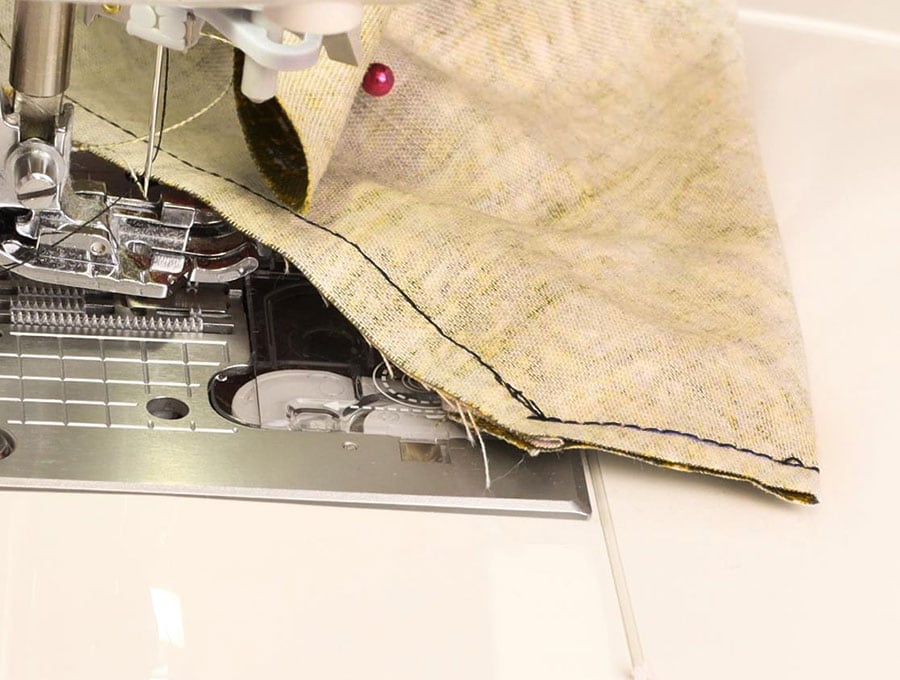
Cut off the corners 1/4″ (6mm) away from the seam line
STEP 12:
Take your iron and press the seam allowances towards the backing fabric – this will make it easier once you come to do the top stitching right at the end.
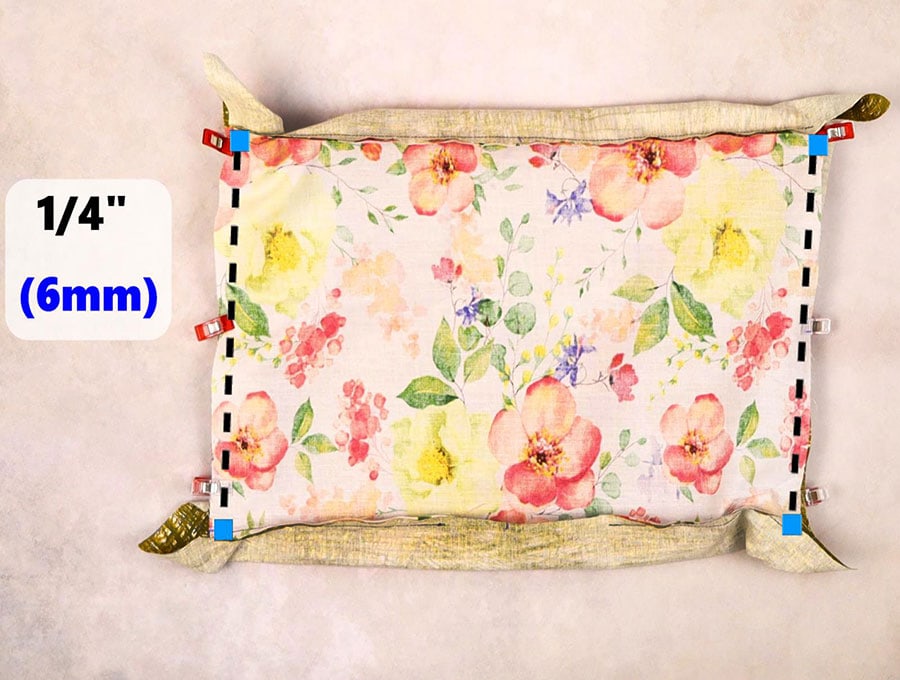
STEP 13:

Pull the place mat through the gap, poking out the corners gently with a turning tool or a chop stick to make sure you don’t poke a hole through the fabric.
STEP 14:

Once the place mat is correctly turned out it is time to press it flat with your iron, making sure the backing fabric over the gap is neatly turned in.
STEP 15:
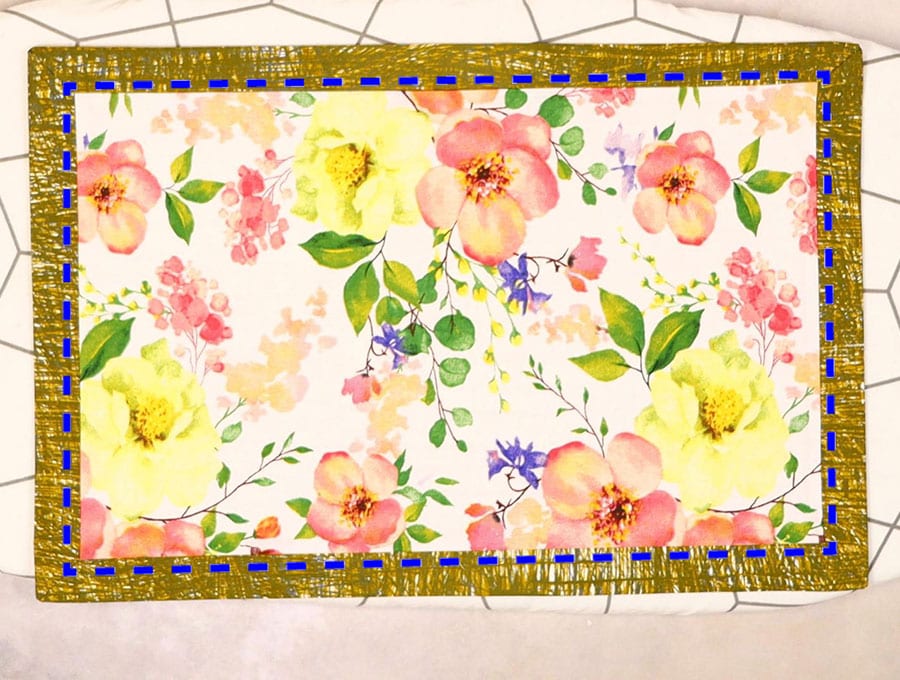
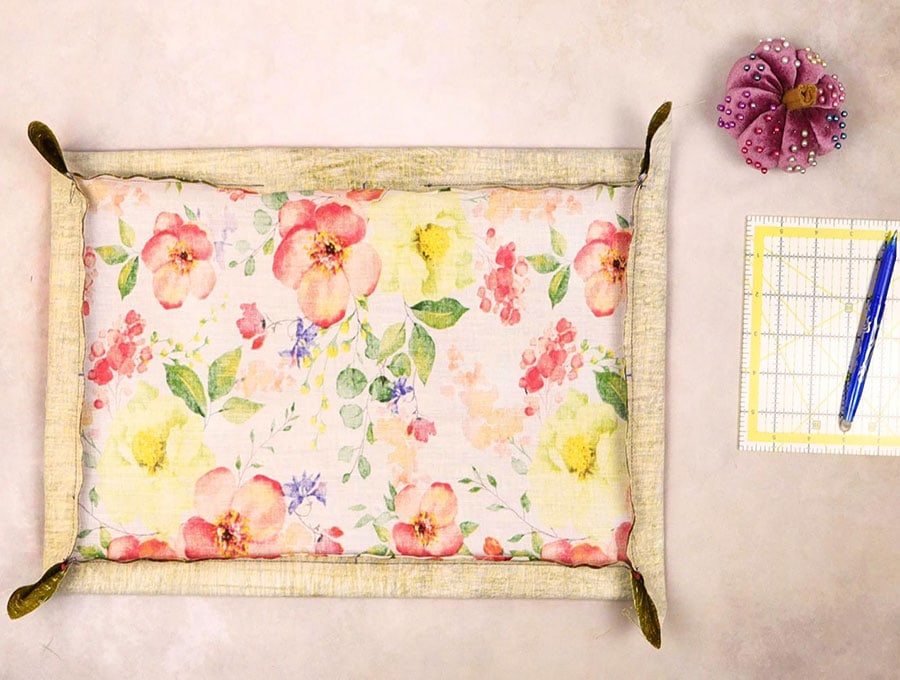
The last step is to run a line of top stitching just outside the edge where the self-binding meets the front fabric – as close to the edge as possible. When you come to a corner leave the needle in the fabric, lift the presser foot, swing the fabric 90 degrees, re-engage the pressure foot and continue stitching for a perfectly stitched corner.
Once you have done the first placemat it’s pretty easy to finish off the next three – you may want to run a production line, doing the pinning first then stitching to save time rather than completing each placemat before starting the next.
If you enjoyed this tutorial then please give us a like and follow to have more tutorials like this sent to your inbox. We would love to see your tablemats used in a table setting – please share your photos in the comments section. We love sharing and nurturing creativity.
Do you like this? Pin for later:
Wanna be friends? Click HERE and follow me on Pinterest
RELATED: