
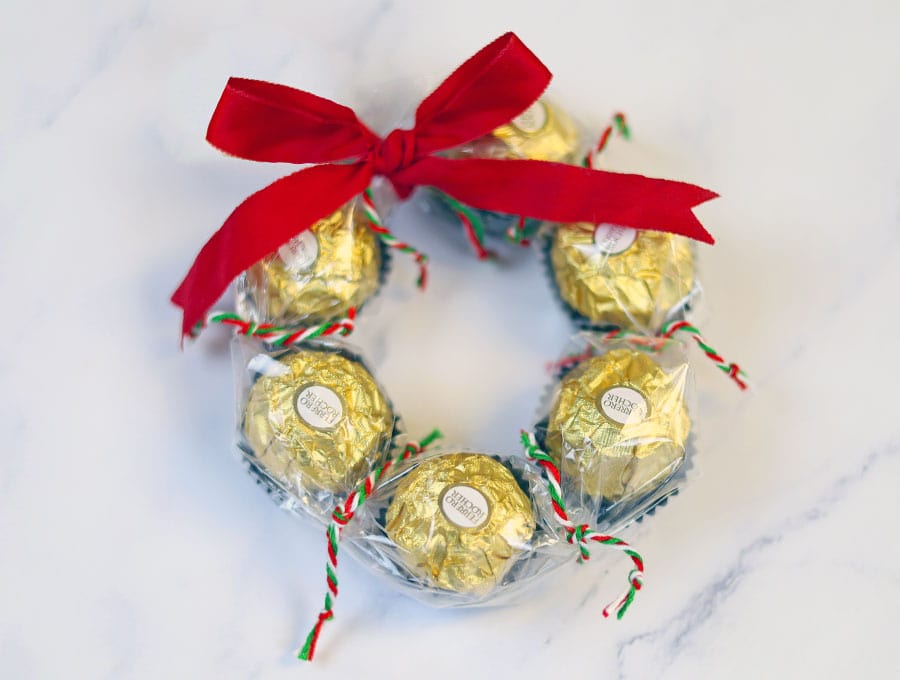
DIY Chocolates Wreath Gift
When you want to impress your favorite people with a special handmade gift but you are strapped for time, it’s time to get creative. I got you — let’s make a chocolate wreath gift! It’s basically the easiest way to look like a holiday crafting genius without breaking a sweat. Plus, you get to eat some (most?) of the tasty treats while you work, which is honestly the best part.
True story: I barely had enough chocolates left to finish my first wreath because I kept casually “tasting” them. Hubby was around “helping” me so he had to make a last-minute trip to the store to restock our chockolate supplies— oops! Whether you’re gifting it to friends, family, coworkers, or just keeping it all for yourself (no shame), this wreath is a delicious way to spread some holiday cheer. Grab your favorite chocolates, maybe a little hot cocoa or a fresh cut of coffee, and let’s make something sweet — literally!
Below you will find my step by step written tutorial with VIDEO instructions for all the visual learners.
We occasionally link to goods offered by vendors to help the reader find relevant products. Some of the links may be affiliate meaning we earn a small commission if an item is purchased.
Table of Contents
How to make the Chocolates Wreath Gift
Supplies and tools
- 6 round chocolate balls like Ferrero Rocher, Lindor or Raphaello
- cellophane or clear gift wrap
- string or twine: a string of yarn or embroidery floss to tye between the chockolate pieces
- red ribbon – 3/8″ to 1/2″ wide (1-1.5cm) for the bow at the top
- clear tape – to secure the cellophane
- ruler or measuring tape
- gift tag and/or charm (optional)
Follow us for free patterns & tutorials! [easy-profiles]
Chockolate Wreath Gift – Step by step instructions
Watch the diy chockolate wreath gift video first and then follow the written step by step instructions below.
Please enjoy and don’t forget to Like and SUBSCRIBE over on YouTube to be kept up to date with new videos as they come out.
Ferrero rocher chockolate wreath gift VIDEO TUTORIAL
INSTRUCTIONS:
STEP 1:
Cut a piece of cellophane that is at approximately 15cm (6″) wide and 43-50 cm (17-20 inches) long to accomodate 6 chockolate balls.
If you are making smaller or larger wreaths, you’ll need a piece of cellophane that is large enough to accomodate the chockolates and some overlap and space between the chockolates to allow tying between the pieces.
TIP: if you don’t have cellophane, you can even use a clear page protector like I did here!
STEP 2:
Arrange the chockolates in a row, spacing them evenly and leaving a gap between chocolates that is about the same size as one chocolate.
To put it simpler: put one chocolate, then leave a space about the size of one chocolate, then put the next chocolate, and so on until you run out of chocolates.
STEP 3:
Fold the long edges of the cellopane over the chocholates, overlapping them and taping them together in the middle and both ends.
STEP 4:
Cut six 10-15 cm (4–6 inch) long pieces of string. Use a string, some yarn or twine string, or make your own christmassy twisted cord using embroidery floss.
STEP 5: (optional)
To make your own three color twisted cord cut 100 cm (40″) of red, green and white embroidery floss. Tie then together at the top with an overhand knot and hold them down with a heavy object like a cup, a candle or a book. Start twisting each floss in the same direction.
From the other end, begin twisting each floss clockwise. Keep twisting until it starts curling aound itself. weight it down and repeat with the next color of floss.
Each color should be twisted in the SAME clockwise direction.
When all three colors are twisted, hold the loose ends together and pull them to equal lengths. Now release the weighted end to allow them to twist together. Knot the loose ends together to hold the twist in place.
Before cutting the 6 separate pieces of string, make sure to make two knots between each cut to hold the twist in place.
STEP 6:
Start tying between the chockolates. Arrange them as you go.
STEP 7:
Being both ends together to make a circle and tie them together at the top.
STEP 8:
Tie the red ribbon in a bow at the top to add a festive touch
STEP 9: (optional)
Add a gift tag or a small charm to make it even more festive.

To make it even more personal you can attach the personalized Monogram keyring I designed here
And there you have it — a chocolate wreath that looks amazing and tastes even better. Just a heads-up: grab more chocolates than you think you’ll need, because, well… someone’s gotta do the taste test!
Thanks for crafting (and snacking) along with me. If you want more tasty, creative, and maybe a little messy sewing and craft ideas, don’t forget to subscribe to my newsletter. Your inbox—and your sweet tooth—will thank you!
Do you like this? Pin for later:
Wanna be friends? Click HERE and follow me on Pinterest
RELATED: