
Book Sleeve with a Bow tie // Easy Book pouch Sewing Pattern
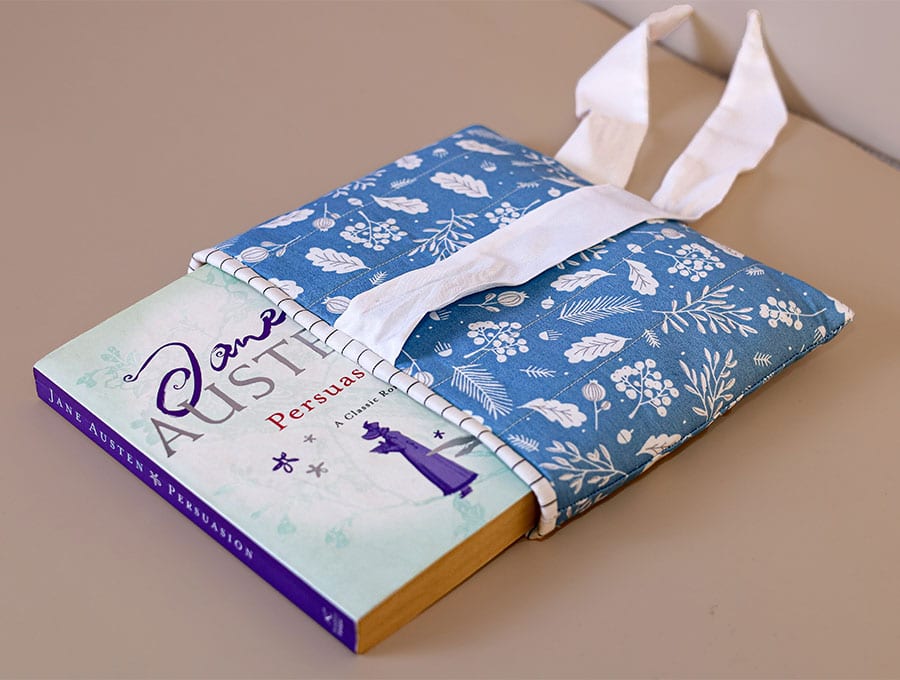
There is something quietly lovely about giving a favourite book its own little handmade home — something soft and considered. This quilted book sleeve is exactly that: a snug, padded cover that you can slip your book into and fasten with a ribbon bow at the top, keeping the pages safe and the cover protected.
The quilted layers give it a satisfying padded firmness, while the ribbon tie adds a finishing flourish that makes it feel like a gift — to yourself or to someone else. You can change the fastening to a loop and button closure, or leather ties depending on the recipient’s style. Whether you are heading out on a birdwatching walk with your field guide, tucking a well-loved journal into your bag, or simply wanting to protect a treasured novel from the bumps and scrapes of daily life, this sleeve is a wonderfully practical make.
Best of all, this beginner-friendly project comes together in a single sitting. There is no complicated shaping or fiddly hardware, just straightforward straight-line sewing with a pleasingly professional result. The pattern is also easy to adjust: simply measure your own book and scale the dimensions accordingly, so the finished sleeve fits like it was made for that book alone. Learn how to make this cute book sleeve in under an hour!
Below you will find my step by step written tutorial with VIDEO instructions for all the visual learners.
We occasionally link to goods offered by vendors to help the reader find relevant products. Some of the links may be affiliate meaning we earn a small commission if an item is purchased.
Table of Contents
- 1 How to make the Book pouch
- 2 Supplies and tools
- 3 How to Sew a Book Sleeve
- 3.1 Book Sleeve VIDEO TUTORIAL
- 3.2 INSTRUCTIONS:
- 3.3 STEP 1:
- 3.4 STEP 2:
- 3.5 STEP 3:
- 3.6 STEP 4:
- 3.7 STEP 5:
- 3.8 STEP 6:
- 3.9 STEP 7:
- 3.10 STEP 8:
- 3.11 STEP 9:
- 3.12 STEP 10:
- 3.13 STEP 11:
- 3.14 STEP 12:
- 3.15 STEP 13:
- 3.16 STEP 14:
- 3.17 STEP 15:
- 3.18 STEP 16:
- 3.19 STEP 17:
- 3.20 STEP 18:
- 3.21 STEP 19:
- 3.22 STEP 20:
- 3.23 STEP 21:
- 3.24 STEP 22:
- 3.25 STEP 23:
- 3.26 STEP 24:
- 3.27 STEP 25:
- 3.28 STEP 26:
- 3.29 STEP 27:
- 3.30 ALTERNATIVE FASTENER OPTIONS:
- 3.31 METHOD 1 – Leather loop with a button book fastener
- 3.32 METHOD 2 – Velcro
- 3.33 METHOD 3 – Shoelaces
- 3.34 METHOD 4 – Snap fastening
How to make the Book pouch
Supplies and tools
- fabric – 2 pieces of 100% tightly woven cotton (one main, one lining)
- fusible interfacing
- matching thread
- scissors (or rotary cutter and a cutting mat)
- ruler or measuring tape
- iron and ironing board
- sewing clips or pins
DOWNLOAD: Book sleeve sewing pattern [Free pdf file]
more sizes coming soon!
Follow us for free patterns & tutorials! [easy-profiles]
How to Sew a Book Sleeve
Watch the diy book sleeve video first and then follow the written step by step instructions below.
Please enjoy and don’t forget to Like and SUBSCRIBE over on YouTube to be kept up to date with new videos as they come out.
Book Sleeve VIDEO TUTORIAL
INSTRUCTIONS:
STEP 1:
Print out the book pouch pattern onto A4 or US letter paper, then join with clear tape as shown on the pattern pieces to create the book sleeve body, and the ribbon tie.
STEP 2:
From the book pouch pattern piece cut:
- 2 of the outer fabric
- 2 of the lining fabric
- 2 fusible batting pieces (these you will cut according to the dashed line on the pattern to reduce bulk).
For the ribbon tie you can use the pattern to cut a 2 pieces of satin fabric, or use a ready-made piece of ribbon. In our FAQ section you can see other options too if making this book sleeve for a person who does not like ribbons.
STEP 3:
Turn the two pieces of outer fabric wrong side up and place the fusible sides of the batting over each piece, clip in place. Turn over and fuse with your iron according to the manufacturer’s instructions.
STEP 4:
It is optional if you want to quilt the outer fabric. If you do, then use a quilting ruler to draw equally distant lines across the fabric, then stitch working from the center outward to avoid any bunching or puckering of the fabric. It does give a good finish to quilt the cover in my opinion.
STEP 5:
To create the ribbon tie fold each side of the tie, right sides facing each other, clip or pin in place and stitch, using a ¼ inch (6 mm) seam allowance, down the length and across the angled edge to meet at the folded point.
STEP 6:
Snip off the pointed extra fabric at the closed end of each ribbon tie and singe with a lighter to prevent fraying – satin is notorious for fraying!
STEP 7:
Turn the ties the right way out using a turning tool or a blunt object like a chopsticks to avoid poking a hole in the fabric. Use a pin to carefully pull out the pointy end from the right side.
STEP 8:
Give the ties a press once they are carefully tuned out and the ends are neat.
STEP 9:
Fold the ribbon ties in half on the short ends and hand press, or insert a pin to mark the middle.
STEP 10:
Take the quilted book cover piece and on the long side fold in half and cut a small V notch in the outer fabric where it extends beyond the batting to mark the middle – or use a fabric marking pen to indicate the middle.
STEP 11:
Pin the ribbon so the raw edges line up with the edge of the middle and the marks or mark and notch align. Pin in place with the ribbon tie facing in to the middle of the fabric. Repeat Steps 10 and 11 with the other side of the book cover.
STEP 12:
Stitch across the raw edges of the ribbon tie 1/8 of an inch (3 mm) from the edge.
STEP 13:
Fold up the ends of the ribbon and clip so they do not get tangled when you stitch the pieces together later.
STEP 14:
Place the one side of the book cover over the other, right sides facing each other and ribbon ties lining up. Clip in place around the sides.
STEP 15:
Stitch around three sides ¼ of an inch (6 mm) from the edges, leaving the side with the ribbon ties open.
STEP 16:
Trim the 2 corners at the bottom to reduce bulk when turning the right way out.
STEP 17:
Lay the lining piece right sides together and clip in place.
STEP 18:
Mark a gap in the middle of one long side of around 3 inches (7-8 cm).
STEP 19:
Stitch down a short side, across the long side where the gap is marked, backtacking before and after the gap, then up the other short side. Backtack at the start and finish and use a seam allowance of ¼ of an inch (6 mm). The other long side will not be stitched.
STEP 20:
Finger press the raw edges of the gap open in in line with seam, and clip off the corners nearest the side with the gap to reduce bulk when turning.
STEP 21:
Turn the lining the right way out, then insert it into the book case outer, so right side of the lining faces right side of the outer fabric.
STEP 22:
Open out the seams of the outer and lining at the top and pin together on each side, then pin or clip around the top so the fabrics fit together neatly.
STEP 23:
Stitch around the top using a ¼ inch (6 mm) seam allowance, backtacking at the start and finish.
STEP 24:
Turn the book cover the right way out by pulling the fabric through the gap at the bottom of the lining. Push out the corners of the lining and outer neatly, using a turning tool. The outer and lining will be opposite each other.
STEP 25:
Stitch the gap in the lining closed after ensuring the raw edges are turned in in line with the seam, using either slip stitches by hand, or machine stitch closed as close to the folded edges as possible, then backtack, and trim off the extra threads.
STEP 26:
Push the lining inside the outer cover, unclip the satin ribbon ties, and give the book cover a press, making sure the lining sits just inside the outer at the top, or if you want your lining visible then make sure it sits above the outer, and is the same width all the way around the top of the book cover.
STEP 27:
Clip the lining and outer together at the open end, making sure the ties lie outside of the cover then top stitch 1/8 of an inch (3 mm) from the edge if you don’t want the lining showing. If you do have the lining showing then stitch at the point where the outer meets the lining, flipping up the ribbon ties, so the stitching does not catch them.
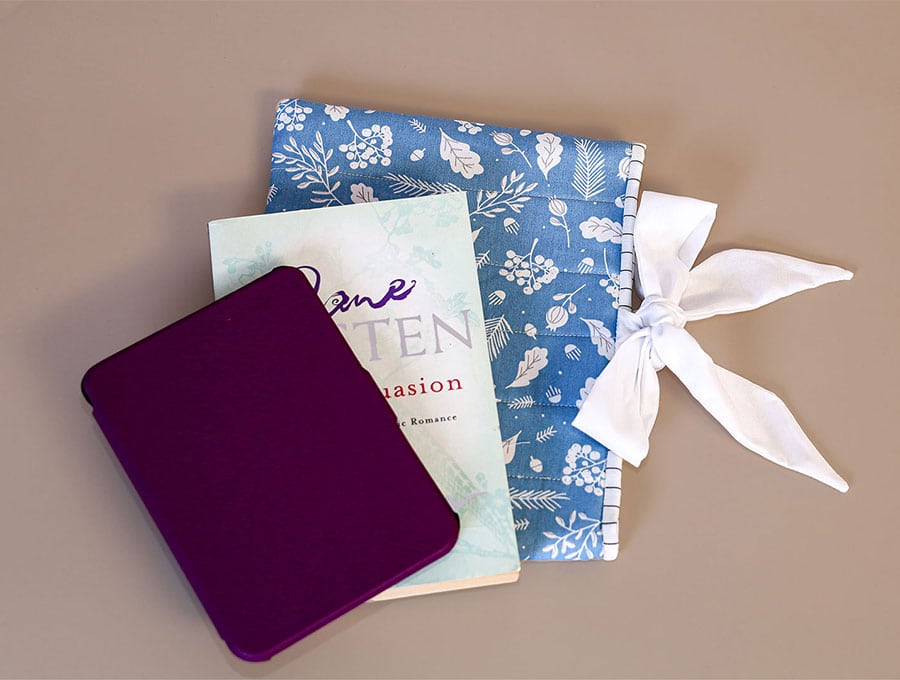
And you are all done!
You book cover is ready to have the newest bestseller slipped inside as a gift, or to preserve a favorite well used book, like a birdwatcher’s guide, a sewing manual, a treasured cook book or a book of inspirational quotes.
When the wrapping becomes the present you’re doing well on the sustainability scale, because you’re saving stuff going into landfill and giving those gorgeous bits of fabric in your stash a new lease on life. Depending on the fabric chosen this book sleeve can suit anyone from children to adults, male or female. The best part is that it is a 15 minute make – how easy, yet how impressive with our free printable pattern that is adjustable for books in a range of sizes.
ALTERNATIVE FASTENER OPTIONS:
Q I plan on giving a man a book by a business guru. What can I use to fasten the book cover instead of a ribbon?
A: I suggest using one of the following one of the following 4 methods:
Create a loop using a thin piece of leather, and insert on the one side in STEP 10 and STEP 11. When the book cover is finished, you can hand sew a button into the correct place to keep the cover closed. If you are making a larger cover, you may need two loops and buttons to keep the cover closed. Place them equidistantly from the middle.
METHOD 2 – Velcro
Use a 1 inch (2.5 cm) piece of braid to create a tab that is 4 inches (10 cm) long. Attach the braid as you would the ribbon tie in STEP 10 and 11. To complete the tab, turn back the raw edge and sew a piece of Velcro to the wrong side of the braid and stitch around the edges, then make an x shape in the middle. Check where the tab flips over the front cover and attach the other side of the Velcro in position, stitching through the fabric and lining around the edge of the Velcro.
METHOD 3 – Shoelaces
Use a flat shoelace in an matching color to create a tie in place of the ribbon ties. Simply take the shoelace, cut it in half and insert as in STEPS 10 and 11.
METHOD 4 – Snap fastening
If you have a stud setting machine then create a tab using a piece of braid or create one from two layers of fabric as you did for the ribbon tie, except this time you will have two pieces of fabric 3 inches (7.5 cm) wide and 4 inches (10 cm) long cut to a V at one end. Stitch together with right sides facing each other using a ¼ inch (6 mm) seam, turn the right way out, pressing out the corners and point. Attach to one side as in STEPS 10 and 11. Then once the book sleeve is complete line up the two sides of a popper stud, one near the point on the tab, and the other on the outer cover, then attach using the machine.
Do you like this? Pin for later:
Wanna be friends? Click HERE and follow me on Pinterest
RELATED: