
DIY Drawstring Jewelry Pouch with 8 pockets // Easy Jewelry Pouch Pattern
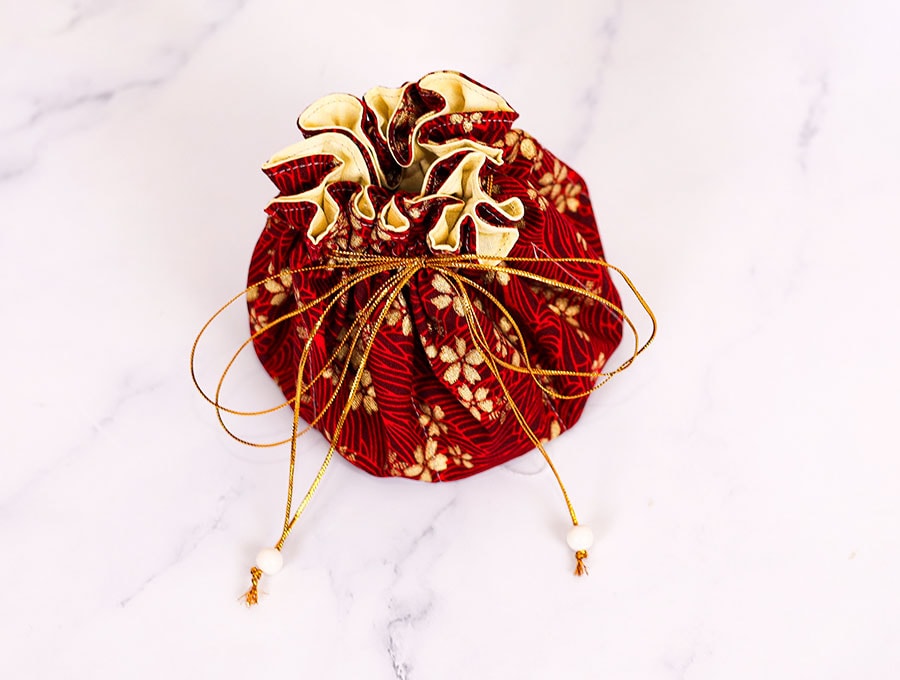
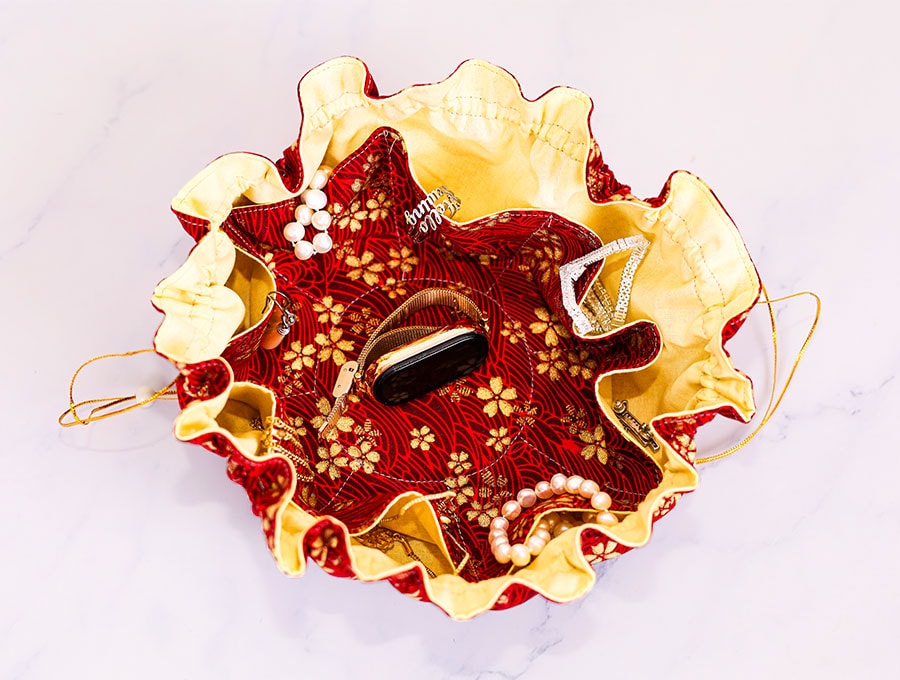
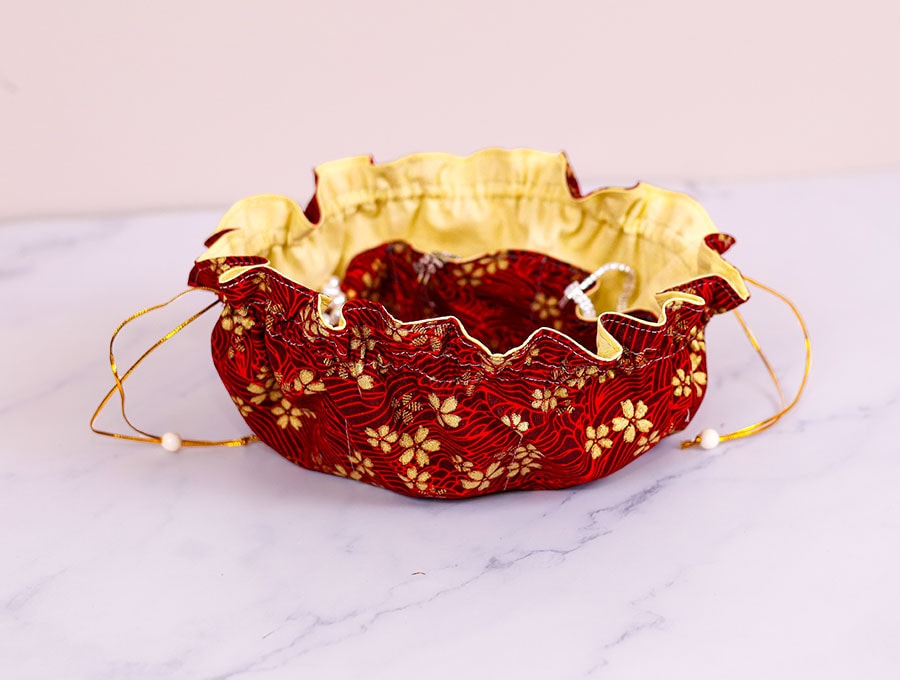
Looking for a stylish way to store you jewelry? Are you tired of tangled necklaces and missing earrings when you go on holiday? This adorable jewelry drawstring pouch is the answer to every accessory lover’s storage struggles. With eight individual interior pockets, every ring, bracelet, pair of earrings, and pendant has its own dedicated home — keeping your collection organized, protected, and travel-ready. It opens up completely flat
and when you pull and tie the drawstrings – it turns into a compact little pouch. The best part? This project is beginner-friendly, comes with a free pattern, and is the perfect excuse to raid your fabric stash. Those pretty remnants you’ve been saving for “just the right project” have finally found their calling. A fat quarter or two is all you need to create a gift-worthy pouch that looks like it came straight from a boutique.
Whether you’re making one for yourself, a daughter, or as a handmade gift for a jewelry-loving friend, this pouch sews up in less than an hour. Follow along with our step-by-step instructions and free downloadable pattern, and you’ll have a beautiful, functional accessory organizer ready before you know it.
Below you will find my step by step written tutorial with VIDEO instructions for all the visual learners.
We occasionally link to goods offered by vendors to help the reader find relevant products. Some of the links may be affiliate meaning we earn a small commission if an item is purchased.
Table of Contents
- 1 How to make the jewelry organizer bag
- 2 Supplies and tools
- 3 How to Sew a jewelry pouch with 8 pockets
- 3.1 Jewellery organizer pouch VIDEO TUTORIAL
- 3.2 INSTRUCTIONS:
- 3.3 STEP 1:
- 3.4 STEP 2:
- 3.5 STEP 3:
- 3.6 STEP 4:
- 3.7 STEP 5:
- 3.8 STEP 6:
- 3.9 STEP 7:
- 3.10 STEP 8:
- 3.11 STEP 9:
- 3.12 STEP 10:
- 3.13 STEP 11:
- 3.14 STEP 12:
- 3.15 STEP 13:
- 3.16 STEP 14:
- 3.17 STEP 15:
- 3.18 STEP 16:
- 3.19 STEP 17:
- 3.20 STEP 18:
- 3.21 STEP 19:
- 3.22 STEP 20:
- 3.23 STEP 21:
- 3.24 STEP 22:
- 3.25 STEP 23:
- 3.26 STEP 24:
- 3.27 STEP 25:
How to make the jewelry organizer bag
Supplies and tools
- fabric – 2 pieces of quilting or woven cotton (one main, one lining)
- small circle of batting
- satin rope for the drawstring – 2m (2 yards)
- matching thread
- scissors (or rotary cutter and a cutting mat)
- ruler or measuring tape
- iron and ironing board
- sewing clips or pins
DOWNLOAD: Jewelry pouch pattern [Free pdf file]
Follow us for free patterns & tutorials! [easy-profiles]
How to Sew a jewelry pouch with 8 pockets
Watch the diy jewelry pouch video first and then follow the written step by step instructions below.
Please enjoy and don’t forget to Like and SUBSCRIBE over on YouTube to be kept up to date with new videos as they come out.
Jewellery organizer pouch VIDEO TUTORIAL
INSTRUCTIONS:
STEP 1:
Download the Drawstring Jewelry Pouch sewing pattern and print out the three pattern pieces of 2 full circles and 1 half-circle, which will be cut on the fold.
STEP 2:
Cut out the pattern pieces and find some suitable fabric from your stash that will accommodate the pattern pieces. A soft velvet, or printed cotton will work well for the exterior while a satin or other smooth lining fabric will do for the inside.
STEP 3:
Place a piece of outer fabric and a lining fabric, right side to right side on your worktop and place the pattern piece marked 2 over the fabric. Pin in place then cut out the 9 ½ ” (24 cm) circle.
STEP 4:
Place the pattern piece marked 1 on a fold of the outer fabric then cut out the 13” (33 cm) circle. Repeat with the lining fabric on a fold.
STEP 5:
Place the right sides of the outer and lining fabric facing inwards for pattern piece 1 and pin or clip together.
STEP 6:
Place the right sides of the outer and lining fabric facing inwards for pattern piece 2 and pin or clip together.
STEP 7:
Place the pattern piece marked 3 over a piece of batting and cut out the circle.
STEP 8:
Mark a gap of around 5cm (2 inches) on the fabric for each circle before stitch around the edge of the circle using a ¼” (6 mm) seam allowance.
STEP 9:
Fold the raw edges of the gap back in line with the seam and finger press, then trim down the rest of the seam allowance for both circles with pinking shears – the little v notches made by the shears help to keep the fabric lying flat once turned. If you do not have pinking shears use scissors to trim down the seam allowance, making sure not to cut too close to the stitch line.
STEP 10:
Turn each circle the right way out by pulling the fabric gently through the gap and using a turning tool to push the seams out neatly. Give each circle a press once you have turned in the raw edges of the gap in line with the seam.
STEP 11:
Topstitch around each circle 1/8” (3 mm) from the edge, including across the turned in section of the gap so you have two perfect circles.
STEP 12:
Take pattern piece 3 and place over the batting, pushing a pin through the center dot on the pattern and through to the batting. Set aside for a minute.
STEP 13:
Take the smaller circle cut from pattern piece 2 and fold in half horizontally, finger press, unfold, then fold in half vertically and finger press. Mark the spot where the folds intersect with a fabric marking pen on the inner fabric. Repeat with the large circle cut from pattern piece 1.
STEP 14:
Place the circle cut from pattern piece 2, lining side up, on your worktop and over it place the batting. Line up the pin in the batting with the mark you made on the lining. Pin the batting in place from the side with the printed pattern, and also mark the center with a fabric marking pen on the outer printed fabric.
STEP 15:
With the outer side up of pattern circle 1 lining side up, place pattern circle 2 over it outer side up, lining up the center marks, then place pattern piece 3 over the center with a pin to help line up the centers, then draw around the edge of the pattern piece to give you a topstitch line for over the batting piece.
STEP 16:
Once you have the fabric and batting circles in place take the paper pattern for circle 2 and fold in half, then line up with pattern circle 2 and draw the spokes of the wheel to create the pockets going from the outer edge of the batting circle you drew in Step 15 to the edge of the outer fabric for pattern circle 2.
STEP 17:
Continue folding and marking until you have 8 lines from the edge of the batting circle to the outer edge of pattern circle 2.
STEP 18:
Top stitch around the inner small circle first, then stitch each of the spokes of the wheel, backtacking at the start and finish. Do not stitch across the center of the circle. Press with an iron when finished
STEP 19:
Mark the drawstring channel on the lining side of the large circle, measuring 1/2” (1.3 cm) from the edge of the smaller circle to join the dots and make a circle, then ¾” (2 cm) from the edge of the smaller circle of fabric to make a slightly bigger circle that you mark with a fabric marking pen
STEP 20:
Stitch around the inner and the outer circles you marked in the previous step.
STEP 21:
Use your scissors to cut 2 small vertical slits in the outer fabric, opposite each other through which to insert the drawstring.
STEP 22:
Use a hand sewing needle and a buttonhole stitch to work around the edges of the slits so they don’t fray out with use.
STEP 23:
Tie the ends of the double drawstring cord to a safety pin and insert, pushing the safety pin around the circle until it comes out at the point where you inserted it.
STEP 24:
Add a couple of beads to the ends of the drawstring cord, knotting them in place securely.
STEP 25:
Gather up the drawstring cord evenly around the pouch and tie with a bow.
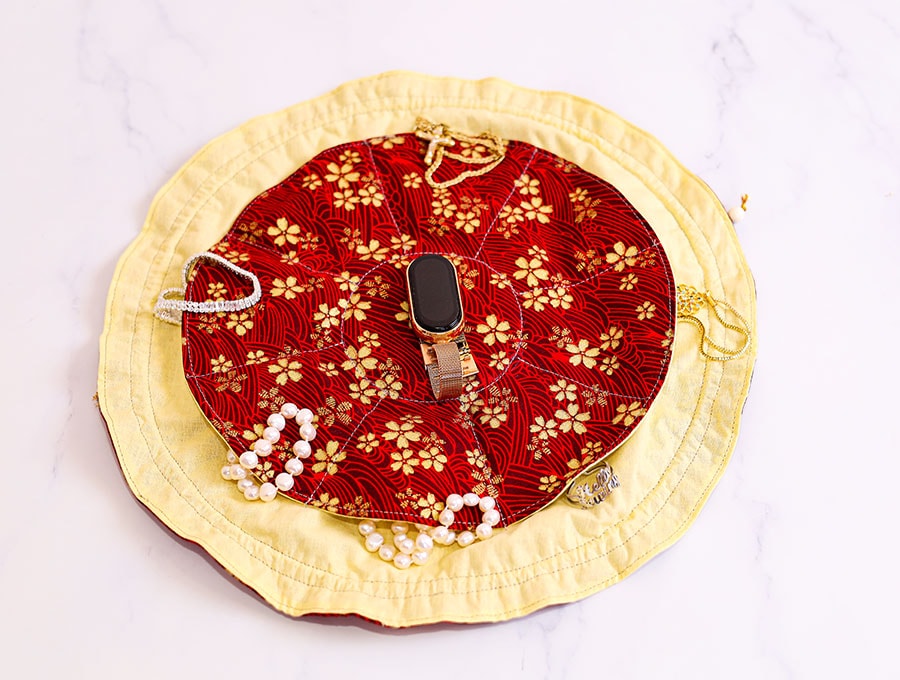
Once you have tested the pouch cord you can open it out and start loading the bag with jewelry. This also makes a good item to store hair items like clips, elastic ties, scrunchies etc, so they are in one place.
My pet hate is chains getting tangled when you take jewelry on holiday, or when going from the office to an evening event. This is what inspired the idea of the jewelry pouch with its 8 compartments that keeps items separated but together in one pouch, ready at a moment’s notice. It’s also handy at home for hair accessories. With our free printable jewelry pouch pattern all you need is some beautiful fabric from your stash and you’re ready to create.
Give us a like and subscribe if you enjoyed making this quick and easy jewelry pouch with its 8 compartments.
Do you like this? Pin for later:
Wanna be friends? Click HERE and follow me on Pinterest
RELATED: