
Breakaway Lanyard with Pockets // Lanyard with Twin Pockets and Breakaway Safety Claps
Whether you’re an artist sketching in a park, a sewist pinning fabric at your cutting table, or a crochet enthusiastic working on a project, there’s one frustration we all share: the moment your pencil rolls off into the grass, your scissors disappear under a pile of fabric, or your crochet hook vanishes into the couch cushions — right when you need them most.
This lanyard solves that problem in style. This is a beginner-to-intermediate sewing project requiring only basic straight stitching and a handful of materials. Once made, you’ll wonder how you ever worked without it.
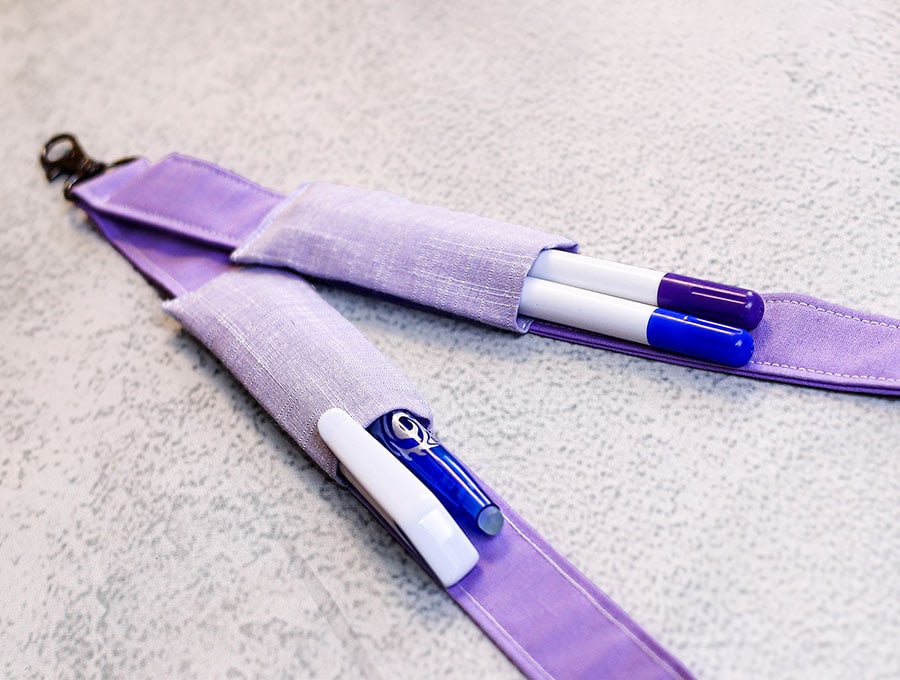
This simple but clever accessory keeps your most-reached-for tools right at your fingertips, tucked into two slim pockets sized to hold a pen, a fabric marking pen, small scissors, or a crochet hook. No more hunting. No more interruptions. Just you and your craft.

Safety first — and we mean it. A standard fixed-loop lanyard worn around the neck can pose a serious risk if it snags on machinery, a door handle, or gets caught while you’re moving. The breakaway clasp releases instantly under sudden tension, meaning the lanyard parts harmlessly rather than putting pressure on your neck. This makes it safe for use in workshops, warehouses, classrooms, and studios alike. If you’re a warehouse worker or retail assistant who needs a pen and box cutter always within arm’s reach, the breakaway feature is what makes this wearable on the job — practical and compliant with workplace safety expectations.
Beyond safety, think about what you’re gaining day to day. Your tools won’t blow away on a breezy outdoor sketching trip. They won’t get buried under a bolt of fabric or drift to the far end of a warehouse bench. They hang right there, visible, accessible, and ready to use.
Below you will find my step by step written tutorial with VIDEO instructions for all the visual learners.
We occasionally link to goods offered by vendors to help the reader find relevant products. Some of the links may be affiliate meaning we earn a small commission if an item is purchased.
Table of Contents
- 1 How to make the breakaway lanyard with pockets
- 2 Supplies and tools
- 3 How to Sew a Lanyard with Pockets and Safety Breakaway
- 3.1 Breakaway Lanyard with Pockets VIDEO TUTORIAL
- 3.2 INSTRUCTIONS:
- 3.3 STEP 1:
- 3.4 STEP 2:
- 3.5 STEP 3:
- 3.6 STEP 4:
- 3.7 STEP 5:
- 3.8 STEP 6:
- 3.9 STEP 7:
- 3.10 STEP 8:
- 3.11 STEP 9:
- 3.12 STEP 10:
- 3.13 STEP 11:
- 3.14 STEP 12:
- 3.15 STEP 13:
- 3.16 STEP 14:
- 3.17 STEP 15:
- 3.18 STEP 16:
- 3.19 STEP 17:
- 3.20 STEP 18:
- 3.21 STEP 19:
- 3.22 STEP 20:
- 3.23 STEP 21:
How to make the breakaway lanyard with pockets
Supplies and tools
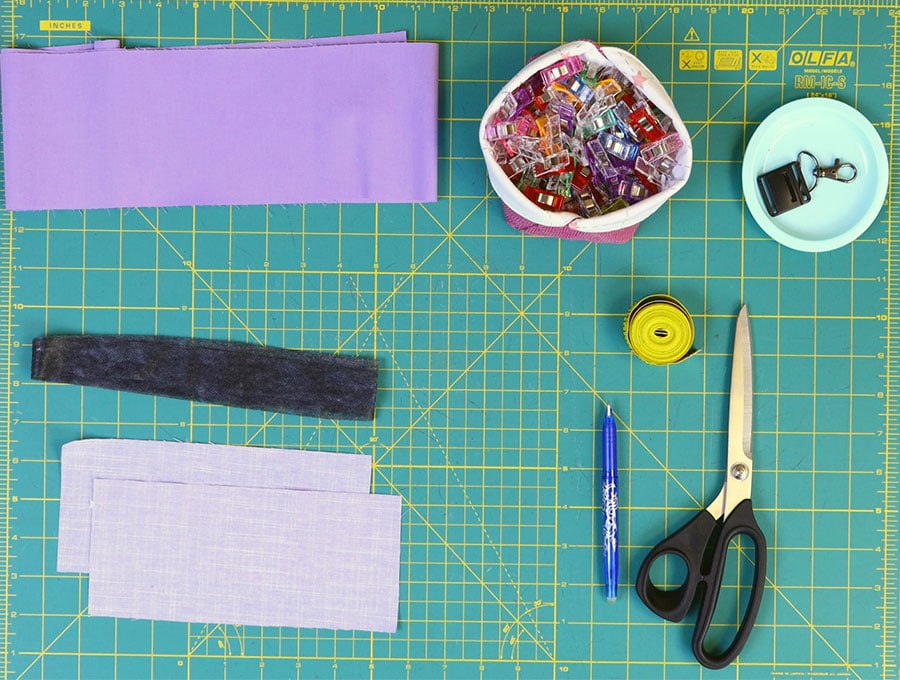
- fabric – 2 pieces of 100% tightly woven cotton (one for the lanyard, one for the pockets)
- fusible interfacing
- matching thread
- scissors (or rotary cutter and a cutting mat)
- ruler or measuring tape
- iron and ironing board
- sewing clips or pins
- breakaway clasp
- lobster (swivel) clasp
Follow us for free patterns & tutorials! [easy-profiles]
How to Sew a Lanyard with Pockets and Safety Breakaway
Watch the diy Safety lanyard with pockets video first and then follow the written step by step instructions below.
Please enjoy and don’t forget to Like and SUBSCRIBE over on YouTube to be kept up to date with new videos as they come out.
Breakaway Lanyard with Pockets VIDEO TUTORIAL
INSTRUCTIONS:
STEP 1:
Cut material to the following dimensions:
- Cotton fabric in the color and pattern of choice 4 x 40 inches (10 x 100 cm)
- Fusible interfacing 1 x 40 inches (2.5 x 100 cm)
- 2 pocket pieces 4 x 1 ½ inches (10 x 34 cm)
You will also need:
- 1 swivel clasp 1 inch (2.5 cm) wide
- 1 breakaway clasp 1 inch (2.5 cm) wide
STEP 2:
With the wrong side up fold over each of the short sides ¼ of an inch (6 mm) and press. Repeat this step with the second pocket.
STEP 3:
Fold each pocket in half along the length, right side to right side and clip at each end to keep the folds in place and at the top to keep the raw edges together.
STEP 4:
Stitch along the raw edges using a seam allowance of ¼ of an inch (6 mm) for both pockets, backtacking at the start and finish over the fold.
STEP 5:
Turn each pocket so the seam is in the middle then open out the seam and press.
STEP 6:
Turn each pocket the right way out – you’ll see in the video how I use a ruler once I have started the turning of the fabric to get it done quickly.
STEP 7:
Press each pocket, ensuring the seam is at the center back. Set aside.
STEP 8:
Place lanyard fabric on your worktop wrong side up. Fold in half along the length and press.
STEP 9:
Open out the fabric and fold each side in to the center fold and press, then fold again and press the four layers of fabric.
STEP 10:
Open up the fabric and within the second fold place the fusible interfacing sticky side down, flip over the first fold to cover the interfacing and press with an iron to fuse the interfacing to the lanyard length.
STEP 11:
Give a final press to the 4 layers of fabric once refolded into place and clip the open edges along the length.
STEP 12:
Top stitch along each long side as close to the edge as possible, backtacking at the start and finish.
STEP 13:
Fold in half to find the middle of the strap and press with an iron to mark the middle, then thread the swivel clasp onto the lanyard, positioning in the middle at the pressed fold and pin just below it
STEP 14:
Using a zipper foot for your machine stitch as close as possible to the bar of the swivel clasp, backtacking at the start and finish.
STEP 15:
Remove the zipper foot and set your machine to a zigzag stitch and zigzag across the short ends of the lanyard. If you have a serger (overlocker), you can serge (overlock) the ends so they don’t fray.
STEP 16:
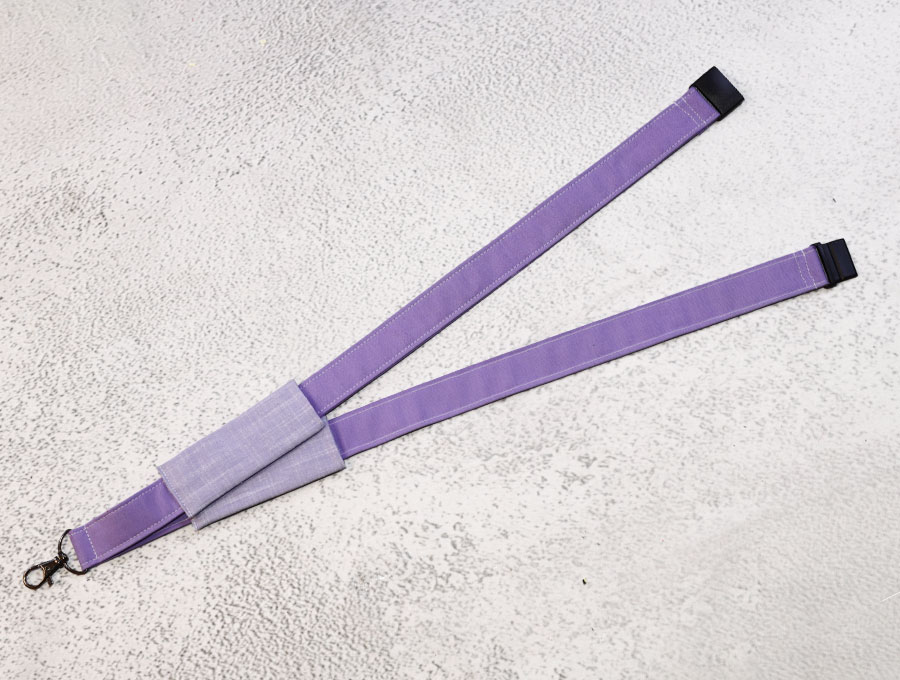
Twist the lanyard as shown in the video so it sits flat against the chest, the add the breakaway clasp sides to each end and pin in position, ensuring the folds are to the inside of the lanyard where is sits against the neck.
STEP 17:
Do two lines of stitching across the width of the lanyard to hold each side of the clasp in position, backtacking at the start and finish of each line of stitching.
STEP 18:
Measure 12 ½ inches (32 cm) from the fold where the breakaway clasp is attached on each side of the lanyard and make a mark. Remember the lanyard is slightly twisted to lie flat, so you will mark on the top of the fabric for one side and on the inside of the fabric for the other side.
STEP 19:
Place the top of the pockets in line with the marks and pin or clip in position.
STEP 20:
Stitch across the bottom of each pocket to close the ends and simultaneously attach them to the lanyard, backtacking at the start and finish.
STEP 21:
This is the fiddly bit – you need to stitch only the layer of pocket fabric closest to the lanyard fabric, and move the top fabric aside, so that when you are finished you do not see the stitching. Bend the top fabric back slightly so you can get in there and stitch, backtacking at the start and finish.
The lanyard is ready to go. Put it on your neck and give a sharp tug to test the breakaway clasp. Then trim off any extra threads and lastly load up with the pen, pencils, fabric marking pen, box cutter, or whatever small items you need to keep handy on your lanyard. This lanyard is just so handy!
Keep misplacing your pen, pencil, box cutter or small sewing scissors but need to move around and have these items ready to use immediately? Then read on for the instructions on how to make the safe breakaway lanyard that is going to make life a while lot easier for anyone, from students to artists, sewing enthusiasts, retail workers unpacking items and checking off stock as well as warehouse staff. It’s a project that comes together in minutes and will use those long strips left in your stash!
Like and subscribe for more of our videos and step-by-step instructions delivered straight to your inbox and join our 101 000 like-minded subscribers who love producing practical items to use, or gift, that only take a few minutes to make.
Do you like this? Pin for later:
Wanna be friends? Click HERE and follow me on Pinterest
RELATED: