
Breakaway Lanyard with Loops for Pens and Glasses // Sew Breakaway Pen Lanyard
Whether you’re a teacher, nurse, on the shop floor counting stock, or even sewing from home, keeping your pens and glasses close at hand is now a breeze. In this step-by-step tutorial, you’ll learn how to make your own breakaway pen lanyard to keep your essentials right where you need them. Featuring dedicated loops to hold pens and glasses securely, this lanyard is designed for everyday convenience. The breakaway clasp ensures safety by releasing under pressure, so it never becomes a hazard.
Are you ready to make something that you’ll actually use? Today we’re diving into one of my all-time favourite makes — a breakaway lanyard complete with loops for your pen and eyeglasses! No more patting your pockets in a panic or hunting through your bag for your pen and specs. This project is beginner-friendly, quick to put together, and totally customisable to the interests of the user. So grab your supplies and let’s get sewing!
Below you will find my step by step written tutorial with VIDEO instructions for all the visual learners.
We occasionally link to goods offered by vendors to help the reader find relevant products. Some of the links may be affiliate meaning we earn a small commission if an item is purchased.
Table of Contents
- 1 How to make the Breakaway Pen Lanyard with Loops
- 2 Supplies and tools
- 3 How to Sew a Breakaway Pen Lanyard with Loops
- 3.1 BreakAway pen lanyard VIDEO TUTORIAL
- 3.2 INSTRUCTIONS:
- 3.3 STEP 1:
- 3.4 STEP 2:
- 3.5 STEP 3:
- 3.6 STEP 4:
- 3.7 STEP 5:
- 3.8 STEP 6:
- 3.9 STEP 7:
- 3.10 STEP 8:
- 3.11 STEP 9:
- 3.12 STEP 10:
- 3.13 STEP 11:
- 3.14 STEP 12:
- 3.15 STEP 13:
- 3.16 STEP 14:
- 3.17 STEP 15:
- 3.18 STEP 16:
- 3.19 STEP 17:
- 3.20 STEP 18:
- 3.21 STEP 19:
- 3.22 STEP 20:
- 3.23 STEP 21:
How to make the Breakaway Pen Lanyard with Loops
Supplies and tools
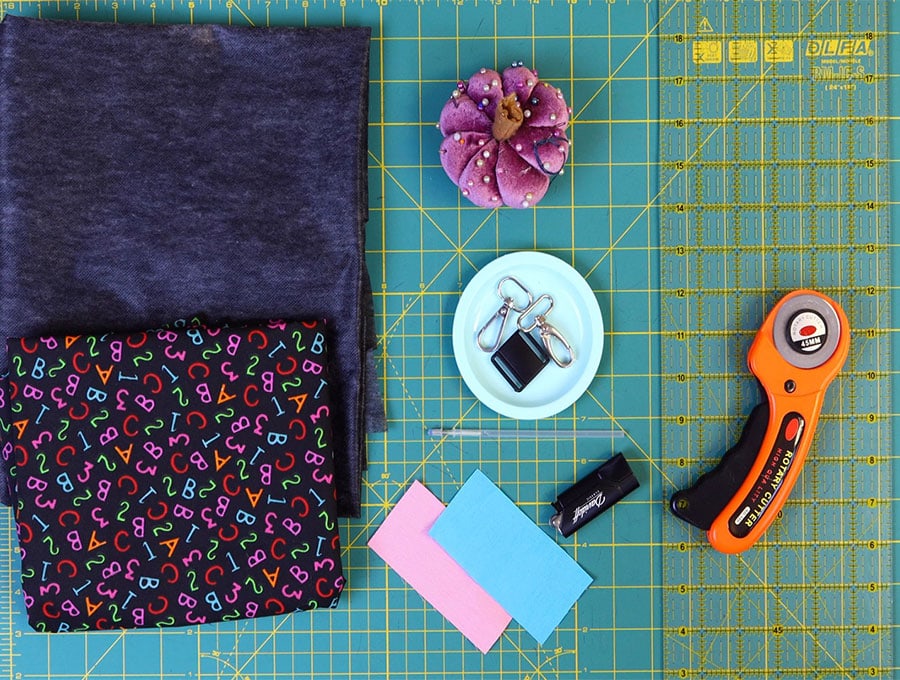
- fabric – woven cotton
- fusible interfacing
- matching thread
- scissors (or rotary cutter and a cutting mat)
- ruler or measuring tape
- iron and ironing board
- sewing clips or pins
- breakaway clasp
- lobster (swivel) clasp
Follow us for free patterns & tutorials! [easy-profiles]
How to Sew a Breakaway Pen Lanyard with Loops
Watch the diy breakaway lanyard with loops video first and then follow the written step by step instructions below.
Please enjoy and don’t forget to Like and SUBSCRIBE over on YouTube to be kept up to date with new videos as they come out.
BreakAway pen lanyard VIDEO TUTORIAL
INSTRUCTIONS:
STEP 1:
Choose a swivel clasp size. I went for a ¾ inch, (2 cm) one.
Choose a breakaway clasp size. I went for the 1 inch (2.5 cm) breakaway clasp.
STEP 2:
Cut your fabric for the main part of the lanyard 40 x 4 inches (100 x 10 cm)
Cut the fusible interfacing to 40 x 1 inch (100 x 2.5 cm)
STEP 3:
Fabric for the 2 loops needs to be cut to 2 x 3 1/8 of an inch (5 x 8.5 cm) for each one.
STEP 4:
To make the loops fold in half along the length, right sides out and press.
STEP 5:
Open the fabric, lay it right side down on your worktop, and fold each side in to meet the pressed fold in the middle and press. Then fold again so the folded sides meet and press again. Repeat with the other fabric for the loop.
STEP 6:
Stitch along each side of both loops, as close to the edge as possible.
STEP 7:
Fold each loop in half, line up the ends, and pin, then stitch across the short ends 1/8 of an inch (3 mm) from the edge, backtacking across the ends.
STEP 8:
Turn the loops so the seam is on the inside.
STEP 9:
Take the fabric for the lanyard and with the wrong side up, fold in half along the length and press.
STEP 10:
Open out the fabric and lay wrong side up, then fold in each side to the center seam and press.
STEP 11:
Fold again along the length so the folded edges meet and press.
STEP 12:
Unfold the length of fabric and with wrong side up place the fusible interfacing, sticky side down on the first edge and press so it attaches. Refold into the pressed folds and give one final press.
STEP 13:
Stitch along the single folded edge 1/8 of an inch ( 3 mm) in. The double folded edge needs to stay open to later insert the loops.
STEP 14:
Slide the lobster clasp to the middle – making sure the lanyard ends meet up.
STEP 15:
Measure 6 inches (15 cm) down from the bottom edge of the swivel clip and make a mark on each of the ‘legs’. Remove the lobster clasp.
STEP 16:
Slide one of the loops you made onto the fabric and position it over the mark.
- Option 1: Slide the raw seam allowance inside the open edge and pin.
- Option 2: Open out the loop seam and position the stitch line in the middle of the lanyard width and pin.
Slide the second loop onto the other end of the lanyard and move up to the mark and position using option 1 or 2.
Make sure the loops lie flush with the edge of the open side and extend a little over the edge on the stitched side.
STEP 17:
Stitch along the open double folded edge 1/8 of an inch ( 3 mm) in along the length of the lanyard, backtacking over the loops to make sure they are secure.
STEP 18:
Slide the lobster clasp onto the lanyard, line up the ends and the loops, then stitch just below the bar of the lobster clasp, backtacking over the stitch line.
STEP 19:
Zigzag over the raw ends of the lanyard.
STEP 20:
Slide one side of the breakaway clip over a lanyard end and fold back the fabric, then do a double stitch line to secure the breakaway clip.
STEP 21:
Slide the other end of the breakaway clip over the other lanyard end and fold back the fabric, then do a double stitch line to secure, first making sure the clip pieces line up and click into place, and both the raw edges are on the back. Backtack to make sure the stitching is secure.
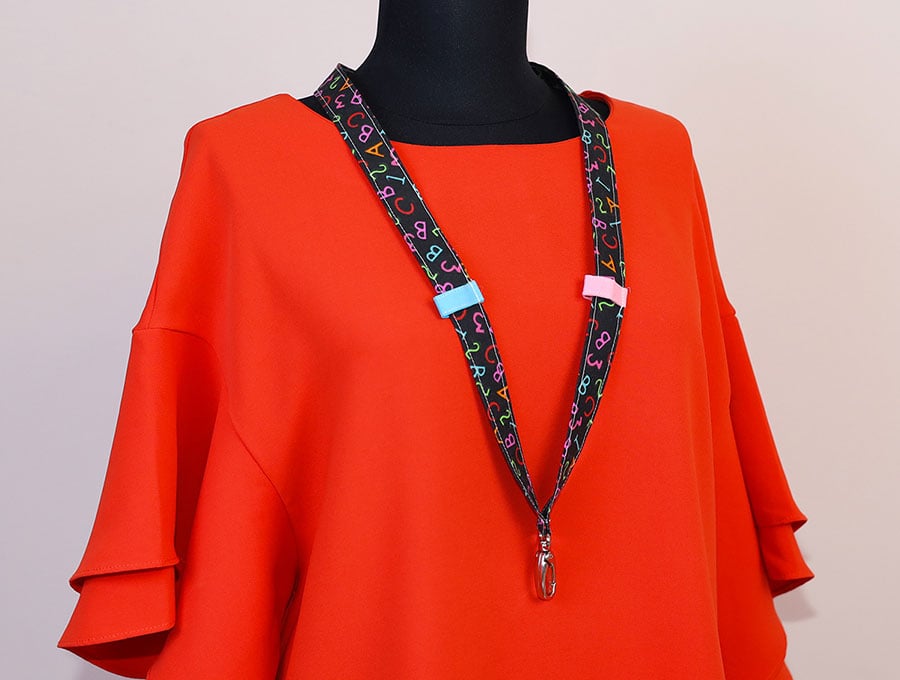
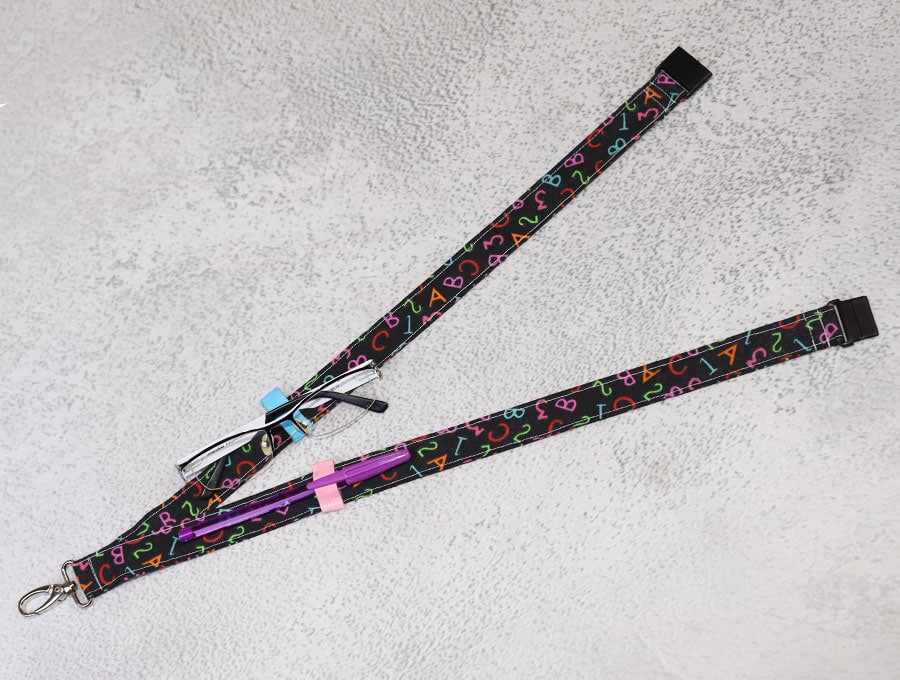
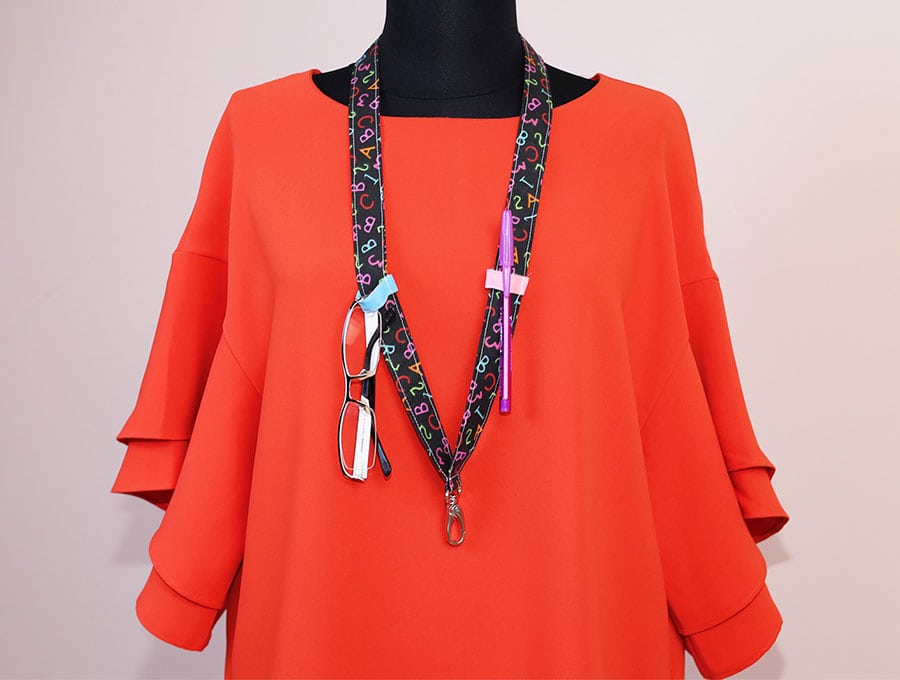
The lanyard is now ready to use, with its breakaway clip for security in case it should get caught on something. The loops accommodate a pen and glasses – which is especially good if you are outdoors recording times for sports events and need somewhere to put your sunglasses momentarily. You can also clip your keys to the loop instead of glasses if you need to keep your keys close for locking and unlocking cabinets.
If you enjoyed this tutorial – you know what to do – hit the like and subscribe buttons and you’ll be able to get the latest tutorials first that help you make practical items from those left over bits of fabric in your stash.
Do you like this? Pin for later:
Wanna be friends? Click HERE and follow me on Pinterest
RELATED: