
DIY Crossbody Bag – Small Cell Phone Pouch
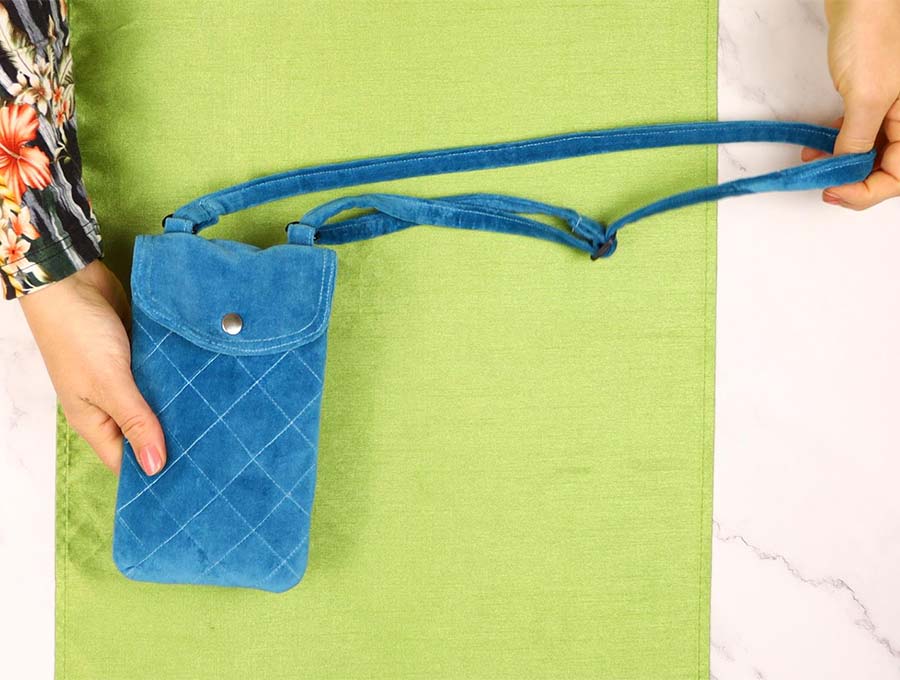
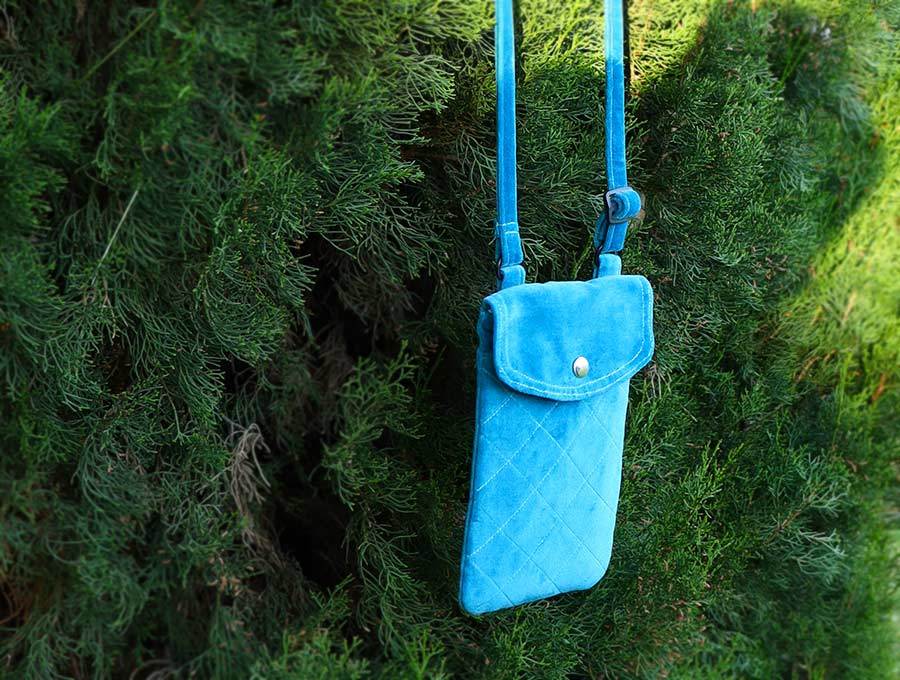
The crossbody bag is ideal when going sightseeing, cycling, shopping, to concerts and about town. It’s perfect for when you need a few valuables safe on your body, rather than a massive granny-style bag. This easy quilted and fully-lined crossbody bag fits a cell phone, credit card, or cash and your lipstick. What more do you need to dance the night away? This DIY crossbody bag can be made from fabrics in your stash like cotton or linen or a suede finish fabric for evening. You can even embellish it with beads and tassels for an authentic festival style bag.
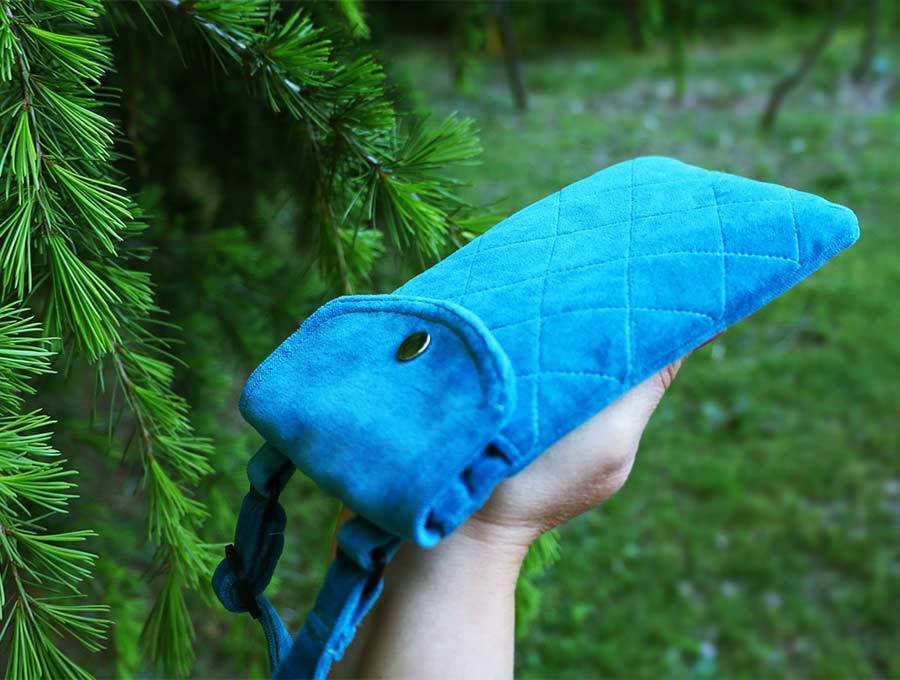
Have you seen the photos of carefree women cycling along with a little crossbody bag to keep the vital necessities safe? With our free printable crossbody pattern and step-by-step instructions, this could be you. The crossbody bag is quilted and perfect for keeping your cell phone safe, plus other essentials, like a credit card and lipstick. It is not only for days out cycling. Use it when you go shopping or at festivals and concerts when you want to be unencumbered and enjoy all the fun without a large bag weighing you down. You’re bound to have suitable fabric in your stash, so let’s get started.
Below you will find my step by step written tutorial with VIDEO instructions for all the visual learners.
We occasionally link to goods offered by vendors to help the reader find relevant products. Some of the links may be affiliate meaning we earn a small commission if an item is purchased.
Table of Contents
- 1 How to make a Crossbody Bag
- 2 Supplies and tools
- 3 How to Sew a Cell phone pouch
- 3.1 Small Crossbody Bag VIDEO TUTORIAL
- 3.2 INSTRUCTIONS:
- 3.3 STEP 1: Prepare the crossbody bag pattern
- 3.4 Step 2: Cut out the fabrics
- 3.5 Step 3: Fuse fleece
- 3.6 Step 4 (optional): If the fabric frays..
- 3.7 Step 5: Transfer design
- 3.8 Step 6: Quilt
- 3.9 Step 7: Attach lining to pocket
- 3.10 Step 8: Assemble
- 3.11 Step 9: Sew
- 3.12 Step 10:
- 3.13 Step 11:
- 3.14 Step 12:
- 3.15 Step 13:
- 3.16 Step 14:
- 3.17 Step 15:
- 3.18 Step 16:
- 3.19 Step 17:
- 3.20 Step 18:
- 3.21 Step 19:
- 3.22 Step 20:
- 3.23 Step 21:
- 3.24 Step 22:
- 3.25 Step 23:
- 3.26 Step 24:
- 3.27 Step 25: Prepare the strap
- 3.28 Step 26:
- 3.29 Step 27:
- 3.30 Step 28:
- 3.31 Small Crossbody bag FAQ:
How to make a Crossbody Bag
Supplies and tools
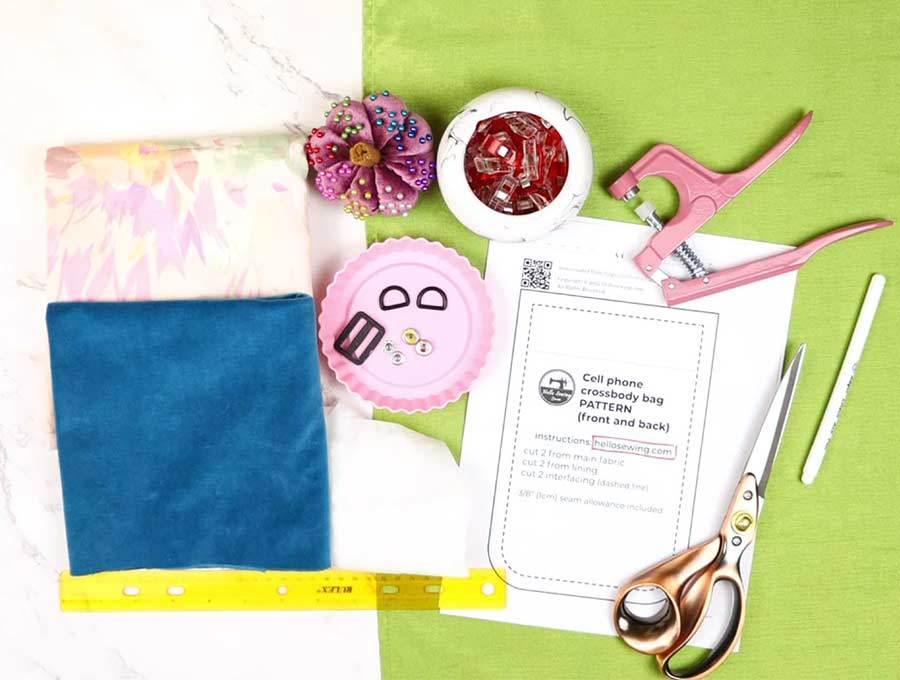
- main fabric – home décor or cotton fabric
- lining fabric – cotton
- Strap slider adjuster
- 2 D-rings – 3/4″ (2cm) wide
- 3oz fusible fleece or fusible interfacing
- scissors (or rotary cutter and a cutting mat)
- matching thread
- ruler or measuring tape
- iron and ironing board
- sewing clips or pins
- metal snaps (you will need a sewing awl and snap pliers
Follow us for free patterns & tutorials! [easy-profiles]
DOWNLOAD: crossbody bag pattern (Free PDF file)
How to Sew a Cell phone pouch
Watch the diy crossbody bag video first and then follow the written step by step instructions below.
Please enjoy and don’t forget to Like and SUBSCRIBE over on YouTube to be kept up to date with new videos as they come out.
Small Crossbody Bag VIDEO TUTORIAL
INSTRUCTIONS:
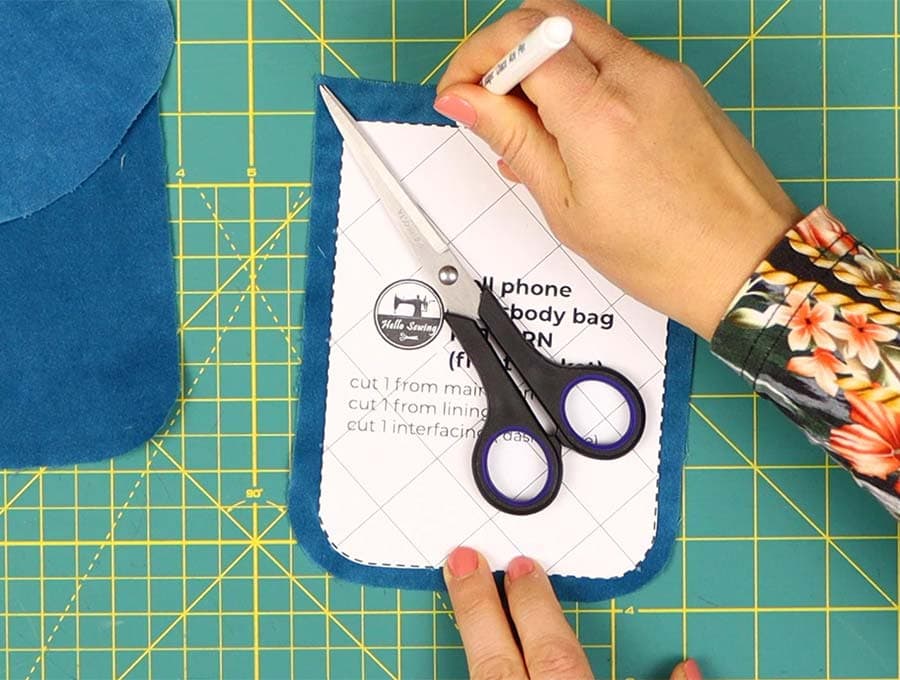
STEP 1: Prepare the crossbody bag pattern
Cut out the pattern pieces provided in the free downloadable PDF crossbody bag pattern. Select sufficient fabric to accommodate all the pattern pieces. You’ll also need a small section of lining fabric and fusible fleece to create the quilted effect.
The seam allowance is 3/8″ (1cm) unless indicated otherwise and is already included in the pattern
If you don’t have enough material to cut one piece for the strap, you can cut two pieces plus an extra inch to make up the pattern length.
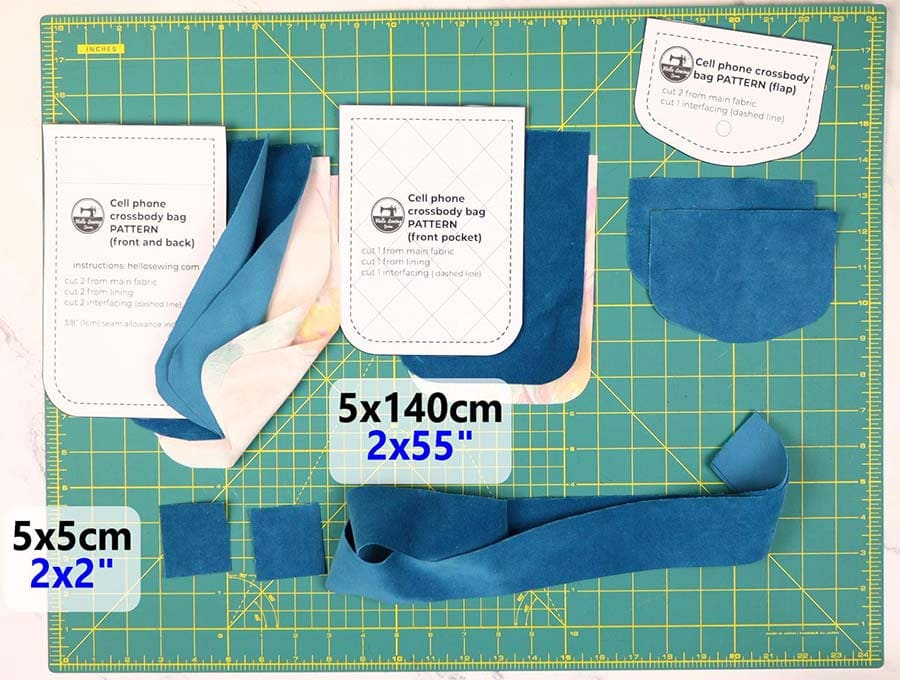
Step 2: Cut out the fabrics
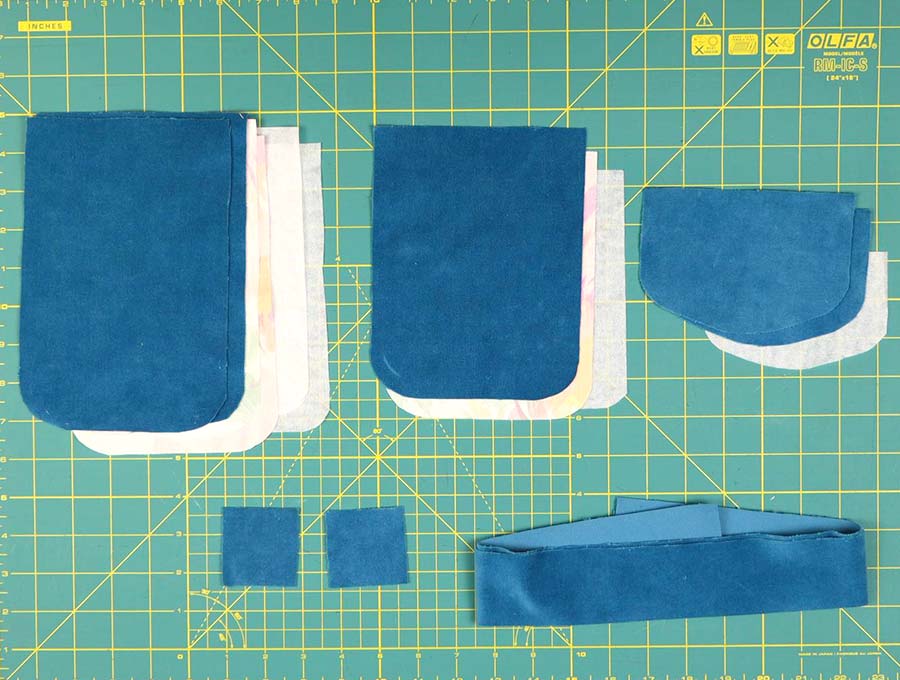
Cut out:
- 2 fabric pieces for the main bag, 2 lining pieces, 2 fusible fleece pieces
- 1 fabric piece for the pocket front, 1 lining piece and 1 fusible fleece piece.
- 2 fabric pieces for the bag flap, 1 fusible fleece
- 1 fabric strap
- 2 fabric pieces to create loops
As you’ll see on the pattern, the fusible fleece will be slightly smaller, so you don’t have too much bulk around the seams.
Step 3: Fuse fleece
Fuse the fleece to the pattern pieces, placing it onto the wrong side of the fabric and iron to fuse, according to the manufacturer’s instructions.
Step 4 (optional): If the fabric frays..
Stitch around the edge of each of the 4 fabric pieces that comprise the bag, around 1/8 inch (3mm) from the edge, to prevent fraying as you work.
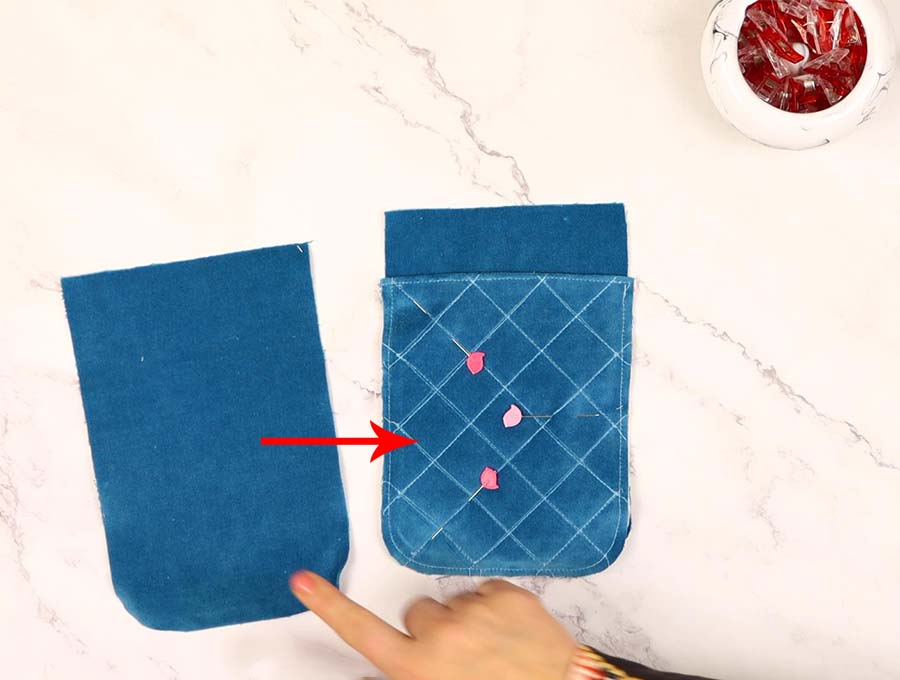
Step 5: Transfer design
Turn the pattern pieces right side up, and using the pattern which has the criss-cross design marked on it, make dots along the edges with a fabric pen where each line starts and ends on the front pocket piece. Use a ruler to join up the dots.
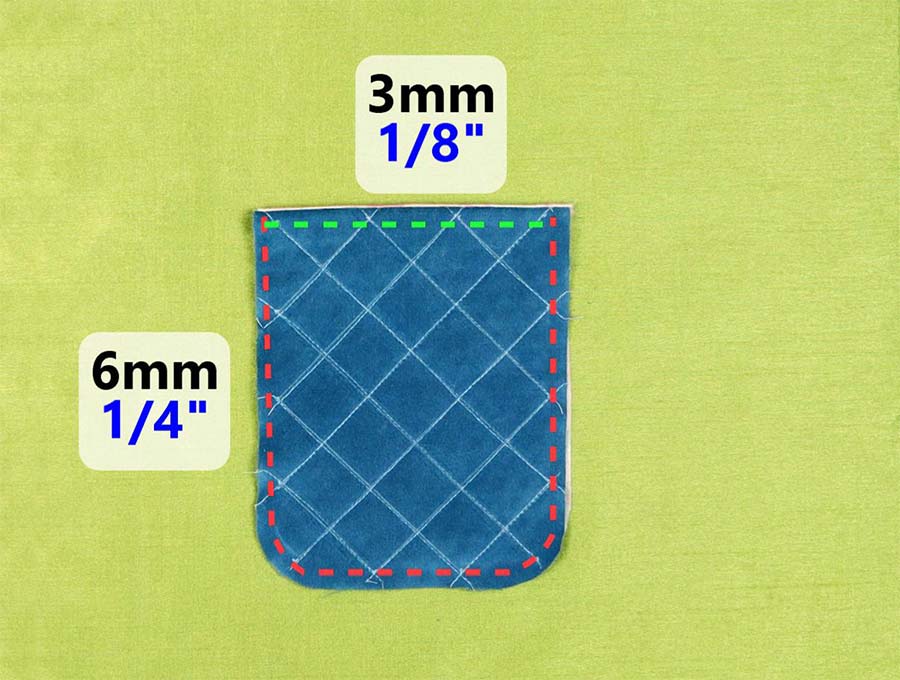
Step 6: Quilt
Stitch along the lines to create the quilted effect on the pocket piece, starting from the center and working outwards.
Step 7: Attach lining to pocket
Once you have completed the quilting, take the lining fabric and, placing right side to right side, stitch it along the top of the bag front using a 3/8 inch (1cm) seam allowance.
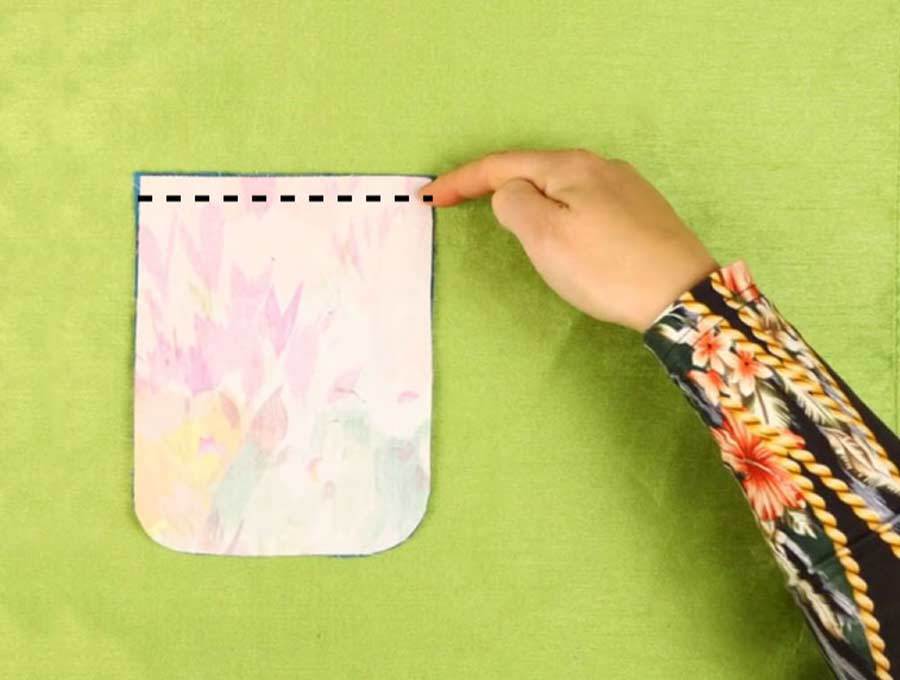
Flip it over, so the right sides of both pieces are showing, then stitch right around the edge, basically over that first line of stitching you created to prevent fraying.
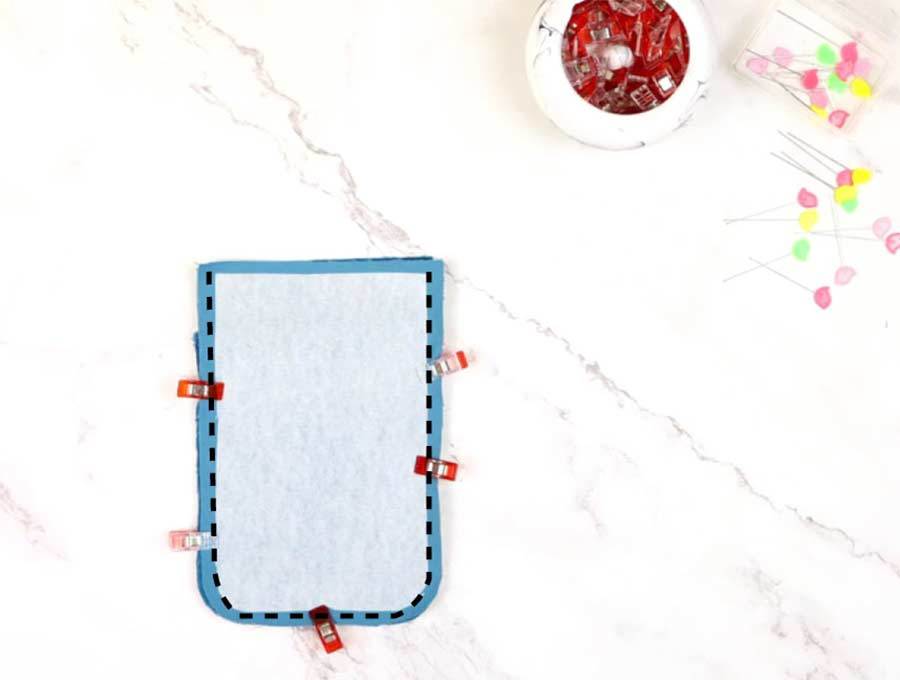
Step 8: Assemble
Lay the quilted pocket piece wrong side facing against the right side of the bag piece, then on top of that, lay the back part. Clip together.
Step 9: Sew
Back tacking at the start and finish, stitch all around the sides and bottom, 3/8 inch (1cm) from the edge, leaving the top open. Trim the edges neatly after sewing and make small V-shape nicks into the fabric on the curves to make it lie flat once turned.
Step 10:
Turn the bag with its pocket the right way out.
Step 11:
Take the bag flap pattern piece, place it right side up on the worktop, then take the matching flap with its attached fusible fleece, place right side down onto the first piece, line up the edges and clip together.
Step 12:
Stitch around the edge 3/8 inch (1 cm from the edge, then trim and make notches around the curved areas so it will lie flat when turned, Trim the excess off the corners and turn, so the flap is the right way out and press flat.
Step 13:
Topstitch around the sides and bottom of the flap as close to the edge as possible, then follow up with another line of topstitching 1/4inch (6mm) inside this line taking care that the double row of stitches is equally spaced.
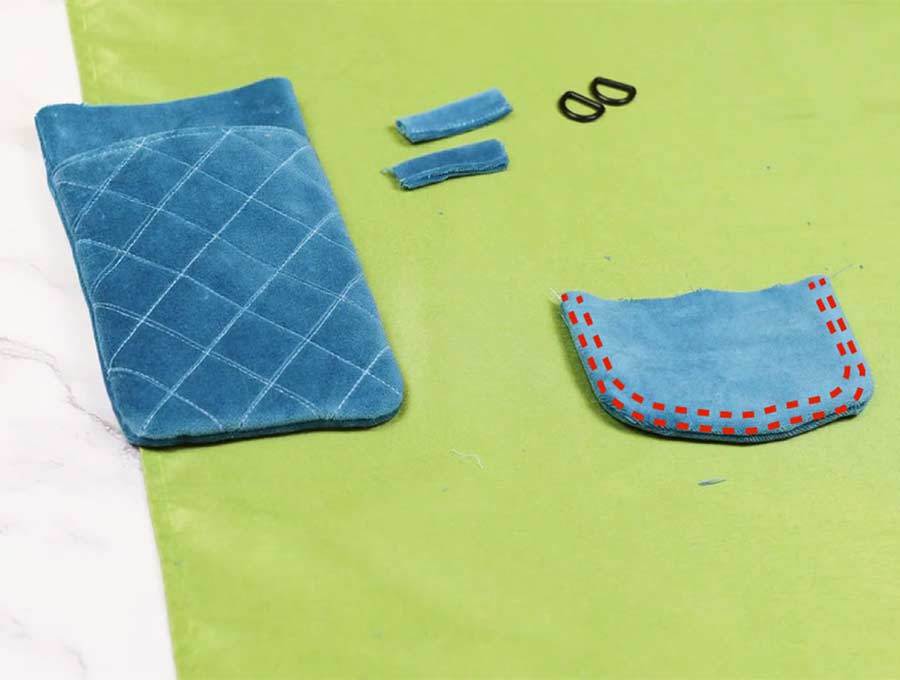
Step 14:
To create the loops for the strap attachments, take the two small pieces and fold them in half, then open out and fold in from each side to meet the center fold. Clip in place. Stitch down the open edges.
Step 15:
Slip the loop through the D-rings, line up the ends evenly and pin the ends together. Baste to keep in place.
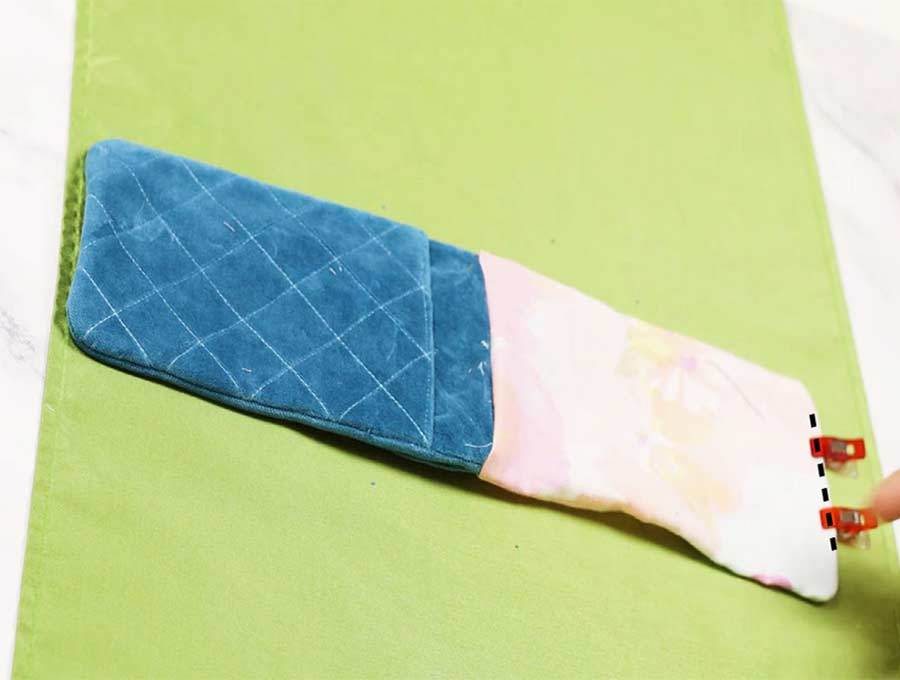
Step 16:
Align the raw ends of the loops with the raw edges of back part of the bag. Clip in place. The strap will hang from here.
Step 17:
Stitch across the ends of the loops to attach them to the bag back tacking at the start and finish.
Step 18:
Pin or clip the flap piece to the side of the bag where the loops have been attached, and stitch in place using the usual 3/8 inch (1cm) seam allowance.
Step 19:
Take the two lining pieces for the main bag and place right side to right side. Stitch them down the sides and around the bottom leaving a 3 inch (8cm) gap for turning and back tacking at the start and finish. Notch out around the corners to ease the fabric when it is turned.

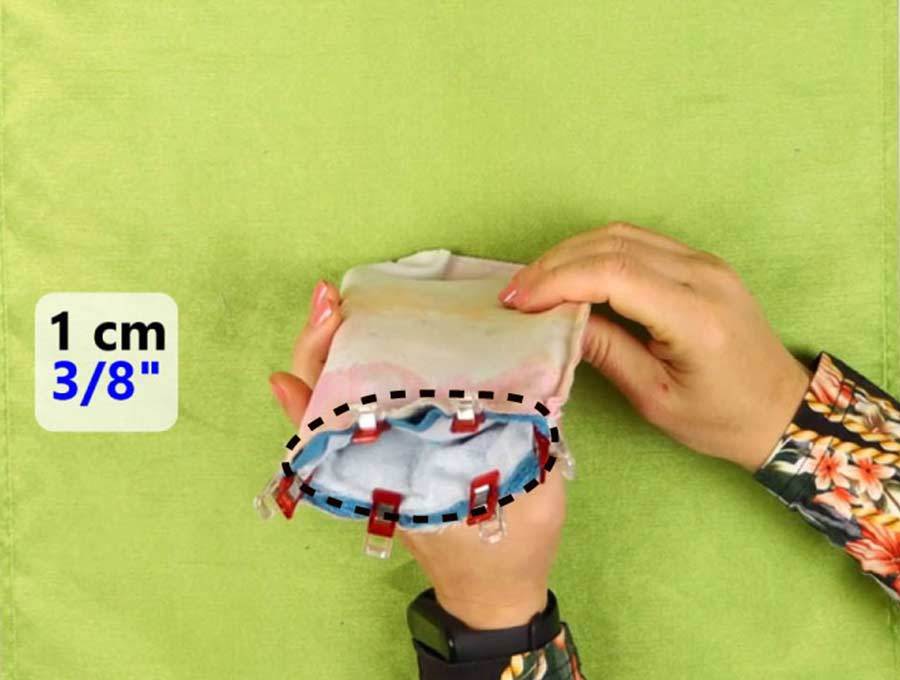
Step 20:
Slip them inside out completely over the quilted outer bag, making sure the flap is lying down against the back of the bag. Clip or pin all around the top.
Step 21:
Stitch the lining to the bag body, back tacking at the start and finish.
Step 22:
Gently pull the bag through the gap, then fold in the raw edges of the gap, and pin.
Step 23:
Stitch the gap on the lining to close the gap and create a neat finish. Tuck the lining inside the bag
Step 24:
Press the bag.
Step 25: Prepare the strap
If you don’t have enough length of fabric for the strap you can join 2 pieces of fabric. Place the two lengths, right sides facing, at right angles to each other. Stitch diagonally from top left to bottom right, across the square formed where they overlap. Trim off the extra fabric next to the seam. Open out to create the correct length strap. Press the diagonal seam open.
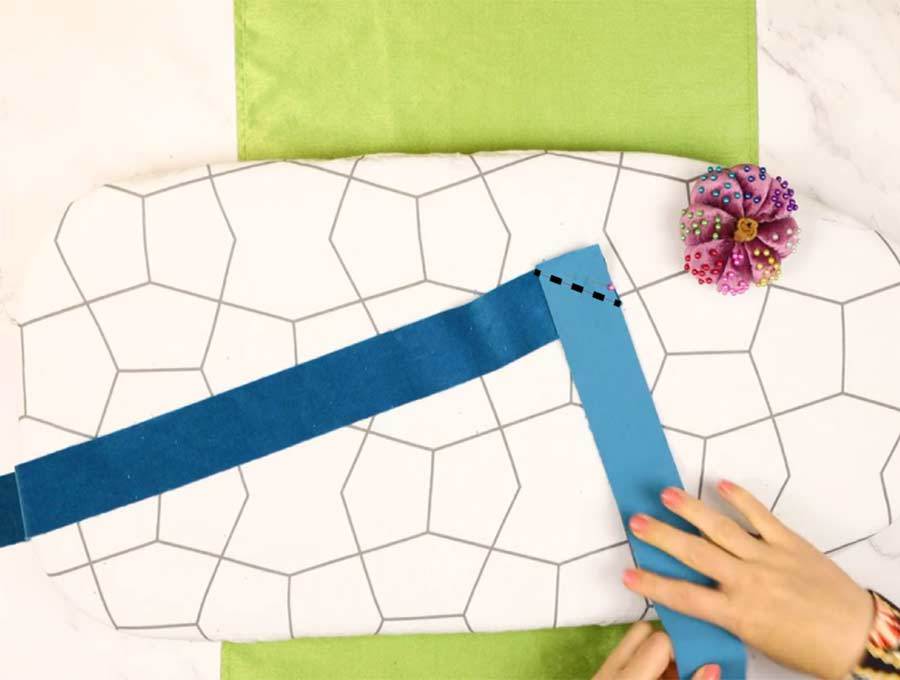
Take the strap, fold it in half lengthways and press lightly. Open it flat and fold in one side to the middle fold, then the other side to meet the centerfold. Press in place, then fold over the one folded side to meet the other folded side and press. You now have enough strength in the strap.
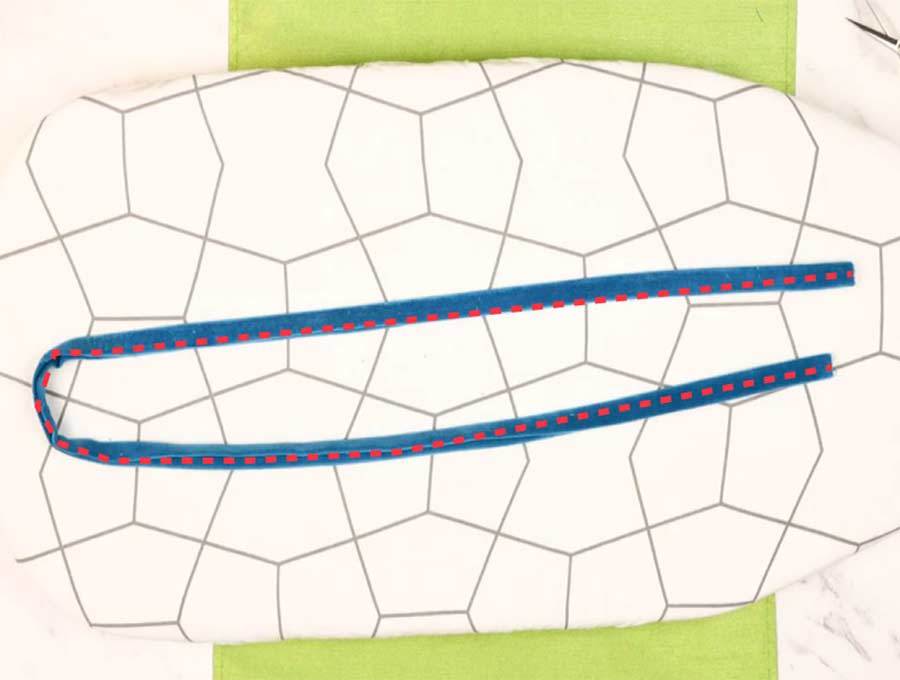
Step 26:
Stitch along the open edge of the strap.
Thread on the strap slider that will adjust the strap on the one side, taking the strap fabric back through the metal D-ring on the back of the bag and up over the inner bar of the strap slider. Fold over the end once to hide the raw edge and pin it to the strap. Stitch the end, back-tacking at the start and finish to ensure the stitching won’t pull loose.

Step 27:
Now take the other end of the fabric strap and make sure there are no twists before threading it through the other D-ring. Fold over the raw edge before pinning it to the strap. Stitch, back tacking to make sure it is secure.
Step 28:
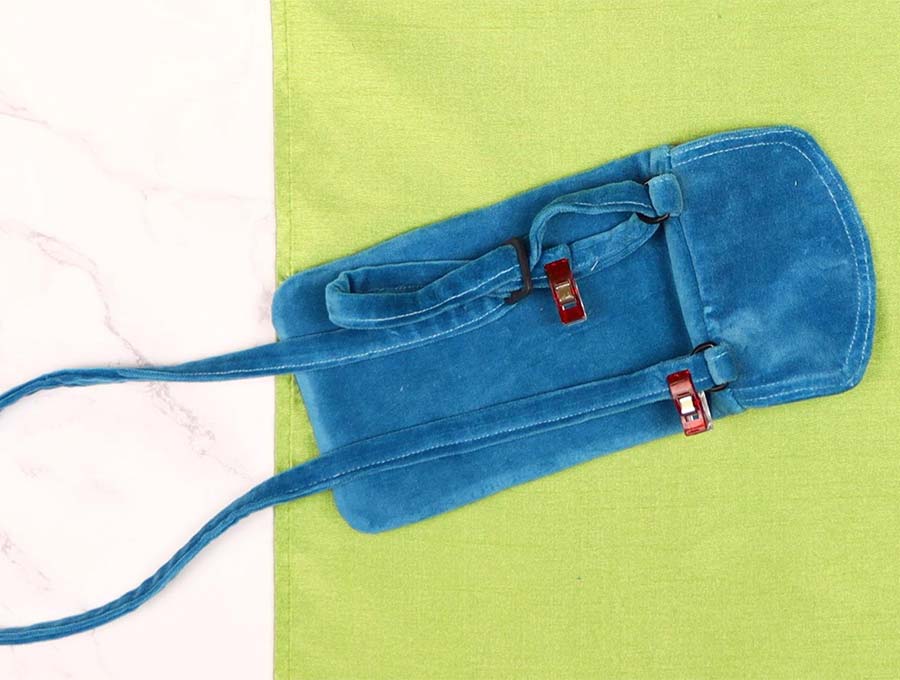
Attach the stud closing so that your cell phone remains securely in the bag. As you see in the video, you can use metal studs either pressed with stud pliers or hammered into place. See our FAQ section for alternative closings if you don’t have this stud system.
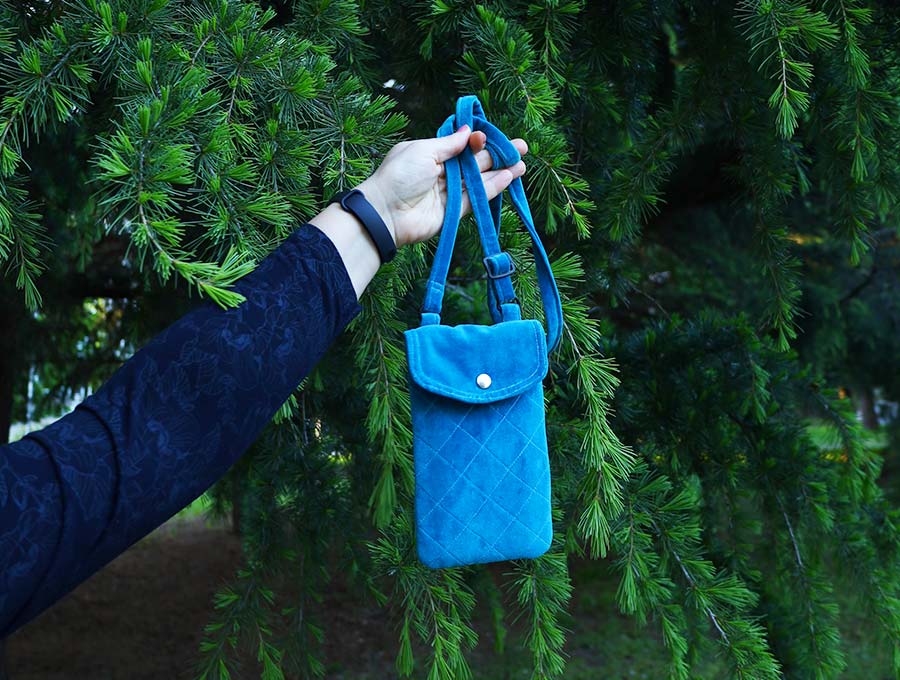
Your small DIY crossbody bag is now ready to use, keeping the vital necessities of life on the move safely slung to your body.
Small Crossbody bag FAQ:
Q: If I don’t have the system for attaching stud closures, can I use something else?
A: There are several alternatives to the stud closure. You can stitch on a press stud, then add a fancy button on the flap to finish the look. You can use a small piece of Velcro attached to the inside of the flap, with another piece on the front of the bag. Another method is to stitch a small loop made of the same fabric onto the flap, then place a button over which the loop can slip, on the front of the bag.
I love the clever construction of this crossbody bag with the padding to keep your cell phone protected. Because it is slung crossbody, there is less chance of it slipping off a shoulder when cycling, getting on and off buses and trains, motorcycles, or in and out of cars. It is also safe, as being crossbody, it cannot be snatched easily. The bag leaves your hands free. If you liked this pattern, then hit the subscribe button to have more fun and useful patterns delivered to your inbox. They’re a great way to put those smaller pieces of fabric from your stash to good use.
Do you like this? Pin for later:
Wanna be friends? Click HERE and follow me on Pinterest
RELATED: