
Canadian Smocking Round Pillow Tutorial [VIDEO]
For years I envied people who have these delightful cushions in their homes. The Canadian smocking looks so complicated, but it is not difficult at all – you just have to be careful when constructing your grid to ensure the marks are in the right place and after that, well, it’s easy peasy. This is one of those lovely projects you can do while sitting in front of the TV or the fire place on a cold winter’s evening, as the majority of the work is hand done. Make this luxurious looking pillow in a rich velvet, perfect for the festive season, or try cotton or linen in tints of beach sand to add summer texture to you home.
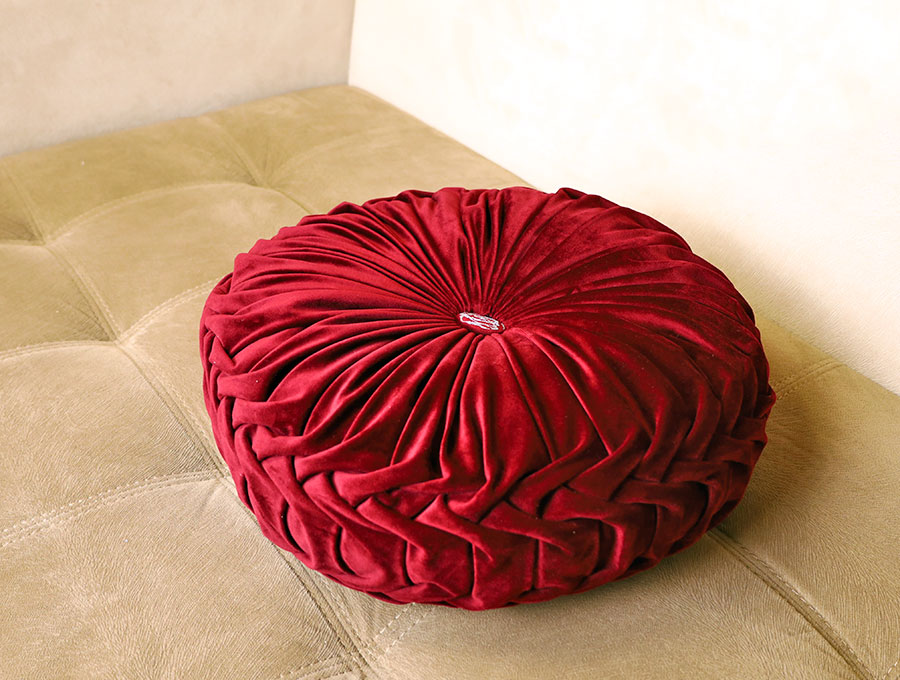
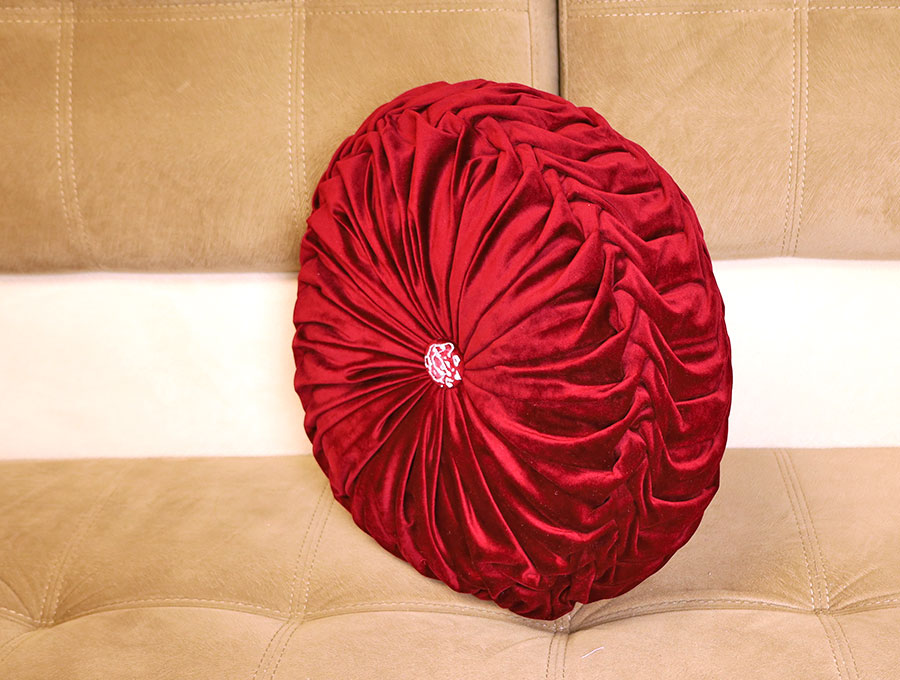
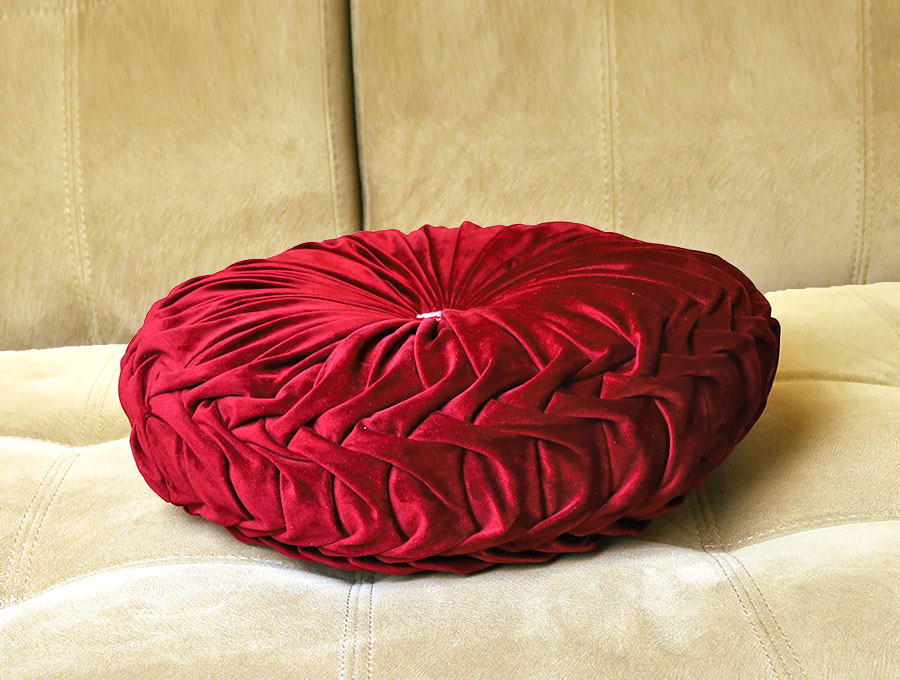
I made mine in a rich red velvet for a festive look, but you can do these in any colour and suitable fabric. This project needs only one machine stitched seam or even entirely by hand, so most of it can be done while watching TV or the kid’s playing – I love multi-tasking to make optimal use of time. And I love it even more when the result is as stunning as this.
Below you will find my step by step written tutorial with VIDEO instructions for all the visual learners.
We occasionally link to goods offered by vendors to help the reader find relevant products. Some of the links may be affiliate meaning we earn a small commission if an item is purchased.
Table of Contents
How to make a Canadian Smocked Pillow
Supplies and tools
- fabric – velvet or other suitable fabric – 68 x 22 inches (173 x 56 cm) – plain color!
- matching thread
- scissors (or rotary cutter and a cutting mat)
- ruler or measuring tape
- iron and ironing board
- sewing clips or pins
-
Needle and strong thread
-
Ready-made circular cushion insert or polyester stuffing
-
2 matching shanked buttons in the same shade as the fabric
DOWNLOAD: [Free pdf file]
Follow us for free patterns & tutorials! [easy-profiles]
How to Sew a Canadian Smocking Round Pillow
Watch the diy Canadian smocked pillow video first and then follow the written step by step instructions below.
Please enjoy and don’t forget to Like and SUBSCRIBE over on YouTube to be kept up to date with new videos as they come out.
Canadian Smocking pillow VIDEO TUTORIAL
INSTRUCTIONS:
STEP 1:
Cut the fabric – you will need one piece 68 x 22 inches (173 x 56 cm).
Place the piece of velvet fabric wrong side up on your worktop with the long side parallel to the top and bottom, then fold up in half. Make a small mark at the fold, then open up and using your ruler draw a line across the width of the fabric.
STEP 2:
Turn the fabric so the short sides are parallel to the top and bottom of your worktop.
STEP 3: Drawing the grid pattern
- Using you ruler mark the grid starting from the center line you drew and working outward. From the central line measure 1 inch (2.5 cm) on either side and draw the two lines -ensuring you mark at the top and bottom and join the lines to make sure the lines don’t go skew.
- From the lines you drew now draw a further set of lines in the following order moving to the left of the leftmost 1 inch (2.5cm) line you drew . They will be 1 inch (2.5 cm), ¾ inch (2 cm) and 1 inch (2.5 cm) apart.
- To the right of the rightmost 1 inch (2.5 cm) line you drew mark lines 1 inch (2.5 cm) ¾ inch (2 cm) and 1 inch (2.5 cm) apart.
- Starting from the bottom of the fabric draw blocks 1 inch (2.5 cm) apart all the way up across the 4 lines on either side of the central mark – do not draw across center line and the 1 inch gap on either side – leave that section clear. Our visuals make this really easy to follow.
STEP 4: Drawing the canadian smocking leaf pattern
- Starting on the far left hand side skip a block at the bottom and draw a diagonal line from the bottom left corner to the top right corner of the second block up. Skip the next block then repeat the diagonal lines on every alternate block until you get to the top of the fabric.
- The middle column of blocks remains blank, then on the next column across, skipping the very bottom 2 rows draw a diagonal line across the next block from the bottom right corner to the top left. Continue in this way to the top. Watch our visuals to see how this is done. On each row of three blocks only ONE should have a diagonal line drawn across it.
- Moving to the set of three block in rows on the right of the center gap, starting on the first column miss two rows of blocks and then on the third row draw a diagonal line from the bottom left hand corner up to the top right hand corner of the block. Skip the next row then draw another diagonal, and continue to the top skipping alternate rows. These diagonals will NOT be in line with the ones on the left grid pattern but one block upwards. See out visuals if you are unsure.
- Leave the center block free of any diagonal lines and on the bottom left hand side start on the second block up from the bottom marking a diagonal line from the bottom right corner of the block to the top left hand corner. Skip a row then continue marking alternate rows in the same way.
STEP 5:
You are now ready to start smocking. Make sure you have your needle threaded with your matching strong thread, with a knot in the bottom so it does not pull through the fabric. Start in the bottom far right hand corner at the first diagonal, making a small stitch at the start of the diagonal, then going up to the opposite end of the diagonal and making a small stitch there. Pull the thread up to pull the opposite ends of the diagonal together and secure them in place by stitching through both bits of fabric.
STEP 6:
Make a small stitch into the bottom right corner of middle block of the blank row of squares above, then take a long stitch, not pulling it tight, to the top left corner. Next a small stitch into the diagonal marked on the left going down and into the corner where the diagonal is marked and pull tight, giving it a stitch to keep the smocked section in place.
STEP 7:
Keep moving up the column working the diagonals in the same pattern established to create the smocked effect until you get to the top. If you run out of thread during the process, end off by putting the needle through a loop of the thread to create a knot, clip off, then start with the new thread.
Repeat the process with the grid on the right.
STEP 8:
Once the smocking is done, line up the two short ends of the fabric and clip in place, before running a line of stitching 3/8 of an inch (1cm) from the edge, backtacking at the start and finish.
STEP 9:
Turn the fabric right side out. Thread your needle and make a knot in your strong thread. Starting next to the machine-stitched seam take a large 1 ½ inch (4 cm) stitch across the front of the fabric, followed by a small stitch to get the thread to the back of the fabric, followed by a large stitch in the front. Keep on in this way until you have worked your way right around the cushion, pulling up the thread at intervals, and eventually into a tight circle.
STEP 10:
Work into that small circle where the fabric has been gathered, securing the pleats in the fabric, ensuring you stitch across the small gap to secure the edges, then end off by knotting the thread on the right side of the fabric and clip.
STEP 11:
Thread your needle again and make a knot in your strong thread. Starting next to the machine-stitched seam on the other end, take a large 1 ½ inch (4 cm) stitch across the front of the fabric, followed by a small stitch to get the thread to the back of the fabric, followed by a large stitch in the front. Keep on in this way until you have worked your way right around the cushion, this time do not pull the thread tight, as you need space to insert the cushion.
STEP 12:
Insert the circular cushion inner, settling it in place, then pull up the thread to close the circle. Finish by working into the fabric around where you have pulled it tight to ensure it does not come apart, then end off with a knot and clip the end of the thread.
STEP 13:
To stitch on the buttons start with your knotted thread on one side of the cushion and push the needle through to the opposite side of the center of the cushion. Start attaching the button by putting the needle and thread through the shank and pulling the thread to the other side of the center of the cushion, working the thread through the shank at least twice, then attach the second button to the other side of the cushion, pulling it tight against the first button to create that deep buttoned effect, continue working through the shank twice to ensure it is firmly attached, then end by winding the thread around the one shank, creating a knot hidden below the button and snipping off the thread.
You beautifully luxurious cushion is ready to use. This does not have to be in velvet. I can see these cushions working well in a house with a beach house vibe if done in a cream or sand colored cotton, or linen, fabric. My advice is to avoid prints as the Canadian smocking creates an interesting textural effect and is best done in a plain fabric to show off the pleats. If you enjoyed making this cushion then please like and subscribe. I am so interested to see how your cushions turned out so please upload your photos in the comments section, and don’t forget to share if you know someone who would enjoy making this cushion.
*** FAQs and tips:
Do you like this? Pin for later:
Wanna be friends? Click HERE and follow me on Pinterest
RELATED: