
DIY Tea Wallet // Tea Bag Holder Sewing Pattern
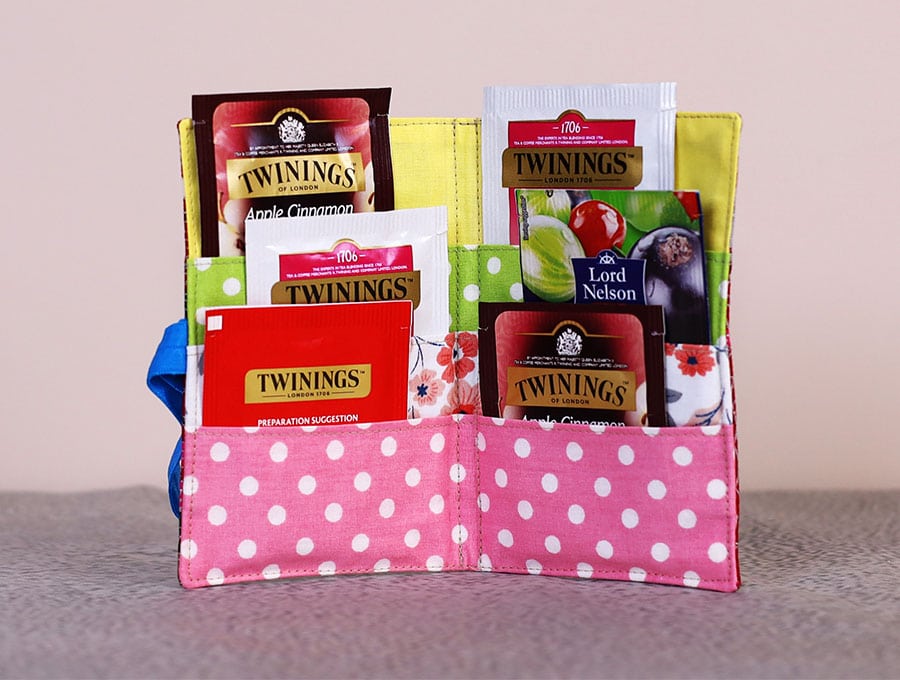
Learn how to make this handy tea bag wallet. Never dig through your bag for a lone tea bag again. This sweet little Tea Bag Wallet holds six of your favorites, slips into any purse, and takes minimal fabric to make.
If you’re a tea lover, you’ll know the quiet disappointment of arriving somewhere and being faced with a rather sad selection of generic teabags — or worse, none at all. Whether you’re spending a weekend in a caravan, staying over at a friend’s place, or navigating a long journey, having your favourite brew with you can make life just so much better.
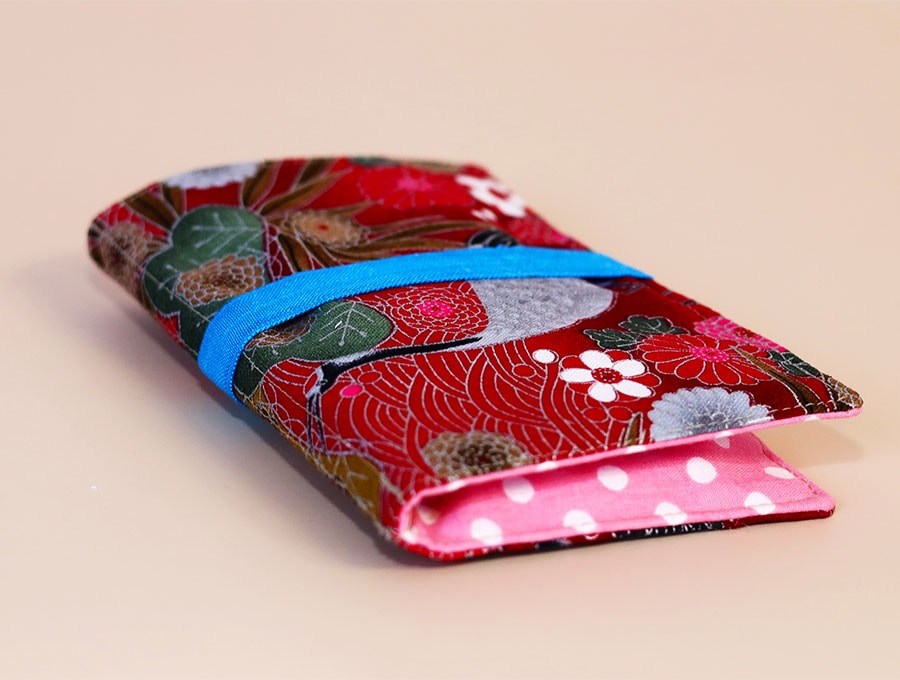
Enter the tea wallet — a charming and practical sewing project that’s slim enough to slip into your handbag or tuck into an overnight bag. This clever fabric pouch holds up to six different teabags, keeping them neat, protected, and ready to use when you need them. Think of it as your personal miniature tea wardrobe.

The beauty of carrying six slots is the sheer variety you can bring along. Feeling delicate? Reach for a floral green tea. Need a bold afternoon pick-me-up? Your Earl Grey is right there. Craving something warming and exotic on a chilly caravan evening? Tuck in an oolong or a cosy chai latte sachet.
Best of all, a tea wallet is a joy to sew — a perfect small project that comes together quickly and makes a wonderful gift for any tea-obsessed friend. So grab your fabric scraps and let’s get stitching.
Below you will find my step by step written tutorial with VIDEO instructions for all the visual learners.
We occasionally link to goods offered by vendors to help the reader find relevant products. Some of the links may be affiliate meaning we earn a small commission if an item is purchased.
Table of Contents
- 1 How to make the tea bag holder
- 2 Supplies and tools
- 3 How to Sew a tea wallet
- 3.1 tea bag holder VIDEO TUTORIAL
- 3.2 INSTRUCTIONS:
- 3.3 STEP 1:
- 3.4 STEP 2:
- 3.5 STEP 3:
- 3.6 STEP 4:
- 3.7 STEP 5:
- 3.8 STEP 6:
- 3.9 STEP 7:
- 3.10 STEP 8:
- 3.11 STEP 9:
- 3.12 STEP 10:
- 3.13 STEP 11:
- 3.14 STEP 12:
- 3.15 STEP 13:
- 3.16 STEP 14:
- 3.17 STEP 15:
- 3.18 STEP 16:
- 3.19 STEP 17:
- 3.20 STEP 18:
- 3.21 STEP 19:
- 3.22 STEP 20:
- 3.23 STEP 21:
- 3.24 STEP 22:
- 3.25 STEP 23:
- 3.26 STEP 24:
How to make the tea bag holder
Supplies and tools
- fabric – small pieces of woven cotton (one outer, one lining, 3 pockets)
- fusible interfacing
- matching thread
- scissors (or rotary cutter and a cutting mat)
- ruler or measuring tape
- iron and ironing board
- sewing clips or pins
- 3mm (1/8″) wide elastic (or fabric ties, ribbon)
DOWNLOAD: Tea Wallet Sewing Pattern [Free pdf file]
Follow us for free patterns & tutorials! [easy-profiles]
How to Sew a tea wallet
Watch the diy tea wallet video first and then follow the written step by step instructions below.
Please enjoy and don’t forget to Like and SUBSCRIBE over on YouTube to be kept up to date with new videos as they come out.
tea bag holder VIDEO TUTORIAL
INSTRUCTIONS:
STEP 1:
Download and print out the pattern for the tea wallet (at 100%, no scaling) – it will take three A4 or letter size pieces of paper.
Cut out the pieces you need for the pattern and match up the pattern pieces with the fabrics you would like to use.
You will need to cut the following from the main pattern piece for the body of the wallet:
- 1 x outer fabric
- 1 x fusible interfacing
- 1 lining
- Then cut 3 pocket pieces from the pocket pattern.
STEP 2:
Place the outer piece of the main body wrong side up and over it the fusible interfacing, sticky side down. Fuse according to the manufacturer’s instructions. Set aside.
STEP 3:
Fold the top pocket, right sides facing each other along the length and press, then clip the raw edges together. Do the same with the middle pocket.
STEP 4:
For the bottom pocket put the wrong sides together and press. This one is different from the first two!
STEP 5:
Stitch the top and middle pockets using a ¼ inch (6 mm) seam allowance along the raw edges you clipped.
STEP 6:
Turn the top and middle pockets the right way out using a turning tool or a safety pin, then ensure the seams are neatly turned out and press.
STEP 7:
Top stitch along the folded edge of all three pockets – not the seamed edge, as close to the fold as possible.
STEP 8:
Take the lining and place it right side up on your worktop.
STEP 9:
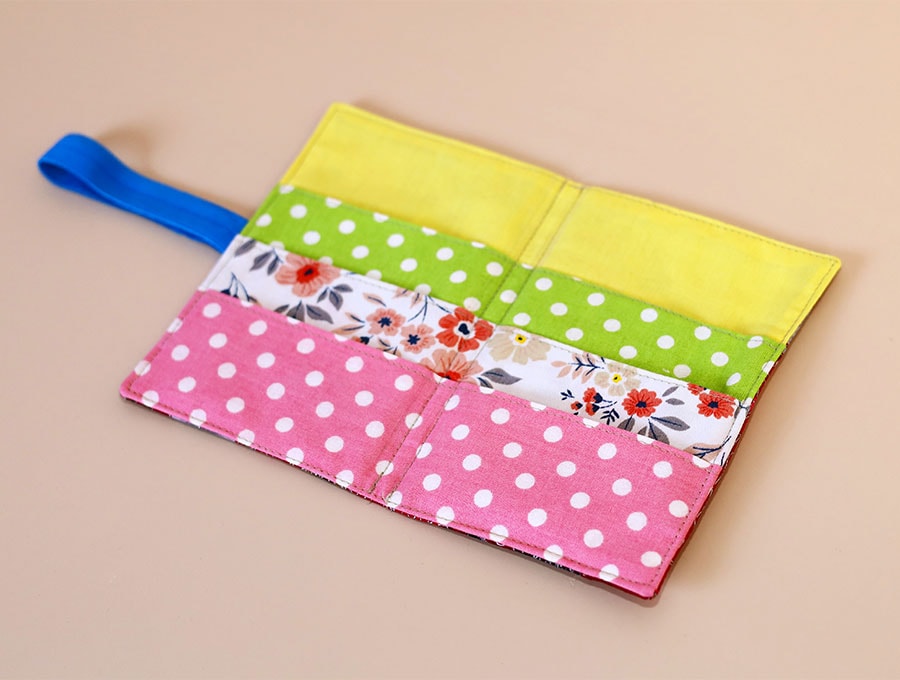
Take the pattern piece for the main body and fold on the marked lines – there are two double dashed lines vertically down the middle to indicate where the wallet will fold, then there are three horizontal lines across the long side to indicate where the pockets will be placed. Fold all of these lines.
STEP 10:
Fold the vertical lines and lay the pattern piece on top of the fabric and mark first the one and then the other vertical line on the fabric using a fabric marking pen, simply folding and lining up the edges to get the lines in place.
STEP 11:
Next mark the pocket lines working from the bottom of the lining upwards until you have the positions for two of the pockets marked. The third pocket will sit in line with the raw edge of the lining.
STEP 12:
Line up seamed side of the top pocket with the topmost line and clip in place, then stitch 1/8 of an inch (3 mm) from the edge along the base of the pocket – the top-stitched side will be facing to the top.
STEP 13:
Line up the second pocket base with the line nearest the bottom and clip in place, then stitch 1/8 of an inch (3 mm) from the edge along the base of the pocket – the top-stitched side will be facing to the top.
STEP 14:
For the last pocket line up the raw edges of the pocket with the raw edge of the base of the lining, clip in place and then stitch 1/8 of an inch (3 mm) from the edge.
STEP 15:
Place the pattern piece for the outer over the top of the right side of the outer piece and mark the position to put the elastic, ribbon or fabric ties which will be used to keep the tea wallet closed. It will be in the middle of the right hand short side.
STEP 16:
Place the folded piece of elastic with the raw edges in line with the raw edge of the outer fabric, the middle of the elastic in line with the mark made, and the elastic facing the main body of the fabric. If using ribbon or a woven fabric tie place the ends in line with the mark and pin the extra ribbon or tie so it doesn’t get caught up when seaming the edges.
STEP 17:
Stitch back and forth across the end of the ribbon/elastic/fabric tie three times to ensure it does not come loose with frequent opening and closing of the wallet.
STEP 18:
Place the outer piece with elastic/ribbon/fabric tie, wrong side up over the right side of the lining with the three attached pockets. Line up the edges and pin or clip in place, leaving a gap in the bottom towards one side through which to pull the fabric the right way out later.
STEP 19:
Stitch around the edge starting from one side of the gap and finishing of at the other side of the gap. Backtack at the start and finish. The seam allowance will be ¼ of an inch (6 mm).
STEP 20:
Snip off small triangles the corners to reduce bulk when turning, taking care not to snip too close to the stitch line. Finger press the edges of the gap in line with the seam.
STEP 21:
Turn the tea wallet the right way out by pulling the fabric gently through the gap. Use a turning tool to press out the corners and ensure the seams are even and pressed out, then give the item a press with an iron, ensuring that the finger pressed raw edges of the gap are turned up in line with the seam. You can use a pin from the right side to pull out the last little bits to ensure you have neat corners.
STEP 22:
The vertical lines you marked on the tea wallet will have been partially obscured by the addition of the pockets, so make sure you mark them on the top of the pockets.
STEP 23:
Stitch around the tea wallet 1/8 of an inch (3 mm) from the edge, stitch across the turned in edges of the gap to close it.
STEP 24:
Last, stitch the two vertical lines down the tea wallet – these give it the ability to fold and accommodate the size of the teabags inserted into the pockets. By stitch the vertical lines you now effectively have six pockets into which to insert the teabags.
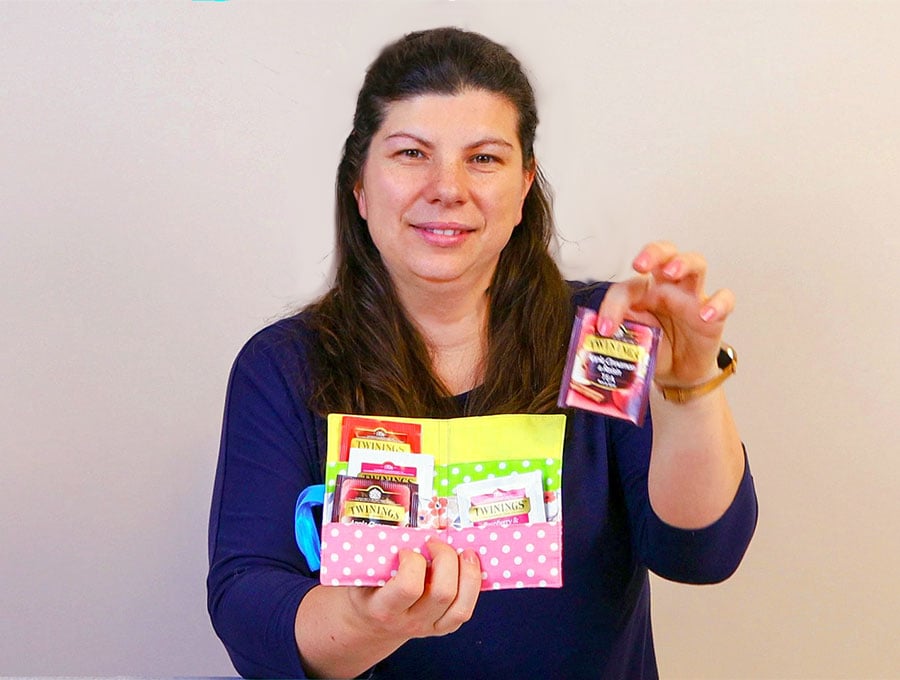
All that remains now is to load the wallet with your special tea bags, close and flip over the elastic to hold it closed, or if you used ribbon or fabric ties, then singe the ends with a lighter so the fabric doesn’t fray and tie the pieces in a neat bow to hold the wallet closed.
If you enjoyed this tutorial then please give us a like and join our 101,000 subscribers. Never miss out on a tutorial again. These tea wallets are perfect to give as gift along with a teacup and saucer – forget the mugs, the swing is back to elegance with beautiful china. Get ahead of the crowd and start searching the second hand stores and marketplace for some great china before everyone gets into the retro swing. Gift a teacup, saucer and matching cake plate with a tea wallet filled with a friend’s favorite teas and maybe a beautifully packed selection of homemade biscuits or brownies or a couple of cupcakes to make their day special.
Make our tea wallet in a few minutes to spoil yourself, a friend or a family member when they are at work or on a trip. The free printable pattern is available at HelloSewing.com, and the tea wallet will use very small pieces of fabric. We all know what it is like to land up somewhere without your favorite teas. The wallet takes 6 teabags, a lovely selection for a day or two away. Add a retro china teacup and saucer – they’re coming back into fashion, and perhaps a homemade selection of sweet biscuits to elevate teatime to a special occasion.
Do you like this? Pin for later:
Wanna be friends? Click HERE and follow me on Pinterest
RELATED: