
DIY Crochet Hook Roll
Where are your crochet hooks – stuck in a box somewhere, bundled in a plastic zip lock bag? Well today that’s going to end with a perfect little crochet hook holder to keep them in size order and all neatly rolled together, ready to use.
Got 30 minutes spare? Come and make the crochet hook roll, which can be adapted to holding acrylic paint pens, pencils, knitting needles or brushes – arty crafty types will love this as a present and it’s so easy to make with our double set of pockets. All you need is two pieces of fabric and some ribbon or cord. Easy as!
Below you will find my step by step written tutorial with VIDEO instructions for all the visual learners.
We occasionally link to goods offered by vendors to help the reader find relevant products. Some of the links may be affiliate meaning we earn a small commission if an item is purchased.
Table of Contents
How to make the Crochet Hook Roll
Supplies and tools
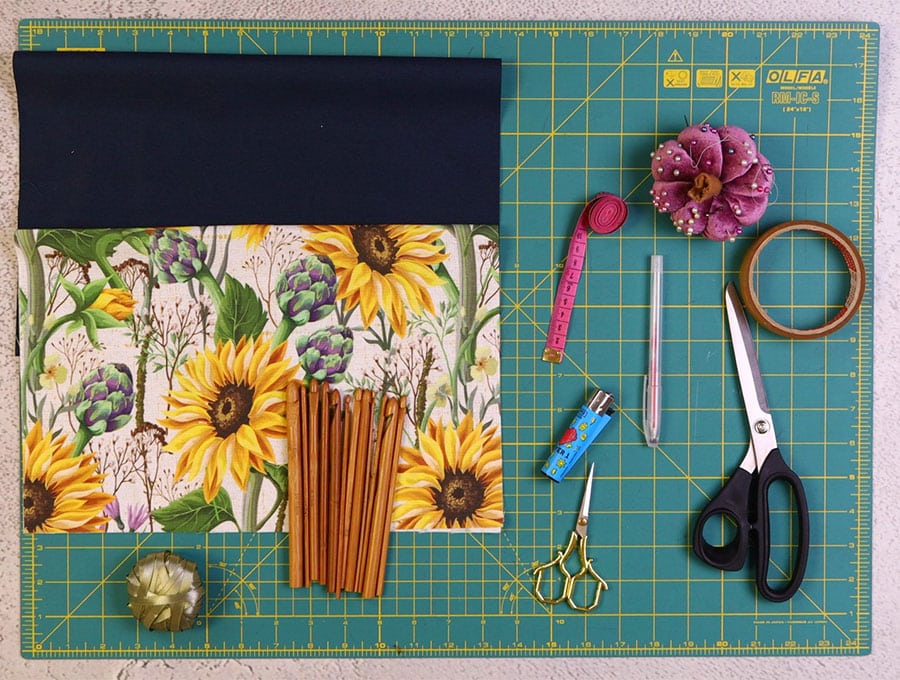
- main fabric – woven cotton, quilting cotton, medium weight home decor fabric
- lining fabric – cotton
- Piece of ribbon or thin cord 30 inches (76 cm)
- matching thread
- scissors (or rotary cutter and a cutting mat)
- ruler or measuring tape
- iron and ironing board
- sewing clips or pins
- fabric marking pen
Follow us for free patterns & tutorials! [easy-profiles]
How to Sew a Crochet Hook Roll
Watch the diy Crochet Hook Roll video first and then follow the written step by step instructions below.
Please enjoy and don’t forget to Like and SUBSCRIBE over on YouTube to be kept up to date with new videos as they come out.
Crochet Hook Roll VIDEO TUTORIAL
MATERIALS:
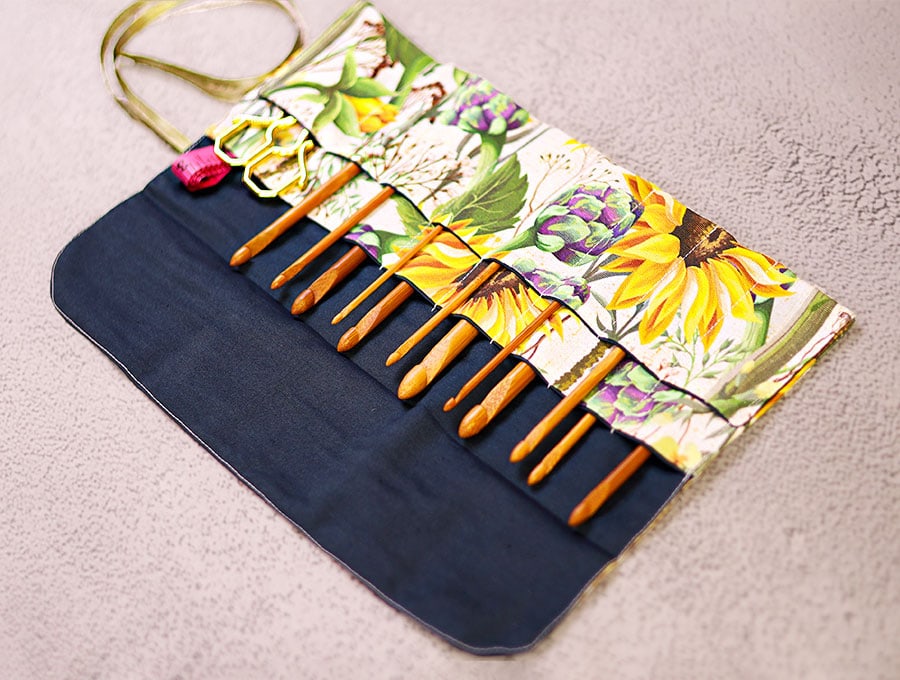
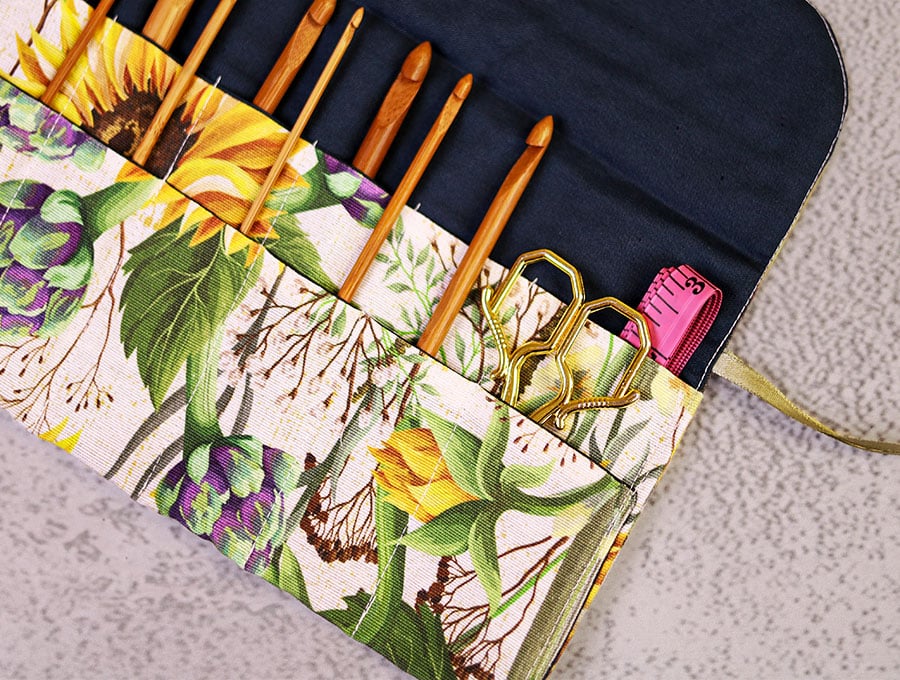
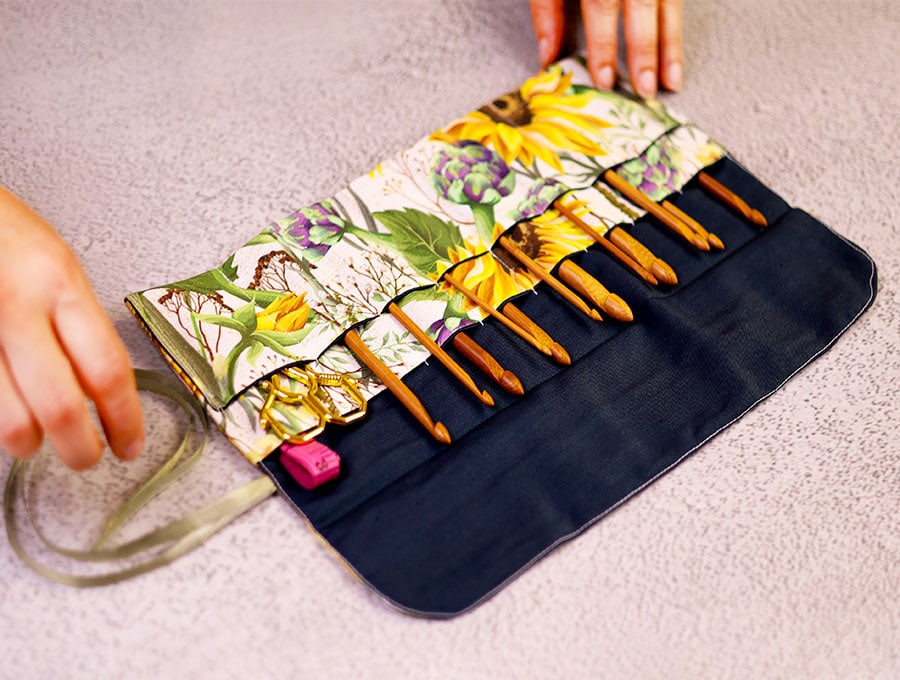
The crochet hook roll has 16 individual pockets for up to 28 hooks (2 per pocket), and two large pockets to fit small embroidery scissors and a tape measure. Of course, you can divide the roll up differently.
Crochet hook roll for 6″ (15cm) long hooks:
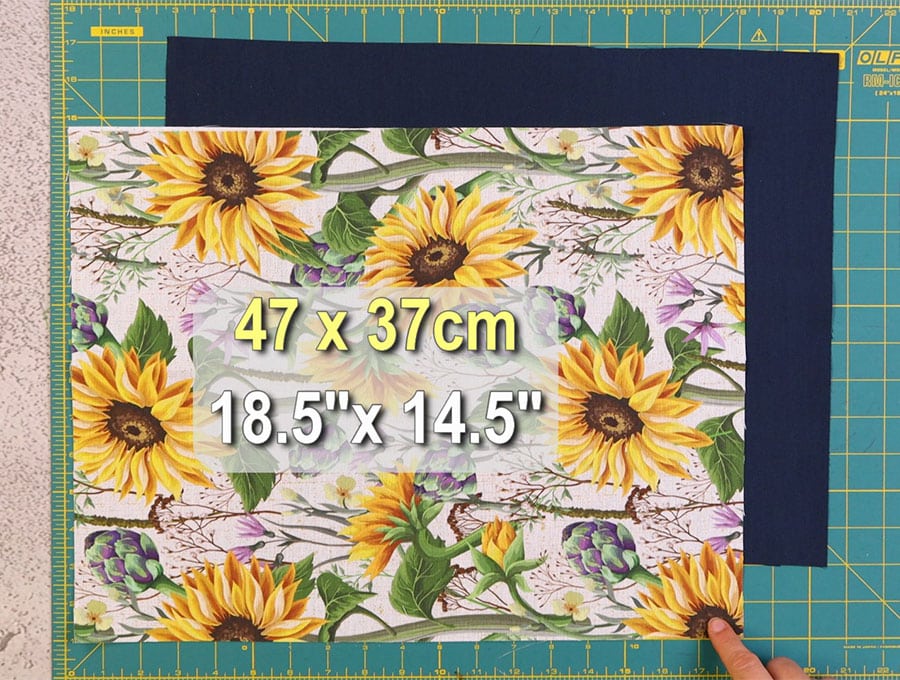
- 1 piece of main fabric 18 ½ x 14 ½ inches (47 x 37 cm)
- 1 piece of lining fabric 18 ½ x 14 ½ inches (47 x 37 cm)
- Piece of ribbon or thin cord 30 inches (76 cm)
I will add more sizes soon!
INSTRUCTIONS:
STEP 1:
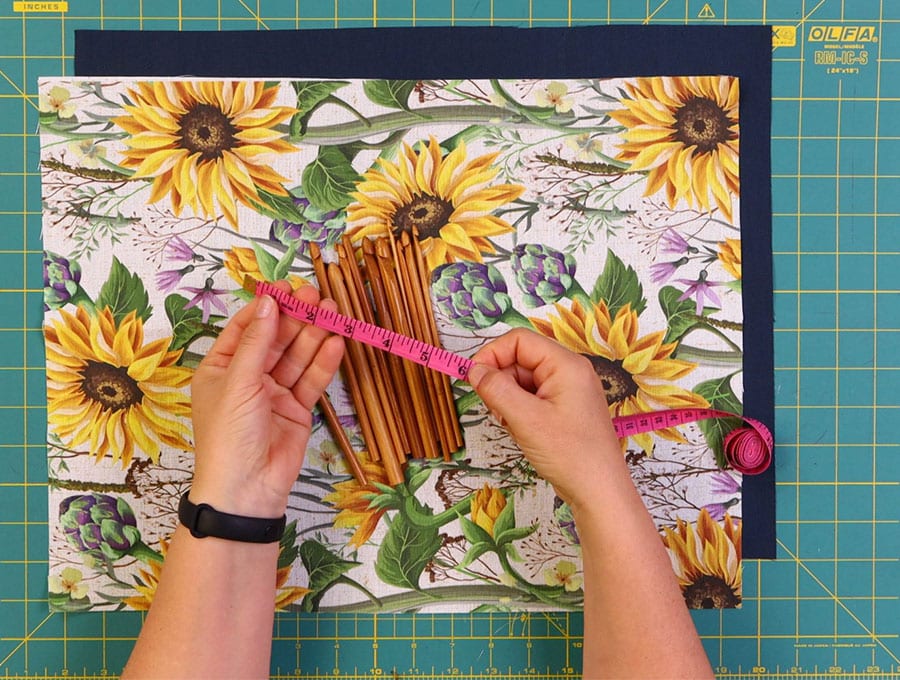
First off measure the length of your crochet hooks. There are patterns for hooks of different sizes at HelloSewing.com. I will be showing you how to make a crochet hook roll for 6″” (15cm) hooks, but the method is the same for all sizes!
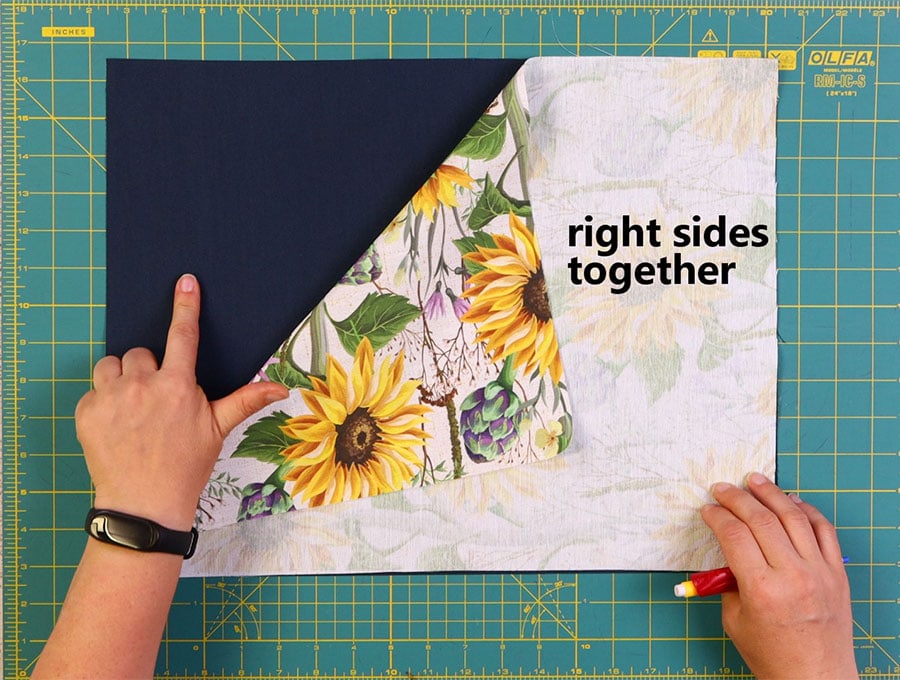
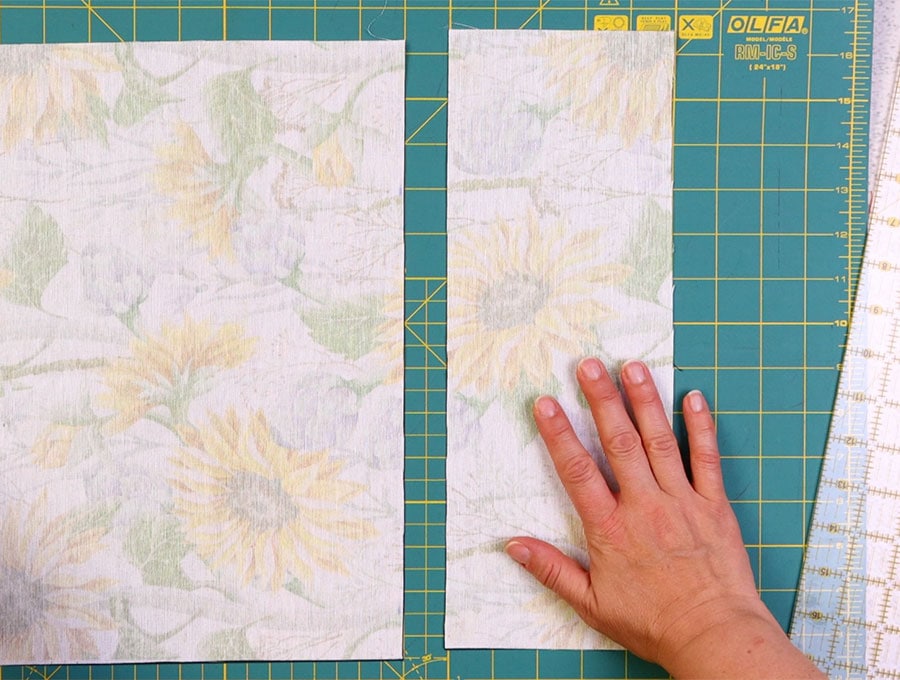
Place the right sides of the fabric together and clip or pin, with the long sides parallel to the top and bottom of your worktop. Then using a self-healing cutting mat and a rotary cutter, cut off 5 inches (13 cm) on the right hand side of both main and lining fabric together.
STEP 2:
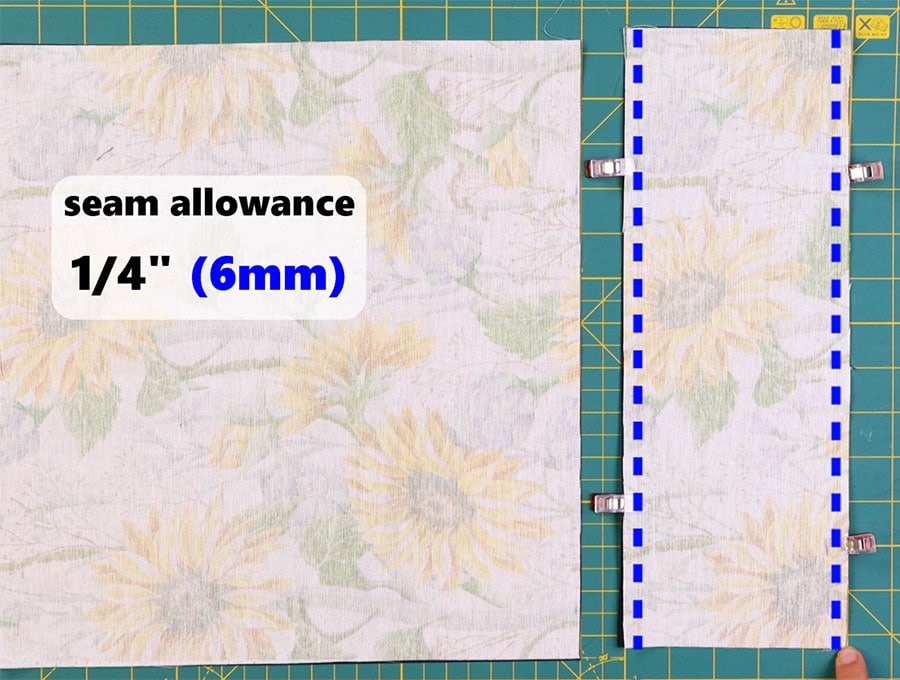
Clip together the 5 x 14 ½ inch (13 x 37 cm) piece of fabric and lining you cut off and stitch along each long side ¼ of an inch (6 mm) from the edge to create the pocket piece.
STEP 3:
Turn the right way out and press, making sure the seams are pressed out.
STEP 4:

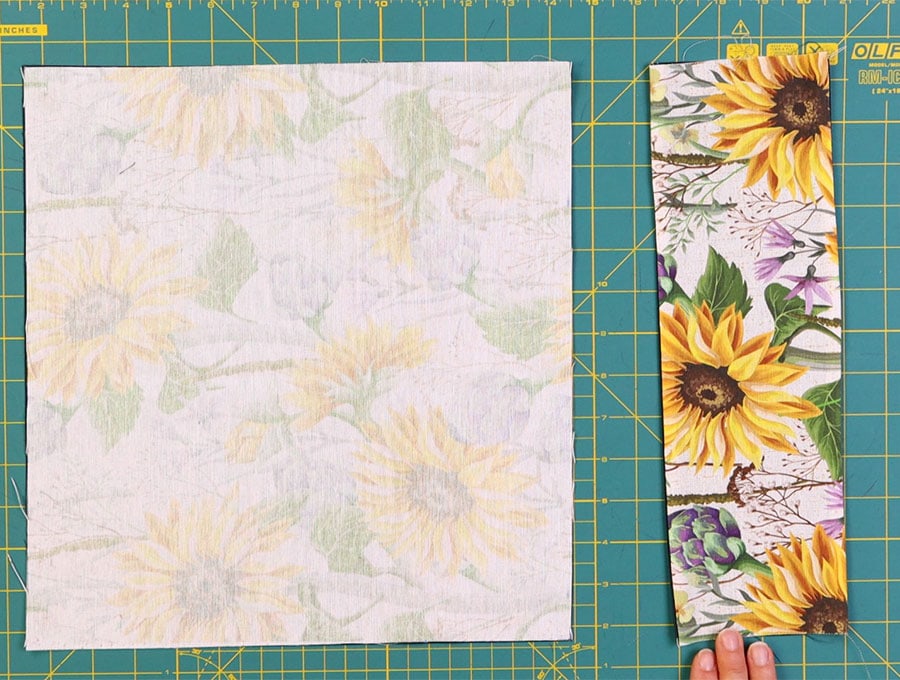
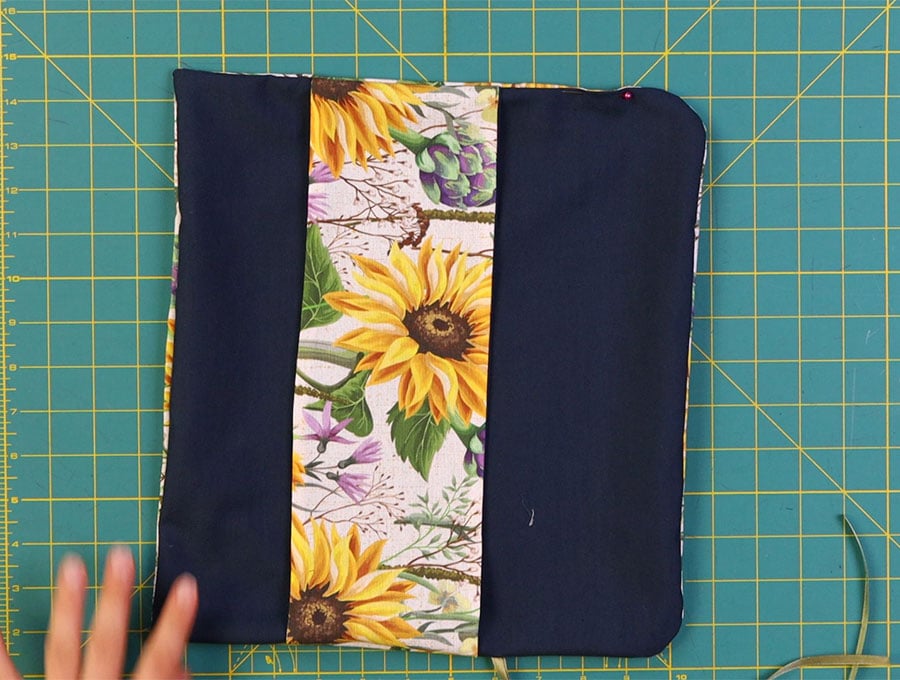
Take the fabric still on the cutting board and using a circular object like a roll of tape or a drinking glass base, round off the corners on the left hand side at the top and bottom. Cut away the excess fabric above the marks.
STEP 5:
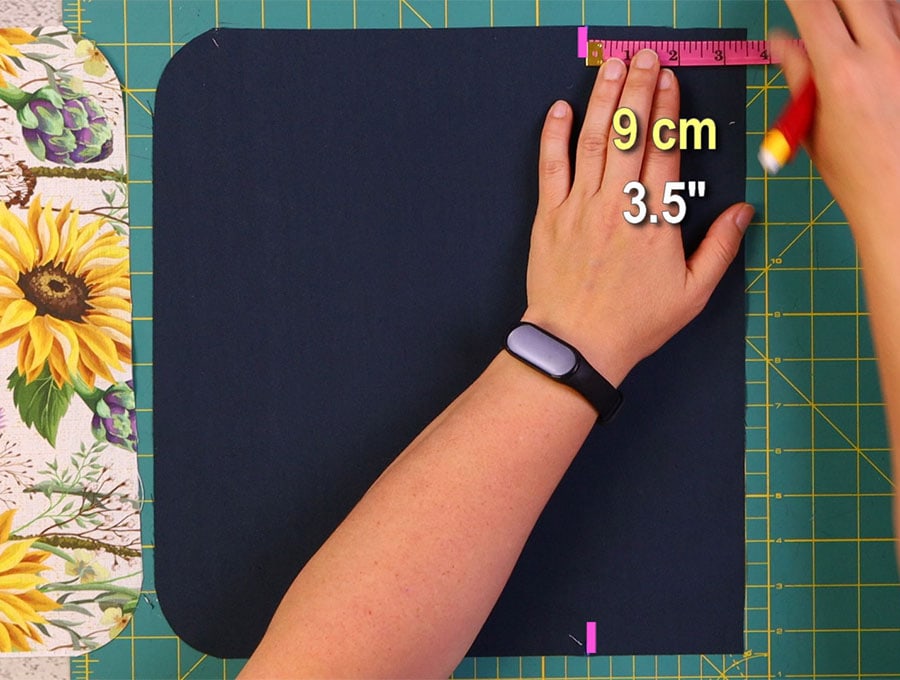
Remove the main layer of fabric and working on the right side of the lining mark 3 ½ inches (9 cm) from the right on the bottom, and 3 ½ inches (9 cm) from the right at the top. Join the marks with a line.
STEP 6:
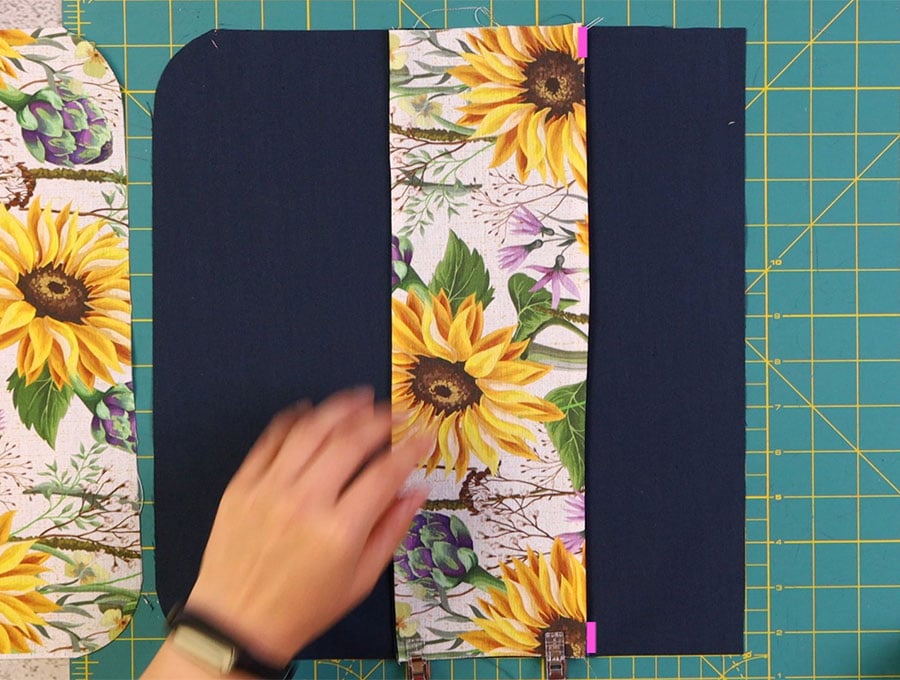
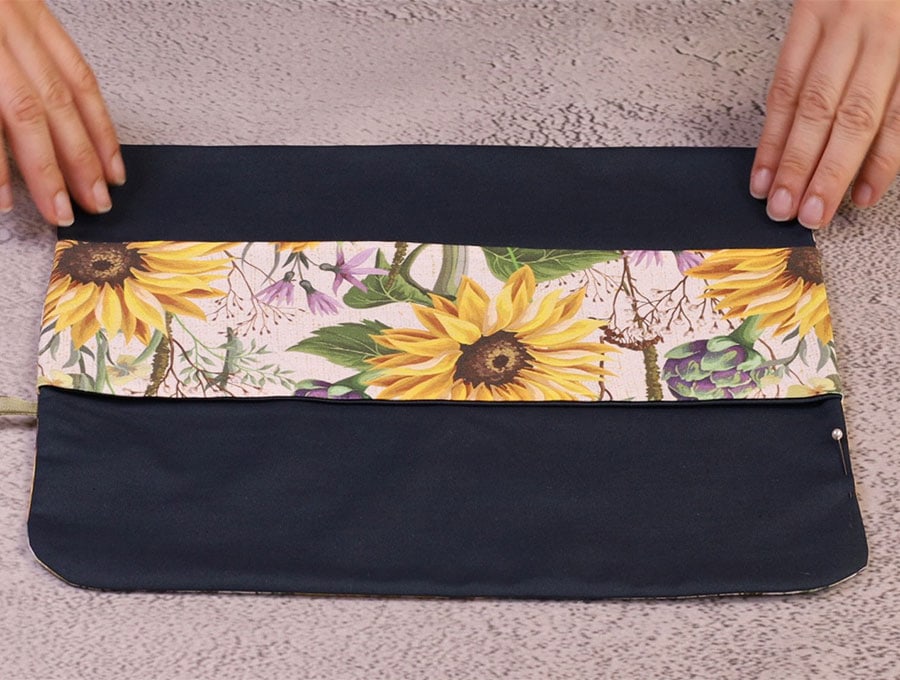
Place the bottom of the pocket piece you stitched in Steps 2 and 3 on the line, right side up and pin or clip in place.

STEP 7:
Cut a piece of ribbon or cord 30 inches (76 cm) long and fold, then place the raw edges to the raw edge of the lining 3/8 of an inch (1 cm) above the pocket piece on the side with flap with the rounded edges. Curl the ribbon around and pin to the fabric so it does not move and get into the seams as you stitch.
STEP 8:
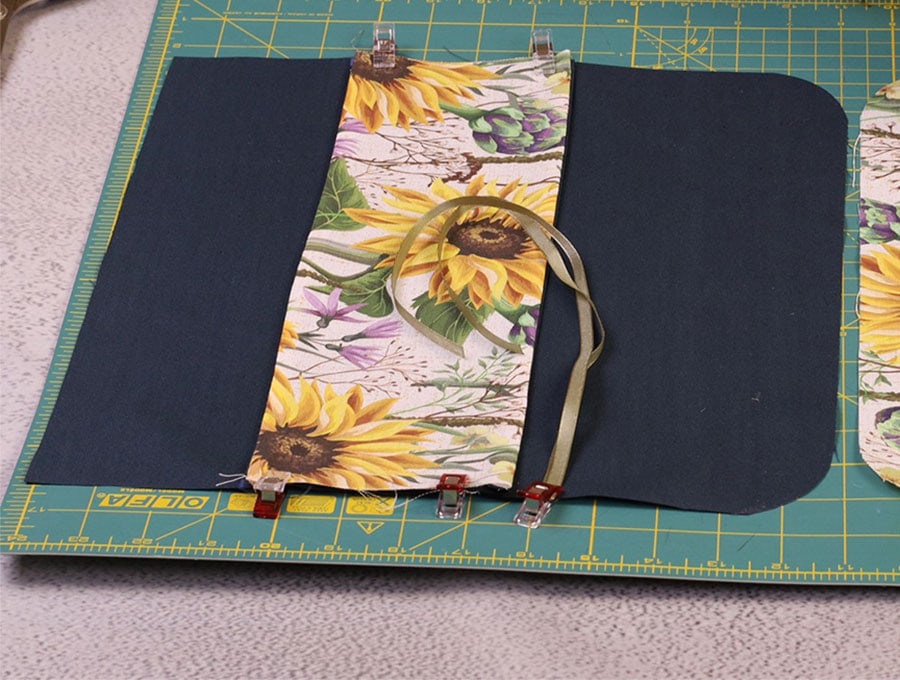
Place the main fabric over the lining with the pocket and ribbon and line up the edges, right sides facing each other. Clip or pin in place. Mark a gap on the side that doesn’t have the ribbon pinned to it, between the top of the pocket and the curve of the flap.
STEP 9:
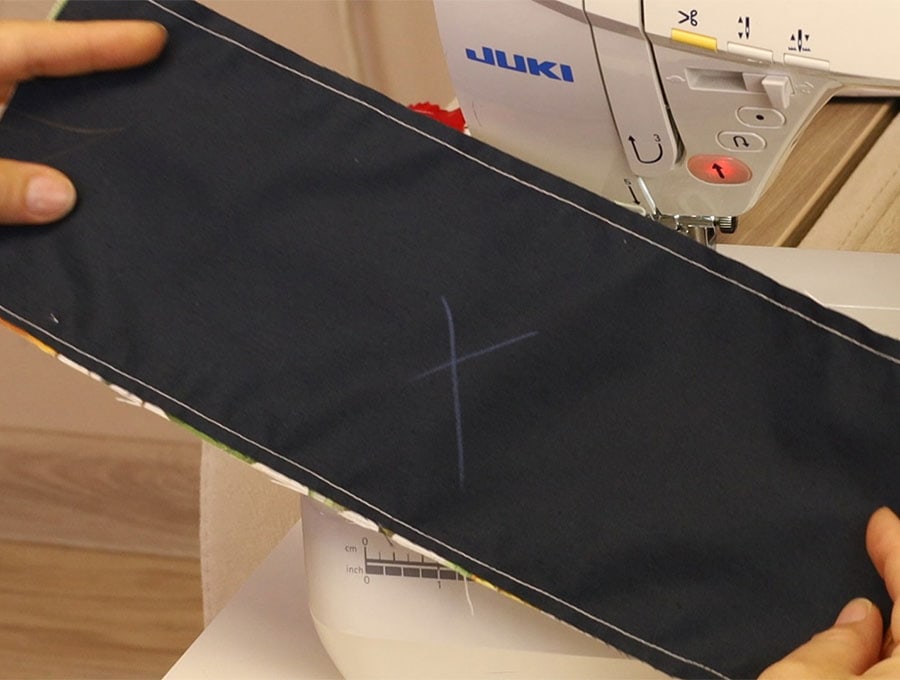
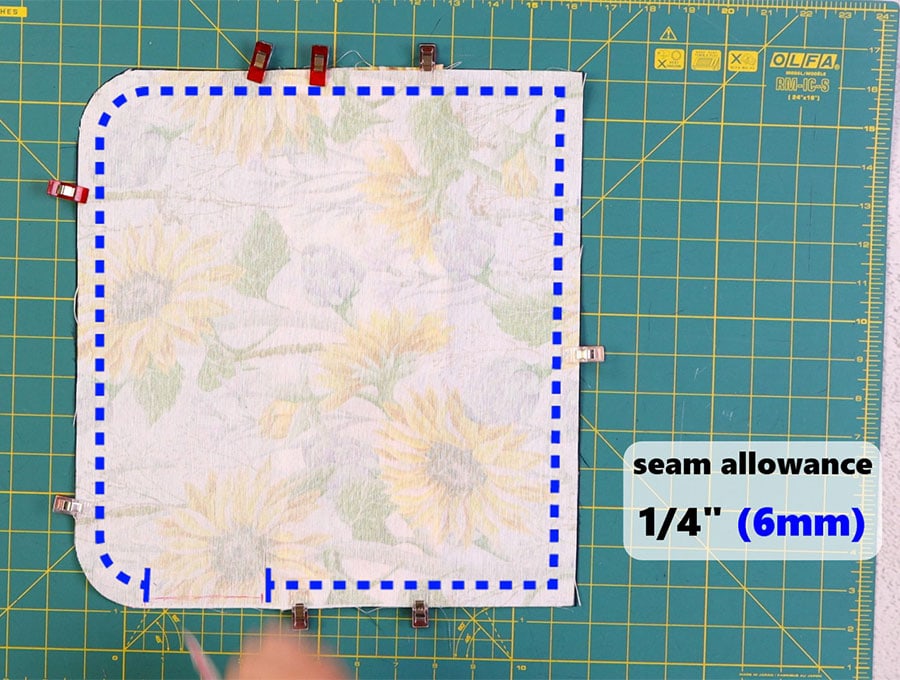
Stitch around the edge using a ¼ inch (6 mm) seam allowance. Make sure to backtack over the area where the ribbon is attached and the start and end of the gap.
STEP 10:
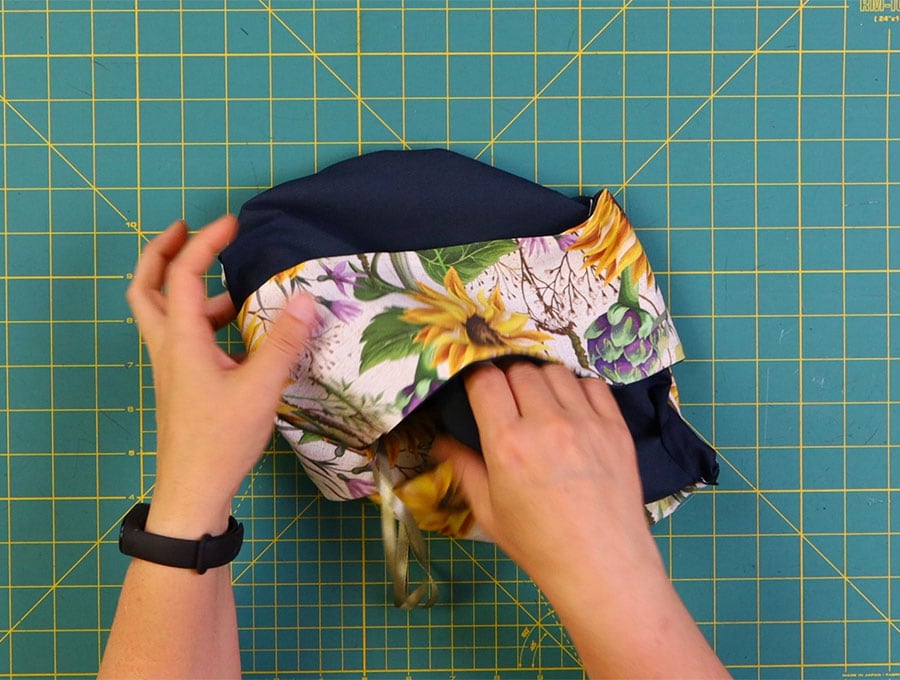
Clip off the tips of the corners and make small nicks along the curve so the fabric will lie flat when it is pulled the right way out.
STEP 11:
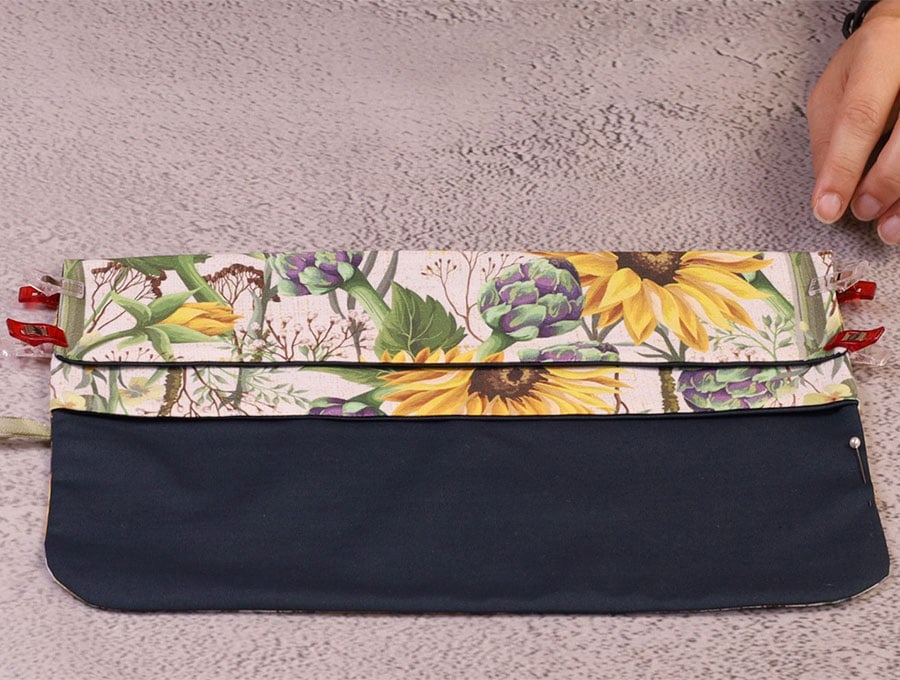
Turn the crochet hook roll the right way out by pulling the fabric through the gap. Use a turning tool to press out the seams and corners, fold in the raw edges of the gap in line with the seam, pin, then press the whole piece.
STEP 12:
Fold the bottom of the roll up so the fold meets the bottom of the pocket and clip in place, as this will make the second row for storing crochet hooks.
STEP 13:
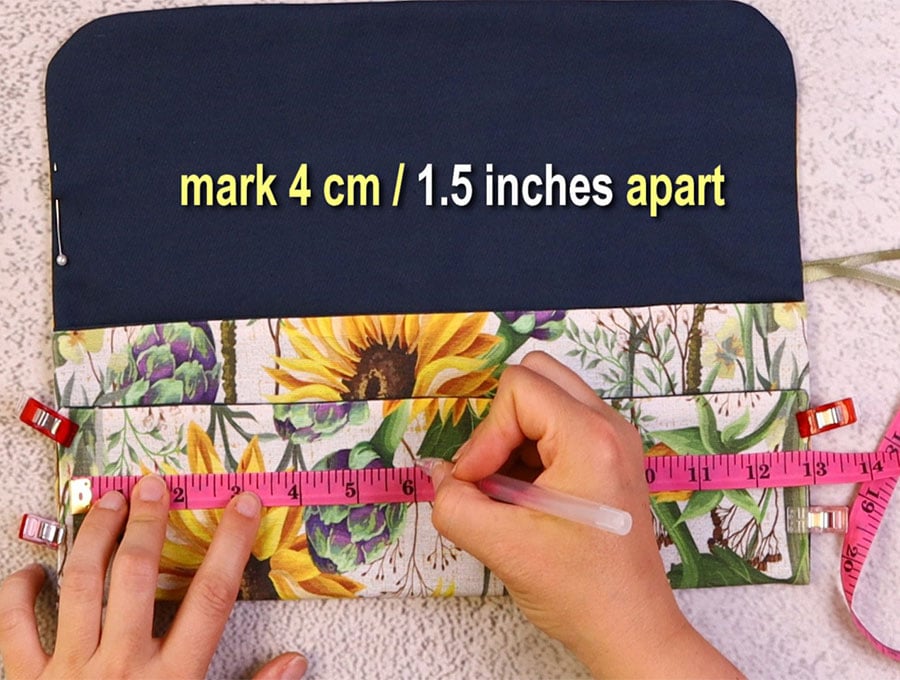
Use a quilting ruler or ordinary ruler to make marks 1 ½ inches (4 cm) apart along the length of the crochet hook holder.
Join with lines going from the bottom to the top of the pocket. (The quilting ruler is easier as it ensure you get a straight line without too much effort.)
STEP 14:
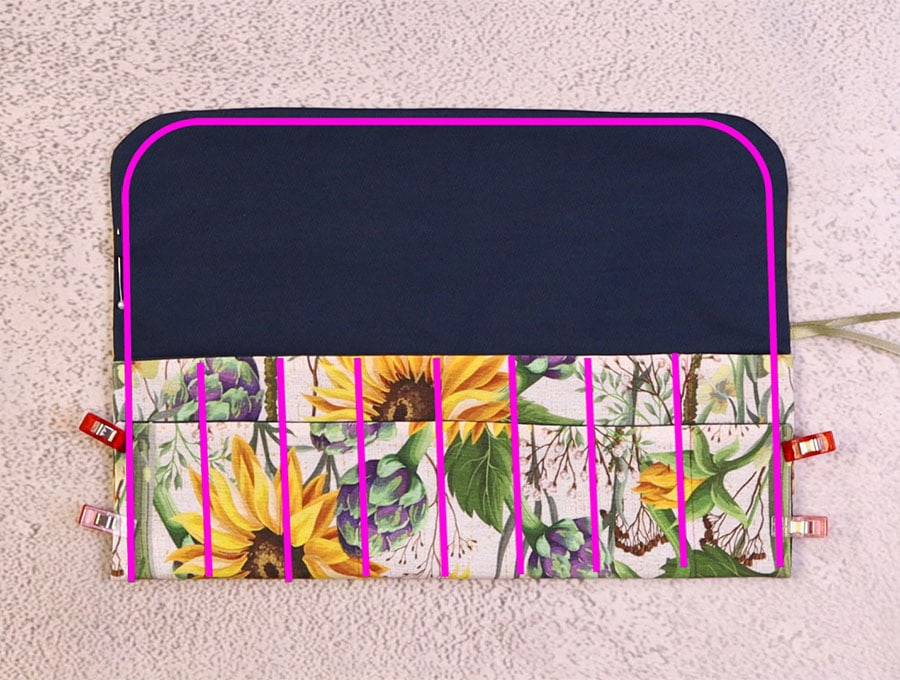
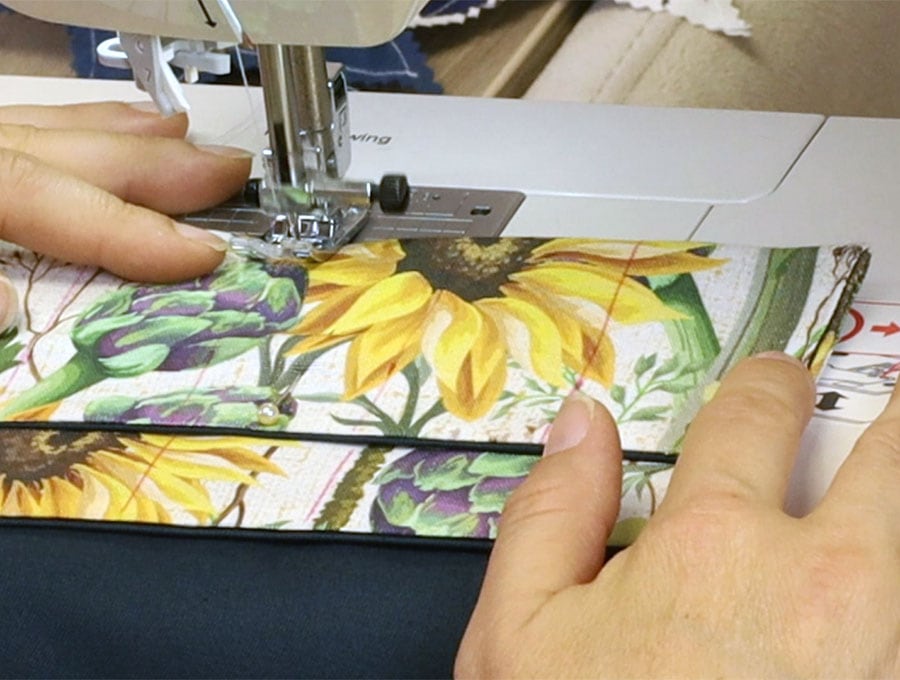
Stitch along each line, backtacking at the start and finish and where the folded over section meets the pocket.
STEP 15:
Stitch from the left hand corner to the top and around to the right hand corner, across the gap. Backtack on this line of stitching at the start and finish.
STEP 16:
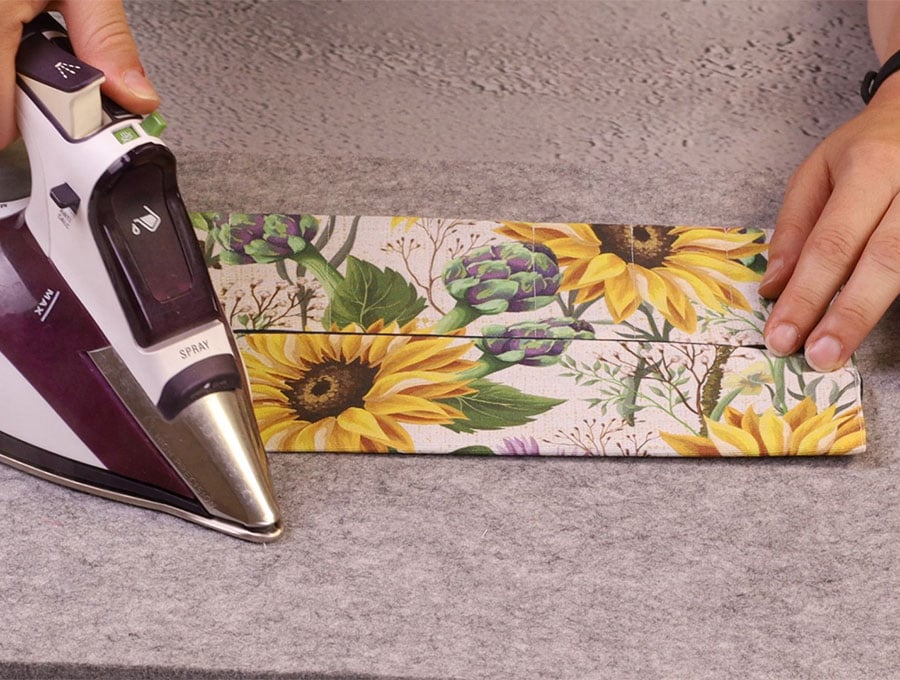
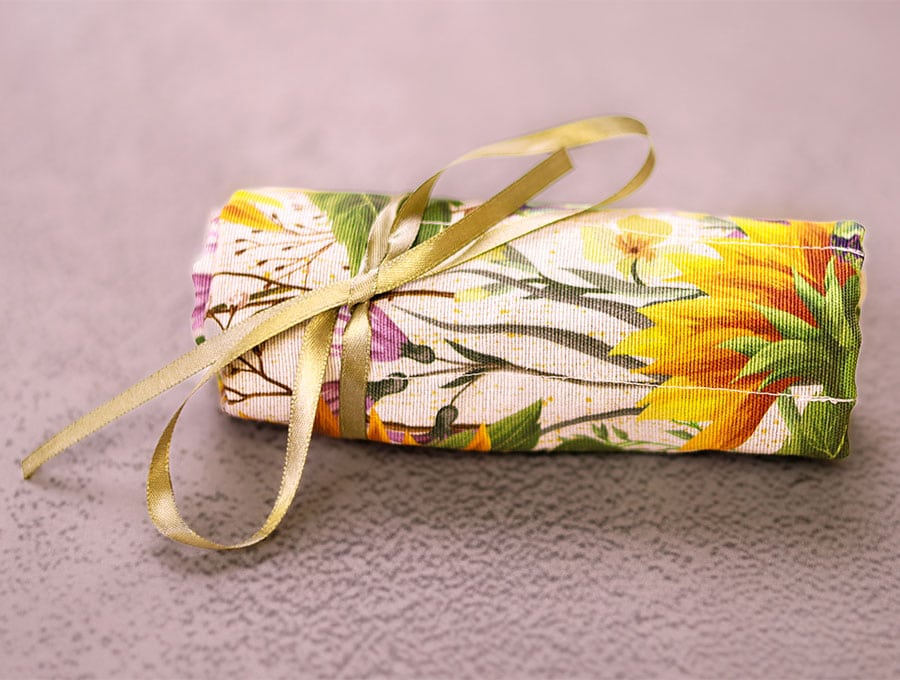
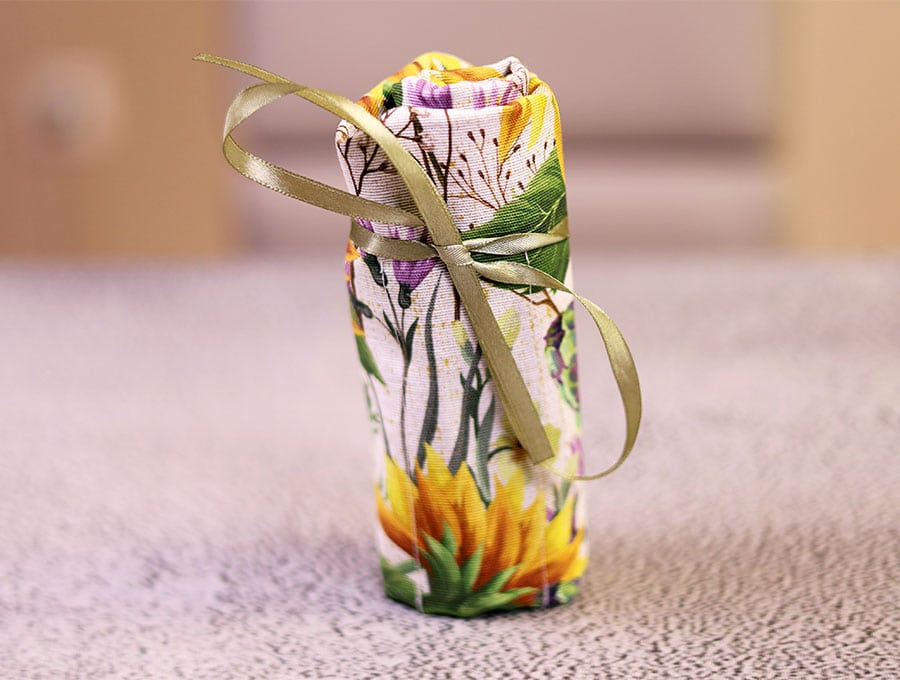
Give the roll a final press, folding down the top flap to meet the bottom flap edge.
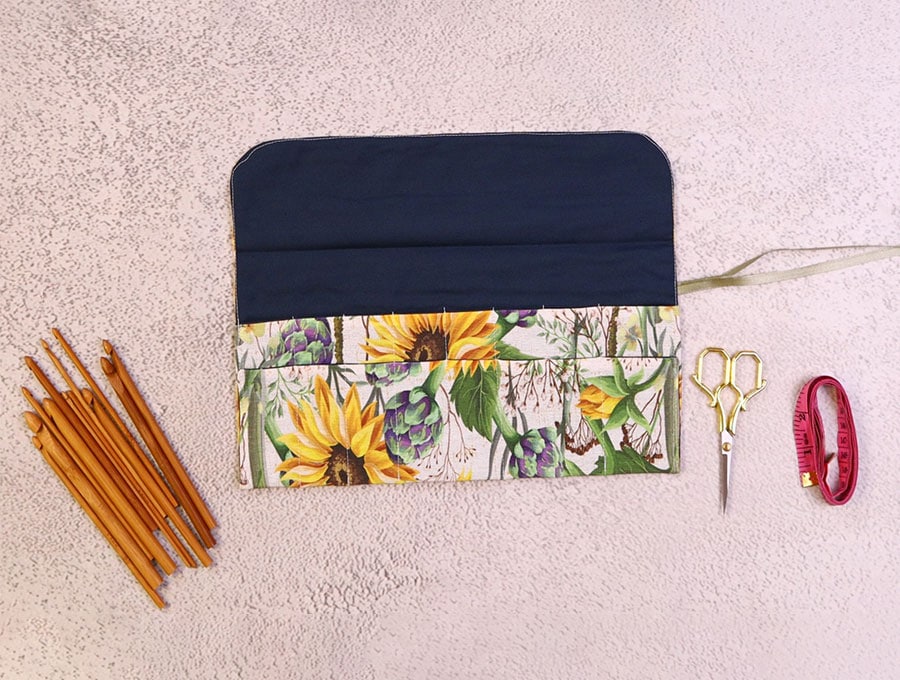
It’s now time for the fun part of inserting the crochet hooks in place along with a tape measure and a small pair of scissors. This project is ideal for someone starting out with crochet as you can give the hooks and the crochet hook roll as a present. Alternatively, if you are a person who crochets then hunt down all those crochet hooks and put them all together in this handy roll.
This project can also be made to accommodate an artist’s watercolor brushes, or a set of specialised pens for calligraphers or illustrators. Extend the fabric even further in height and it can keep knitting needles all together in one place. Like and subscribe for more fun and practical projects that don’t take more than half an hour of your time.
These rolls make excellent presents loaded with whatever takes the interest of kids or adults, from a set of pencils, glitter pens or acrylic paint pens. Combine with a kids or adults coloring book or a sketch pad and your present will give hours of entertainment and provide a handy place to store supplies without them getting lost or damaged.
Do you like this? Pin for later:
Wanna be friends? Click HERE and follow me on Pinterest
RELATED: