
DIY Dog Collar – How to Sew a Dog Collar
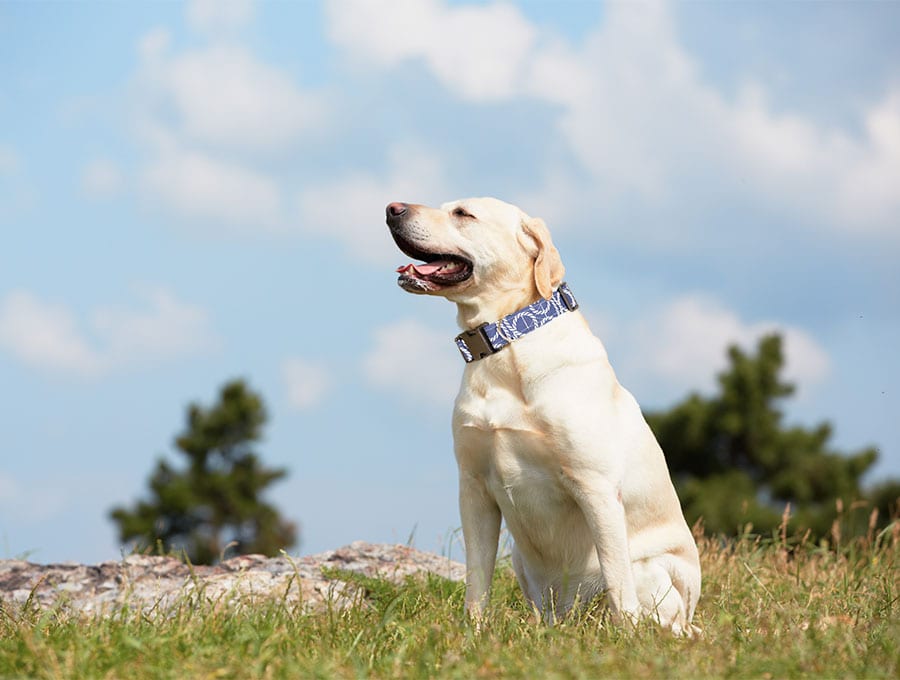
Our DIY dog collar features a soft cotton exterior that both looks good and protects sensitive skin on the dog’s neck with a solid nylon core webbing for durability and strength. Use some of your existing fabric stash to create these stylish collars. We provide the measurements for all dogs from extra small breeds to large dogs. In our FAQ section we even supply you with an easy hack for up-styling an inexpensive bought collar.

Making a personalized DIY dog collar to suit your furry friend’s personality is so easy and satisfying with our easy step-by-step tutorial and visuals. The best part is you can choose the fittings. For a dog that swims a lot a stainless steel D ring and plastic side release buckle and tri-slider are best. These DIY dog collars look professional and make great presents for friends who lavish more on their fur-babies than they do on themselves. It is also the perfect way to use up a long strip off offcut cotton fabric. The cotton is comfortable next to the dog’s skin, and the webbing provides the strength so the dog does not break free from it’s leash. Follow the step-by-step instructions along with the visuals to make these cute dog collars. You never know it may be the start of a new business!
Below you will find my step by step written tutorial with VIDEO instructions for all the visual learners.
We occasionally link to goods offered by vendors to help the reader find relevant products. Some of the links may be affiliate meaning we earn a small commission if an item is purchased.
Table of Contents
- 1 How to make a dog collar
- 2 Supplies and tools
- 3 How to Sew a dog collar
- 3.1 DIY dog collar VIDEO TUTORIAL
- 3.2 How to take the measurements for the collar fabric
- 3.3 These are some common collar sizes based on the circumference of the dog’s neck:
- 3.4 What materials should I use for the fittings?
- 3.5 INSTRUCTIONS:
- 3.6 STEP 1:
- 3.7 STEP 2:
- 3.8 STEP 3: Fold and press
- 3.9 Step 4
- 3.10 Step 5
- 3.11 Step 6
- 3.12 Step 7
- 3.13 Step 8
- 3.14 Step 9
- 3.15 Step 11
- 3.16 Step 12
- 3.17 Step 13
- 4 DIY dog collar FAQs and tips:
How to make a dog collar
Supplies and tools
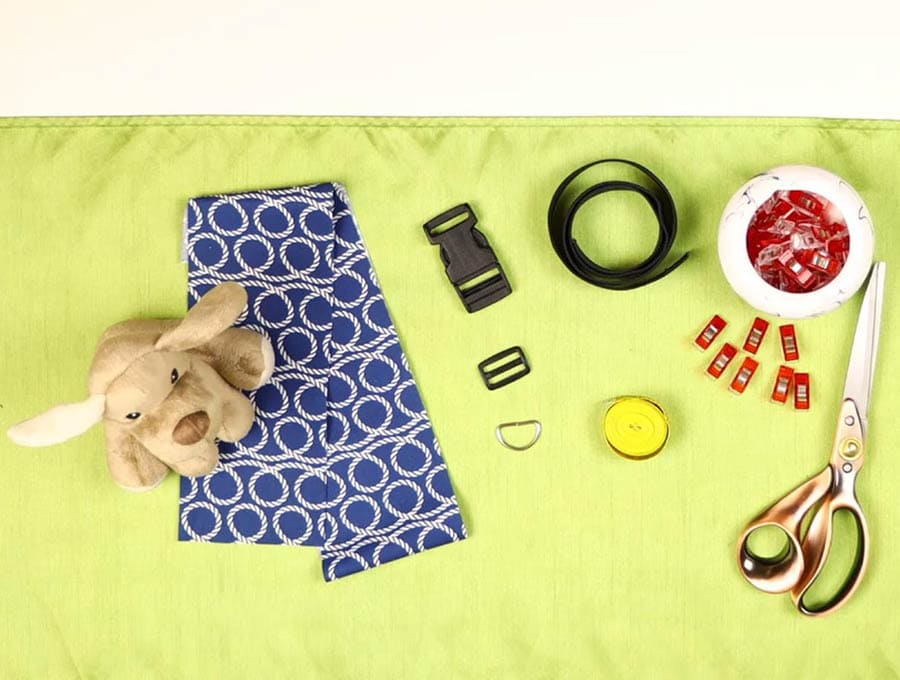
- fabric – cotton fabric suited to the size of the collar
- fusible interfacing
- D-ring
- tri-slider (slider)
- matching polyester thread (it is more durable than cotton)
- scissors (or rotary cutter and a cutting mat)
- ruler or measuring tape
- iron and ironing board
- sewing clips or pins
- Mid weight Interfacing – optional if making small and extra small collars
Follow us for free patterns & tutorials! [easy-profiles]
How to Sew a dog collar
Watch the diy dog collar video first and then follow the written step by step instructions below.
Please enjoy and don’t forget to Like and SUBSCRIBE over on YouTube to be kept up to date with new videos as they come out.
DIY dog collar VIDEO TUTORIAL
How to take the measurements for the collar fabric
First using a fabric tape measure, measure the circumference of your dog’s neck. A correctly fitting collar will allow for you to insert three fingers between the collar and the dog’s neck, so don’t pull the tape measure too tight. Because of the seam allowance and adjustments with the tri-slider you’ll need the fabric to be 6 inches (15 cm) to 10 inches (25 cm) longer, depending on the size of the collar you are making. This will allow for the collar to be adjusted as the dog grows.
These are some common collar sizes based on the circumference of the dog’s neck:
- X-SMALL to fit neck size between 8 inches (20 cm) and 9 inches (23 cm)
- SMALL to fit neck size between 10 inches (25 cm) and 13 inches (33 cm)
- MEDIUM to fit neck size between 14 inches (35.5 cm) and 17 inches (43 cm)
- LARGE: to fit neck size between 18 inches (45.75 cm) and 24 inches (61 cm)
What materials should I use for the fittings?
It depends on your dog – if it’s in the water frequently you’ll want to go for a plastic slide release buckle and tri-slider. The D ring must be of a material that doesn’t corrode like stainless steel rather than galvanized or chromed metal. Perhaps a braided webbing rather than a fabric collar will be better and easier to clean. You can buy attractive strong braids and make them into collars – it’s much quicker than covering the webbing with the fabric.
INSTRUCTIONS:
STEP 1:
Measure the dog’s neck and add 6 to 10 inches (15-20cm) – 6 inches if the collar is for a small dog and 10 if it for a large dog. We are going to make a collar for a large size dog with a neck circumference of 20 inches (51 cm). We are going to use 1 inch (2.5cm) wide polypropylene webbing. If the collar were for a smaller dog we would use ½ inch (12mm) webbing.
So our measurement for the fabric length would be 20 inches plus 10 inches – total 30 inches (76 cm). Cut the fabric 4 times x width of webbing. In our case that is 4 ” (10cm)
STEP 2:
Choose the fabric and measure 30 inches x 4 inches wide (76 x 10cm), then cut it out.
Optional: If you are making this for a small dog, cut a 2 inch (5cm) strip of interfacing to 21 inches. Iron the interfacing to the wrong side of the fabric strip according to the manufacturer’s instructions.
STEP 3: Fold and press
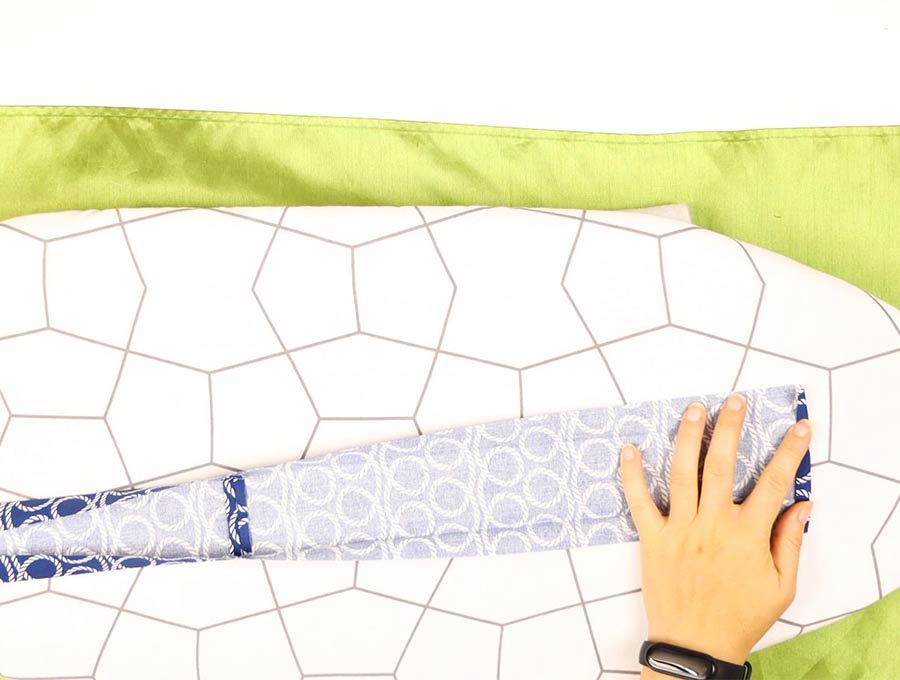
Fold the short ends in 1/4 inch and press.
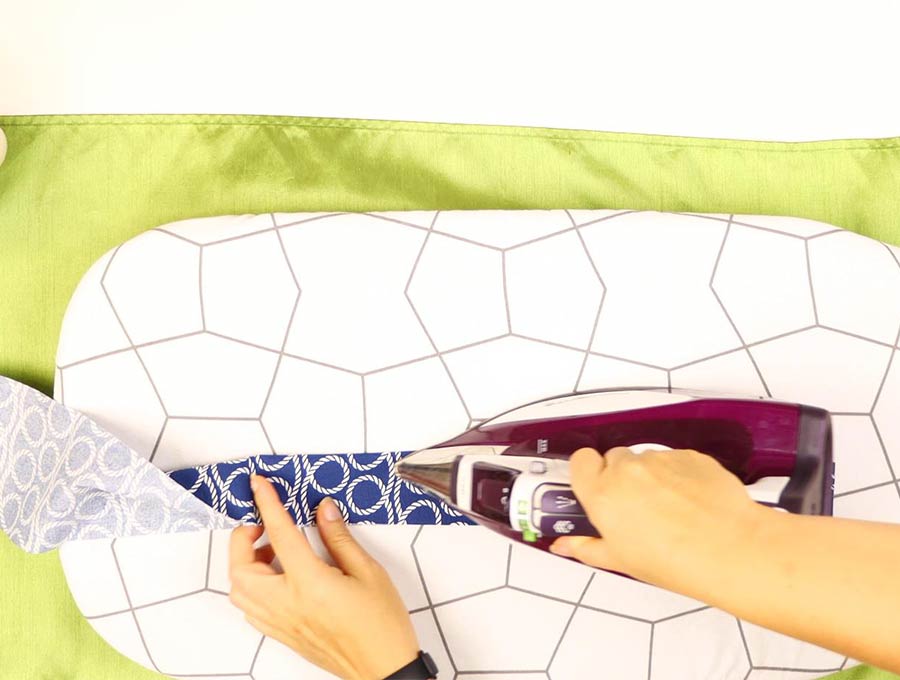
Fold the strip lengthways in half and lightly press before opening out the fabric again.
Then fold each of the long sides in towards the center mark that has been pressed in. Press, then fold over in half, lengthwise again, lining up the edges and press. The collar is now ready for the webbing to be inserted.
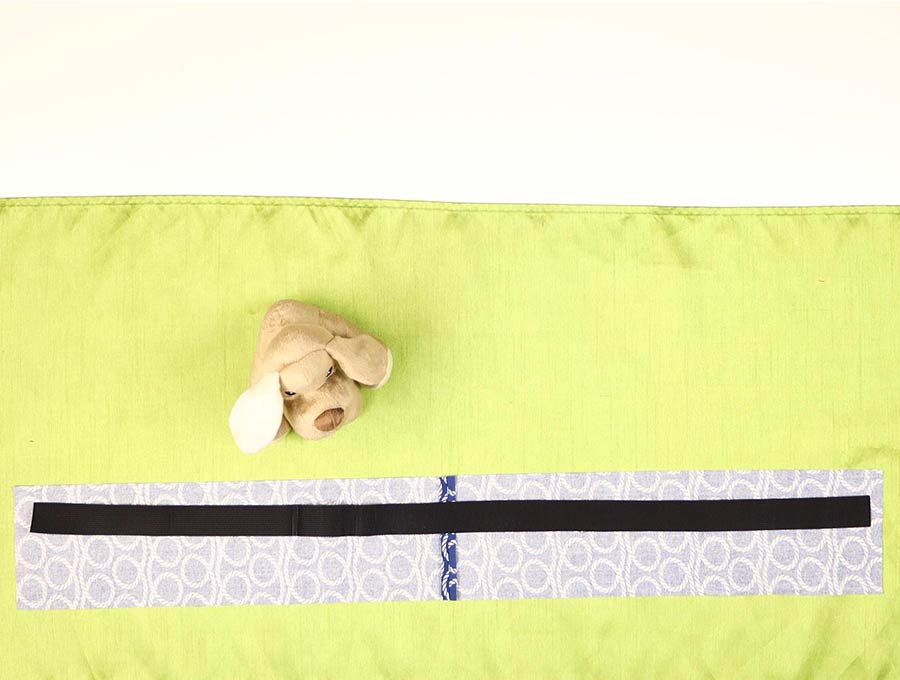
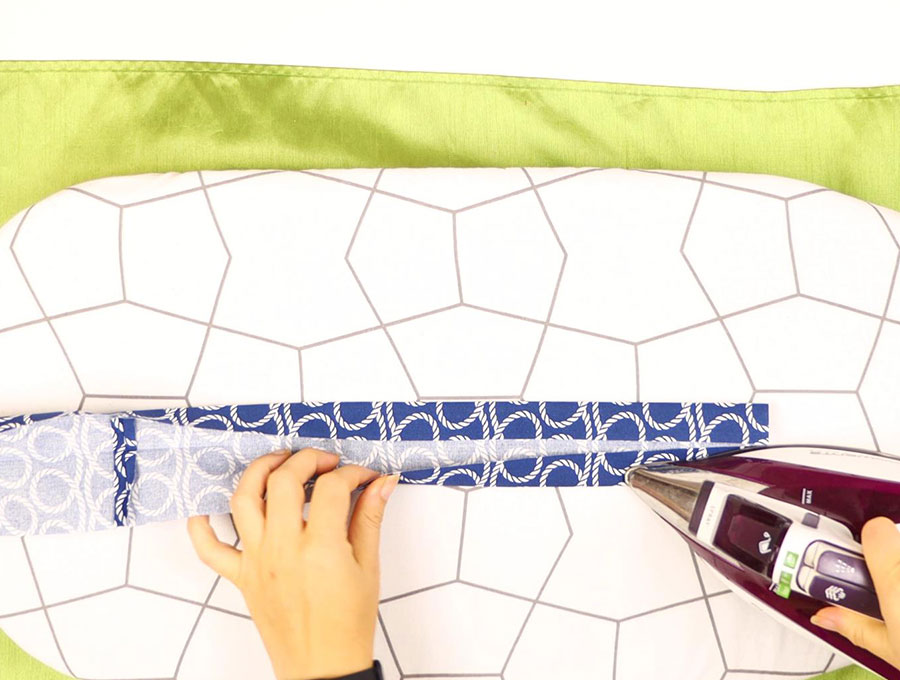
Step 4
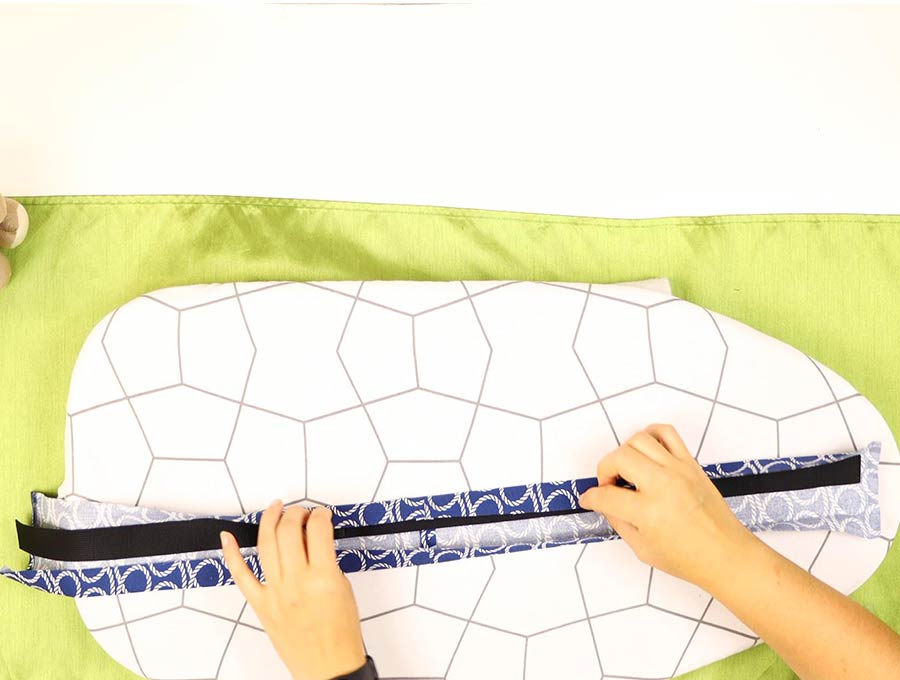
Open out the fold you just pressed in place and line up the webbing so it fits neatly inside the fabric.
Clip in place.
Step 5
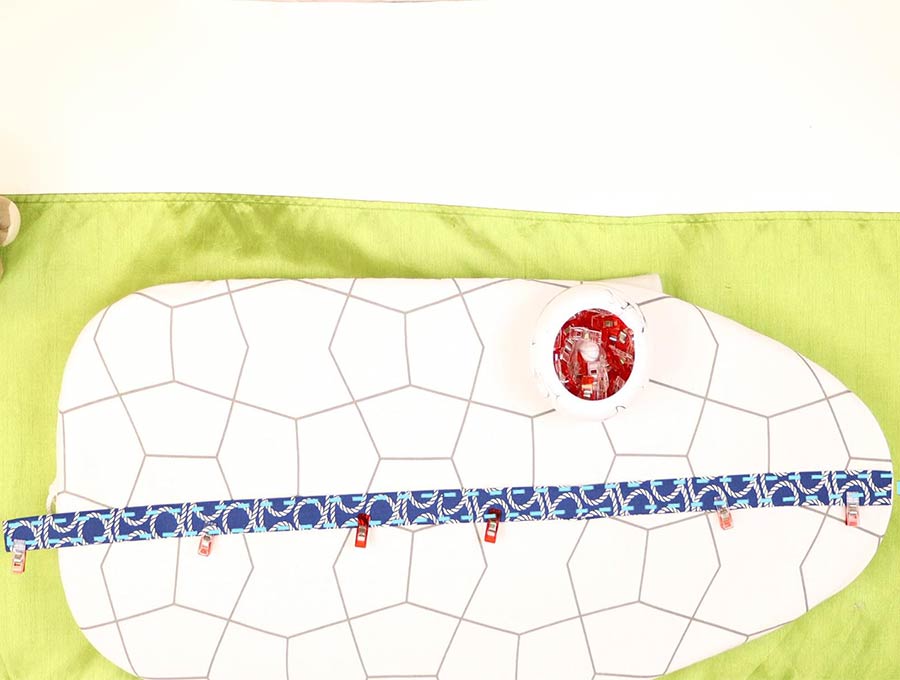
Sew all the way around the short and long edges, 1/8 inch (3mm) from the edge to attach the webbing to the fabric and ensure the fabric is stitched closed. Lift the presser foot at the corners while leaving the needle in the fabric, so you make a neat turn before depressing the presser foot and continuing to sew.
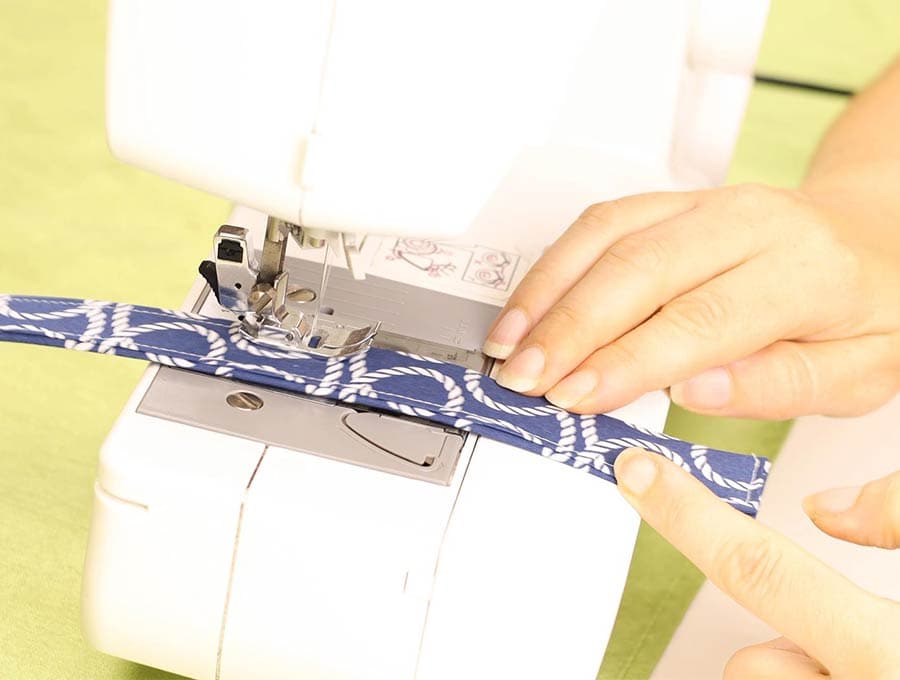
Backtack at the start and finish. You are now ready to add the fittings.
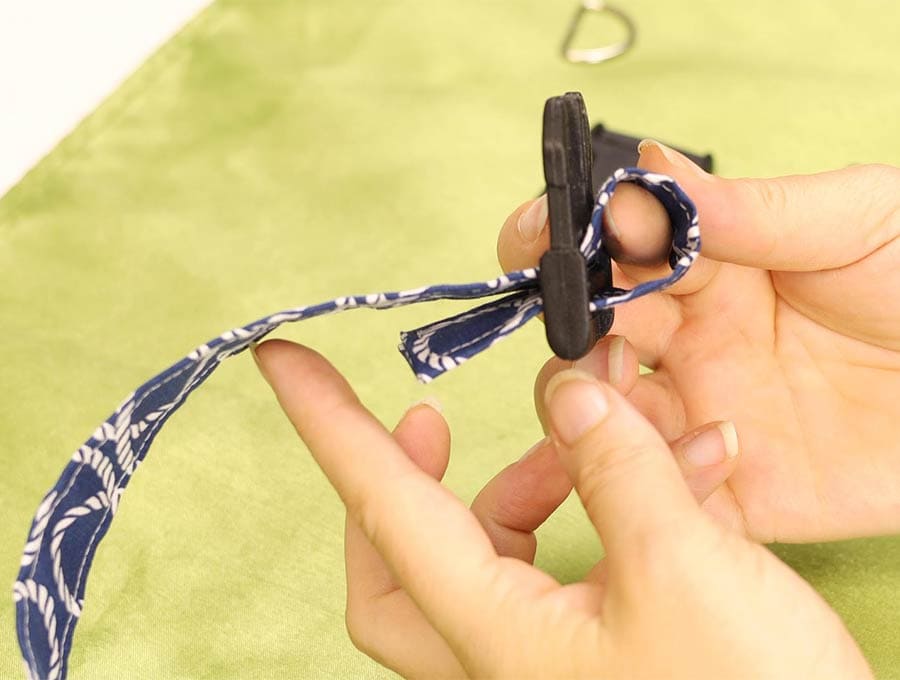
Step 6

Place the side of the collar you want to face outwards on the dog’s neck face-down on the worktop. Take the slider and slide the dog collar fabric over the last gap in the slide, bring it up over the middle bar and down through the last gap. Leave an inch (2.5cm) of fabric extending beyond the slider.
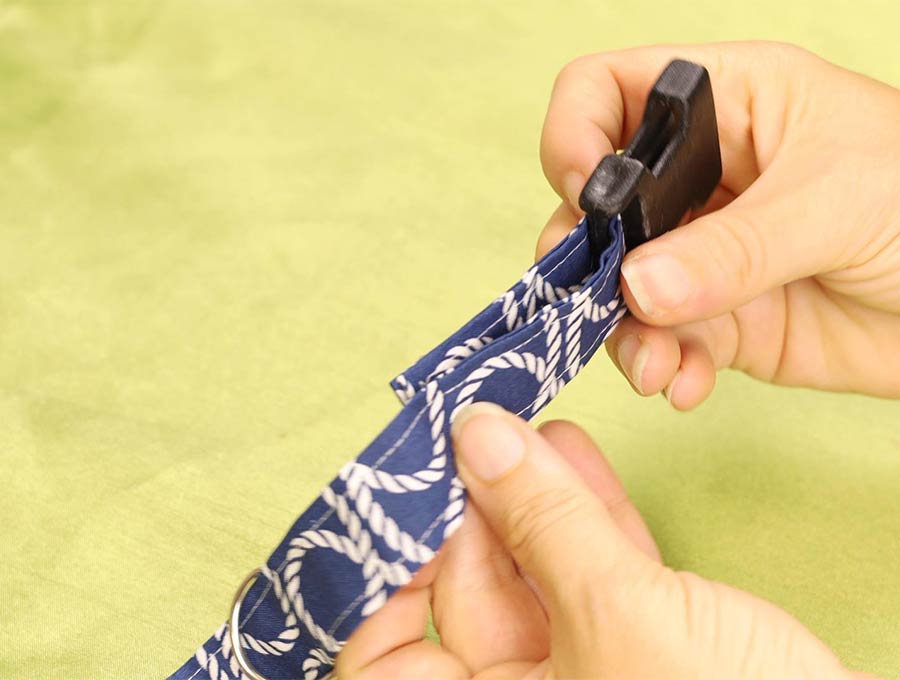
Step 7
Sew a box stitch as close to the slider as you can – doing a line of stitching close to the slider then extending out an inch to the edge of the fabric and down the edge, up again along to create a box that will prevent the slider falling off the collar.
Step 8
Take the contoured side release buckle and using the piece with the prongs slide it onto the opposite end of the fabric to the side where you placed the slider. Insert the fabric over then under the bar on the pronged release buckle, making sure it can move smoothly
Step 9
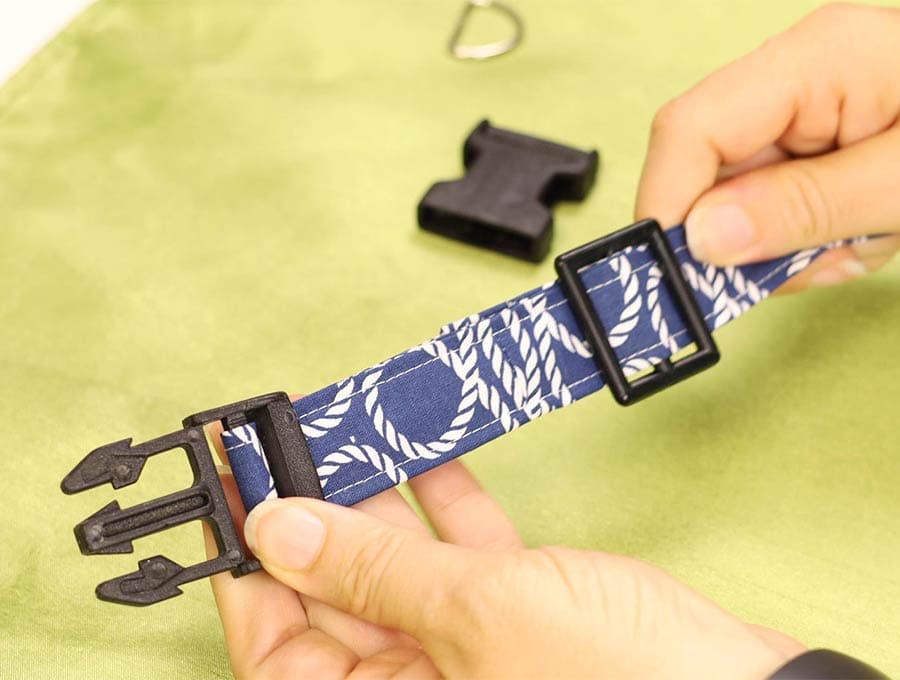
Insert the fabric over the bar on the slider you stitched in place earlier and work it down to the end near the tri-slider. Make sure everything slides and can be adjusted.
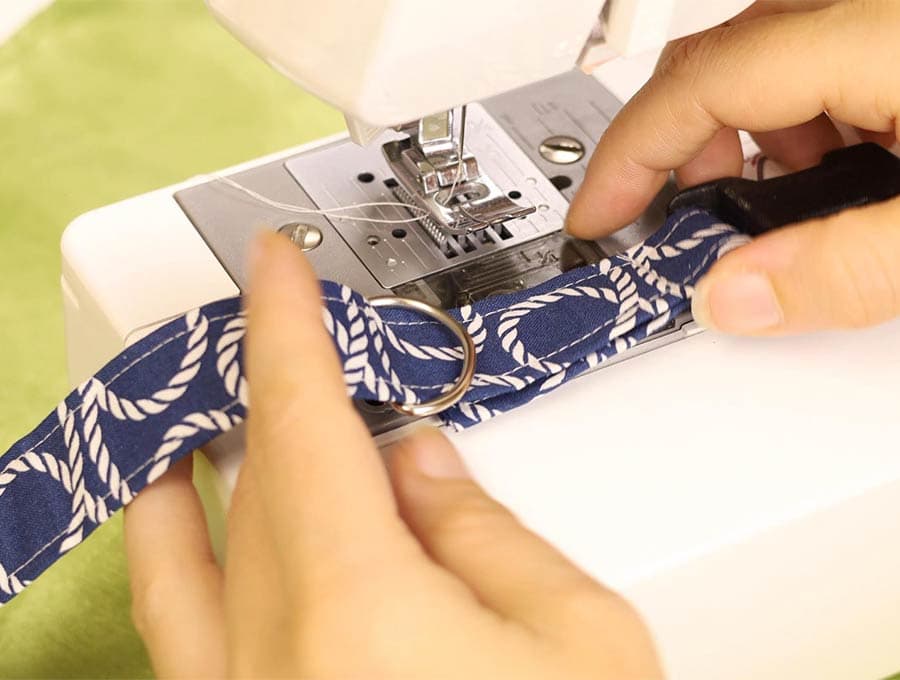
Step 11
Slide on the D ring. Don’t stitch it in place yet. Slide on the other piece of the contoured side buckle making sure the right side of the buckle meets up with the prongs on the other half of the buckle and they are to the side of the collar that will face outwards on the dog’s neck.
Leave a small 1.5 inch (4 cm) tab at the end where you slipped on the second half of the slide release clip.
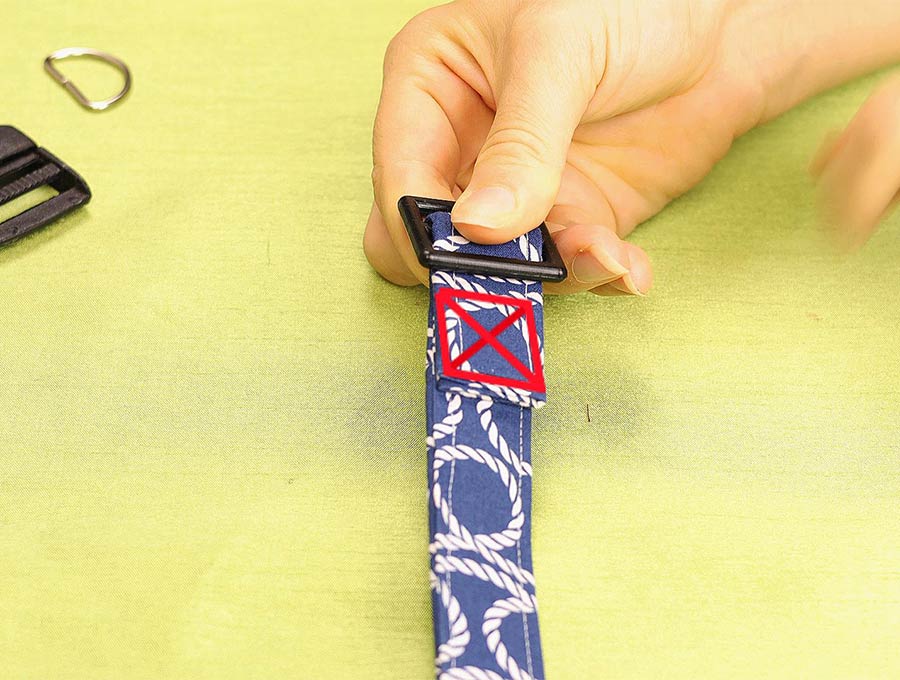
Step 12
Stitch a triple stitch – forward, backward and forward again as close to the point where the buckle is placed.
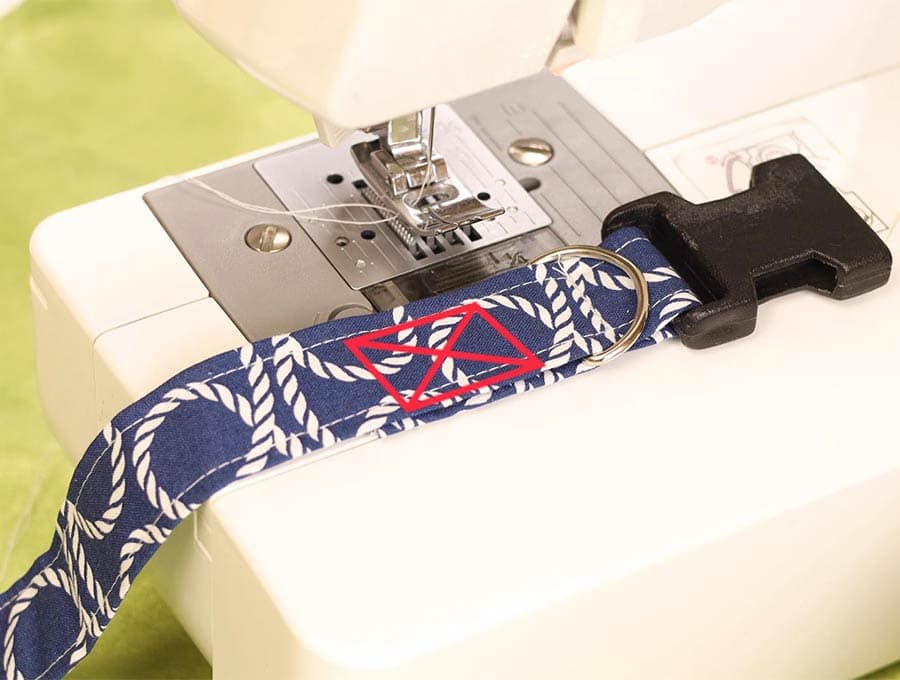
Step 13
Slide up the D ring so it is between the end buckle and the 1.5 inch (4cm) tab. This is the part that will take the most pressure if the dog pulls on the leash, so once the D ring is in placed next to the release catch, stitch a box stitch with an X in the middle to fasten down the end of the 1 inch tab to the collar and secure the D ring in position between buckle and the rest of the collar.
Your dog collar is now ready to test on your furry friend. Adjust the tri-slider to get the correct adjustment to fit the dog’s neck comfortably – remember you should be able to slip 3 fingers between the dog’s neck and the collar. If you enjoyed this step-by-step tutorial then click the subscribe button to have more content like this delivered straight to your inbox and never miss out on a project again.
DIY dog collar FAQs and tips:
Q: Can I make a collar from an old one?
A: You can, if the fittings are still in good condition. Simply disassemble the collar and remove the fittings, such as the tri slider, the D ring and the side buckle. Discard the old collar material, then proceed from Step 1 with new fabric and webbing.
Q: Can I make a fancy dog collar from an existing one?
A: An option is to buy one of those cheap dog collars from a place like the Dollar Store, then personalize it for your dog by adding the fabric as we have shown from Step 1. The only difference is that you will have the webbing and fittings already. Just make sure before you buy a cheap collar that it has been sewn together and not glued. If it is glued don’t buy it as you will have to cut out too much of the webbing, then the collar may be too short for the dog’s neck. With the bought collar all you need to do is rip open the seams, disassemble the dog collar and slip the webbing inside the fabric as we described in the step- by-step tutorial. With the cheap collars the D ring won’t be stainless steel so it won’t be any good if your dog swims a lot. You may want to replace the D ring with a better quality one.
Do you like this? Pin for later:
Wanna be friends? Click HERE and follow me on Pinterest
RELATED:
- DIY dog leash – how to sew it in 10 minutes