
DIY Dog Leash – How to Make a Dog Leash in 10 minutes
Making your DIY dog leash will take just a few minutes once you have assembled the supplies. Fabric, webbing and a quick-release catch are all you need in terms of materials. Follow our step-by-step instructions and visuals to create a personalized leash that is comfortable to use and looks stylish. You can custom-make the leash to the length that suits you and your pet. Cotton prints suited to quilting will work well. Importantly, in this age of reusing and recycling, if the fabric on the leash gets worn, you can disassemble it and make a new covering.
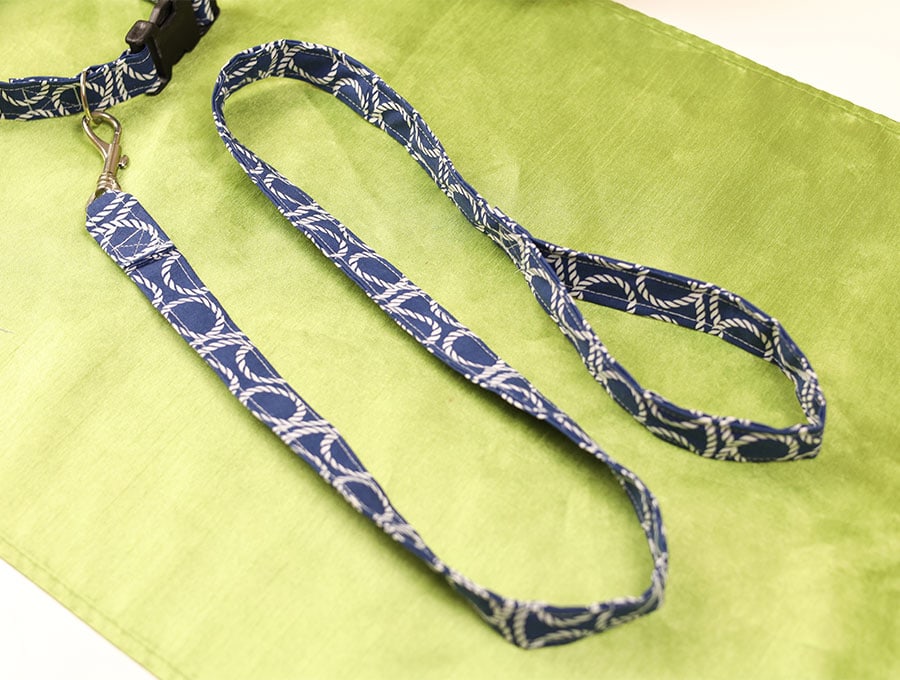
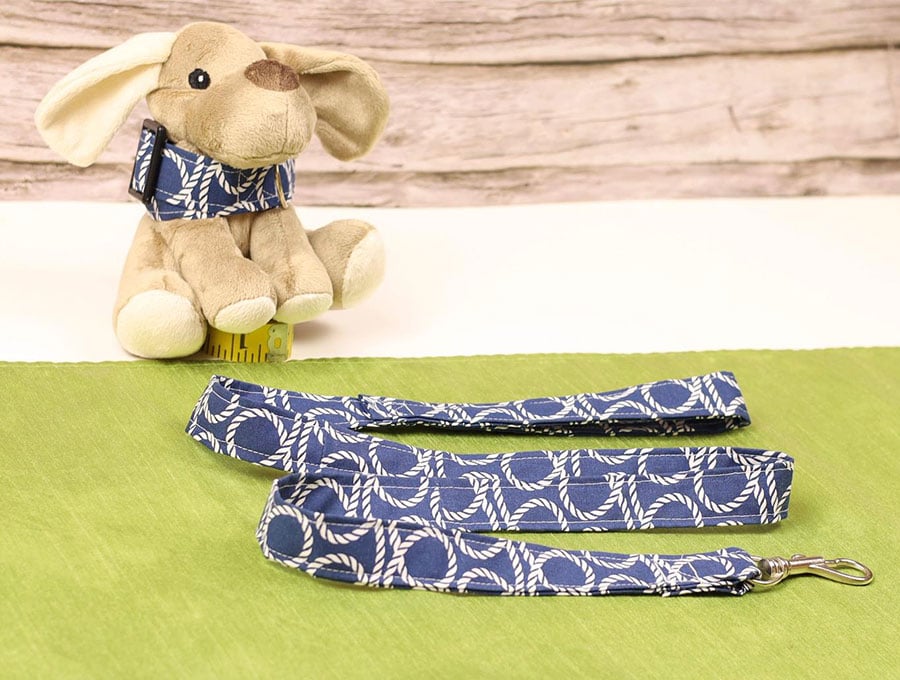
With our step-by-step tutorial accompanied by video instructions for visual learners, you’ll soon have a custom-made leash for your pet – whether it’s a dog, cat, or bearded dragon. The nylon webbing used for dog leashes to give them strength is covered with print or plain fabric to create a personalized leash. Once you see how easy these are to sew, you will probably want to make some for friends and family. After all, what better present for a pet than the prospect of more walkies?
Below you will find my step by step written tutorial with VIDEO instructions for all the visual learners.
We occasionally link to goods offered by vendors to help the reader find relevant products. Some of the links may be affiliate meaning we earn a small commission if an item is purchased.
Table of Contents
How to make a Dog Leash
DIY Dog Leash Supplies and tools
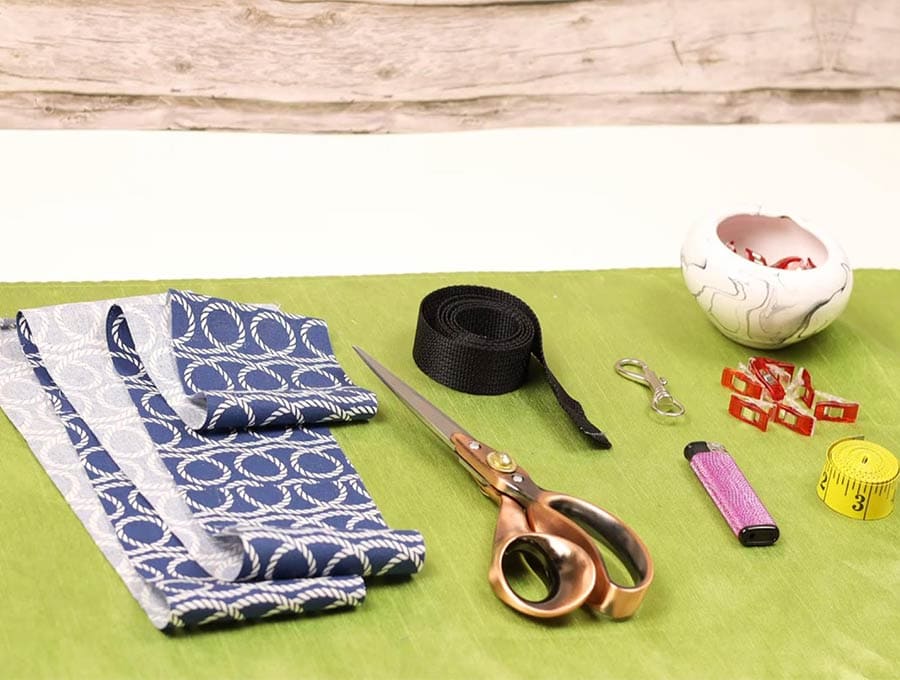
- fabric – tightly woven cotton at least 4ft x 4″(1.5m x 10cm) see below for more info
- 1″ (2.5cm) wide nylon webbing strap at least 4ft (1.5m) long see below for more info
- bolt snap to attach to the dog collar
- (optional) fusible interfacing
- matching polyester thread (it is more durable than cotton)
- scissors (or rotary cutter and a cutting mat)
- ruler or measuring tape
- iron and ironing board
- sewing clips
Follow us for free patterns & tutorials! [easy-profiles]
How to Sew a Dog Leash
Watch the diy dog leash video first and then follow the written step by step instructions below.
Please enjoy and don’t forget to Like and SUBSCRIBE over on YouTube to be kept up to date with new videos as they come out.
DIY Dog Leash VIDEO TUTORIAL
INSTRUCTIONS:
These are some standard leash lengths based on what you will be doing with the dog:
6 Feet (1.8m)
A six-foot leash length is the most commonly used. With this length, you can walk in the park or neighborhoods that are not too crowded, giving the dog a bit of distance to explore.
4 feet (1.2m)
Using the four-foot dog leash on busy city streets and crowded places like dog-friendly fairs and exhibitions means you can keep your dog under close control. It is easier to control the dog when children come up wanting to pat the dog or from it getting tangled with people and stalls. It is also an ideal length if you are training your dog to walk close to you.
8 feet (2.4m)
This length allows you to keep the dog under control but provides plenty of room for exploring when out in fields or parks. It is also ideal if you train your dog and don’t want it running off during training sessions.
What materials should I use for the quick-release catch?
It depends on your dog – if it’s in the water frequently, you’ll want to go for a stainless-steel quick-release. Some laws dictate that at the beach, the dog must be on a leash at all times, even when playing in the water. If your dog is averse to water, then a chromed or galvanized quick-release catch will be fine. If your dog is large and pulls hard, you don’t want to go for a plastic quick-release catch. Plastic is fine for smaller dogs.
STEP 1:
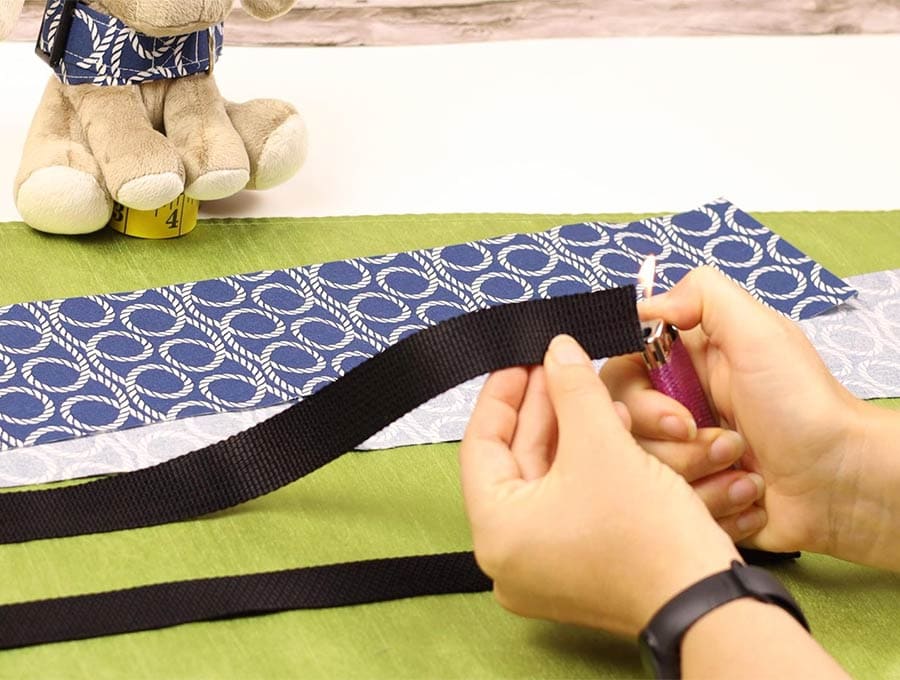
We are going to make a leash for a small to medium dog. The finished leash will be 4-foot (1.2m) using 1-inch wide polypropylene webbing cut to a length of 57 inches.
If the leash were for a tiny dog, we would use a webbing that is ½ inch (12mm) wide. Once cut, seal the cut edges of the webbing with a match or flame to prevent them from unravelling.
STEP 2:
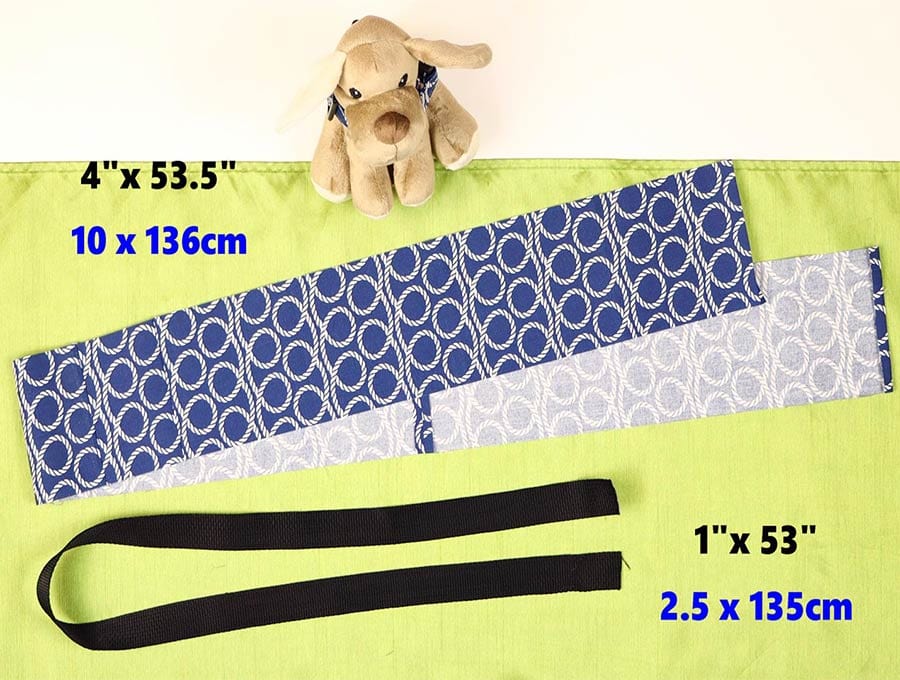
Our measurement for the fabric length would be 4 feet (1.2m) plus an extra 9 ½ inches to allow for an 8-inch foldover for the strap where your hand goes through, plus 1 inch for the foldover on the side where the quick-release catch is fastened. The extra 1/2 inch is for a ¼ inch seam allowance on each short end of the fabric. The fabric length will total 57 ½ inches (1.5 m)
STEP 3: (optional)
If not using interfacing, proceed with the next step
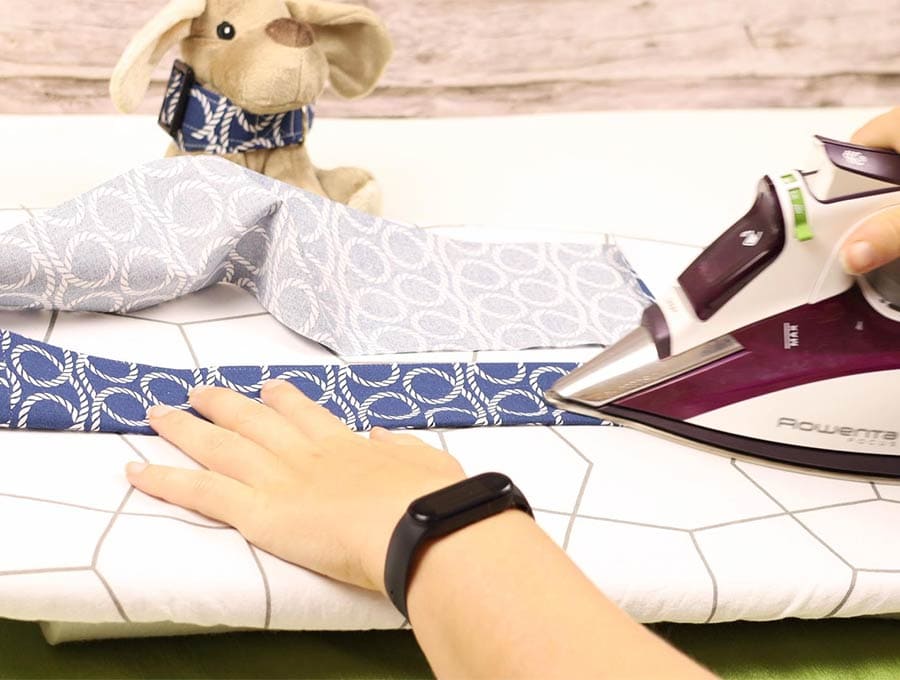
If you are using interfacing, now would be the time to iron the 2-inch wide strip of interfacing to the wrong side of the fabric strip, running down the center of the 4-inch wide fabric.
Step 4:
Fold the short ends of the fabric in 1/4 inch (5mm) and press.
Step 5:
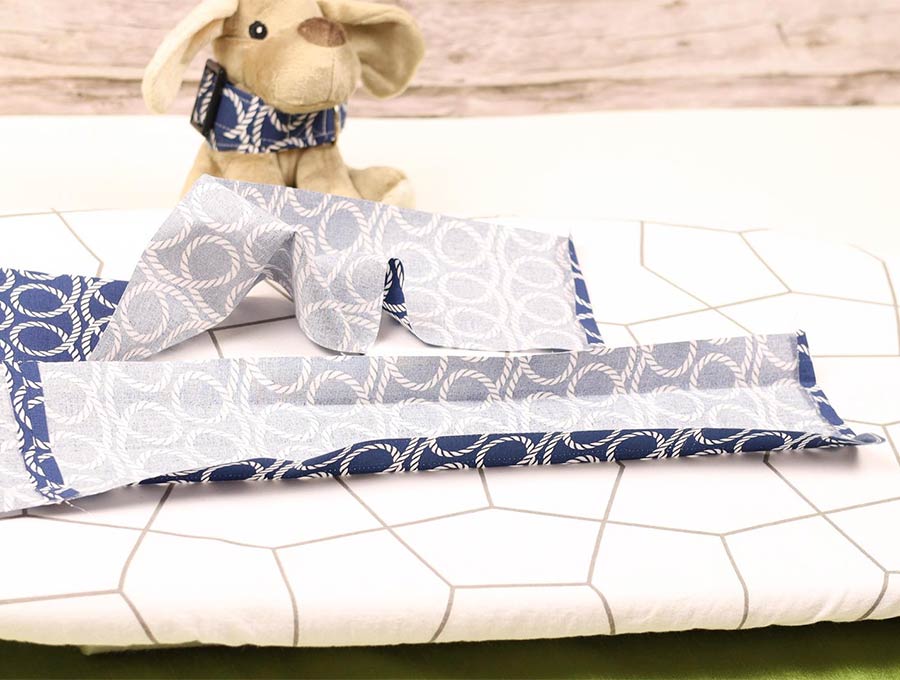
Fold the strip lengthways in half and lightly press before opening the fabric again. Then fold each of the long sides towards the center mark that has been pressed. Press those side foldovers, then fold the whole length in half again, lining up the folded edges and press. The leash fabric is now ready for the webbing to be inserted.
Step 6:
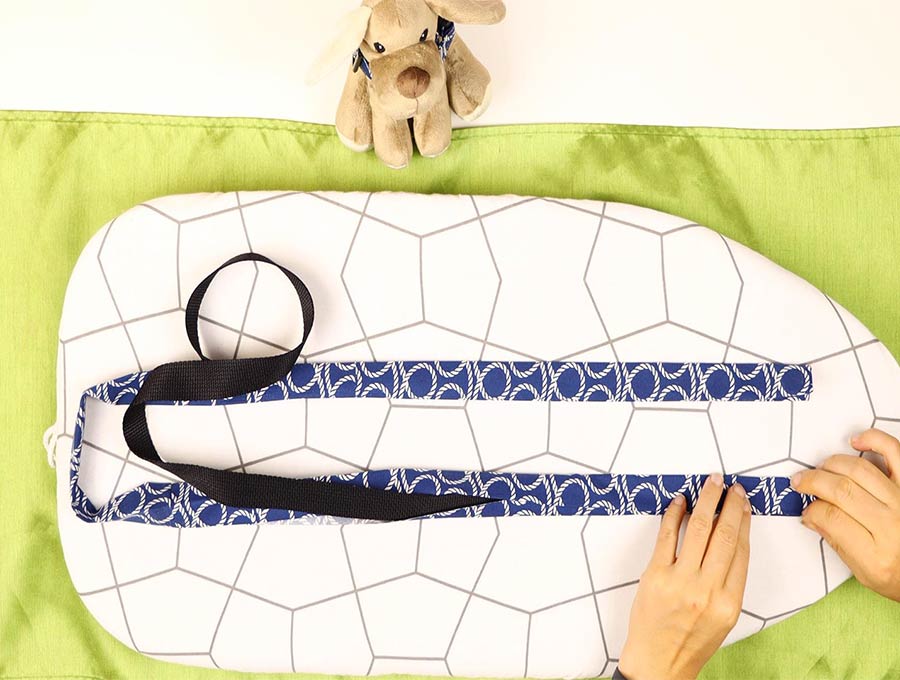
Open out the fold you just pressed in place and line up the webbing, so it fits neatly inside the fabric. Clip in place.
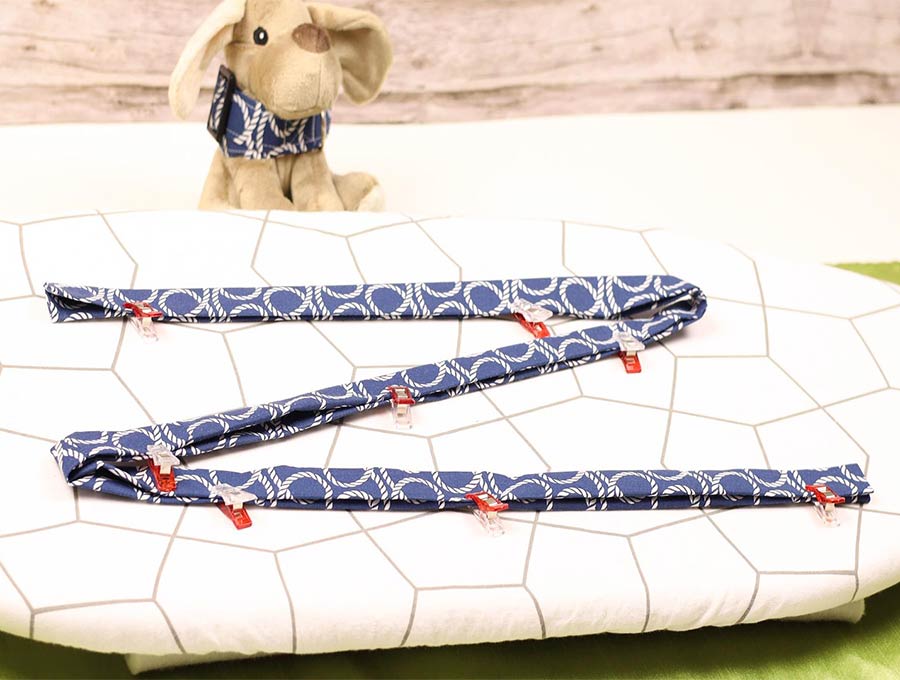
Step 7:
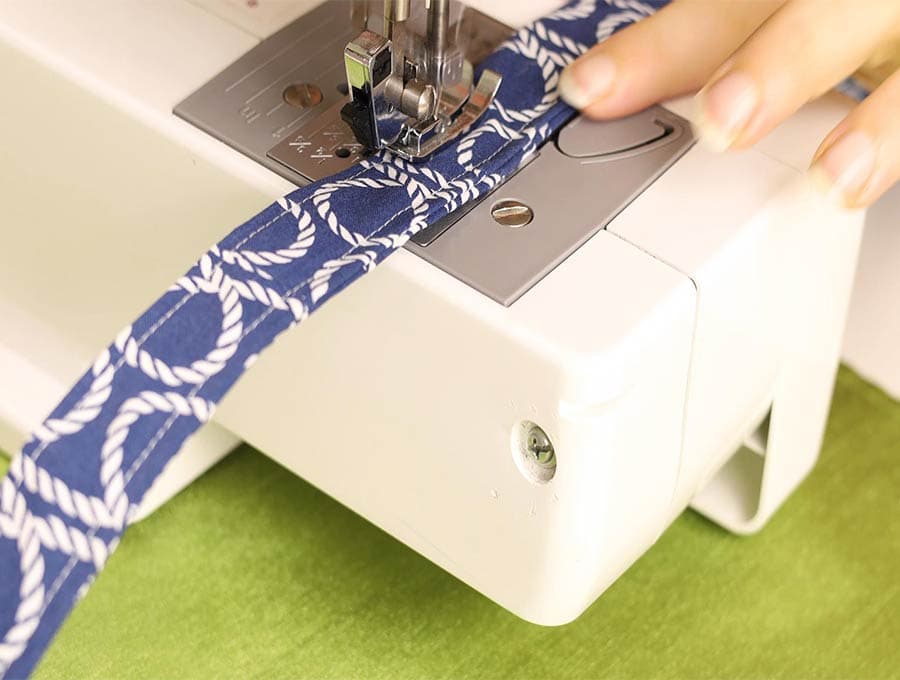
Sew around the short and long edges, 1/8 inch (3mm) from the edge, to attach the leash webbing to the leash fabric and ensure the fabric is stitched closed. Lift the presser foot at the corners while leaving the needle in the fabric. You can then make a neat turn before depressing the presser foot and continuing to sew. Backtack at the start and finish. You are now ready to add the quick-release catch.
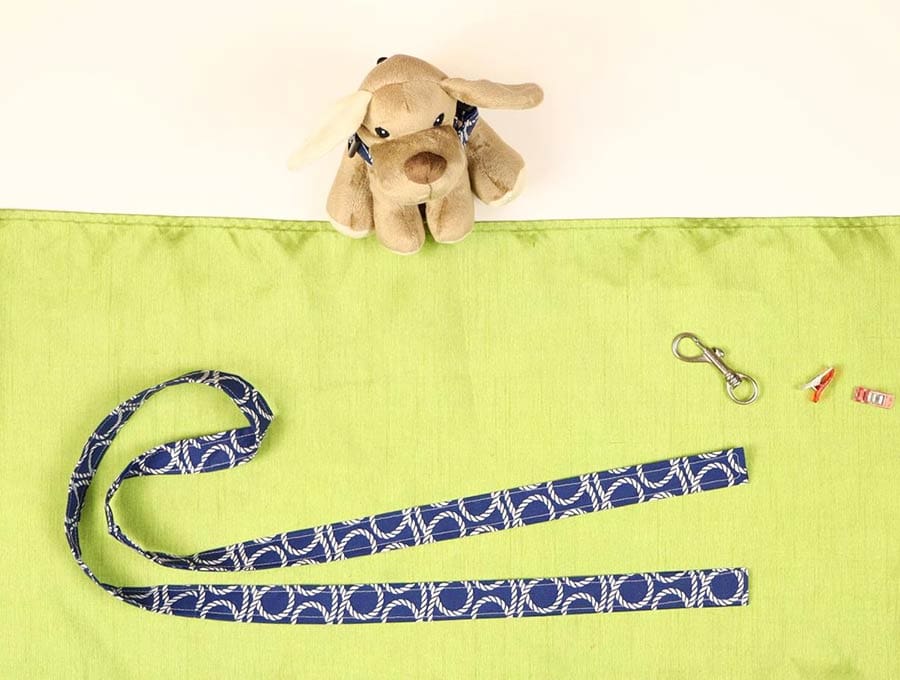
Step 8:
Place the leash on the worktop with the wrong side up, slide the quick-release catch bar over the leash, then fold back 1.5 inch (4cm) of the leash fabric and clip once the edges line up neatly.
Step 9:
Take the opposite end of the fabric to where you stitched on the quick-release catch. Fold it over 8 inches (20cm) to the same side as you folded back the fabric near the release catch to make the handle for the leash. Clip in place.
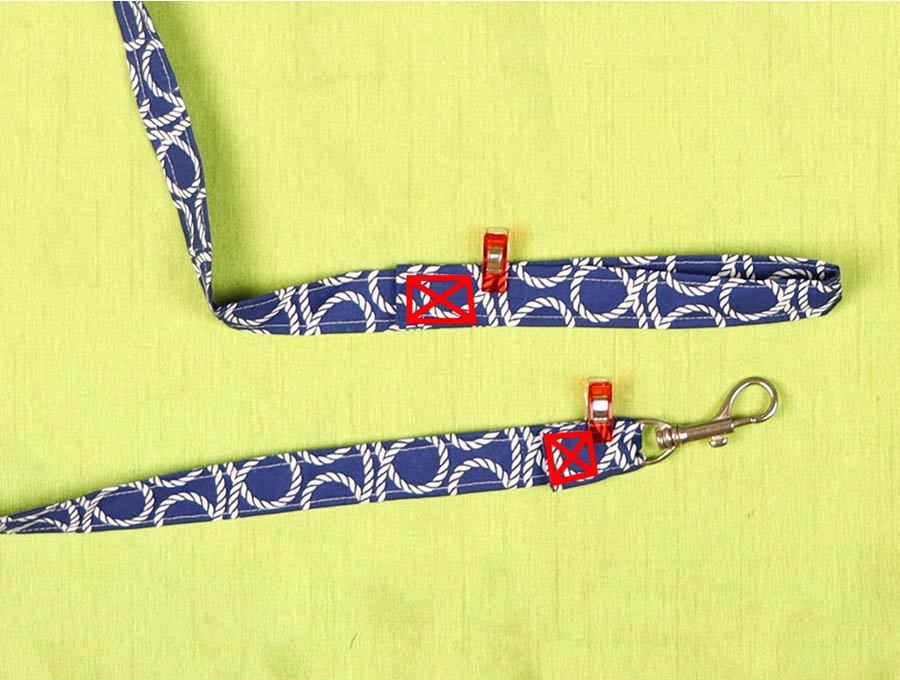
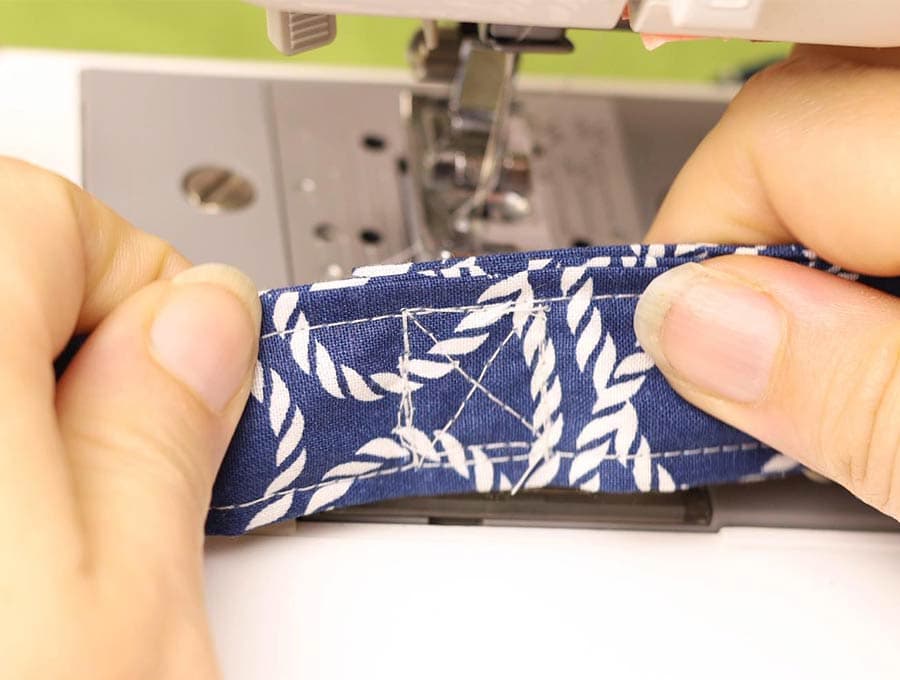
Step 10:
Sew a line of stitching as close to the bar on the release catch extending out 1 inch to the edge of the fabric. Continue right around to create a box that will prevent the release catch from pulling loose. Sew an x over the box stitching for added strength, making sure to back tack at the start and finish of all stitching.
Step 11:
Stitch a box stitch and an X over the inch at the end of the fold, securing it to the leash.
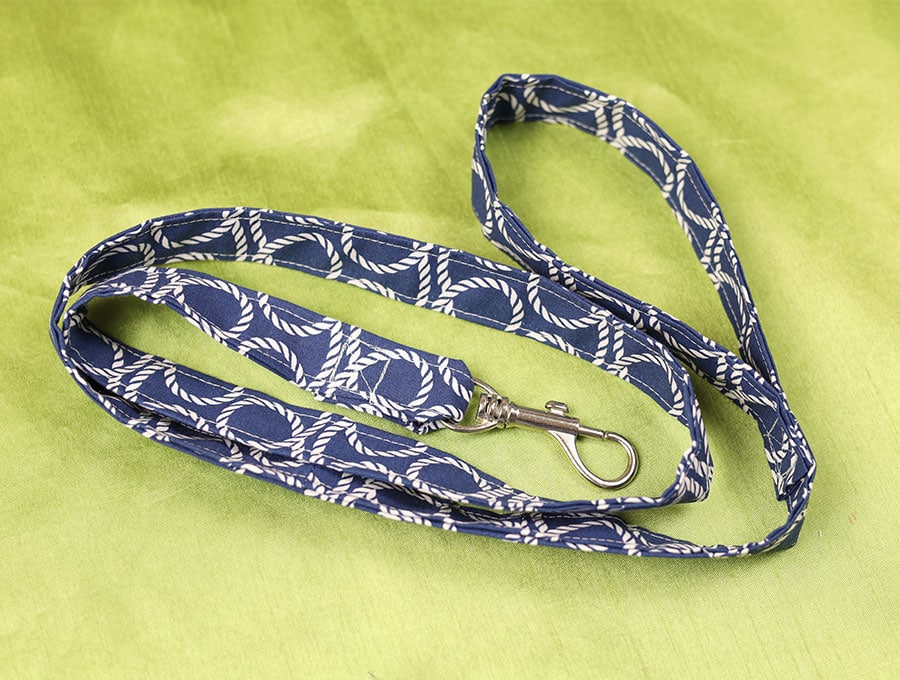
Your leash is all ready to clip onto your pet’s collar. These are so quick to make, and I find they last better than some store-bought leashes – sometimes, the plastic peels off the front of the store-bought leashes, leaving them looking tatty. If the fabric wears out, disassemble it and add a new cover. If you enjoyed making your pet a personalized leash, please click on subscribe to get more great ideas delivered to your inbox.
Do you like this? Pin for later:
Wanna be friends? Click HERE and follow me on Pinterest
RELATED:
- DIY dog collar for your furry friend