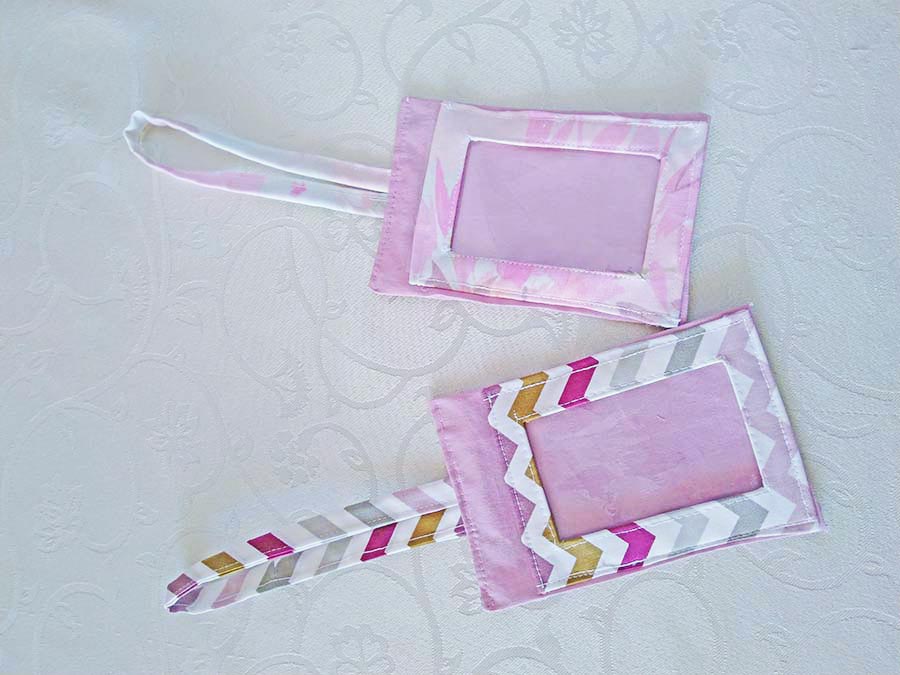
DIY Fabric Luggage Tags for Stylish Travel
It’s a bit embarrassing to say how many times I’ve accidentally picked up someone else’s luggage from the luggage conveyor belt at the airport. Luckily, either I or the original owner somehow noticed on time so I never took the wrong bag home yet. What can I do, the bags basically all look the same, it’s an honest mistake!
And then one time, after the last mix-up, it finally hit me. I should put an easily noticeable tags on my suitcases and I’ll be able to spot my stuff in a flash. That’s when I started making these DIY fabric luggage tags. They are simple enough to make, but they can be a life-saver, or more precisely, luggage-saver. I’ll stop with the bad jokes and move on with the tutorial now.
How to Make Fabric Luggage Tags
Collect the necessary supplies
For this project, you will need some fabric for the main body and the strap, some fusible interfacing fabric, preferably heavyweight type as it is more durable, and a piece of clear vinyl. You can do this without the vinyl as well, it’s up to you, which style you prefer. The tools you will need are scissors, a needle and a thread, or a sewing machine, pins, and an ironing board with an iron.
Start by cutting the fabric
You will need to cut the fabric into three identical pieces, and cut the interfacing into one slightly smaller piece. In this case, the dimensions of the three main pieces should be 4 x 6 inches, while the interfacing piece should be about half-inch smaller at 3.5 x 5.5 inches. If you decide to use the clear vinyl for a see-through cover, cut one piece that’s about the same dimensions as the interfacing, or just a tad smaller.
Fuse the interfacing and make a hole
Take one of the three pieces of main fabric and set the interfacing on top of it, on its wrong side. Fuse the interfacing by ironing it to the fabric. If it wrinkles too much, that means your iron is too hot. Let it cool down a bit and try again and it will be alright.
After you do that, turn the piece over, and grab a ruler or a measuring tape, and a pencil or a pen. Draw a rectangle on the interfacing, one inch from the bottom, and make sure its dimensions are 2 x 3.5 inches. Connect the corners with straight lines so that you end up with an x mark inside the rectangle.
Cut across that x mark and fold the four triangles backward, towards the interfacing. Press it well and cut the tips until they are aligned with the outer edges of the fabric.
Start stitching and assembling the diy luggage tags
If you want to put a vinyl onto the window you just made, put it on the wrong side of the fabric and sandwich it between top the half-inch fold. Then topstitch around all edges with a quarter inch allowance, making sure to go through all layers.
If you don’t want to use the vinyl but leave an open window instead, just stitch around the frame with a quarter-inch allowance.
Take the two remaining fabric pieces and place them on each other, right side on right side. Pin everything together and stitch around the edges with a quarter-inch allowance. Leave an unstitched gap of about two inches at the bottom of the fabric piece. Cut the corners at an angle a bit and flip the piece inside-out through the small opening. Press the whole thing with an iron and make sure to press the open edge to the inside to give it a finished look.
Next, you need to join the frame piece with this back piece. Put them on each other so that the front’s wrong side lays on the back’s right side. Align the bottom edge and the sides of the two pieces. Topstitch the side edges and the bottom to join the two pieces together. Make sure to go through all layers. Sew with a quarter-inch allowance. Leave the upper edge open, that’s where you’ll be inserting your name tag or business card.
Make a hole for a strap
To finalize your new luggage tag, you must make a hole on it for a strap that will keep it tied to the suitcase. In this case, that hole will be a regular buttonhole.
Mark a one-inch buttonhole above the opening on the tag. Center it well. Stitch the buttonhole twice to ensure that it wouldn’t look ragged. Go slowly as you stitch, be careful and stitch through all layers. Cut the hole with a buttonhole cutter if you have one, or with a plain seam ripper if you don’t. If you are afraid of ripping it open too much, put two pins across both ends of the buttonhole. The pins will keep your seam ripper from opening a hole that’s too wide.
Once the hole is finished, you can just put a strap or a band of your choice through it and use it to attach the tag to your suitcase. I always tie the tag to the clothes strap inside the bag, that way it’s secured and it can’t untie or fall out.
I hope you found this diy luggage tags tutorial useful. Now you won’t mix up your bags with someone else’s like I used to do regularly. Your trips will be a bit less stressful from here on out. Travel Safe.
RELATED:

