
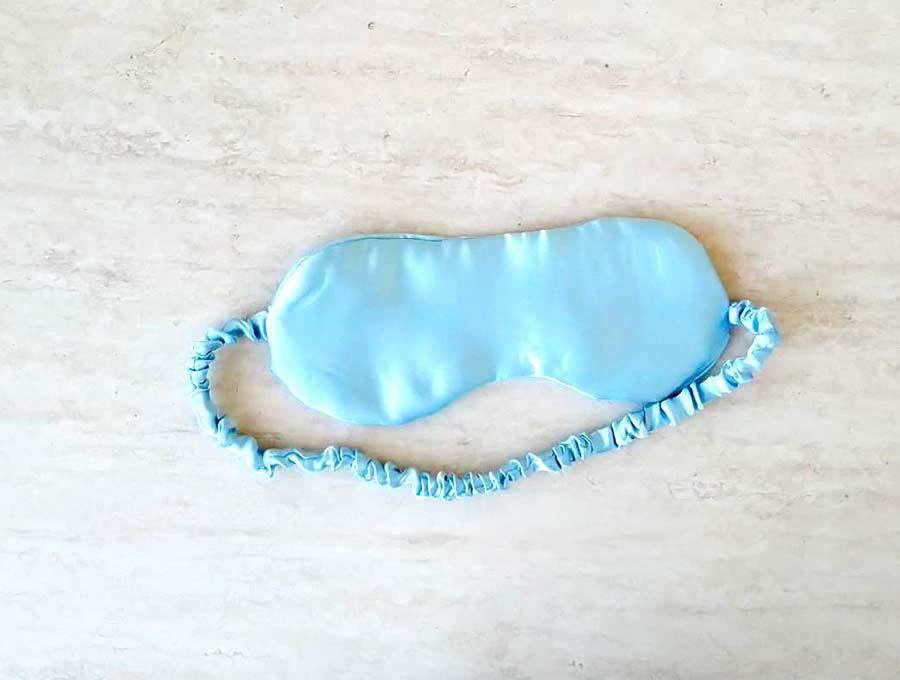
DIY Sleep Mask For Stylish Sleep – Tutorial and Free Pattern
Beauty sleep is so important that you really don’t want to miss on your zzzs. However this can be a real challenge sometimes when you are traveling, if you have (young) kids or just have trouble falling asleep. A simple DIY sleep mask can block the light and help you if you have troubles falling asleep, are staying in an unfamiliar place, or just napping during the day.

Did you know that sleep masks are not just for women? They are underrated but very useful sleeping aid that more people should be utilizing. Just try one and you will be left wondering where they have been all your life.
Below you will find my step by step written tutorial how to make a sleep mask with VIDEO instructions for all the visual learners.
We occasionally link to goods offered by vendors to help the reader find relevant products. Some of the links may be affiliate meaning we earn a small commission if an item is purchased.
Table of Contents
- 1 How to make a sleep mask
- 2 Supplies and tools
- 3 How To Sew a DIY Sleep Mask
- 3.1 DIY Sleep mask VIDEO TUTORIAL
- 3.2 INSTRUCTIONS:
- 3.3 STEP 1: Cut main fabric
- 3.4 STEP 2: Cut wadding
- 3.5 STEP 3: Make the sleeping mask strap
- 3.6 STEP 4: Turn the strap right side out
- 3.7 STEP 5: Insert elastic
- 3.8 STEP 6: Attach mask strap to fabric
- 3.9 STEP 7: Stitch around
- 3.10 STEP 8: Make notches
- 3.11 STEP 9: Turn inside out and insert wadding
- 3.12 STEP 10: Sew the opening shut
How to make a sleep mask
Supplies and tools
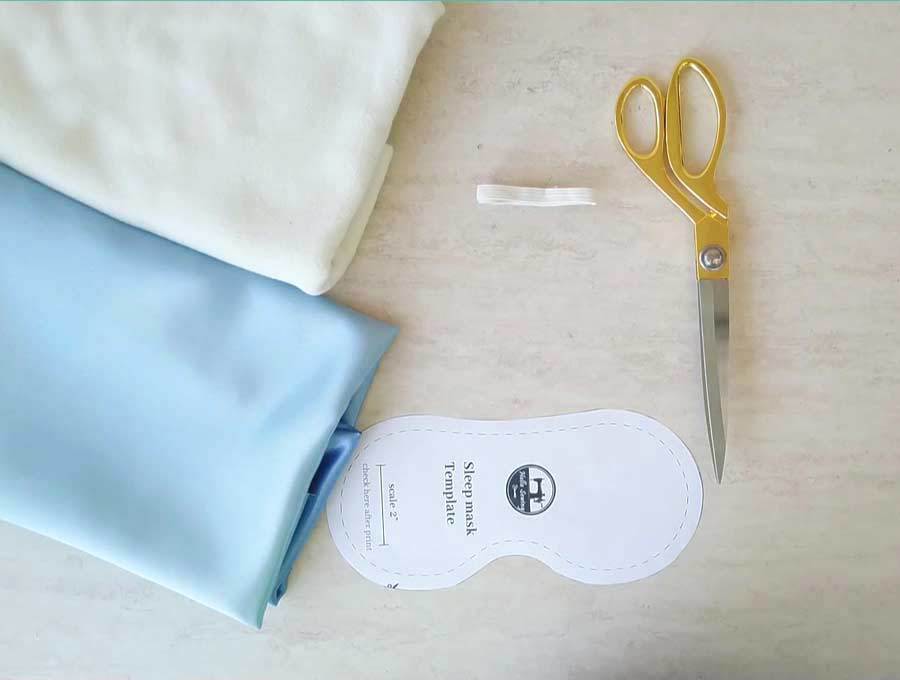
- fabric – choose soft fabric that won’t irritate your eyes (I recommend silk or cotton)
- wadding
- 1.3cm (1/2″) wide elastic – 35-38cm (14-15″)
- matching thread
- scissors (or rotary cutter and a cutting mat)
- sewing machine (one of these will do great, but even a basic Hello Kitty machine will do just fine, or you can even hand sew the mask)
- bodkin (optional)
- tube turner (optional)
DOWNLOAD: sleep mask pattern [Free pdf file]
Follow us for free patterns & tutorials! [easy-profiles]
How To Sew a DIY Sleep Mask
Watch the diy sleeping mask video first and then follow the written step by step instructions below.
Please enjoy and don’t forget to Like and SUBSCRIBE over on YouTube to be kept up to date with new videos as they come out.
DIY Sleep mask VIDEO TUTORIAL
INSTRUCTIONS:
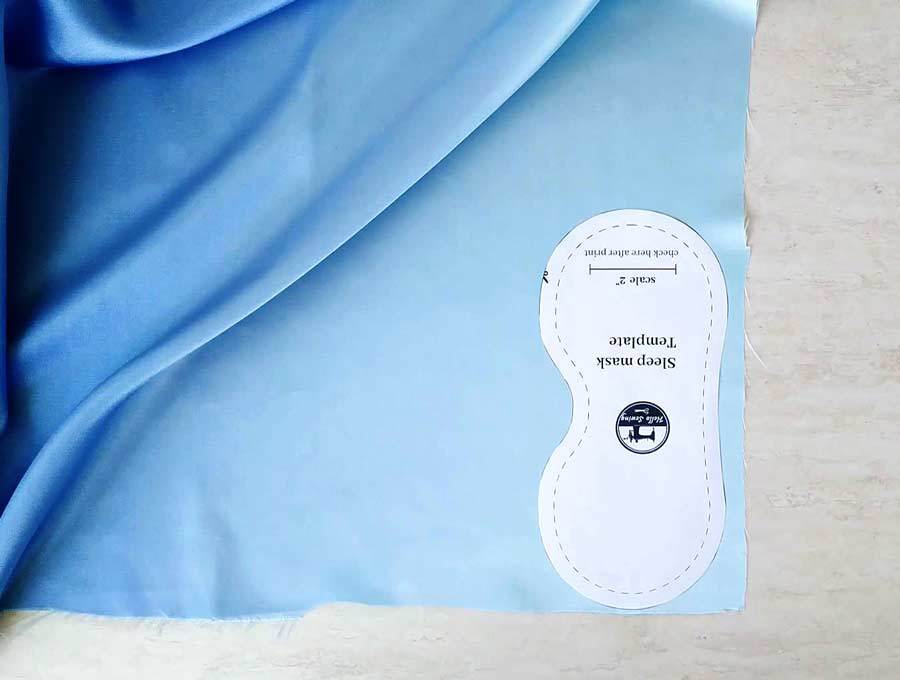
Pre-wash and dry your fabrics before you start sewing. Download the sleep mask pattern, print it at 100% US letter (no scale) and cut it out.
Tip: don’t use your fabric scissors to cut out the paper pattern – this will dull them fast. Use a separate pair of scissors for cutting patterns and fabrics.
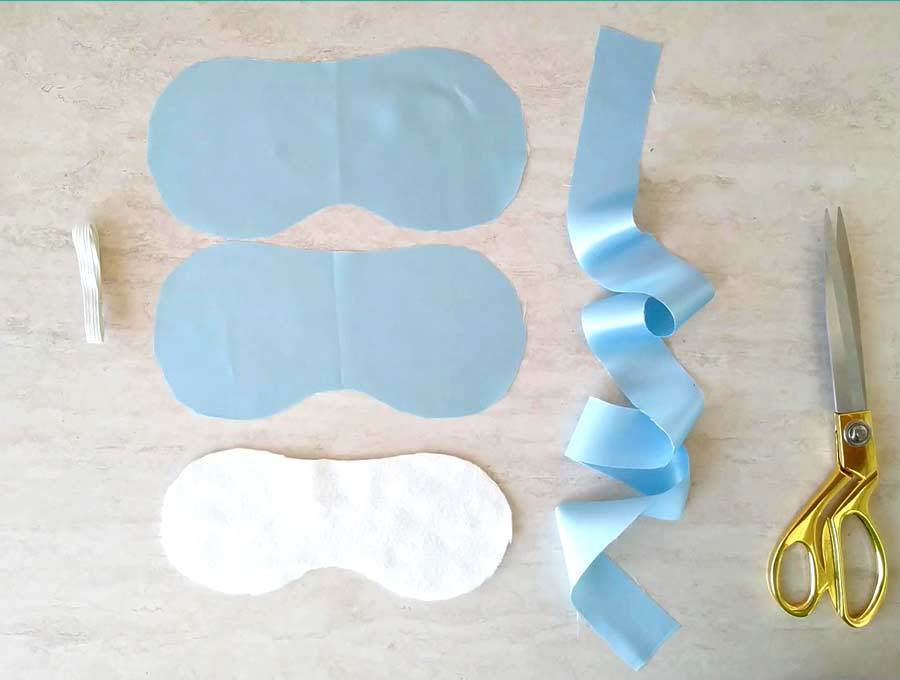
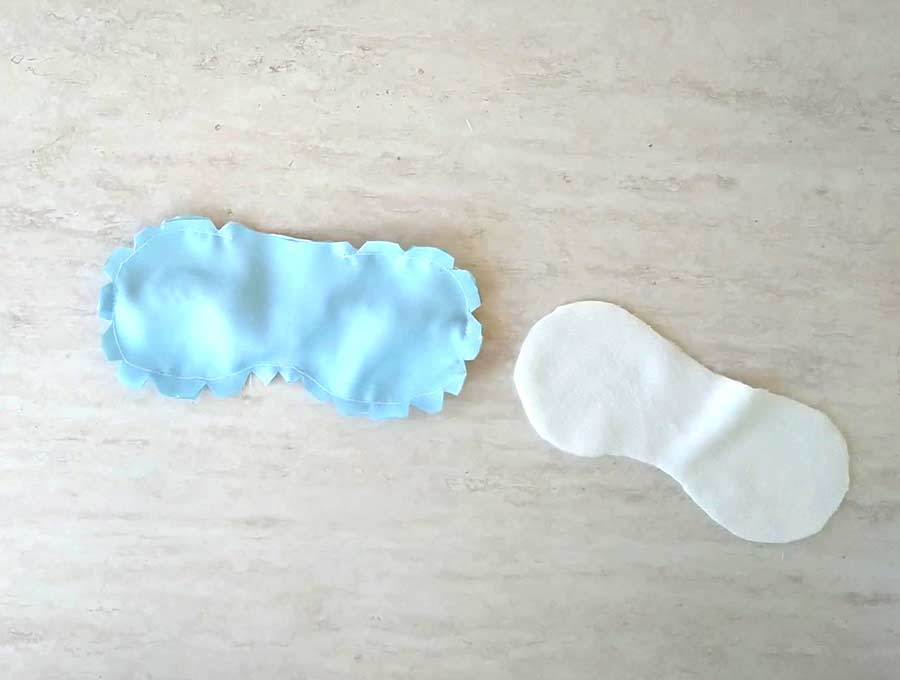
STEP 1: Cut main fabric
Cut 2 pieces of the main fabric according to the pattern. To do that trace the pattern carefully onto the main fabric using a fabric marker. Silk is notoriously slippery, so take your time and make sure it does not shift around or it will distort the mask. Cut out carefully. You should cut 2 pieces – one for the front and one for the back.
Also cut a fabric strip 76 cm x 4.5cm ( 30 x 1 3/4″) from the main fabric for the mask strap.
STEP 2: Cut wadding
Trim the paper pattern according to the dashed seam allowance line. Pin to wadding and cut the wadding according to the trimmed pattern. The wadding should have enough room to fit inside the diy sleep mask.
STEP 3: Make the sleeping mask strap
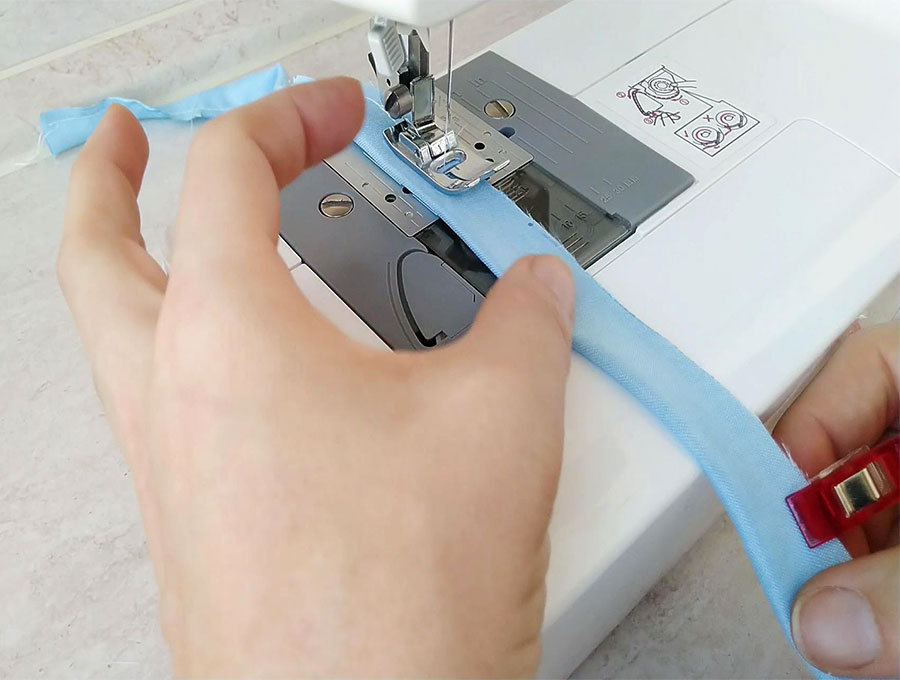
Take the fabric strip and fold it in half lengthwise, with right (pretty sides) together and pin it.
Stitch together the long raw edges of the fabric strip using a 6mm (1/4″) seam allowance. You will now have a long tube of fabric.
STEP 4: Turn the strap right side out
Turn the mask strap right side out. This part is a bit tricky, but we have a tip for you. This tube turner has been a game changer for me. It makes turning long tubes of fabric sooo much easier and faster. Insert the tube turner into the fabric tube, catch the opposite side and gently pull it back. Voila!
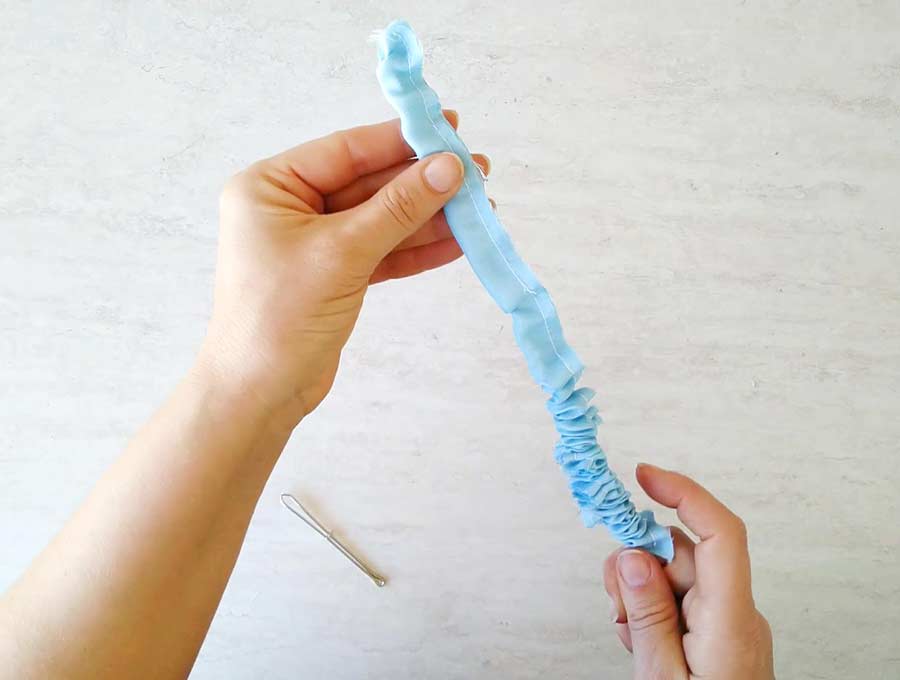
However if you don’t have this handy tool you can use a safety pin. attach it to one end of fabric, slip the safety pin inside the tube and push it all the way to the other side.
STEP 5: Insert elastic
Use either the bodkin or a safety pin to insert the elastic into the fabric tube. Pin on either side to keep elastic in place.
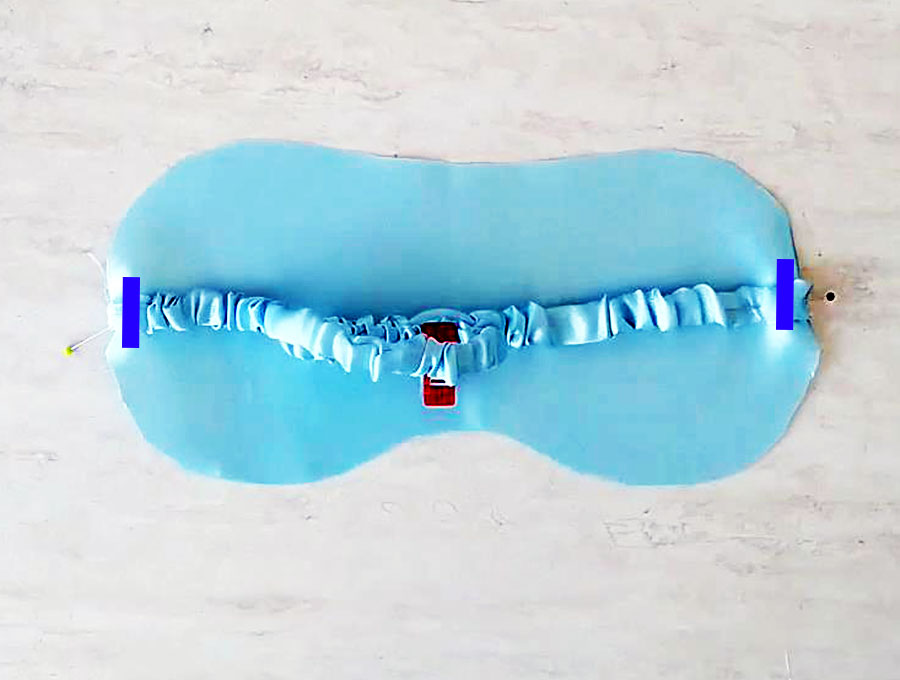
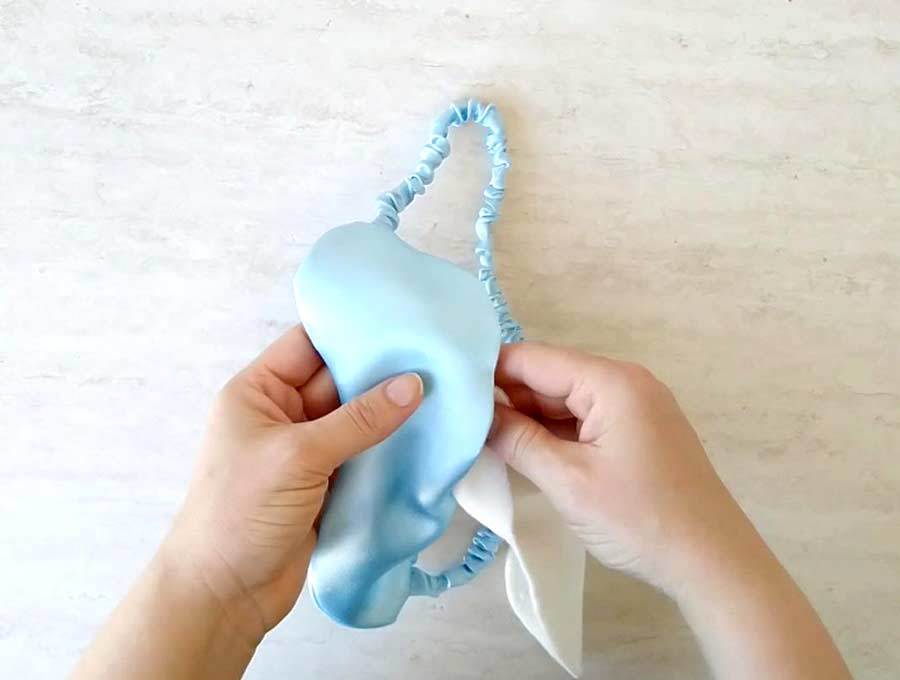
STEP 6: Attach mask strap to fabric
Take one of the main fabric pieces and place it on a flat surface with the right side facing up. Place the strap on top of it and pin according to the X marks in the pattern – in the middle of either short side. Stitch the strap in place using a 6mm (1/4″) seam allowance, making sure to stitch back and forth several times for extra durability.
STEP 7: Stitch around
Take the back piece of the main fabric and place it on top of the eye mask assembly, right sides together. Pin in place, leaving a 7cm (3 inch) opening at the top for turning. At this point the elastic strap should be sandwiched in the middle and pinned away from the seam line.
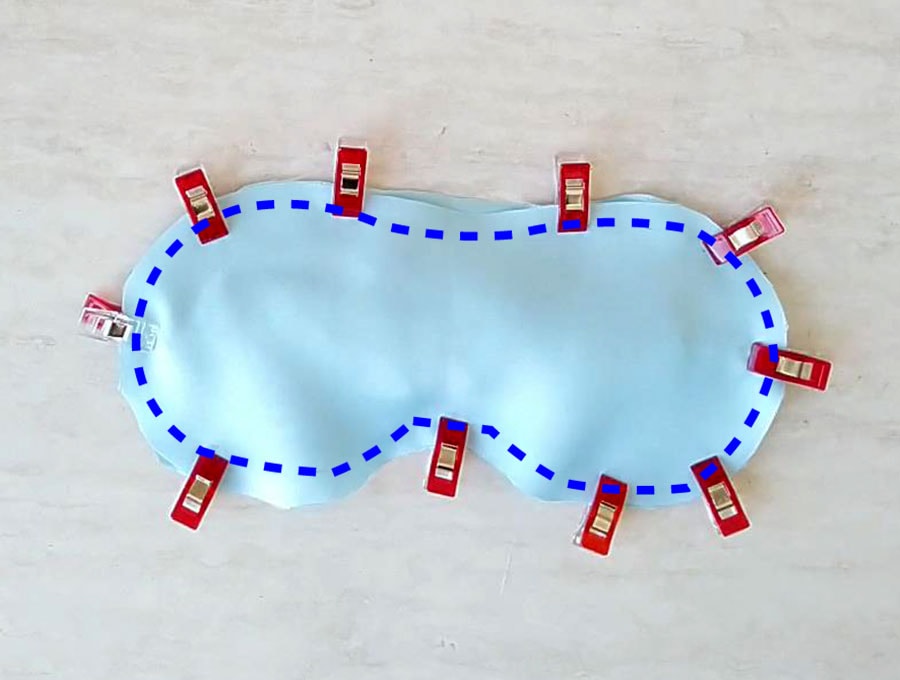
Stitch around the sleep mask using a 1 cm (3/8″) seam allowance and backstitching at the beginning and the end of the seam to reinforce it.
Tip: to make sure you don’t catch the elastic strap as you sew around the mask use a pin or a clip to hold it in place.
STEP 8: Make notches
Make notches all around the sleep mask (clip small triangles around the seam allowance to allow the seam allowance to lay flat). DO NOT notch the opening and be careful not to snip through your stitching.
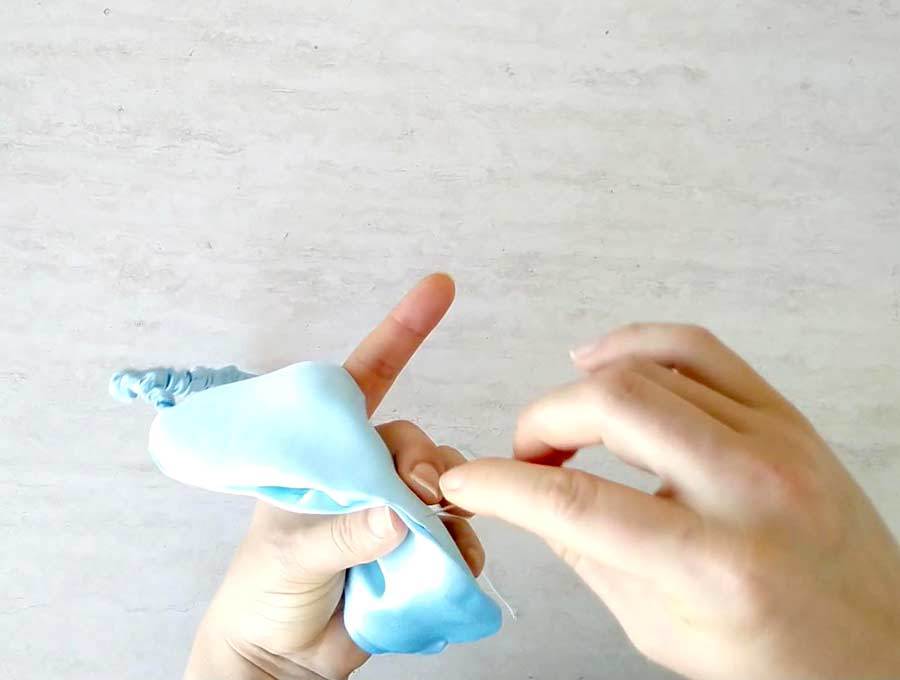
STEP 9: Turn inside out and insert wadding
Turn your mask inside out through the opening. Press the mask using an iron, tucking in the seam allowance of the opening.
Insert the wadding through the opening and wiggle it around to smooth it out.
STEP 10: Sew the opening shut
Handsew the opening closed using a ladder (invisible) stitch and a matching thread.
That’s it! Your diy silk sleep mask is ready! Now that you know how to make it, why not make a few more DIY sleep masks to give to your besties? These eye masks are a great gift and if you also sew up a matching scrunchie, you will have a dream gift set for a very stylish sleep.

Do you find our tutorial how to make a sleep mask easy to follow? How did your sleep mask turn out? Do you have suggestions for improvements? Let me know in the comments below!
Do you like this? Pin for later:

Wanna be friends? Click HERE and follow me on Pinterest
RELATED: