
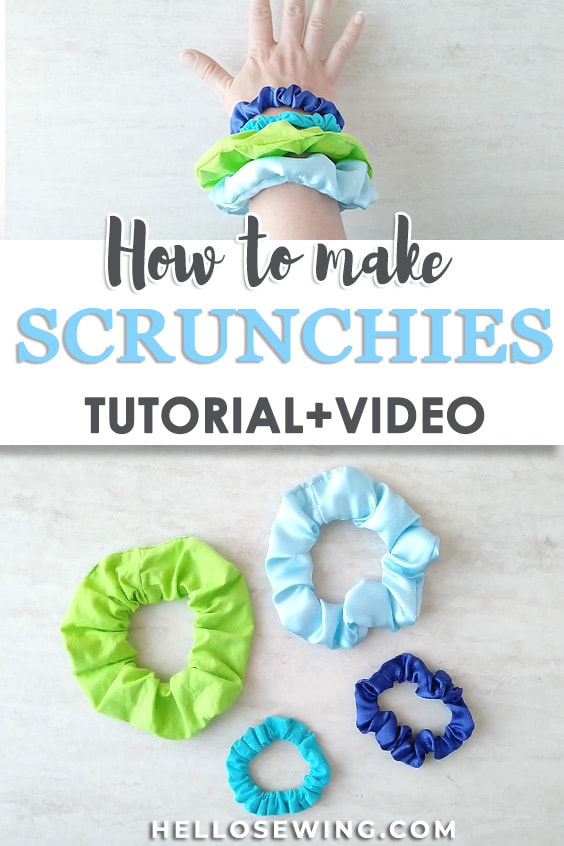
DIY How to Make a Scrunchie + 6 Variations to Wow Everyone
While for some of you those DIY scrunchies are the current trend, for some of us these are a blast from the past! I whipped up a ton in no time and wanted to share with you how to make a scrunchie at home.
Even though the ’90s were well over 30 years ago, the remnants of that unique pop culture are still alive and kicking. Especially when it comes to fashion. When I look at some of my old stuff from the late ’90s that survived to this date, I can’t help but not notice that similar things are what’s “in” recently.
Like these scrunchies for example. Wearing one of them nowadays would definitely strike the mark in a fashion sense. Honestly, it’s not surprising, considering how practical and cute they are and how they fit with almost any clothing combination. That is why I just love making all kinds of scrunchies whenever I can. Not to mention how fun and easy they are to make. I’ll start out by showing you how to make a basic scrunchie, then I’ll show you six different upgrades.
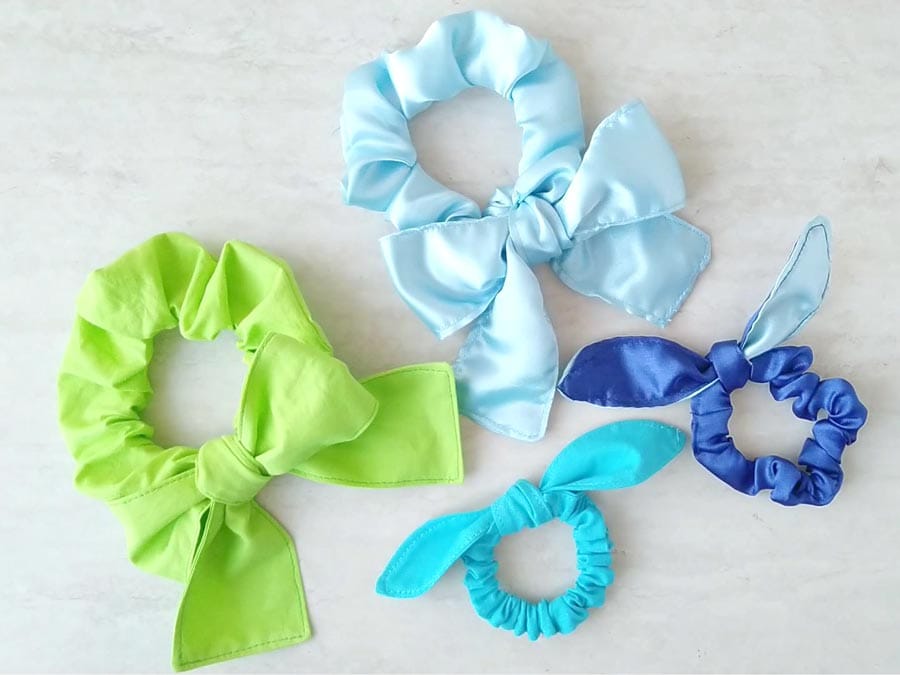
Table of Contents
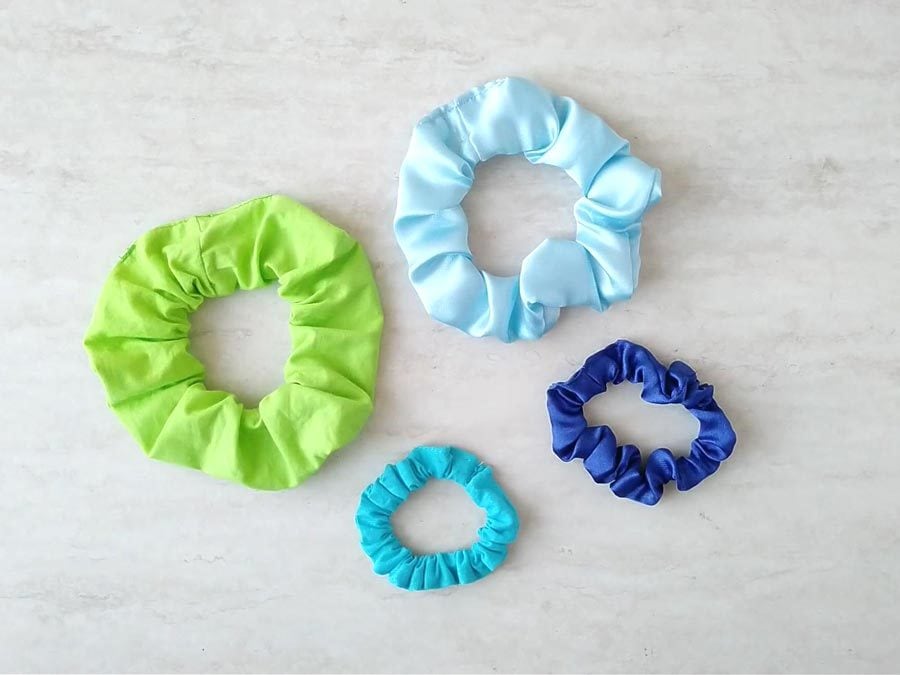
How to sew scrunchies or hair ties with a clean look:
Supplies to sew scrunchies
This project is a real treat for all sewing enthusiasts. It’s very simple and quick, and it costs close to nothing to make. That means you don’t need much stuff for it. You will need:
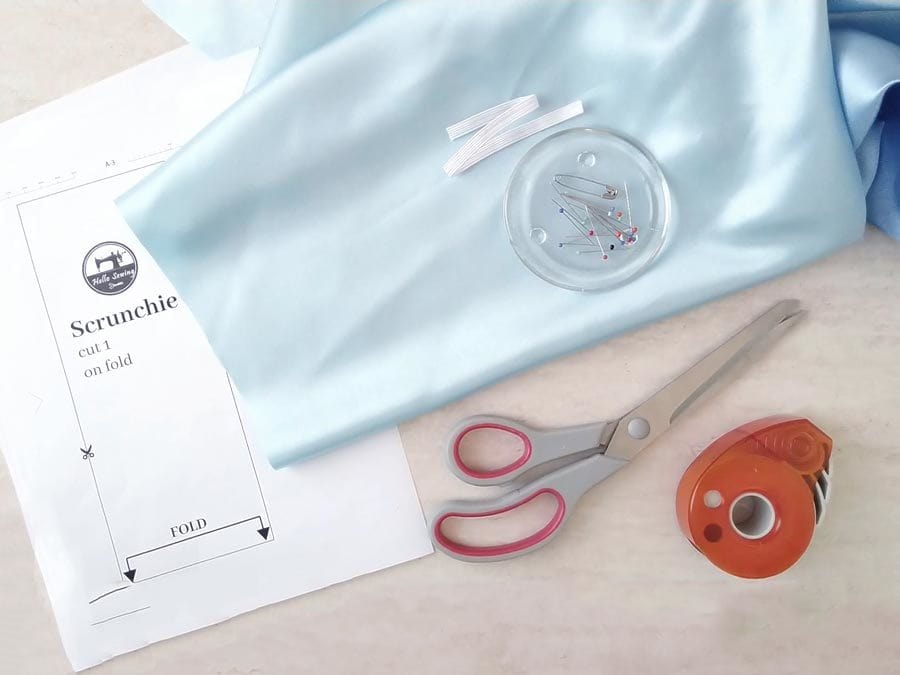
- one strip of fabric – 18″ x 3.5″ for a regular scrunchie, 16″ x 2″ for a mini scrunchie (cotton, velvet, satin or silk all work well )
- 1/4″ elastic – 7-8″ long
- matching thread
- pins
- a safety pin (or tube turner)
- rotary cutter and a cutting mat, or scissors if you prefer using them for cutting
- an iron and its board
- a sewing machine or just needle if you are handsewing
DOWNLOADS:
Scrunchies pattern download (PDF)
Follow us for free patterns & tutorials! [easy-profiles]
If you don’t have a printer – don’t worry. No drawing or designing is necessary, the pattern for the scrunchie is a simple rectangle, so you can just measure and cut away.
How to sew a scrunchie – step by step:
DIY HAIR SCRUNCHIES VIDEO TUTORIAL
Watch the diy scrunchie video first and then follow the written step by step instructions below.
Please enjoy and don’t forget to Like and SUBSCRIBE over on YouTube to be kept up to date with new videos as they come out.
PREPARATIONS: Choose the fabric and cut pattern
- FABRIC: Before you start making your scrunchie, you need to decide which fabric you will be using. The final look of your new hair accessory will be slightly different with different fabrics. Because of this, some scrunchies tend to look better when they are made from a specific type of fabric. For example, I prefer my scrunchies in their basic forms, and those tend to look best when I make them from stretch fabric. Models with short or medium ears are also like this.
Scrunchies that have large accessories like ears or bows end up the best when you use drapes to make them.
Now that you know everything you need to as far as preparations go, you can move on to the creation process of the 90’s style hairband.
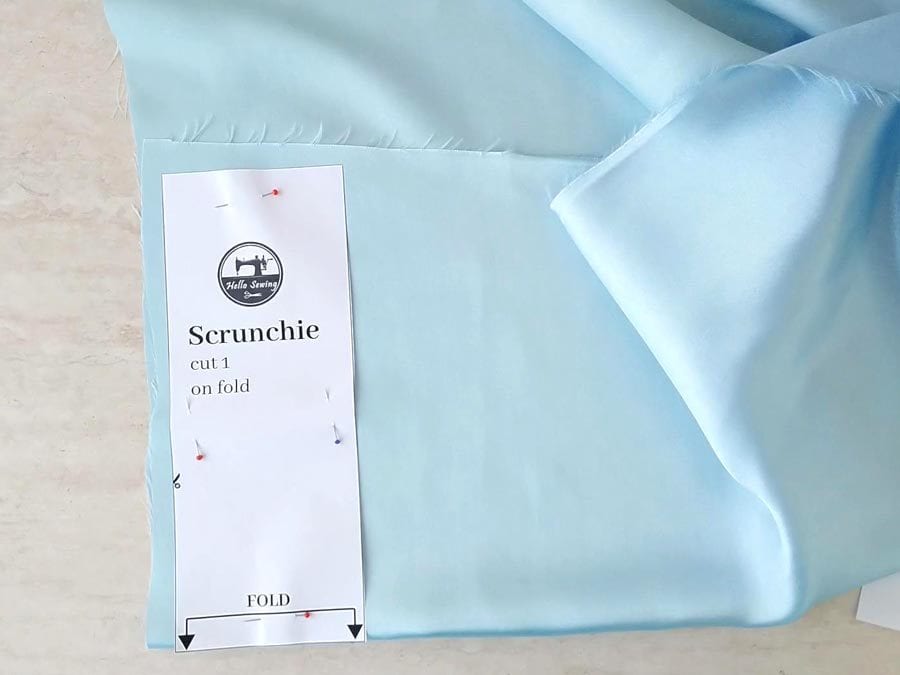
- PATTERN: Download the fabric and print it at 100% (no scale). Don’t print from the browser but save the file and open it up in Adobe Acrobat or Adobe reader and print from there.
STEP 1: Cut the fabric
Use the pattern you downloaded and printed out and place it on top of your fabric. The fabric must be folded in half first and the short edge of the pattern needs to be aligned with the fold of the fabric. Pin the pattern in place and start cutting around it.
STEP 2: Pin the fabric
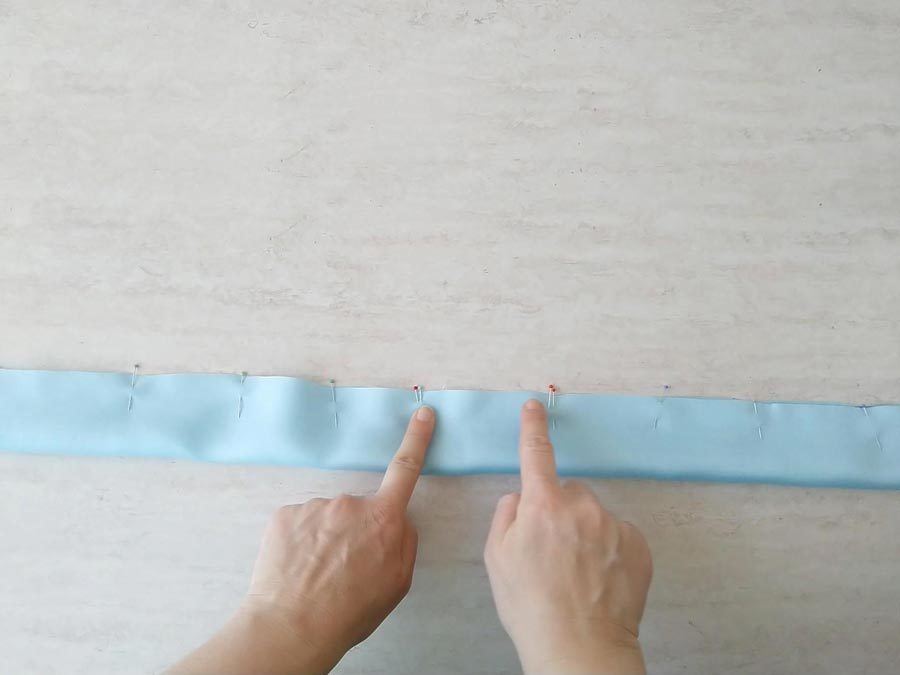
Fold the fabric in half lengthwise and pin everything in place.
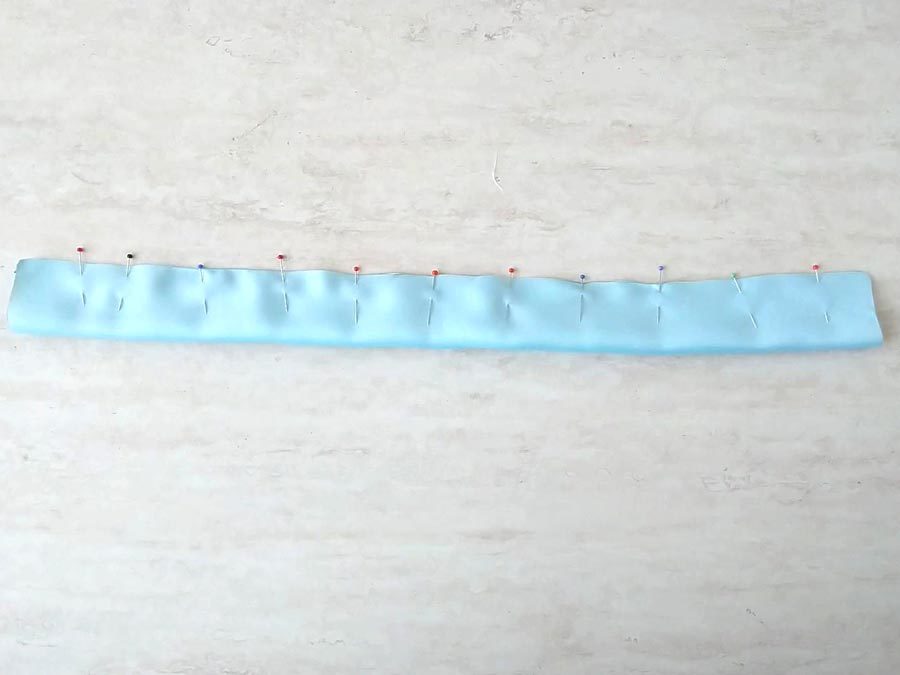
STEP 3: Stitch
Sew all around about inch and a half away from the edge, using a 1/4″ seam allowance. Leave another inch and a half at the end unsewn. Reinforce all stitching with a backstitch so that the seams don’t come apart later on.
STEP 4: Line up short edges and sew them up
Push the fabric inside itself to line up the unsewn edges with each other. Basically, just scrunch it up and wrinkle it a bit. Now the right sides should be facing each other, so if they do, pin them in place and sew along that short edge.
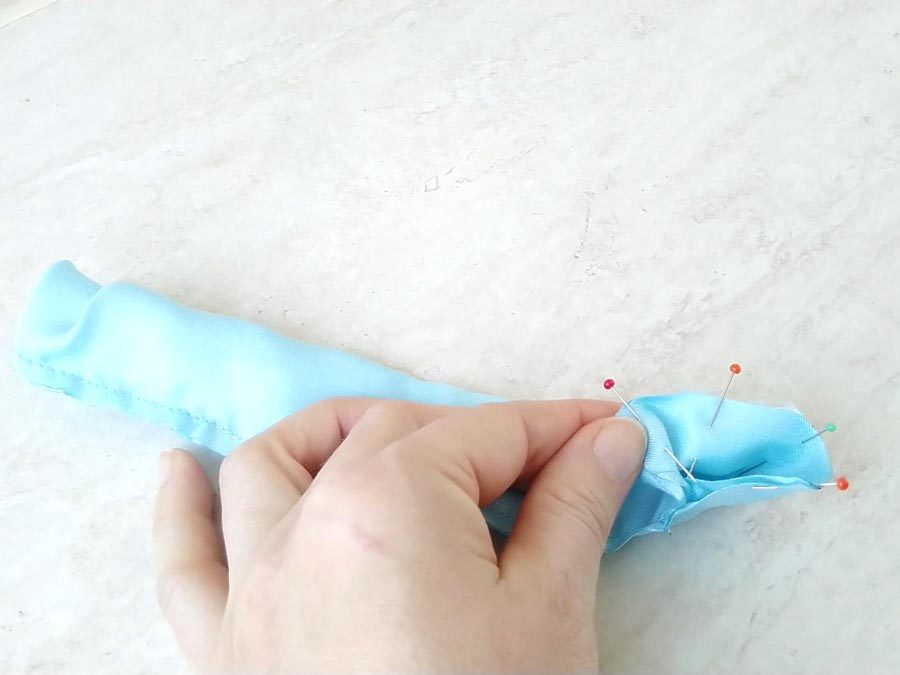
Step 5: Turn right side out
Flip the whole thing inside out by pinching it and pulling it through.
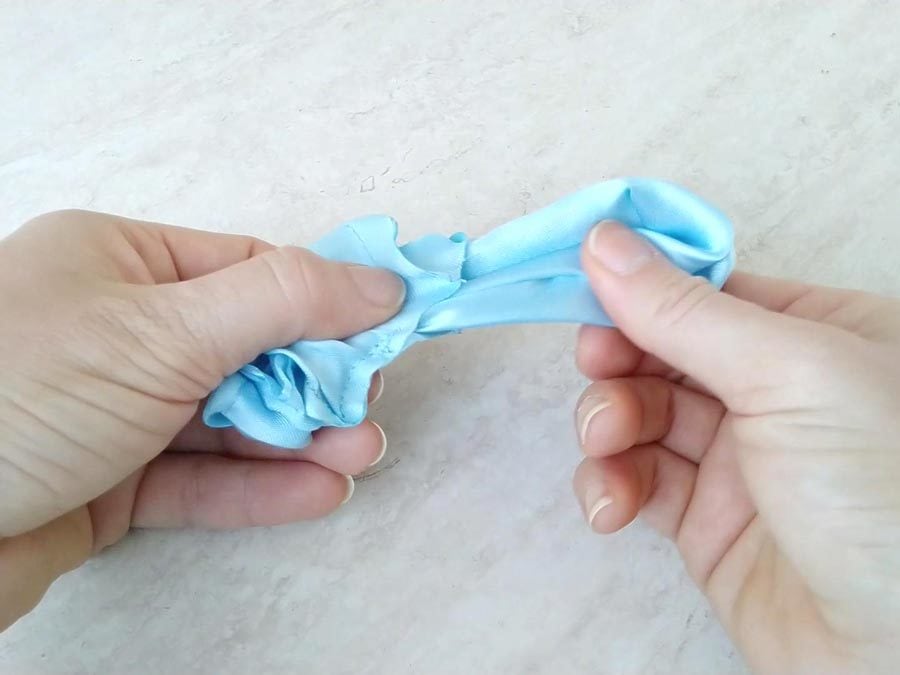
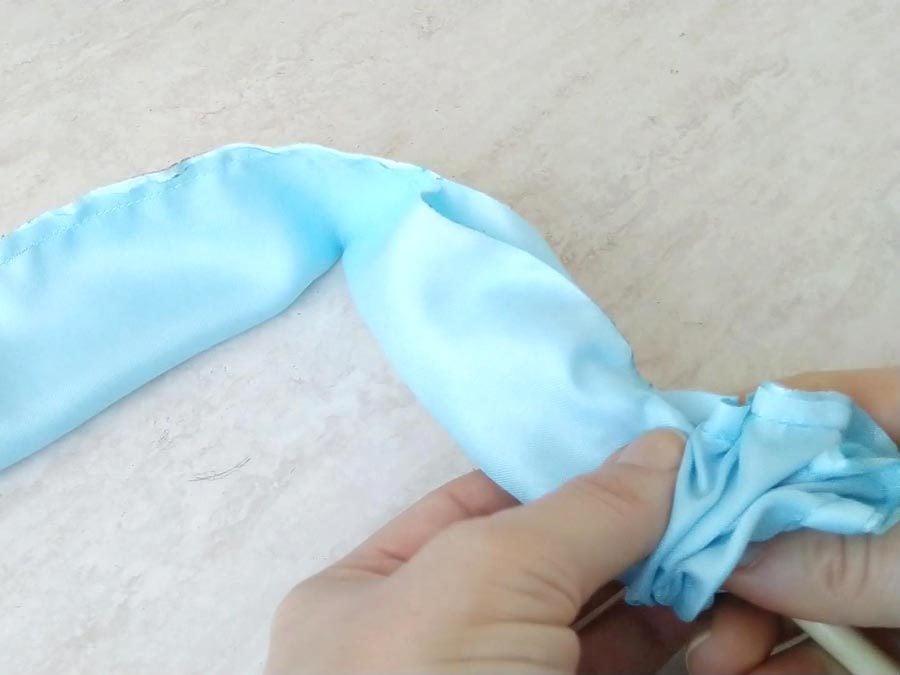
STEP 6: Add the elastic
If your hair is a bit wild and heavy like mine, use a half-inch elastic. A quarter-inch one won’t be able to keep it in check, that one is more suitable for lighter hair. Cut the elastic down to eight inches and pull it through the scrunchie. You can do this by pinning its one end with a safety pin and then putting it through the hairband. Overlap the ends of the elastic and stitch them to each other either using a zig-zag stitch or by straight stitching the ends back and forth few times.
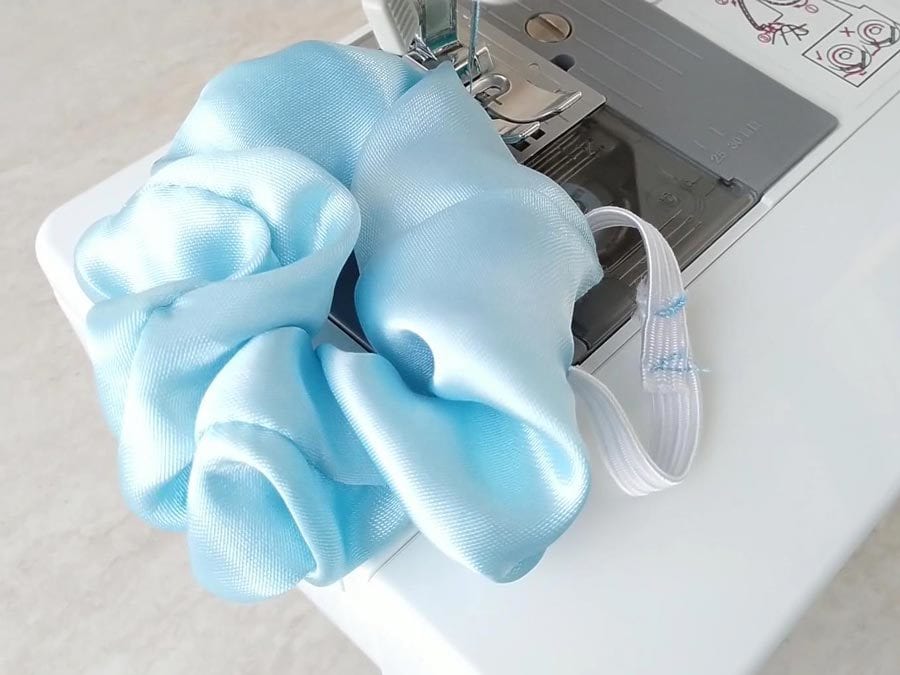
STEP 7: Finalize the scrunchie
Stitch the opening closed or use glue to close it by applying a bit of it on the edge and pinching it a bit before you let it dry.
STEP 8: (OPTIONAL) Make the bow
8.1. Making the bow is very similar to making the scrunchie, so you’ll likely breeze through it.
8.2. Print, cut and tape the bow pattern.
8.3. Fold the fabric, place the pattern on fold and cut it
8.4. Fold the fabric lengthwise and pin it. Make sure to leave a 2 inch gap for turning. I’d like to mark mine with double pins so I don’t skip it when sewing
8.5. Stich the bow and don’t forget to leave the gap
8.6. Turn the whole thing around through the opening. Use something pointy for turning and pushing the corners out – if you don’t have a turning tool a pencil or your scissors will do the job.
8.7. Press with an iron
8.8. Topstitch as close to the edge as possible. Topstitching the scrunchie bow will also close the opening
8.9. Now tie the bow around the hairband. I like to put mine where the stitching is as it looks better and more professional
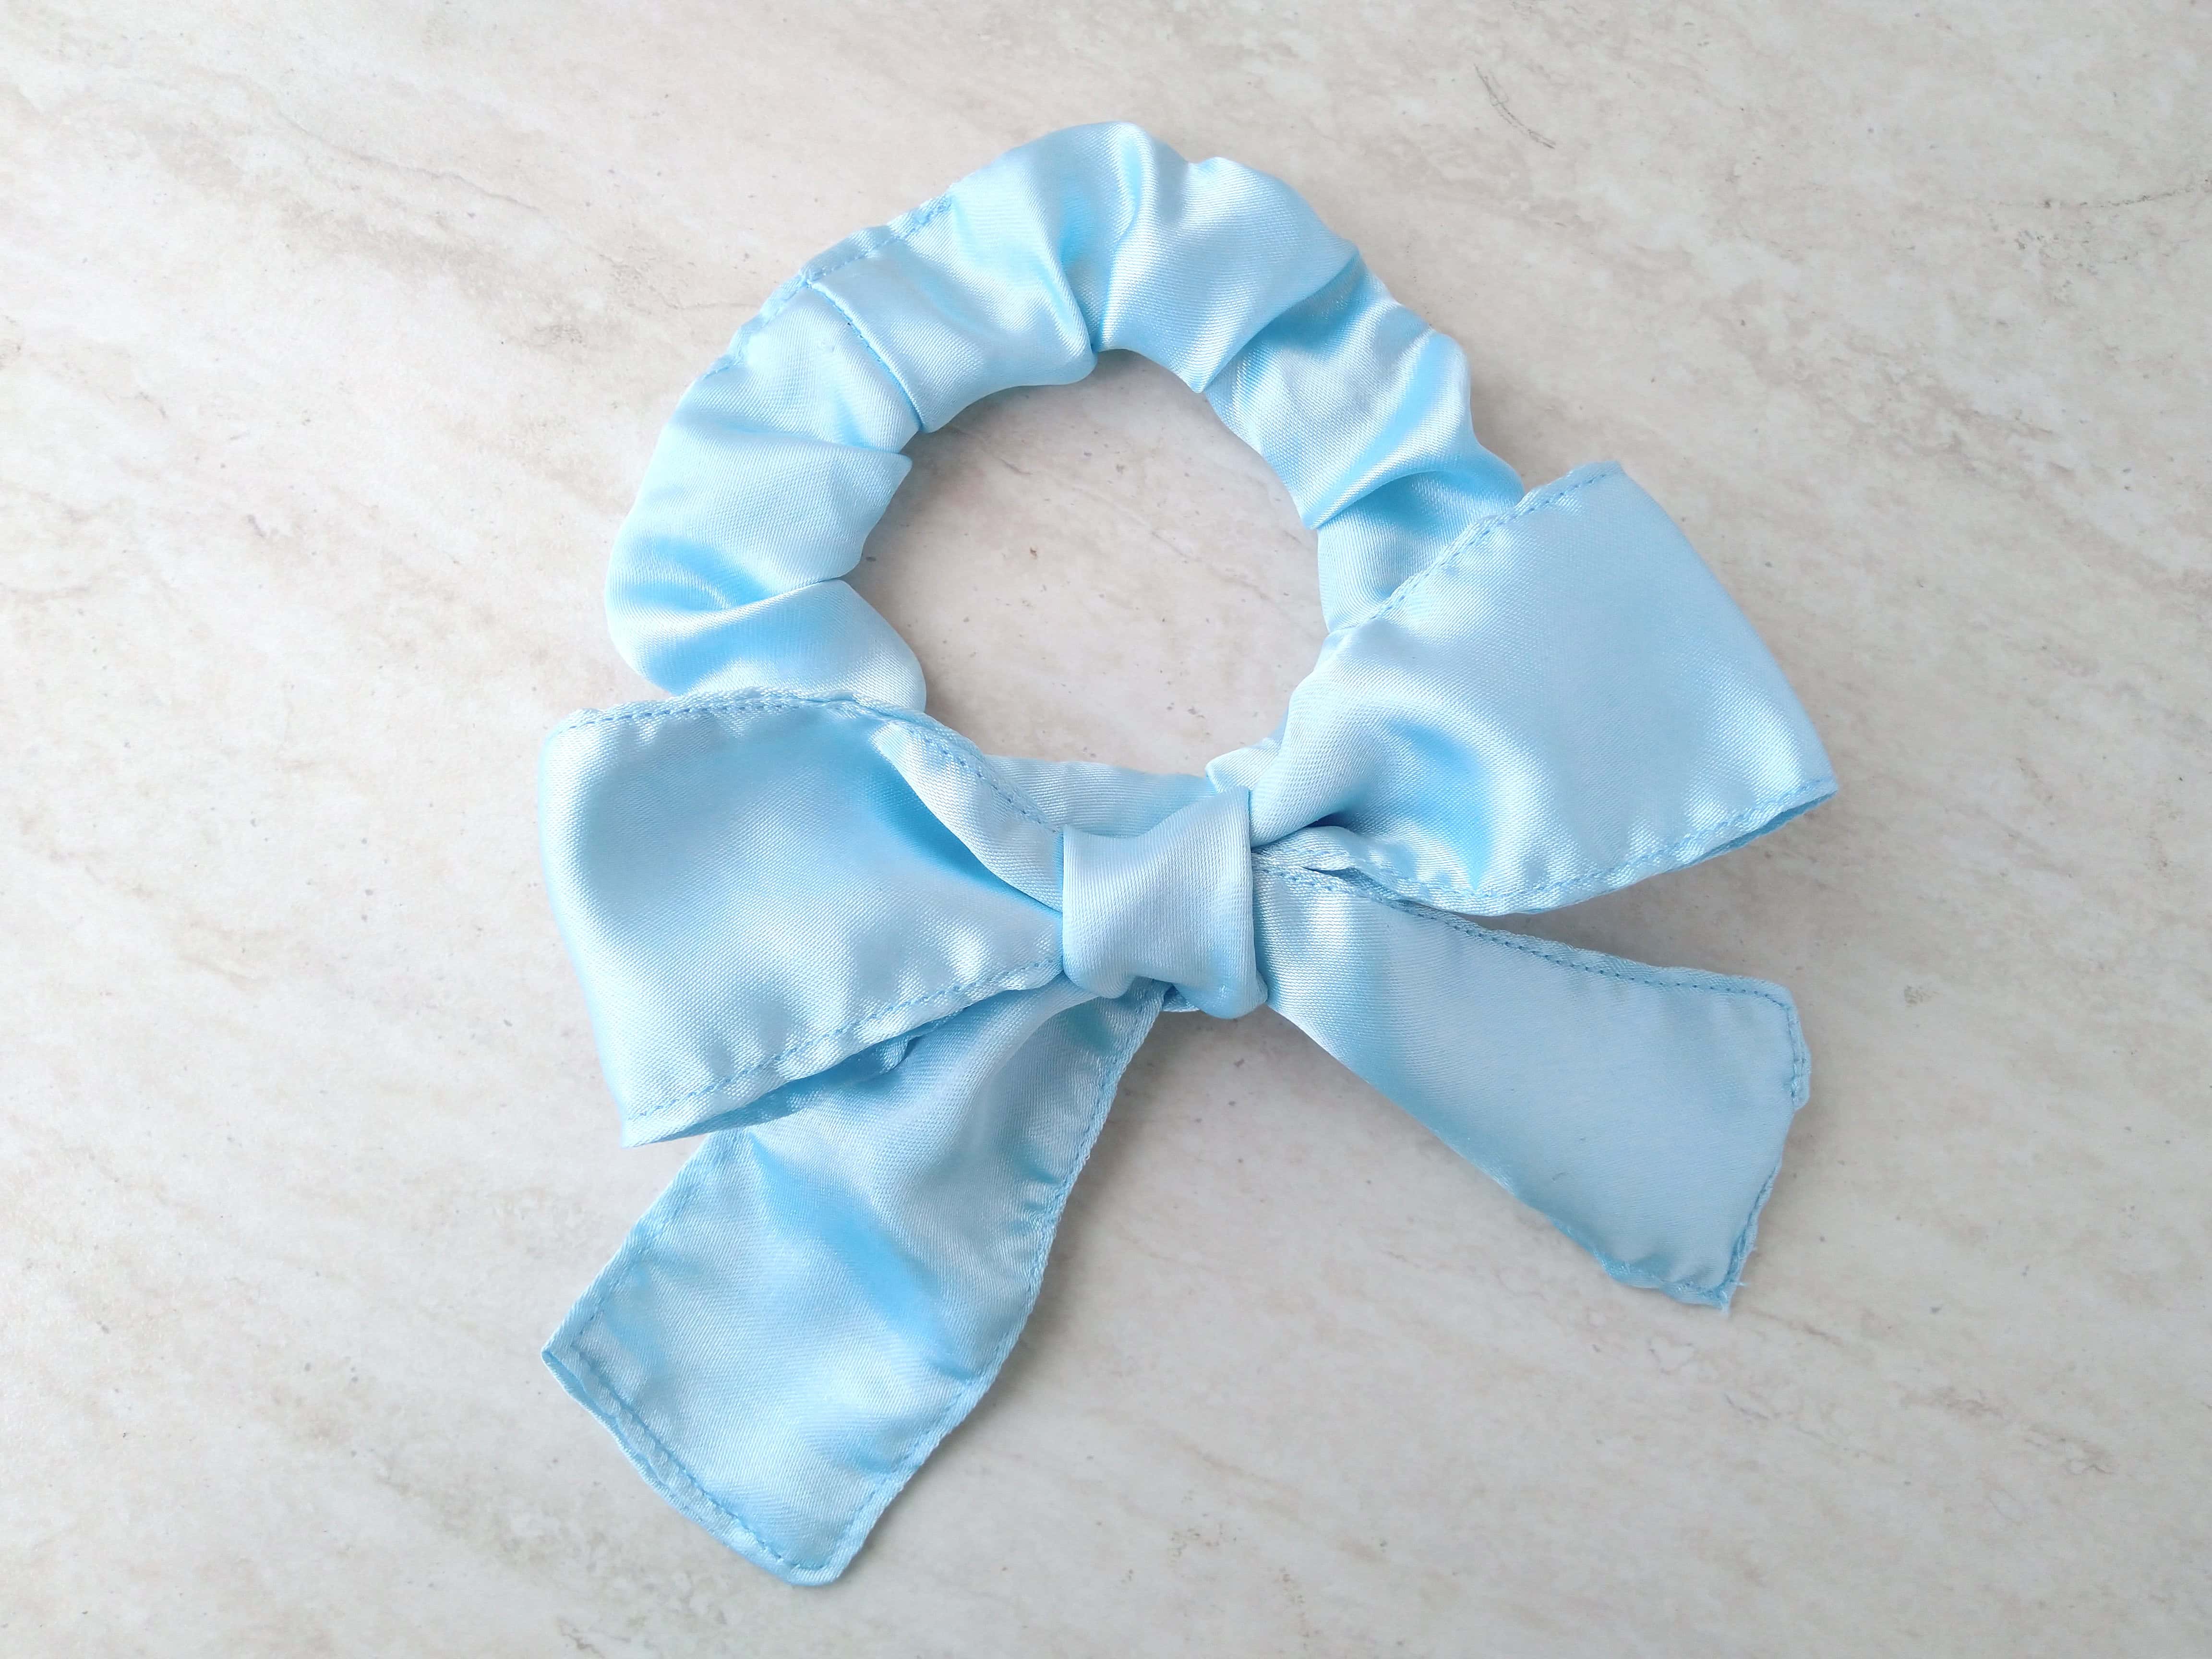
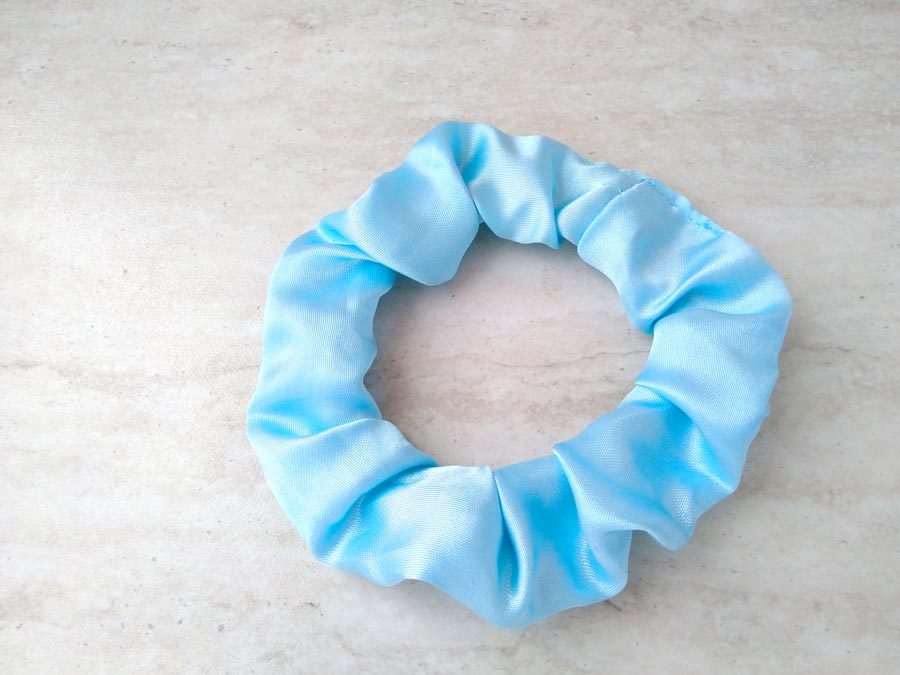
That’s it, your scrunchie is ready for action now!
DIY Scrunchie Variations
Another neat thing about these scrunchies is the fact that they are easily customizable. With just a few alterations in the creation process, you can make entirely different variations of hair ties. Take a look at these eight cute versions of scrunchies and try making all of them by yourself.
-
Mini scrunchie
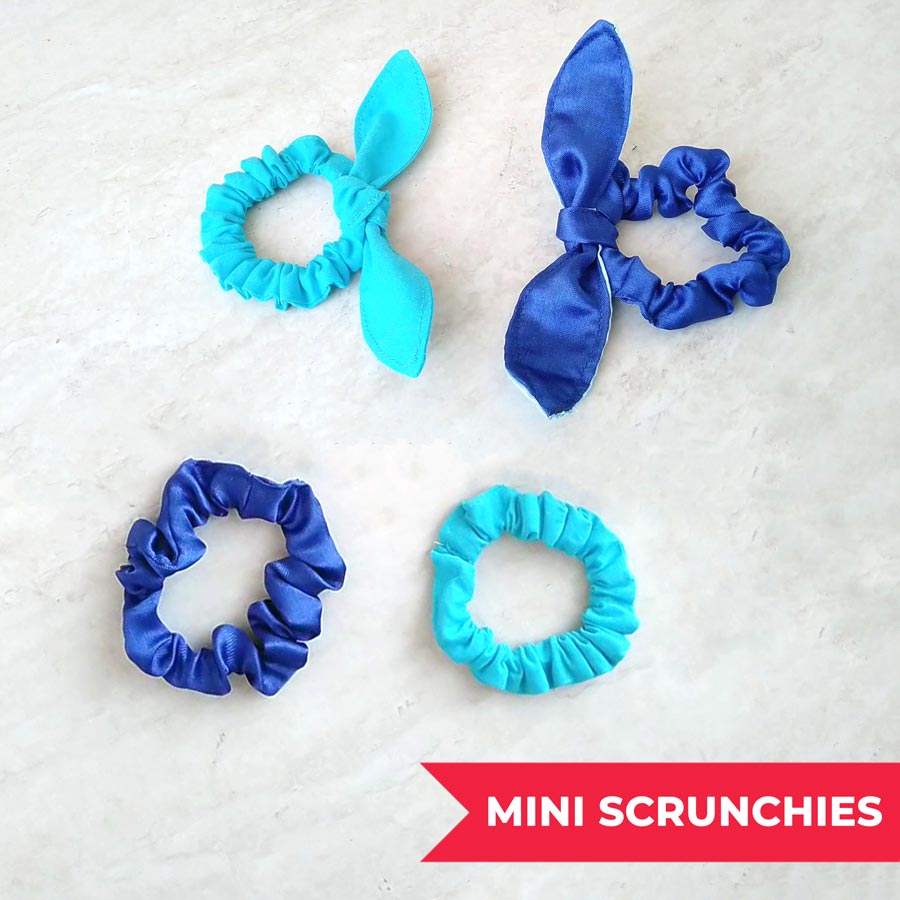
This one is made almost exactly like the one we just covered in this tutorial. The only difference is in the size of the fabric you will be using, as for the mini scrunchie you will need 16″ x 2″ strip of fabric. Also, you can make bunny tails, or just leave the scrunchie as it is. You don’t need glue either, just stitch instead of using the glue.
- Scrunchie from two fabrics
For this type of scrunchie you will have to cut two smaller pieces of different fabric and stitch them together right sides facing each other. The fabric pieces should be about wide two inches and a quarter, and eighteen inches long. Press the seams open after sewing and proceed until the end as if it were the basic scrunchie.
-
Scrunchie with lace / ribbon / white fabric on the edge
Take a nineteen-inch lace and put it inside the scrunchie fabric before you fold it right sides on each other. Let it extend about one inch on each end of the scrunchie. If the lace curls, you can keep it in check by applying a baste stitch on one end. Then continue normally and stitch the seam. Keep the seam on one side, not in the center. Turn the whole thing inside out and add elastic like you would for the basic model. When folding the raw edges in, fold tuck in the lace as well. Stitch everything and you’re done.
Scrunchie with white fabric utilizes the same process the one for the lace variation. The only difference is the white fabric you stitch onto the edge.
-
Scrunchie with a bow
Make a basic scrunchie first. Then download this pattern. Cut two pieces of fabric using the pattern and stitch them together, right sides facing each other. Leave a two-inch opening to turn the thing through it. Clip the corners twice, the second time at an angle. Turn the bow inside out, press it and stitch the opening shut. Tie the bow around your scrunchie.
-
Scrunchie with short or long bunny ears
This variation is practically identical to the one this article was about. The only difference is in the ears. Instead of making bunny tails, you make bunny ears, which is basically the same thing just a tad different in shape and size. Scrunchie with long bunny ears is identical to the short bunny tails kind but you just make the ears longer. Surprising, right?
-
Scrunchie with tails
Use the pattern to cut out a long or short tail for the scrunchie and sew it exactly as you would sew the scrunchie minus the elastic. Tie it around the scrunchie and you are done!
There you have it – making a scrunchie in 7 different ways. There is no reason why not to sew yourself some to match your outfits and sew some for your besties as well. Scrunchies make fantastic gifts!
Now show me the scrunchies you made. Make sure you follow me on Pinterest, tag me and share your makes!
OTHER HAIR ACCESSORIES YOU CAN MAKE:
- DIY Fabric rose – a gorgeous hair pin, stunning table decoration, breathtaking wedding corset. No matter how you use it, it will impress
- DIY Hair ties – now that you know how to make a bow knot, why don’t you spice up your hair ties too?
- How to sew a FABRIC BOW
- Twisted turban headband tutorial
- How to make a headband
- diy elastic hair ties