
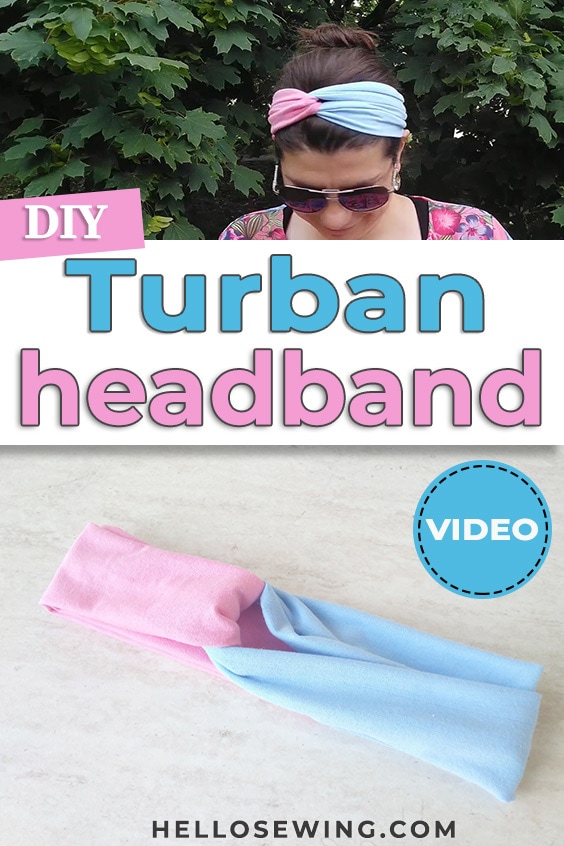
DIY Turban Headband | How to Make a Turban Headband
I’m obsessed with the turban trend. These chick turban style headbands are so pretty, add a nice twist to your style and are a great cover up for a bad hair day! On top of that they are a great scrap buster project!
A stylish “twist“ of the regular headband design that is both practical and fashionable. Even if you’re wearing nothing but a swimsuit, this DIY turban headband can give your look a bit of flair and that fancy edge. And you can also combine it with most of your outfit combinations. If you like the sound of that, you will love this article. Because it will show you exactly how to make a turban headband that was just mentioned.
Below you will find my step by step twist turban headband written tutorial with VIDEO instructions for all the visual learners.
We occasionally link to goods offered by vendors to help the reader find relevant products. Some of the links may be affiliate meaning we earn a small commission if an item is purchased.
Table of Contents
How to make a Turban Headband
Supplies and tools
- fabric – 2 pieces of stretch knit fabric 5 x 21″ (or 5 x circumference of head)
- matching thread thread
- scissors (or rotary cutter and a cutting mat)
- ruler or measuring tape
- sewing machine (a simple machine will do just fine, or you can even hand sew this, although admittedly it will take you more time)
Follow us for free patterns & tutorials! [easy-profiles]
How to Sew a Turban Headband
Watch the diy twisted turban headband video first and then follow the written step by step instructions below.
Please enjoy and don’t forget to Like and SUBSCRIBE over on YouTube to be kept up to date with new videos as they come out.
DIY Turban Headband VIDEO TUTORIAL
INSTRUCTIONS:
STEP 1: Prepare the fabric
Start this project by washing the fabric thoroughly and pressing it flat with your iron. This will prevent any unwanted deformations or shrinkage from occurring later on when you use the headband and wash it for the first time.
The edges of knit fabric tend to curl. Press them with a hot iron on both sides, this will help straighten them out and make cutting much easier.
After you have done that, lay the fabric so that the shorter edges are on the sides.
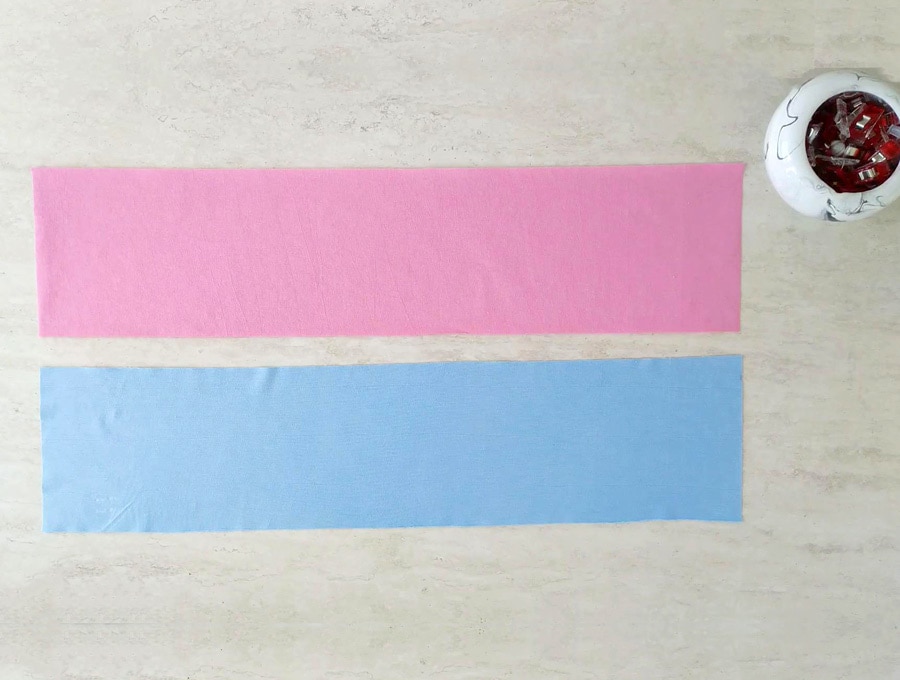
STEP 2: Cut fabric
Cut 2 pieces of fabric 5 inches wide. The length should be the circumference of head. Mine is 21 inches, so I cut 2 strips of different fabrics (one pink and one blue), each 5 x 21″.
STEP 3: Stitch
Fold the fabric piece in half horizontally (lengthwise), and align the edges. Keep the right sides together when you are folding the fabric. Pin or clip in place.
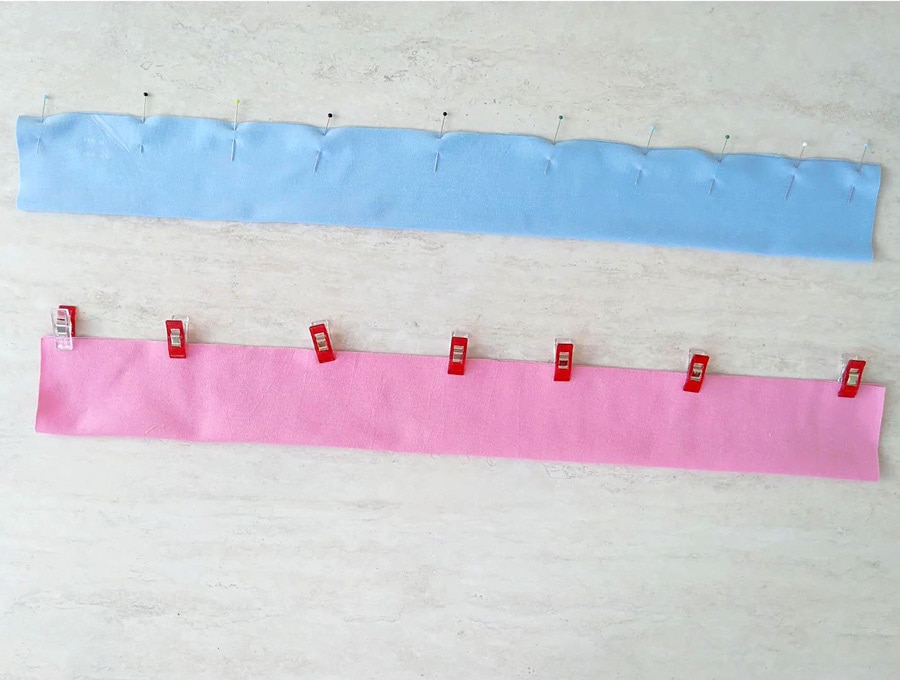
Using a quarter-inch allowance, sew across the long edges that aren’t connected. Use a serger machine if you have one. If you don’t, use your regular sewing machine but set it on zig-zag stitching mode.
Repeat this for the other piece of fabric as well.
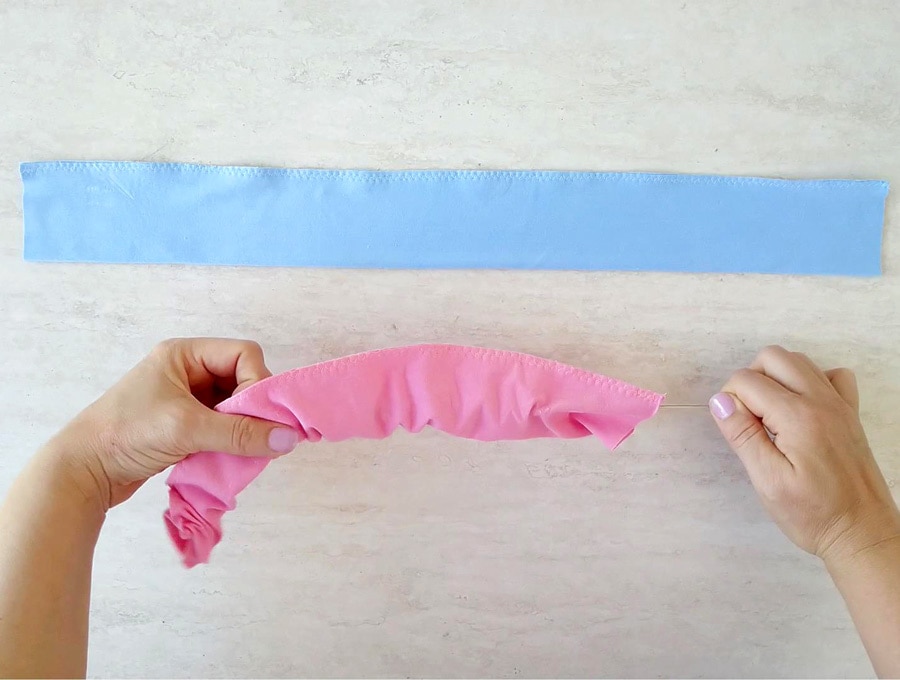
STEP 4: Turn the tubes inside-out
Now you will have two tubes of fabric. You will need to turn them both. Attach a safety pin to one open end of the tube. Then just pull the pin through the tube.
This can be a bit tricky due to the length of the tube, so be patient and go slowly.
If you’re having trouble turning them inside-out, you can use one trick to quickly and easily accomplish the feat. Use a tube turner and voila! You turned the whole thing in a flash.
STEP 5: Prepare the fabric for sewing
Put both fabrics on your workspace on top of each other, stitch lines facing each other, so that they form an X mark.
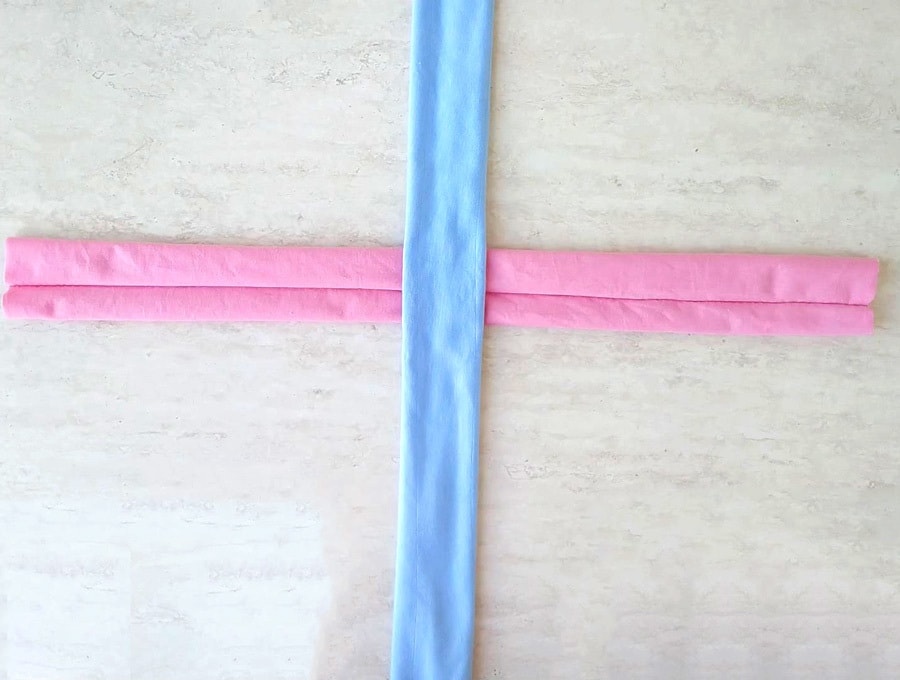
Grab one of the ends of the bottom piece and pull it towards its other end, aligning the short raw edges. Pin them in place. Repeat the process with the other fabric piece.
Bring all four ends together and pin them in place.
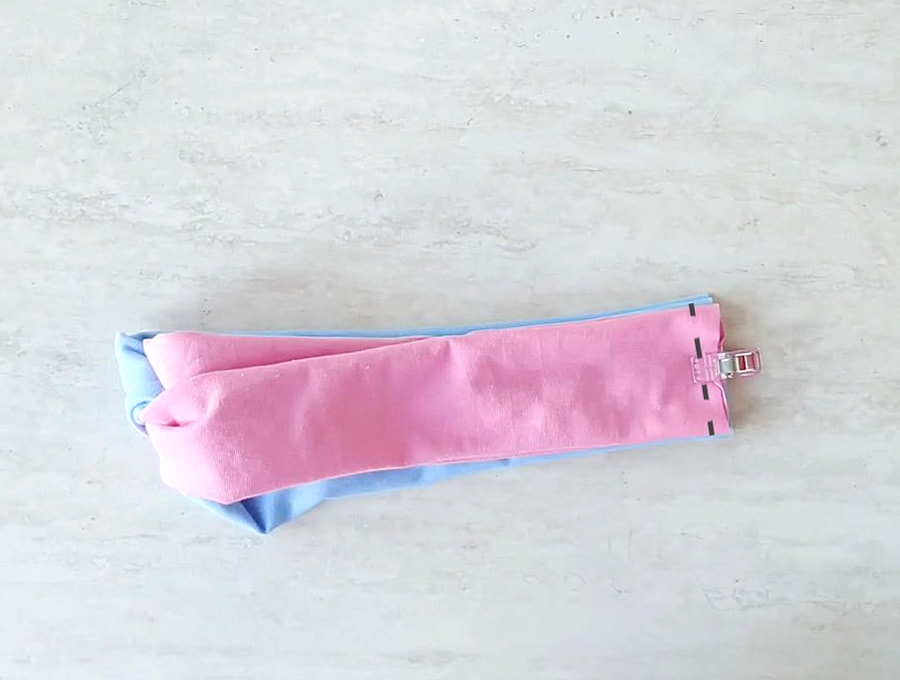
STEP 6: Final stitching
Set your sewing machine to sew with a quarter-inch sewing allowance. Now sew across the two edges you just aligned. Make sure to go through all four layers of the fabric.
If you are an OCD like me and you are sewing a two-color headband, make sure to use different colors for the top and bobbin thread to match the colors of the headband.
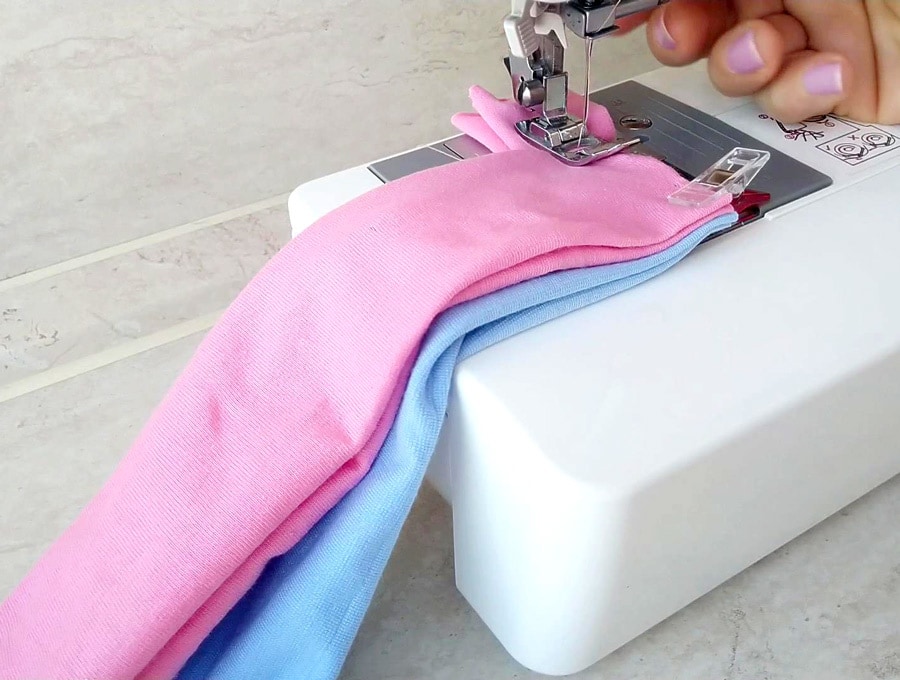
TIP: Use the a folded piece of fabric to level the foot with the bed of the machine. This will ensure it will go through all layers without difficulties.
If you have a serger sewing machine, use it here.
STEP 7: Turn the twisted headband RSO
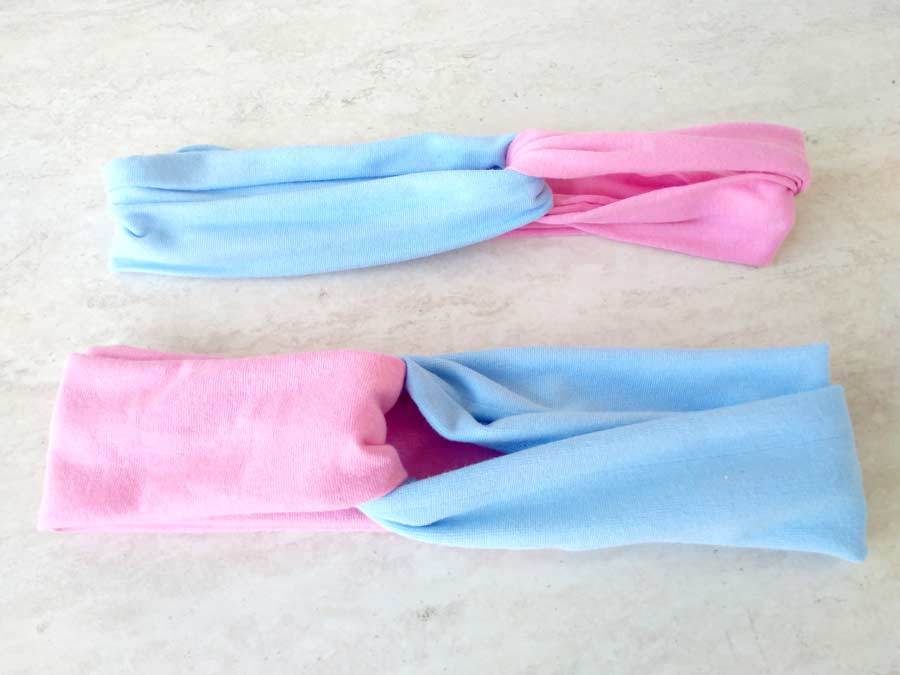
Flip the headband so that the raw edge goes against your head. Your twisted headband is now officially finished!
That’s it your diy turban headband is ready!
Twist turban headband OPTIONS:
- COLOR: Use two different fabrics to make your headband really stand out. Use the same fabric for both pieces for a more classy look.
- WIDTH: Wider fabrics will add more volume to the headband. I’ve gone as low as 3.5 inches, and as high as 7 inches for the width.
Did you make yourself this chick DIY turban headband? How did it turn out? Try making one and let us know how it turned out. If you have some suggestions on how to improve this project, share them with us in the comment section below. Now that you know how to make a turban headband, make a bunch of those lovely twisted turban headbands to match different outfits or to give your besties. They are the perfect balance between fun, functional and stylish!
Do you like this? Pin for later:
Wanna be friends? Click HERE and follow me on Pinterest
RELATED HAIR ACCESSORIES: