
How to Make a Kimono Out of a Scarf | DIY Kimono Sewing Pattern [FREE]
Summer is here so one of our top priorities is staying as cool and as refreshed as possible. But it doesn’t mean we have to sacrifice style and walk around in tank tops. We just need something that combines style with that comfortable, airy design that’s great for hot weather.
So, is there a piece of clothing like that? Sure thing, there’s a kimono!
For us, Westerners, though, wearing a traditional kimono every day would be a bit unusual. Fortunately, there is a fashionable DIY kimono jacket you could wear every day! This kimono top project is very easy and fun, and you don’t even need to use a full-blown kimono pattern to finish it – the sketched kimono sewing pattern below is all you need to refer to. Just follow this tutorial on how to make a kimono out of a scarf or your favorite drapey fabric!

Below you will find my step by step written diy kimono tutorial with VIDEO instructions for all the visual learners. You can even make a matching scrunchie out of the cutouts!
We occasionally link to goods offered by vendors to help the reader find relevant products. Some of the links may be affiliate meaning we earn a small commission if an item is purchased.
Table of Contents
- 1 How to Make a Kimono
- 2 DIY Kimono Top Supplies and tools
- 3 How to Sew a Kimono Cardigan
- 3.1 DIY Kimono VIDEO TUTORIAL
- 3.2 KIMONO TOP INSTRUCTIONS:
- 3.3 STEP 1: Prepare the fabric and draw the kimono sewing pattern
- 3.4 STEP 2: Fold the fabric
- 3.5 STEP 3: Cut out the front opening
- 3.6 STEP 4: Measure and cut out the neck opening
- 3.7 STEP 5: Mark the sleeves
- 3.8 STEP 6: Start making the sleeves and the sides
- 3.9 STEP 7: Finish the raw edges
- 3.10 STEP 8: Hem the front
- 3.11 STEP 9: Sew the front hem
- 3.12 STEP 10: Finish the kimono
- 4 KIMONO HEMMING OPTIONS:
How to Make a Kimono
DIY Kimono Top Supplies and tools
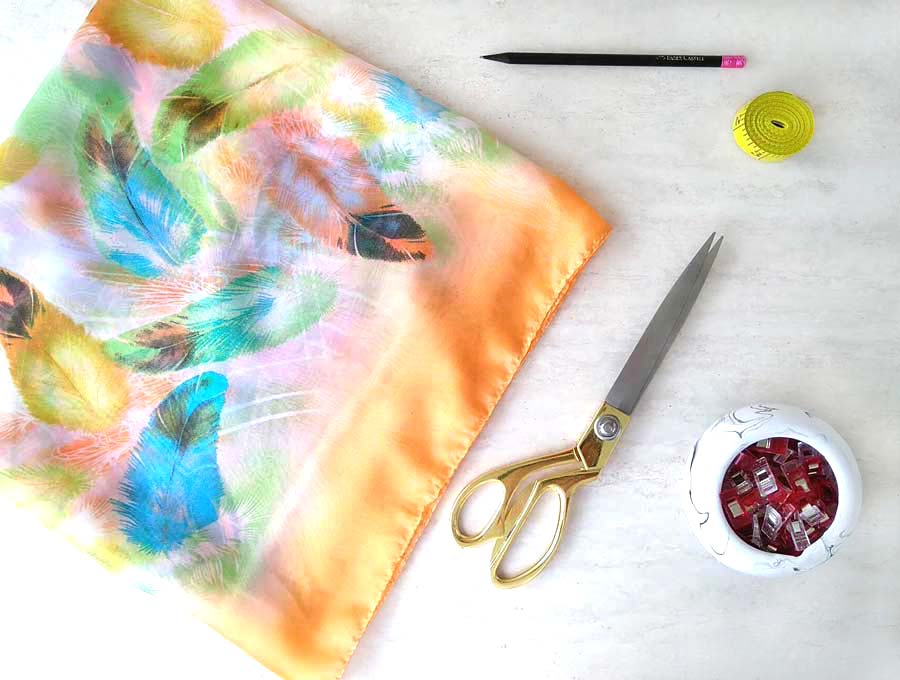
This is a very simple kimono, so you don’t need all that much to make it.
- Scarf or a piece of fabric measuring at least 59 x 45 inches.
- matching thread thread
- scissors (or rotary cutter and a cutting mat)
- ruler or measuring tape
- iron and ironing board
- sewing clips or pins
- sewing machine (a simple machine will do just fine, or you can even hand sew this, although admittedly it will take you more time)
Follow us for free patterns & tutorials! [easy-profiles]
How to Sew a Kimono Cardigan
Watch the diy kimono jacket video first and then follow the written step by step instructions below.
Please enjoy and don’t forget to Like and SUBSCRIBE over on YouTube to be kept up to date with new videos as they come out.
DIY Kimono VIDEO TUTORIAL
KIMONO TOP INSTRUCTIONS:
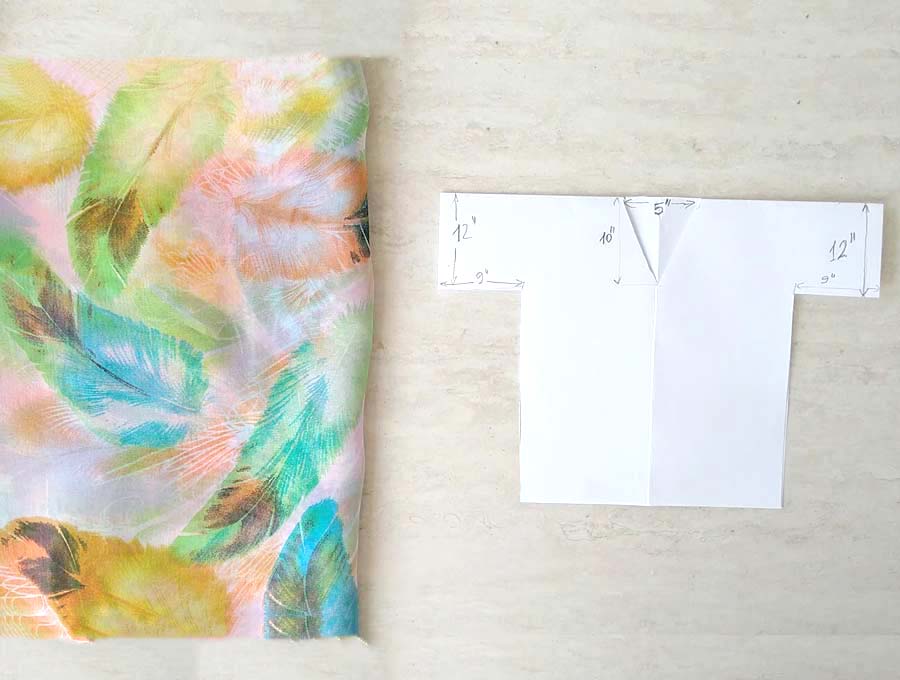
STEP 1: Prepare the fabric and draw the kimono sewing pattern
(skip this step if you are using a scarf)
As with any other sewing project, before you start doing anything with the fabric, first wash it thoroughly and iron it well. This will prevent it from shrinking or deforming after you’ve finished sewing it. Here’s the simple kimono sewing pattern you will need… Yes, it’s THAT easy to make that kimono top!
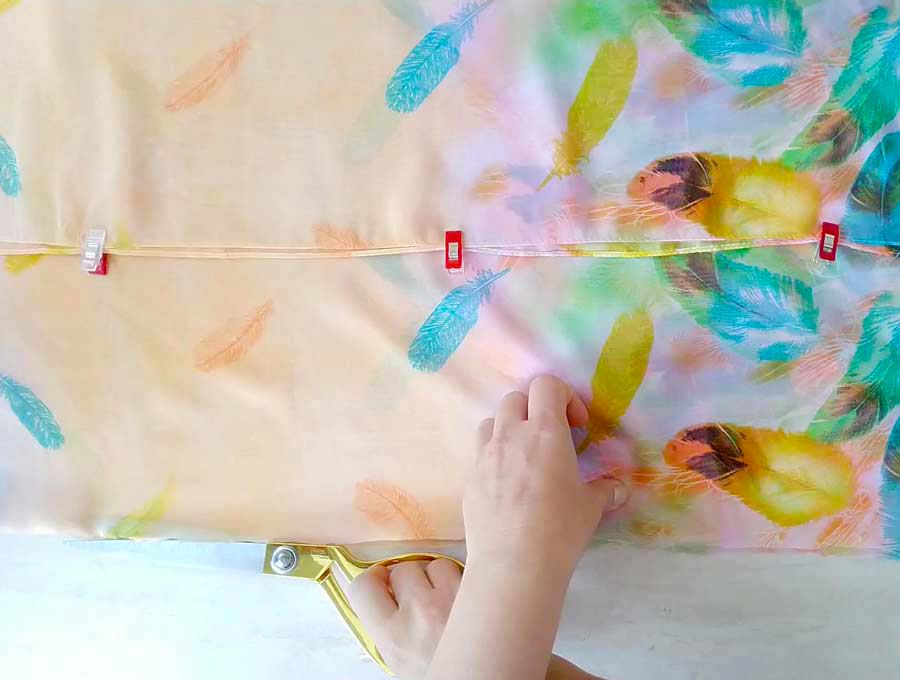
STEP 2: Fold the fabric
Fold the fabric in half horizontally so that the short edges alight, then fold it in half vertically. Pin, or clip everything in place to keep it from moving.
STEP 3: Cut out the front opening
Now you will need to make an opening on the front of the kimono. So find a middle of the fabric width and make a cut. Pay attention, you need to cut through just one layer!
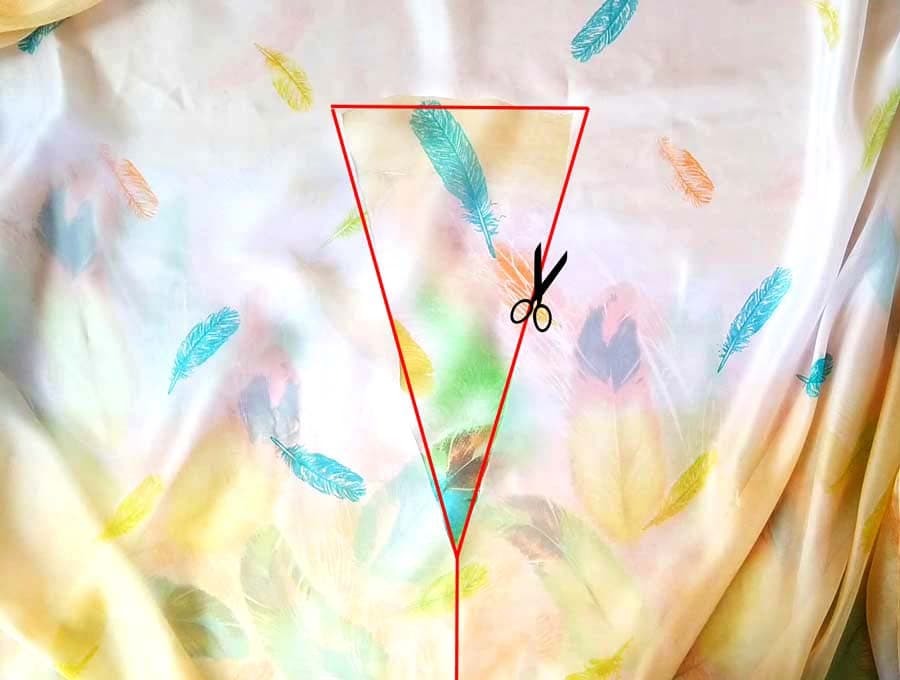
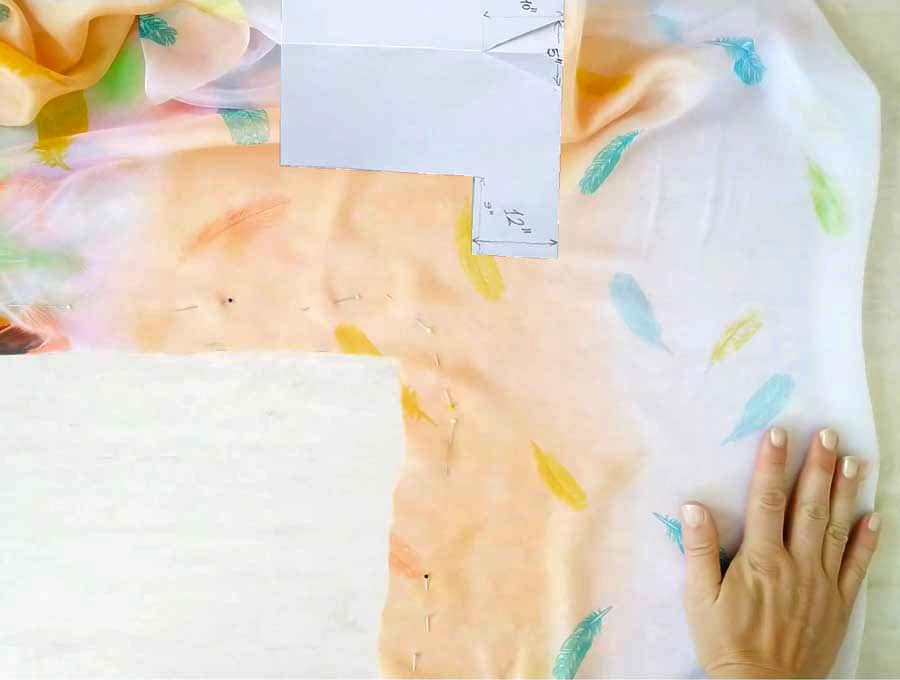
STEP 4: Measure and cut out the neck opening
Unfold the fabric and find the cut you’ve made, you will need to mark and cut the neck opening. Mark a 5 inch line perpendicular to the frontal cut and then mark 10 inches along the cut. Join the ends of the 5 inch line and the and of the mark to make a triangular shape for the neckline. Refer to the kimono sewing pattern above in STEP 1 to make sure the placement is right
This will give your DIY kimono jacket a bit more flair and style when compared to a plain straight-cut front.
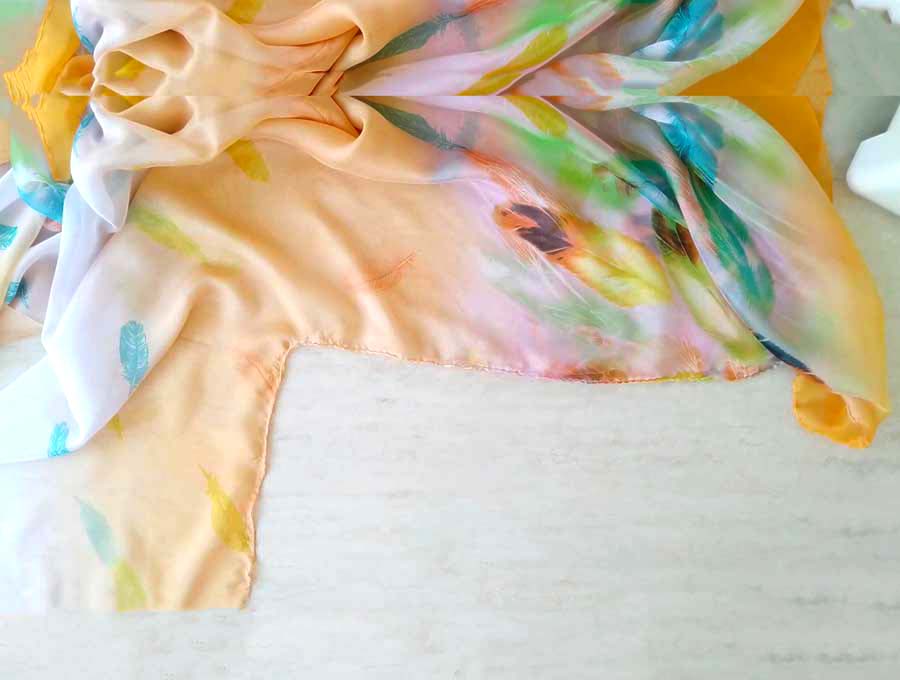
STEP 5: Mark the sleeves
Now you will need to make the sewing lines for the sleeves.
Fold the fabric in half so that the short edges meet. Going from the top towards the bottom, along the left short edge, measure about 12 inches, and mark it. Next, draw a 9 inch line at a 90-degree angle, going from that mark towards the left
Finally, draw another line going from the end of the previous one, all the way to the bottom of the fabric. Make sure that it’s at a 90-degree angle as well.
Repeat on the right side but as a mirror image.
When you finish, cut all excess material so that you get a large T shaped piece of fabric. Try to cut as close as possible to the seam.
STEP 6: Start making the sleeves and the sides
Using a half-inch seam allowance, sew along the lines you just drew using a straight stitch.
STEP 7: Finish the raw edges
Now finish the raw edges along the sleeves and the sides you just sew. Use a serger if you have one, a mock serger stitch or a simple zig-zag stitch.
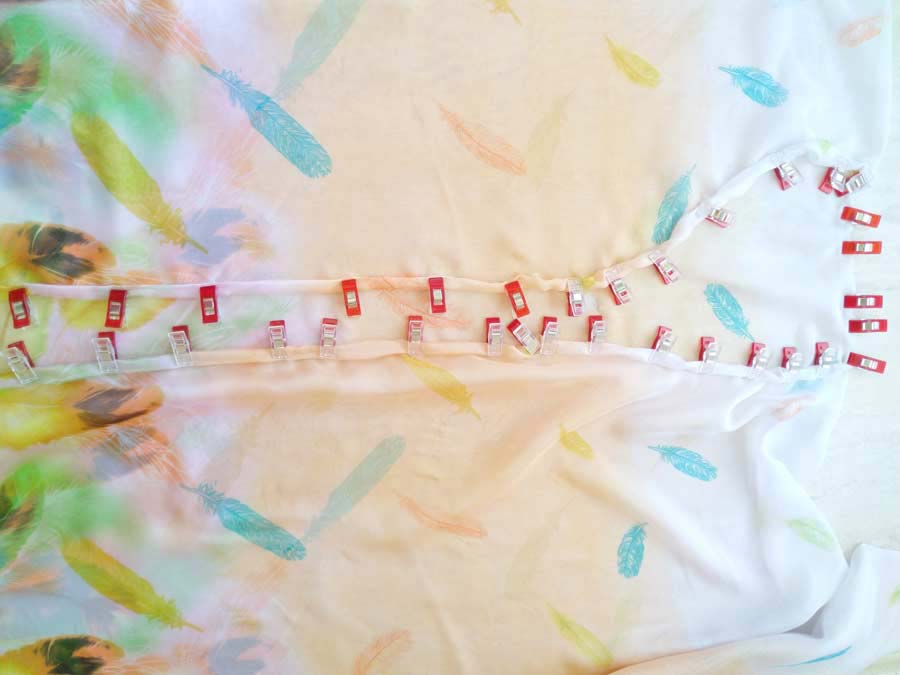
STEP 8: Hem the front
Now you will need to hem the opening on the front of the kimono. Fold the edges two times towards the wrong side of the fabric for about a quarter-inch and then pin them. Use a lot of pins or clips, as silk and drapey fabrics tend to shift a lot.
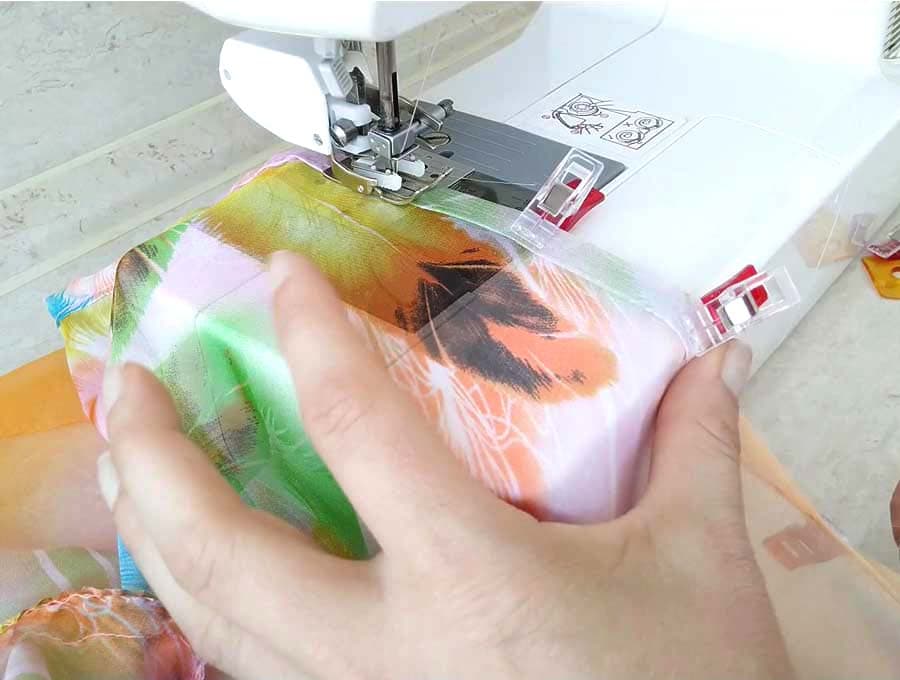
STEP 9: Sew the front hem
Sew across the hem using a straight stitch. I find it helpful to pull the fabric just a little bit as I sew as it creates a cleaner look of the finished hem.
STEP 10: Finish the kimono
If you are not using a scarf you will need to hem the rest of the raw edges as well.
Once you’re done, you can iron the whole thing one more time to give it a crisp look.
This diy kimono jacket is now complete!

You can wear it in a combination with a skirt, shorts, pants, or even over your bathing suit at the beach. It’s very versatile so you can combine it with almost anything.

KIMONO HEMMING OPTIONS:
- USE ROLLED HEM FOOT – The first option is to use a rolled hem foot if your sewing machine can work with it. Attach the presser foot and use it to sew across the sleeves, front and neck openings, and bottom edges to hem them.
- MAKE THE HEMS YOURSELF – The second option is to make those hems yourself. Fold the edges along the sleeves, the bottom, the front, and the lancet two times for about a quarter-inch. Press them flat and then sew across them. Alternatively, you can also use a serger machine for finishing the edges, if you have one at your disposal.
Did you like this tutorial? I hope you enjoyed reading it and that you found it useful. If you have some ideas on how to improve this project, please, share it with us in the comment section below. Your feedback is very important to us!
Do you like this? Pin for later:

Wanna be friends? Click HERE and follow me on Pinterest
RELATED: