
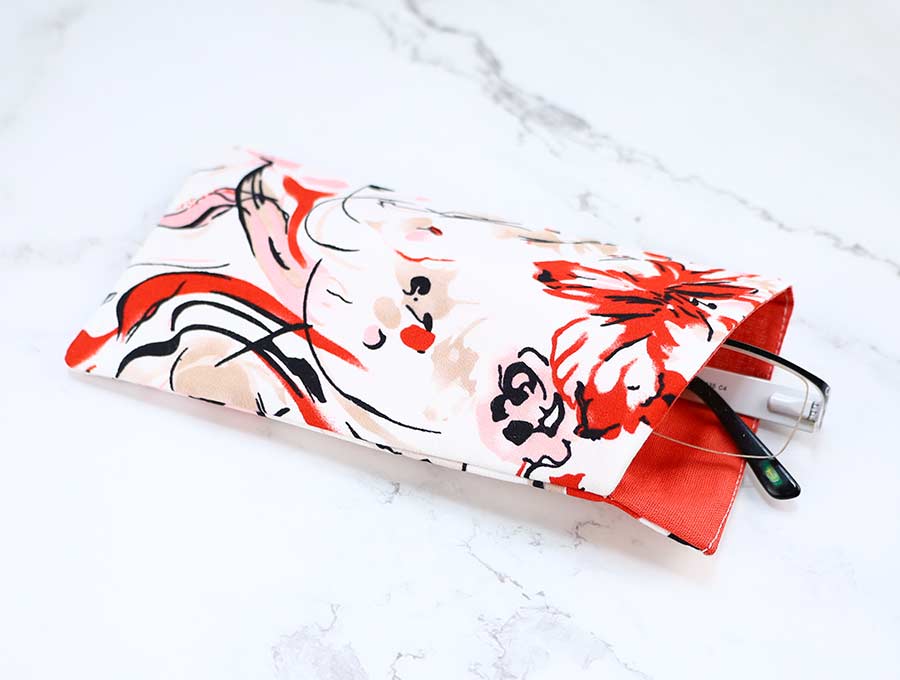
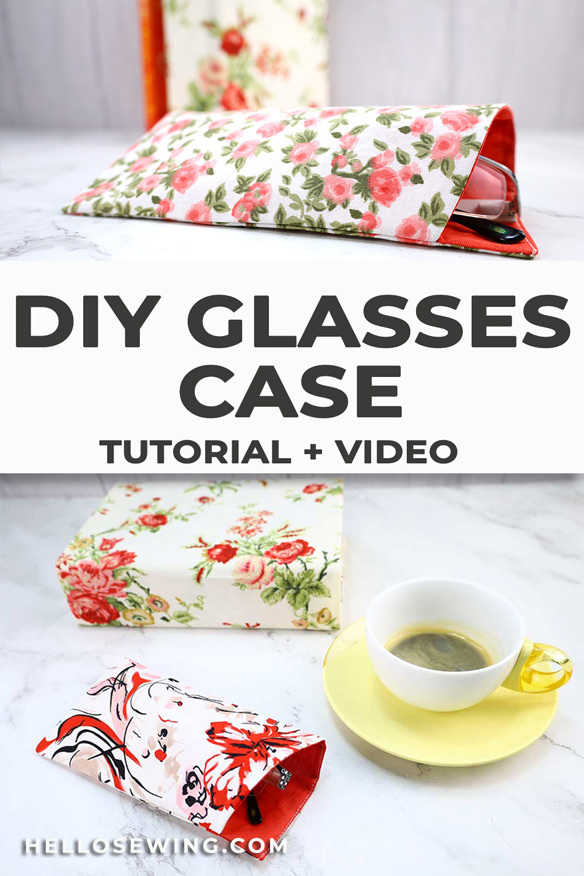
Sew a Sunglass or Eyeglass Case Pattern | DIY Glasses Case
If you are anything like me you keep hopping into a car with your sunnies on, then find you have nowhere safe to put them when you enter a shopping mall. I’ve scratched so many pairs of eyeglasses and sunglasses by shoving them into a purse, or leaving them lying around at home or in the car. This nifty DIY glasses case is just what everyone needs. All you need to do is get my free sunglasses or eyeglass case pattern and carve out 15 minutes of your schedule.
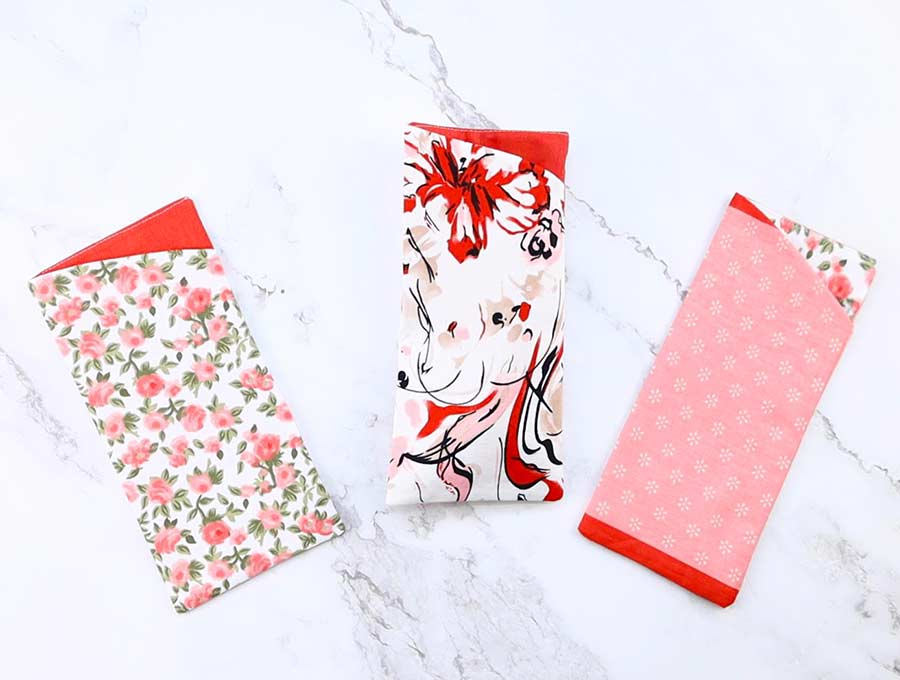
Once you have learned how you’ll want to make a few glasses cases, so you have one for the car, one for home, one in your purse, and maybe a couple extra while others are in the wash. You can use gorgeous fabric scraps if you have some suitable pieces stashed. They also make great gifts that you can personalize according to the taste of the recipient. Just imagine, distressed denim for the teens, sophisticated stripes or polka dots for career girls, and paisley designs for the Bohemian types.
Below you will find my step by step DIY sunglasses case written tutorial with VIDEO instructions for all the visual learners.
We occasionally link to goods offered by vendors to help the reader find relevant products. Some of the links may be affiliate meaning we earn a small commission if an item is purchased.
Table of Contents
- 1 How to Make a Glasses Case
- 2 Supplies and tools
- 3 How to Sew an Eyeglass Case
- 3.1 DIY EYEGLASS CASE VIDEO TUTORIAL
- 3.2 DIY GLASSES CASE INSTRUCTIONS:
- 3.3 STEP 1: Prepare the sunglass or eyeglass case pattern
- 3.4 STEP 2: Cut all the fabrics
- 3.5 STEP 3: Fuse interfacing to the outer piece (optional)
- 3.6 STEP 3: Stitch
- 3.7 STEP 4: Press
- 3.8 STEP 5: Understitch the lining
- 3.9 STEP 6: Stitch down 1 inch
- 3.10 STEP 7: Fold and pin around
- 3.11 STEP 8: Stitch around the glasses case
- 3.12 STEP 9: Turn right side out
- 3.13 STEP 10: Stitch the gap closed
- 3.14 STEP 11: Finish the sunglasses case
- 4 DIY Glasses Case FAQs:
How to Make a Glasses Case
Supplies and tools

- fabric – 2 pieces of 100% tightly woven cotton (one main, one lining)
- fusible interfacing
- my free eyeglass case pattern
- matching thread
- scissors (or rotary cutter and a cutting mat)
- ruler or measuring tape
- iron and ironing board
- sewing clips or pins
- sewing machine
DOWNLOAD: sunglass / eyeglass case pattern (Free PDF file)
Follow us for free patterns & tutorials! [easy-profiles]
How to Sew an Eyeglass Case
Watch the diy eyeglass case video first and then follow the written step by step instructions below.
Please enjoy and don’t forget to Like and SUBSCRIBE over on YouTube to be kept up to date with new videos as they come out.
DIY EYEGLASS CASE VIDEO TUTORIAL
DIY GLASSES CASE INSTRUCTIONS:
STEP 1: Prepare the sunglass or eyeglass case pattern
Download my free eyeglass case pattern and print it from your desktop program without any scaling. Trim the excess paper and set the glasses case template aside.
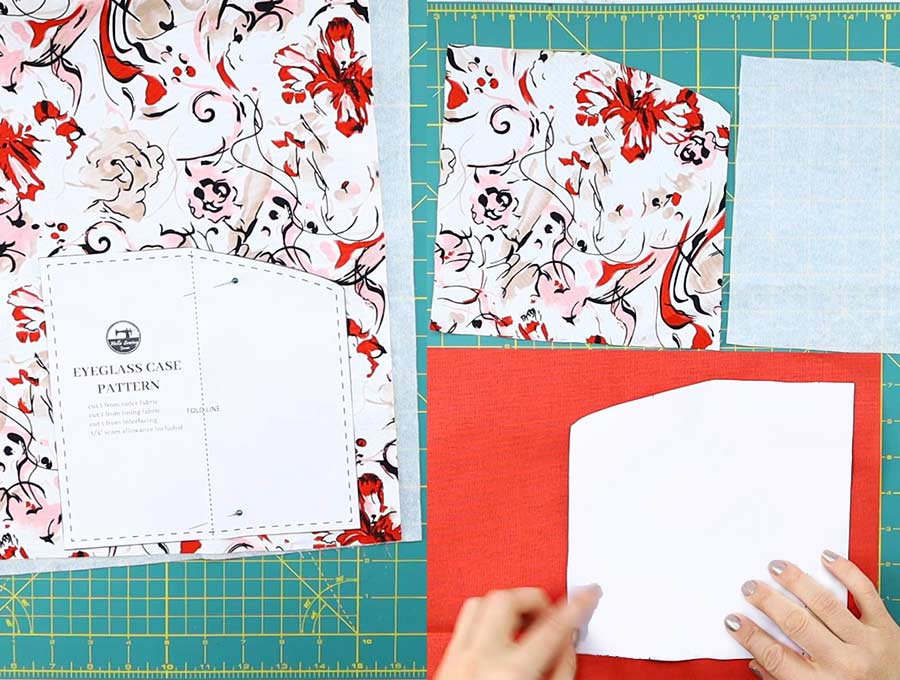
STEP 2: Cut all the fabrics
Fabric options:
- MAIN FABRIC: Choose some suitable fabric bits that are 7 3/4 inches by 7 3/4 inches (20cm x 20cm). A bright and pretty outer pattern in a curtaining or non-stretch clothing fabric will be fine. Avoid heavy upholstery fabrics as they will be too thick to turn neatly.
- LINING: For the lining try to choose a thin polar fleece, or fabric with a brushed finish. Even a soft cotton will work. This just give some padding to protect the lenses. Make sure the colors for the outer and lining work well together.
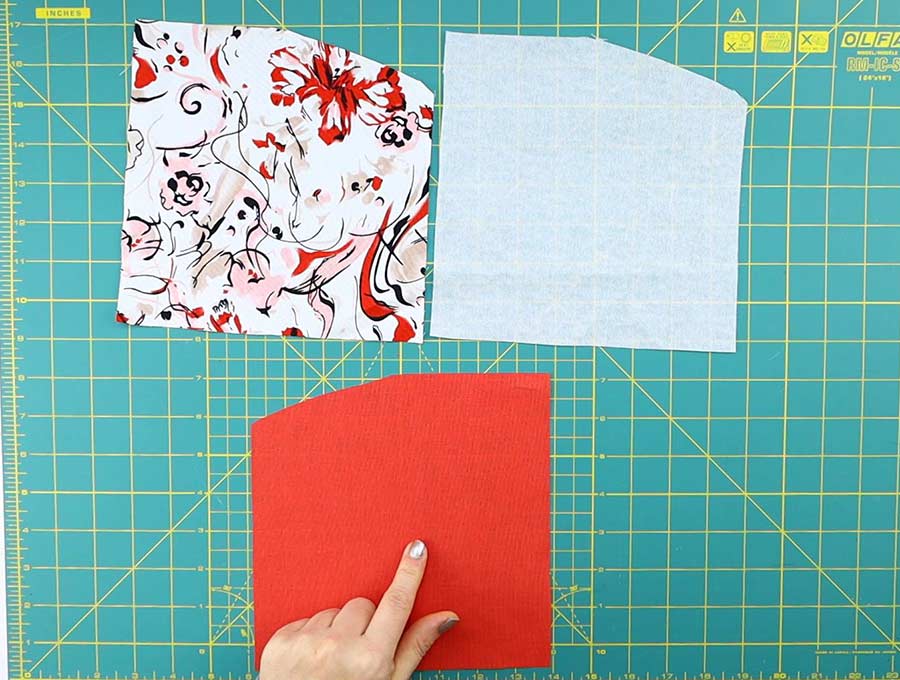
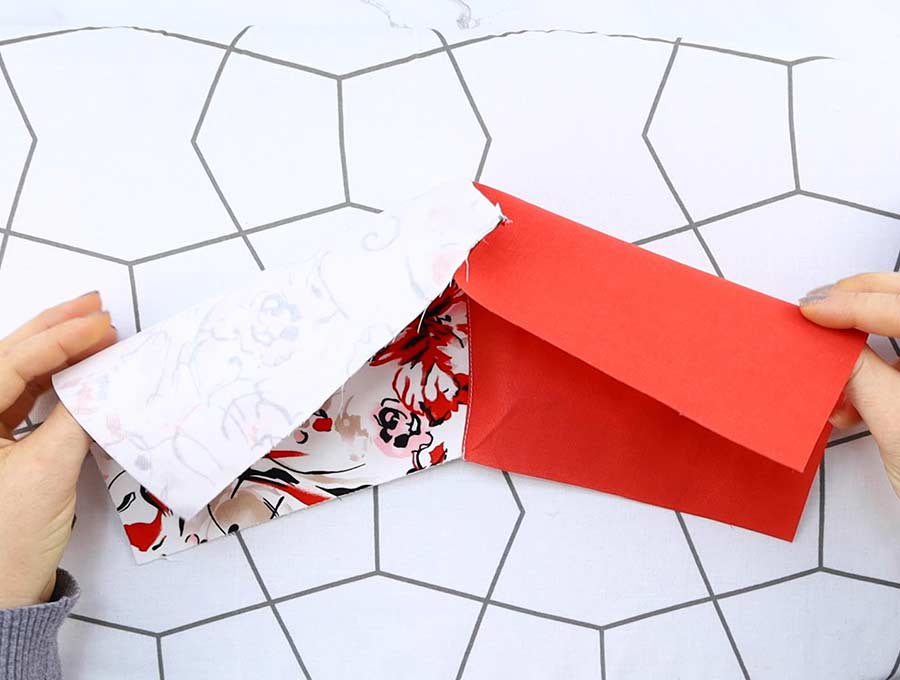
Cut the pattern pieces for the outer casing, the lining and the fusible interfacing – you’ll need one of each. As you’ll see on the eyeglasses case pattern piece one side is side is angled slightly. So you’ll need to cut the lining mirrored.
To do that before cutting this place your fabric right side to right side, so the wrong side of the lining is facing you. Now cut the angle, or lip as it’s known and pin along that angled edge.
There is a faster way to cut the fabrics for this DIY glasses case. I’d like to cut all three pieces at once so I place the interfacing with the bumpy side up, then place the outer fabric with right side on top and then I place the lining with it’s wrong side up.
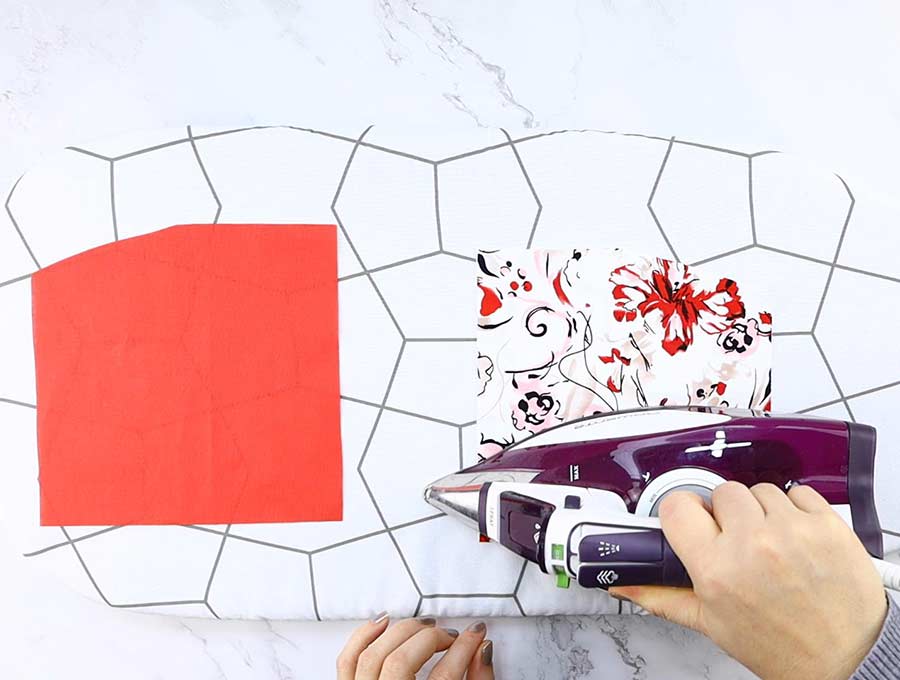
STEP 3: Fuse interfacing to the outer piece (optional)
If you’re workings with some lightweight fabrics, you’ll need to add a little structure to your main fabric. Place the main fabric on top of the bumpy side of the interfacing and press with an iron from both sides.
STEP 3: Stitch

Place the outer fabric on top of the lining fabric right sides facing. Stitch the fabric pieces together along the whole length of the angled side 1/4″ (6mm) from the edge.
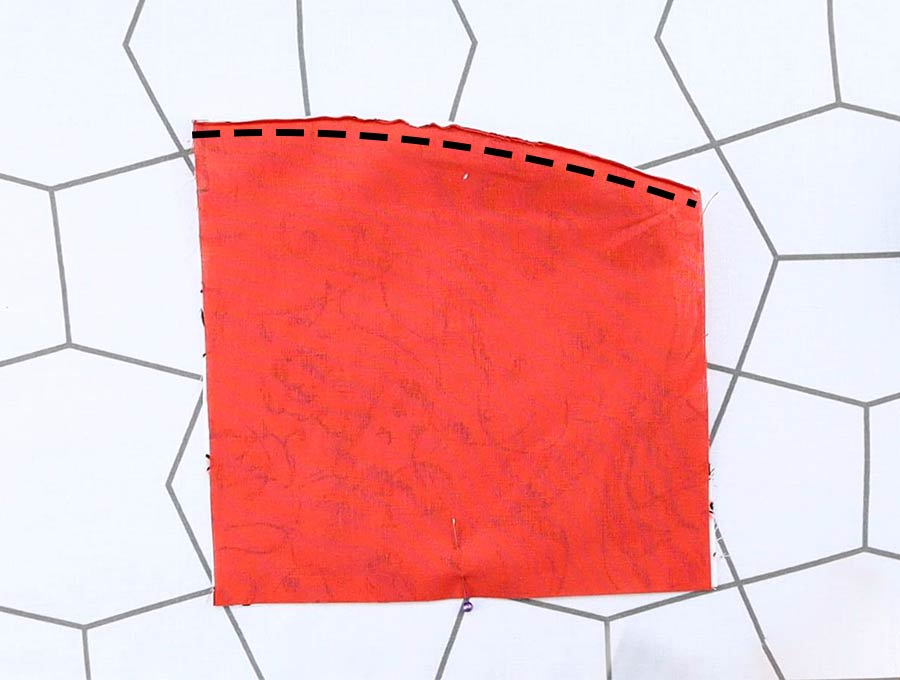
TIP: Trim the seam allowance so its neat, grading it, which means leaving the outer fabric slightly wider than the lining. This allows for a neat finish.
STEP 4: Press
Open out the pieces and turning both the seam allowances towards the lining side, press flat along that curved edge so it’s nice and crisp.
STEP 5: Understitch the lining
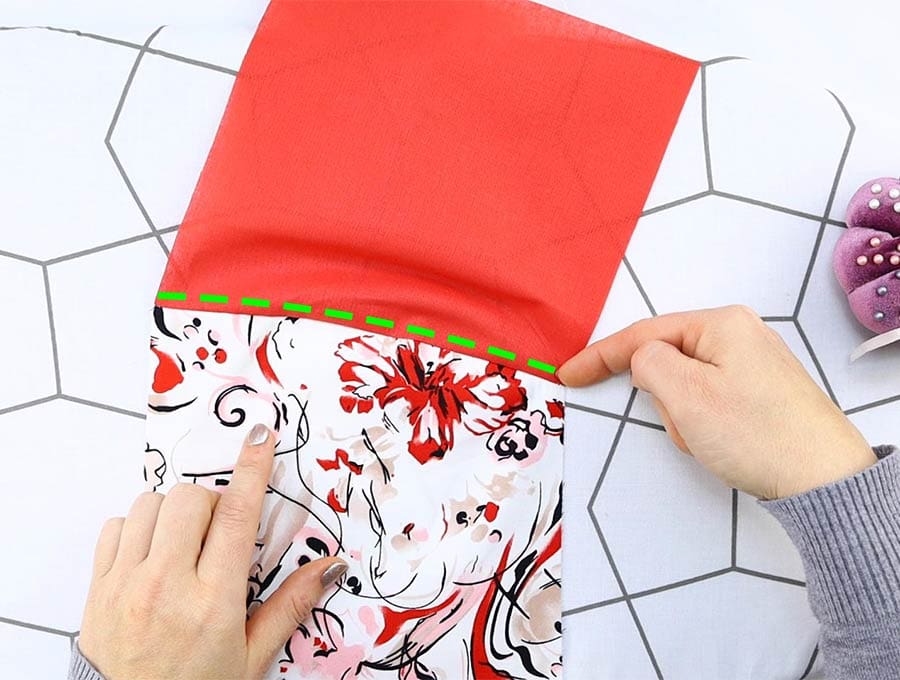
Now you are going to take that flat seam and stitch a neat line on the lining side next to the original line you stitch. This is called under-stitching and will prevent fraying, hold the seam in place, also giving the edge a neat finish when turned.
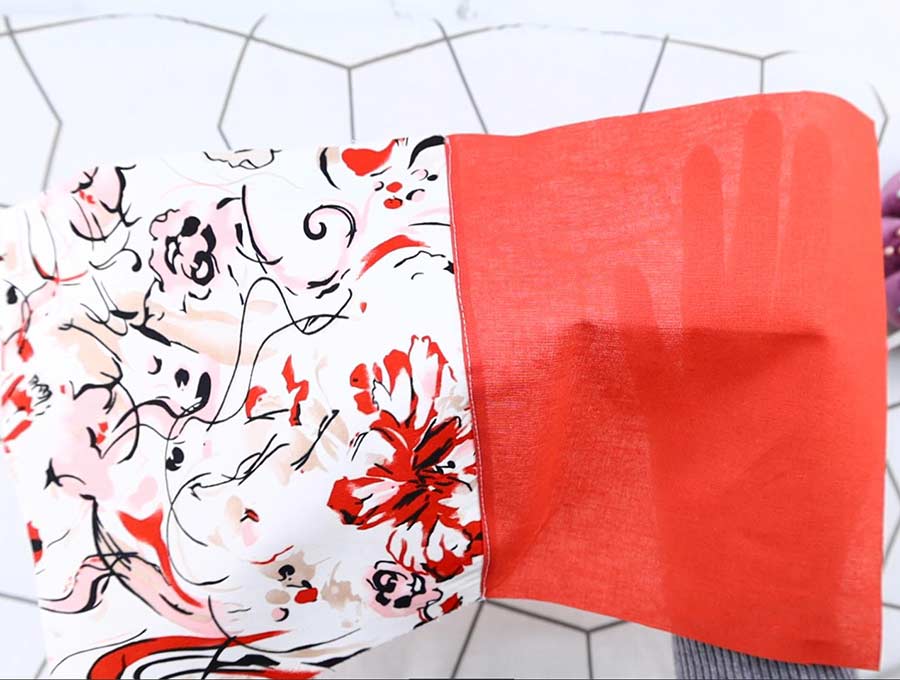
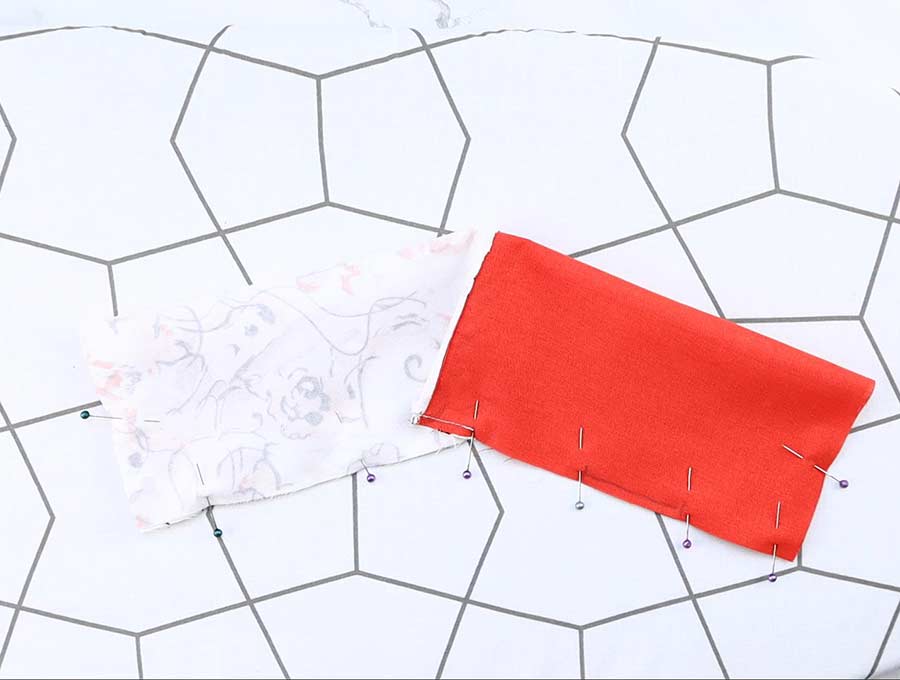
STEP 6: Stitch down 1 inch
Take the end of angled bit and fold it over to meet the opposite seam – right side to right side. You are not going to stitch it, it just helps with locating the opposite seam.
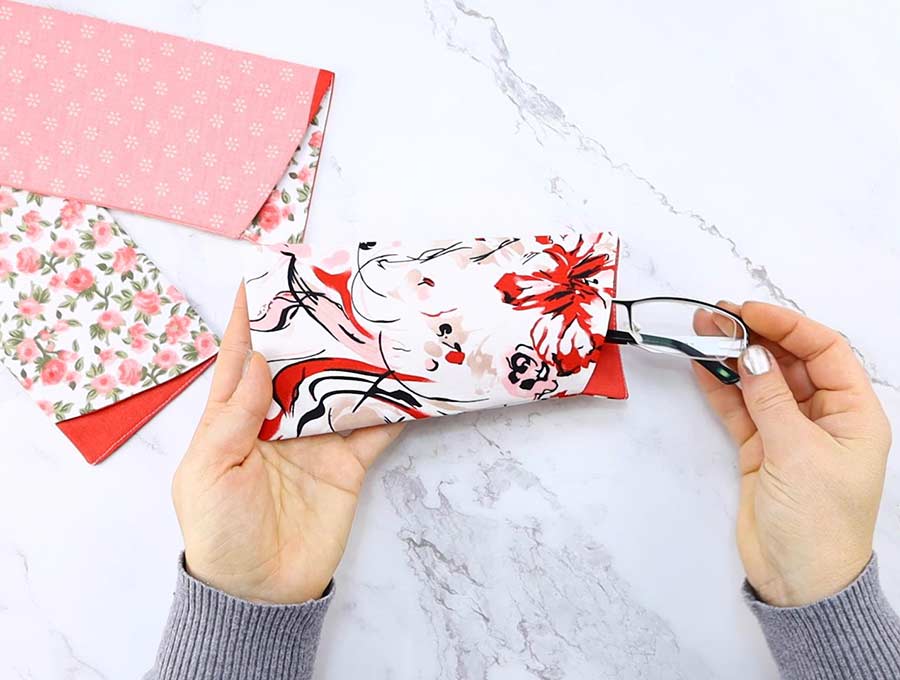
Now take that long straight seam that meets the angled seam and pin down the lining and outer for just 1 inch (2.5cm), then stitch with a 1/4 inch (6mm) seam allowance and trim. This creates the convenient spot on the finished item where you can reach in to get your eyeglasses out of the DIY eyeglass case.
Or you can use my eyeglass case template and transfer the marking so that you know exactly where to stitch.

STEP 7: Fold and pin around
Fold the eyeglass case lengthwise. You now have an inside out piece just under 16 inches long – with the side on the left having the lining and side on the right the outer fabric.
Pin the edges together all around, making sure they line up neatly.
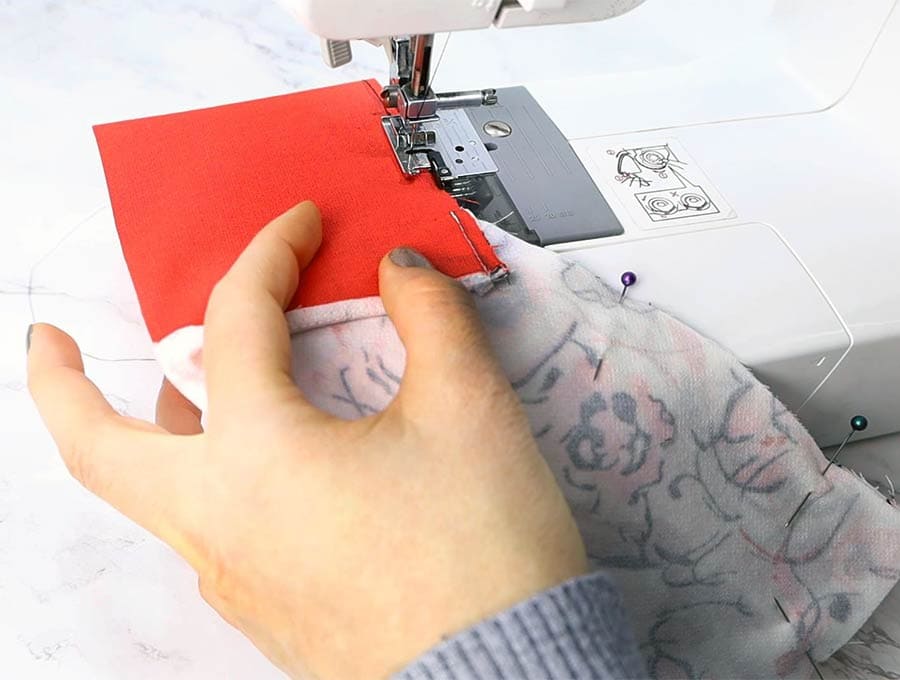
STEP 8: Stitch around the glasses case
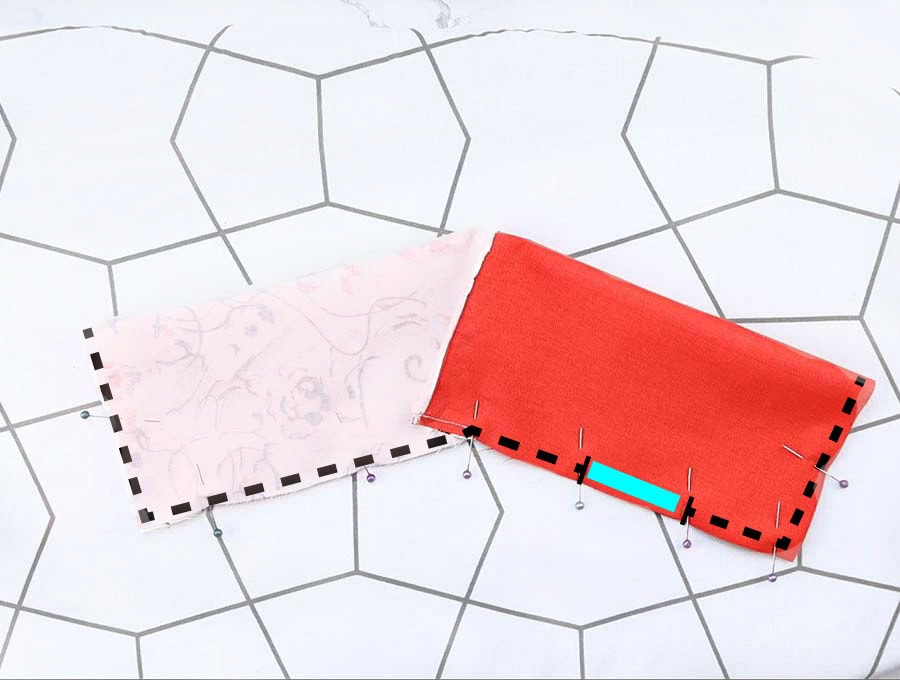
Stitch all the way around the seams you have pinned leaving a 2-inch (5cm) gap midway down the long seam for the lining as this is where you will push the fabric through to turn it. Use 1/4″(6mm) seam allowance
STEP 9: Turn right side out

Trim the seams (you can use pinking shears if you have them), then push the fabric through the opening until it is right side out. You will have the lining on the left and the outer fabric on the right side. Make sure to use a blunt object like a chopstick to push out the corners. It’s tempting to use your scissors but you risk making a hole in the fabric – yikes! Been there, done that, in my very early days of sewing.
STEP 10: Stitch the gap closed
You’re nearly there. It just remains to neatly close the opening on the lining seam with your machine or hand stitch it closed using a ladder stitching or a slip stitching
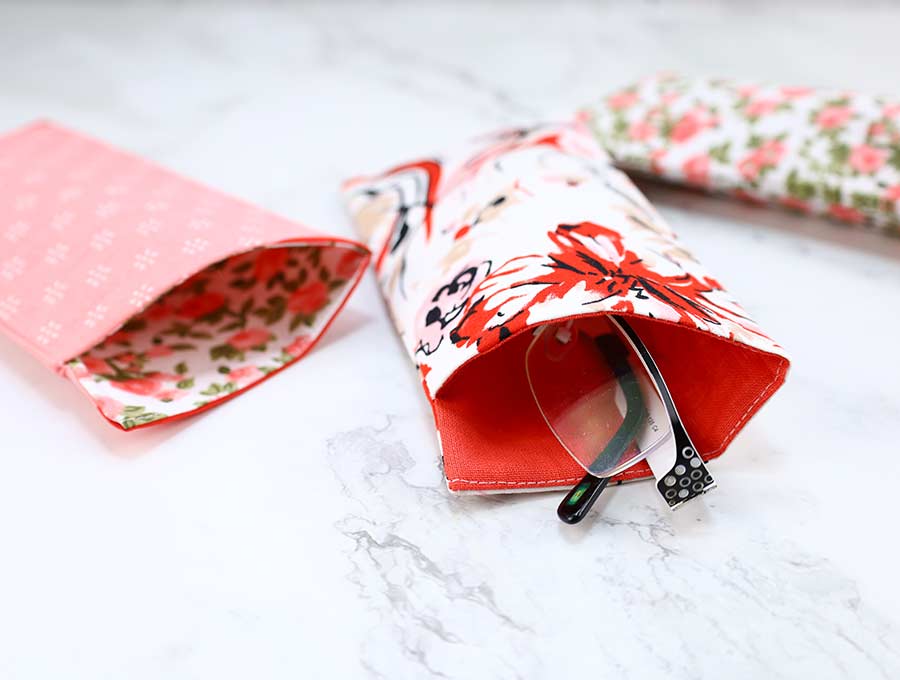
STEP 11: Finish the sunglasses case
Now it’s time to push the lining into the outer fabric case and make sure they fit snugly into each other and lie flat before giving them the final press. And there you are – one eyeglasses or sunglasses case done and dusted.
That’s it your DIY glasses case is ready!
Keep this pattern for eyeglass case handy, because now all your friends will ask for such a cute soft glasses case. It makes for a great gift for both adults and kids, uses very little fabric (scrapbusting anyone?) and stitches up quickly.

DIY Glasses Case FAQs:
Why is the lining not fitting well inside the outer case?
Try to use fabrics of similar weight – if the lining fabric is too thick it may not fit neatly inside. Winter pajama fabric or thin track suiting, or a brushed or plain cotton make for good linings. Avoid heavy track suiting or quilted material as it gets too awkward to turn on such a small item.
How do I stop the glasses falling out of the case?
If this is a concern you can solve it by sewing a tiny piece of Velcro to the inside of the top of the sunglasses case on either side. An alternative solution is to sew a button, centrally place, on the outside of the front of the case – that’s the bit with the angled side, near the top. Take a piece of colored twine or braid and make a loop that you place inside the seam so that when you sew the top piece together it will turn outwards when you turn the fabric. Bring the loop down to hook over the button.
The glasses do fit well inside, and personally I think the eyeglasses case looks sleeker and more sophisticated without closings.
Do you like this DIY eyeglass case tutorial ? Pin for later:
Wanna be friends? Click HERE and follow me on Pinterest
RELATED:
- How to make a fabric book cover
- DIY Book pillow
- The Easiest denim/ ribbon bookmarks