
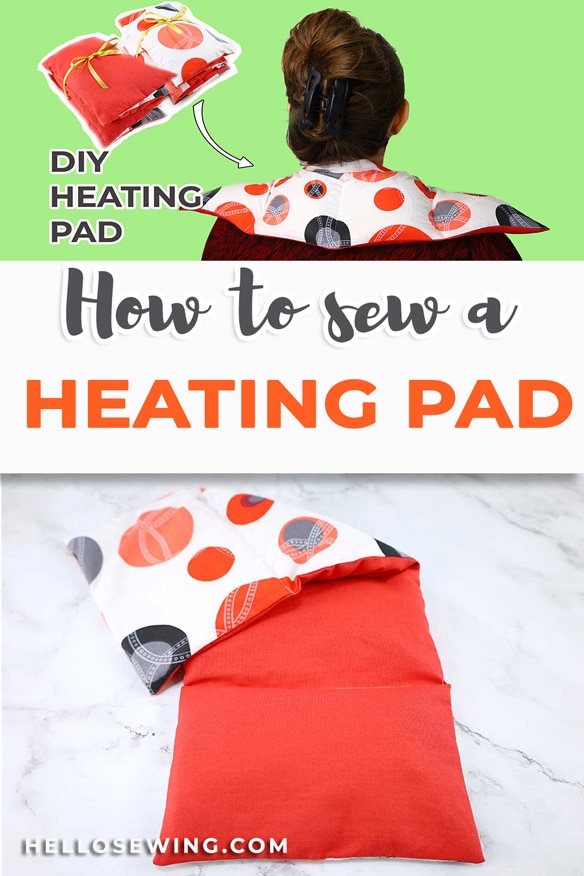
How to make a DIY Rice Heating Pad
I love simple yet useful sewing projects and these microwavable rice heating pads are a prime example. Terrible headaches and muscle aches in the neck area, all due to light cold have plagued me for years. Few years ago, my husband bought me an electrical heating pad and it helped a ton, but still, I’m reluctant to use it every time, just because I tend to fall asleep while using it and it’s a no-no according to the instructions. The solution was easy – a homemade rice heating pad. Now all I do it to fold it in half, pop it in the microwave for a minute or two and put it over the problem area to get a nice warmth that soothes the sore muscles and joints.
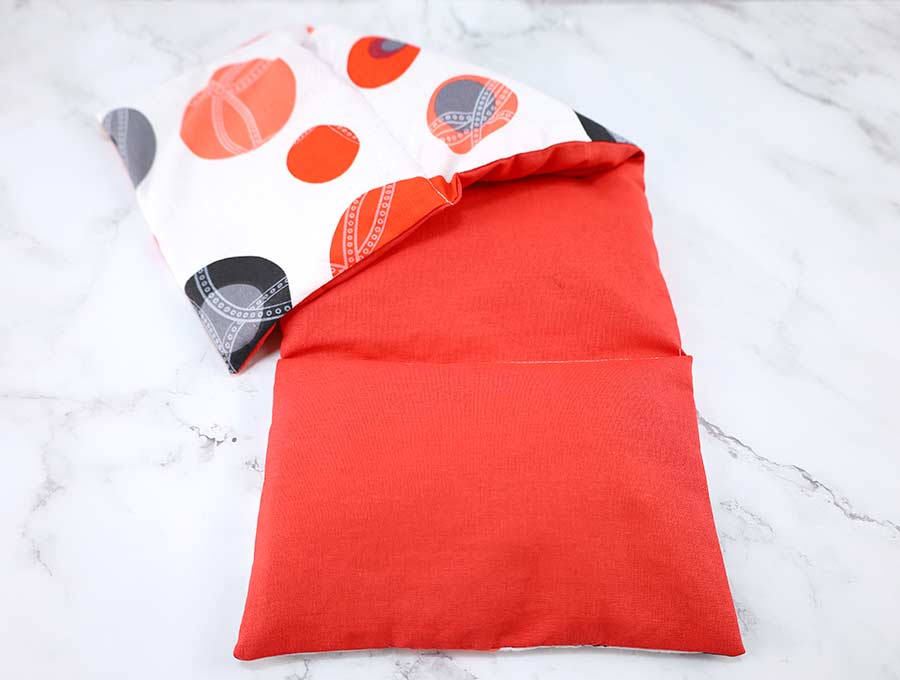
Table of Contents
- 1 How to make a heating pad at home
- 2 Supplies and tools
- 3 How To Sew your own Heating Pad
- 3.1 DIY HEAT PAD VIDEO TUTORIAL
- 3.2 HOMEMADE RICE HEATING PAD INSTRUCTIONS:
- 3.3 STEP 1: Cut fabrics for the heating pad
- 3.4 STEP 2: Layer fabrics with right sides together
- 3.5 STEP 3: Pin in place
- 3.6 STEP 4: Sew
- 3.7 STEP 5: Turn the rice neck warmer inside out
- 3.8 STEP 6: Press
- 3.9 STEP 7: Fold to crease
- 3.10 STEP 8: Mark the compartments of the heating pad
- 3.11 STEP 9: Fill with rice
- 3.12 STEP 10: Pin first compartment
- 3.13 STEP 10: Stitch
- 3.14 STEP 10: Repeat for next 2 compartments
- 3.15 STEP 10: Fill the last compartment
- 3.16 STEP 10: Stitch the gap closed
- 4 How to use the heading pad
Why heating pads work?
Heat therapy increases blood flow to the problem and painful areas and helps relax muscles spasms. The heat opens up the blood vessels which allows for a stronger flow of blood and oxygen to the sore areas.
They work really well for sore neck and back, as well as provide the much-needed relief for menstrual cramps. All you need to do is apply the warm heating pad to the problem area and relax.
Below you will find my step by step written tutorial with VIDEO instructions for all the visual learners.
We occasionally link to goods offered by vendors to help the reader find relevant products. Some of the links may be affiliate meaning we earn a small commission if an item is purchased.
How to make a heating pad at home
Supplies and tools
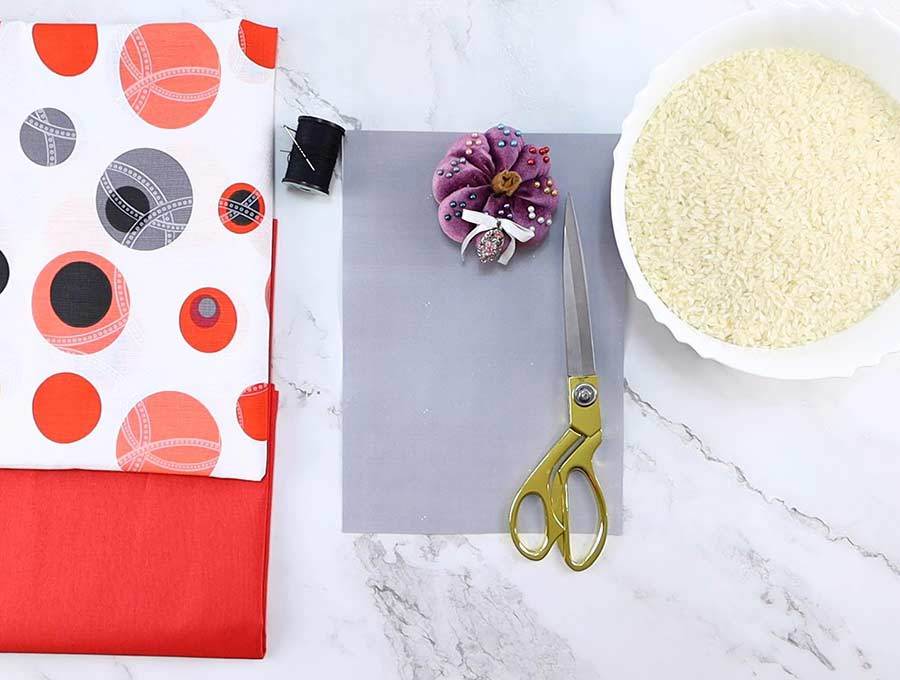
- Front fabric – 9 x 23”, 100% cotton
- Back fabric 9 x 23”, 100% cotton or soft cotton fleece
- 6 cups of uncooked rice for filling (you can also use other organic fillers such as corn, beans or flaxseed)
- cotton thread
- scissors (or rotary cutter and a cutting mat)
- ruler or measuring tape
- iron and ironing board
- sewing clips or pins
- sewing machine
- optional: essential oil (just a drop of your favorite) or few lavender buds will give your heating pad a pleasant aroma
Follow us for free patterns & tutorials! [easy-profiles]
How To Sew your own Heating Pad
Watch the diy heat pack video first and then follow the written step by step instructions below.
Please enjoy and don’t forget to Like and SUBSCRIBE over on YouTube to be kept up to date with new videos as they come out.
DIY HEAT PAD VIDEO TUTORIAL
HOMEMADE RICE HEATING PAD INSTRUCTIONS:
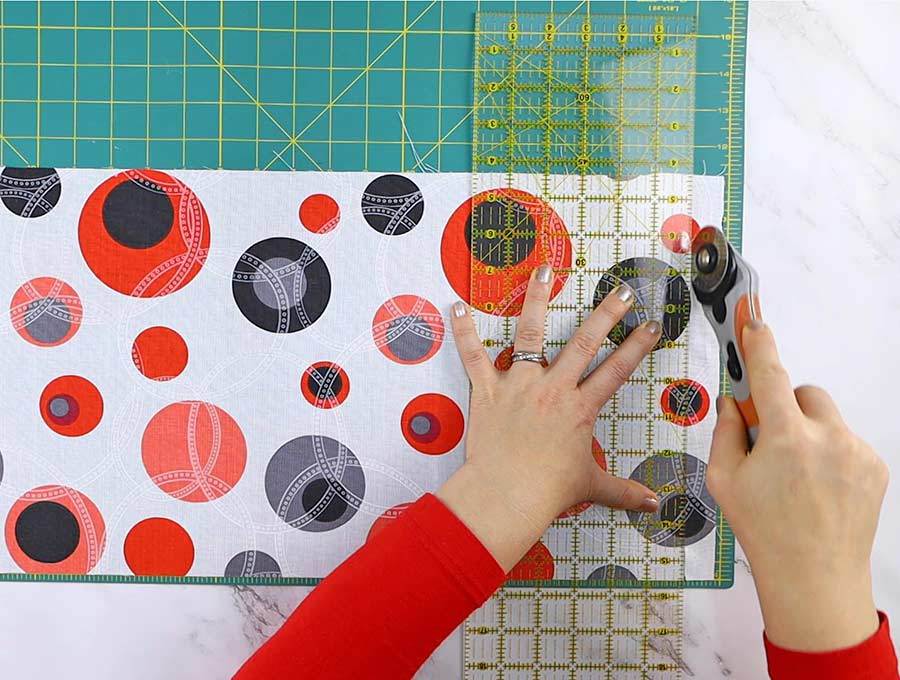
STEP 1: Cut fabrics for the heating pad
I’d like to make mine out of two fabrics in different colors, you can use the same color if you prefer so. While I made both the front fabric and the back fabric from 100% cotton fabric, you can use softer fabric such as fleece for the back as long as it’s made entirely from cotton.
Remember, everything that goes in the microwave should be made of 100% cotton, or there is a risk of fire hazard. Use your best judgement and never heat up a heating pad in the microwave without supervision.
Cut two pieces of fabric 9 x 23 inches each (one for the front, and one for the back)
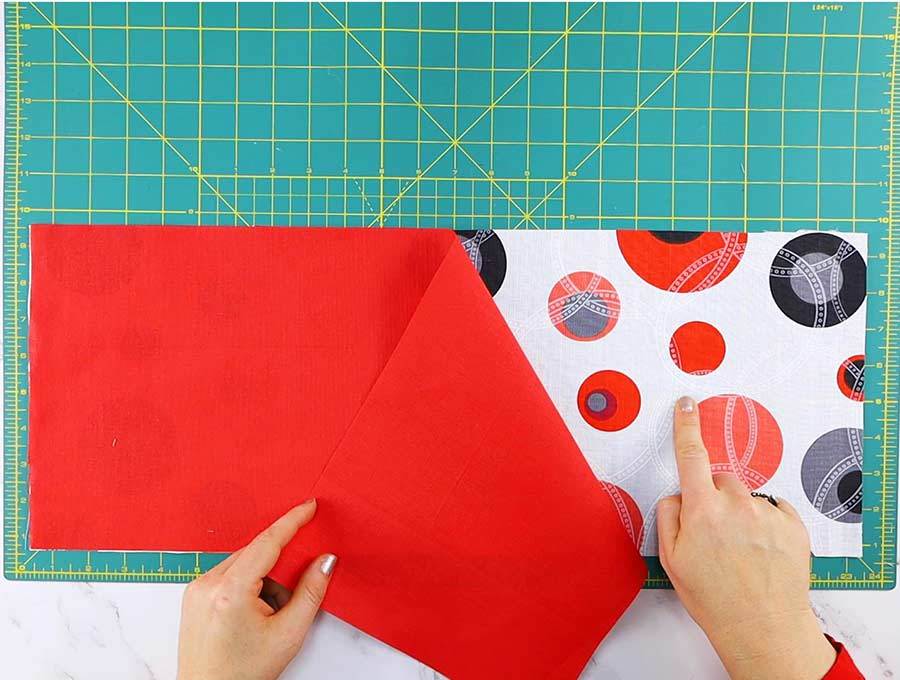
STEP 2: Layer fabrics with right sides together
Place the front piece of fabric on a flat surface before you and then place the second fabric on top of it, with the right sides facing each other.
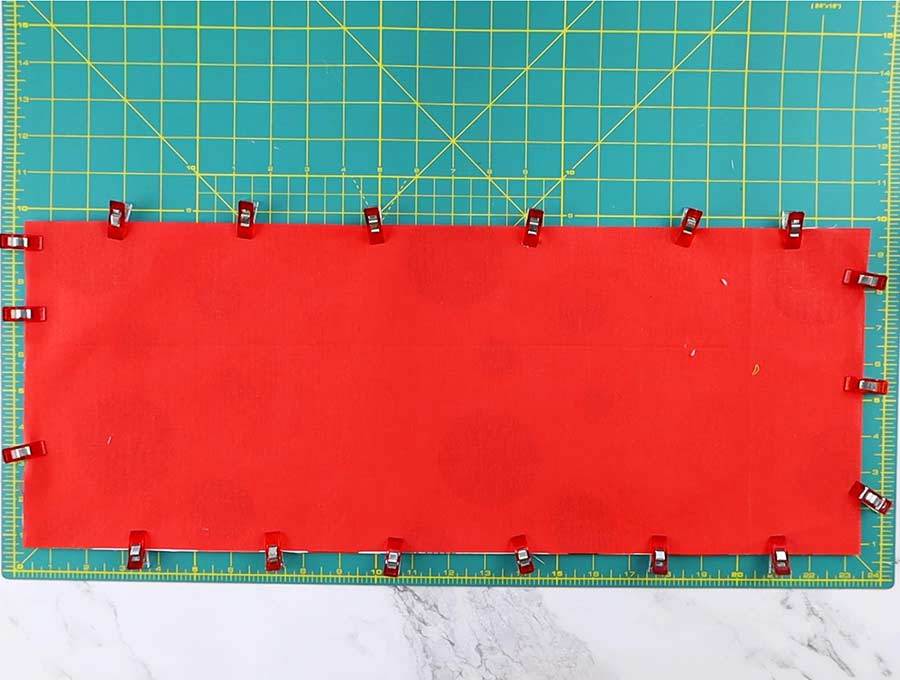
STEP 3: Pin in place
Pin loosely around the heating pad. I’d like to use clips instead as it helps speed up the assembly process. Don’t forget to leave a 3 inch opening on one of the shorter sides to turn around the heating pad later.
STEP 4: Sew
Stitch around the rice heat pad and backstitch to lock your seams at the either side of the opening.
STEP 5: Turn the rice neck warmer inside out
Clip the corners at a 45 degrees angle and turn the rice neck warmer with right side out. Use something pointy to push all the corners out.
Fold in the raw edges of the opening, so that they are flush with the seam and pin the opening.
STEP 6: Press
Use hot iron to press the diy heating pad. And yes, I know that some of you might hate pressing, but it really helps to achieve professional look, so don’t skip it.
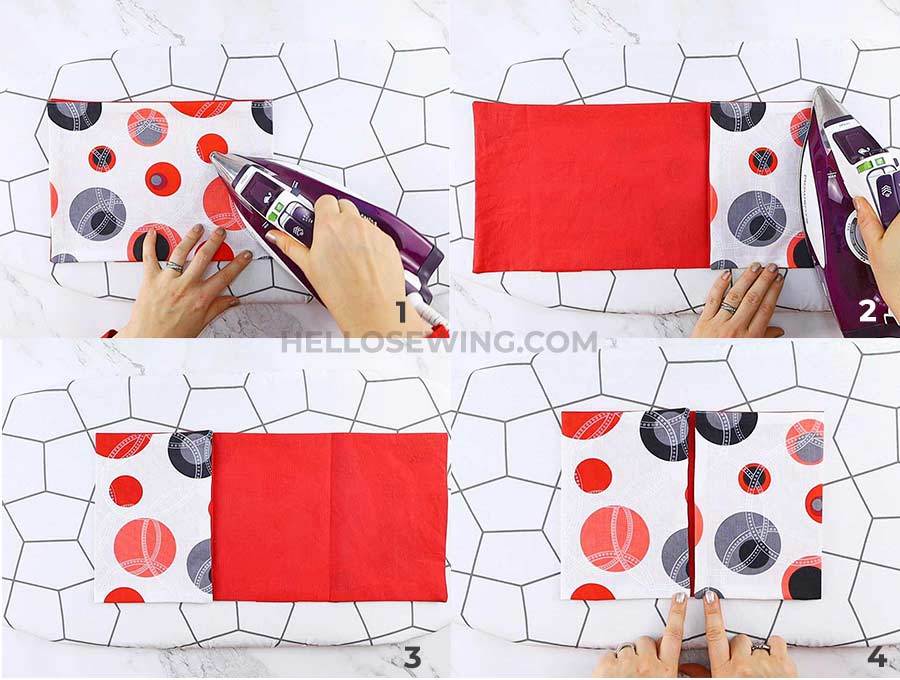
STEP 7: Fold to crease
Fold the rice neck heating pad in half lengthwise to meet the short edges and press to create a crease.
Unfold and fold in the sides so that they meet in the middle. Press the fold to crease them as well. Unfold. You’ll have three folds that make 4 compartments.
STEP 8: Mark the compartments of the heating pad
Use a tailor’s chalk or straight pins on the top and bottom of each crease to mark where you’ll need to sew. Each of these four compartments with be filled with rice to help it spread evenly.
STEP 9: Fill with rice
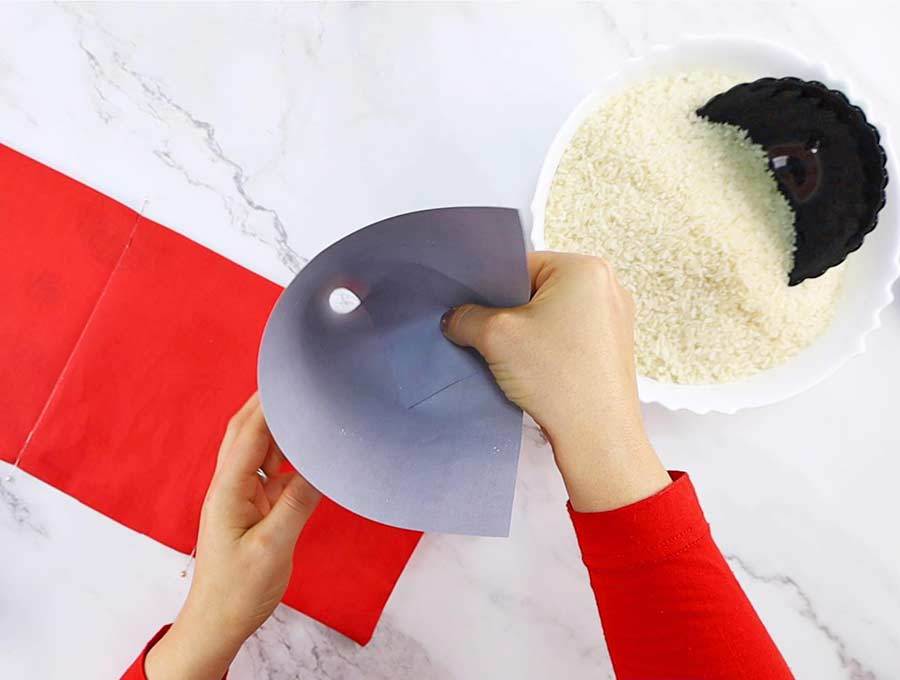
Fill first compartment with approximately 1 1/2 cups of rice. Use a small paper funnel to pour the rice.
OPTIONAL: To make pouring rice easier, if you don’t have a suitable small funnel, you can make one out of paper. Usually, regular plastic funnels tend to clog, so using a simple paper funnel makes this go faster and easier.
To make the paper funnel, just roll the paper until one of the shorter ends overlaps the other end so that you have a wide top opening, and about one-inch-wide opening at the bottom. Tape or staple the paper together and it’s ready.
STEP 10: Pin first compartment
Hold the heating pad up vertically so that all rice falls down in the first compartment. Use your fingers to flush all the rice down, so that it does not interfere with the presser foot.
Pin along the marked line of the first compartment.
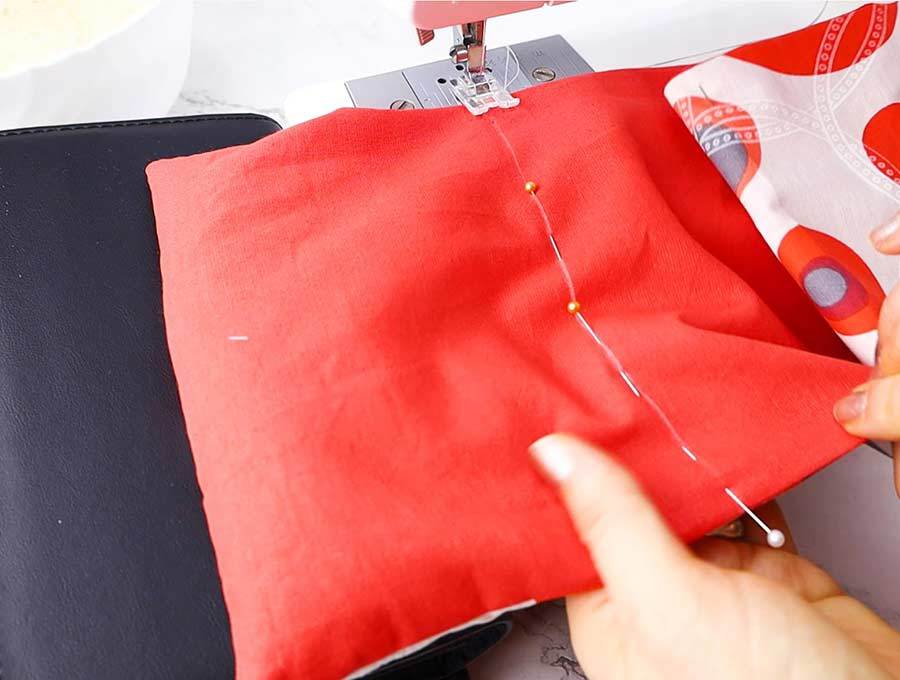
TIPS: 1. Sewing over rice can really crook the seam, so use your fingers to push everything clear around the presser foot. To make things easier I found it really helped to have a second line of pins about an inch away from the stitching line to keep the rice from shuffling while sewing.
- Also sewing the first compartment may be a bit difficult due to the weight of the rice. Use a couple of books on the left to help hold the weight of the first compartment. It really making sewing the heat pads much easier.
That’s it your fabric rose it ready!
STEP 10: Stitch
Now that we have all our ducks in a row, we can stitch the first compartment. Backstitch to secure the beginning and the end of your seam.
Go slow and be careful not to sew through any remaining grains of rice
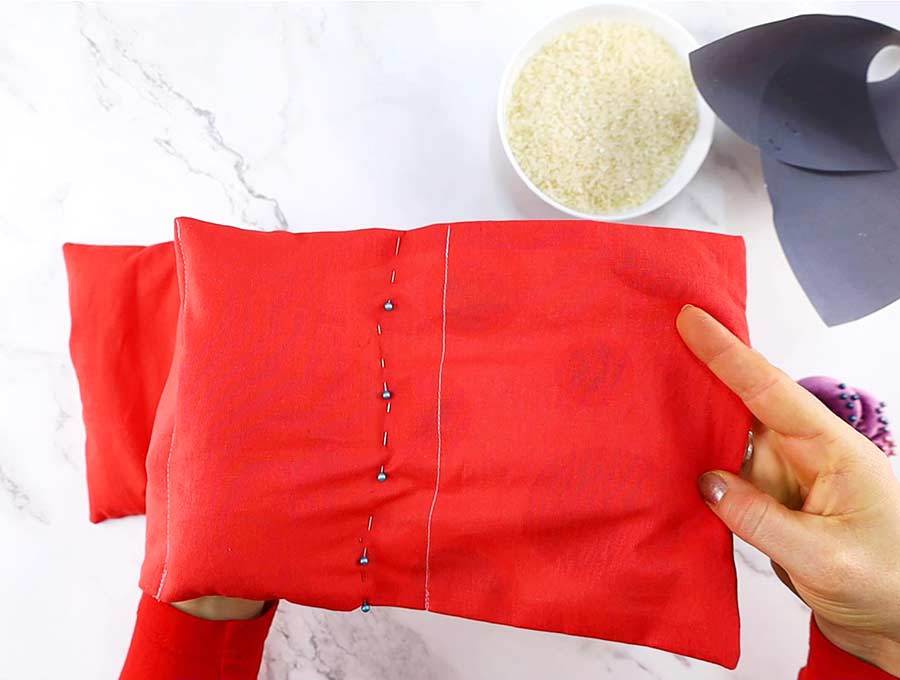
STEP 10: Repeat for next 2 compartments
Fill in the second compartment with rice, pin it in place and stitch.
Fill in the third compartment with rice, pin it in place and stitch.
STEP 10: Fill the last compartment
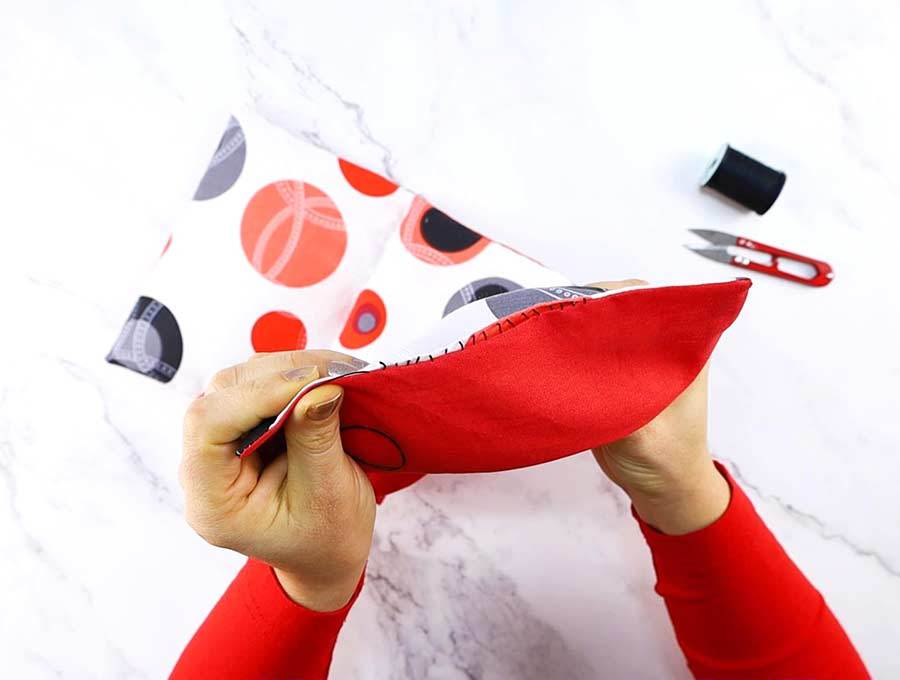
Fill your fourth (last) compartment with 1 ½ cups of rice. No need to pin it as you’ll be handstitching the gap.
STEP 10: Stitch the gap closed
Hold up with last compartment, so that all the rice ends up at the bottom. Thread a needle with matching thread and use a ladder stitch to sew the gap closed.
OPTIONAL:
You can make a cover for your heating pad, that you can take off and wash as needed. All you need to do it to sew a simple open end bag, slightly larger than the heat pad.
How to use the heading pad
To use – fold the rice filled heat pad in half and pop it up in the microwave. Heat in a microwave for 1-2 minutes, place over the sore area and enjoy warm heat.
————————————-
IMPORTANT NOTES: Microwaves differ in how quickly they heat, so I can’t tell you the exact time you’ll need to heat your pad. I suggest you start with 30-40 seconds, open the microwave to check on the heating pad, and then proceed with adding 30 sec increments until you reach your desired warmth. Once you found the perfect time for your microwave, you can set it straight to that time next time you use it.
Use caution, and don’t leave the pad in the microwave without supervision.
Do not heat the neck pad in a conventional oven!
Never use a heating pad on:
infants, people who have had suffered a stroke or people with diabetes, or anyone with a decreased ability to sense pain. If in doubt, consult with your doctor.
————————————-
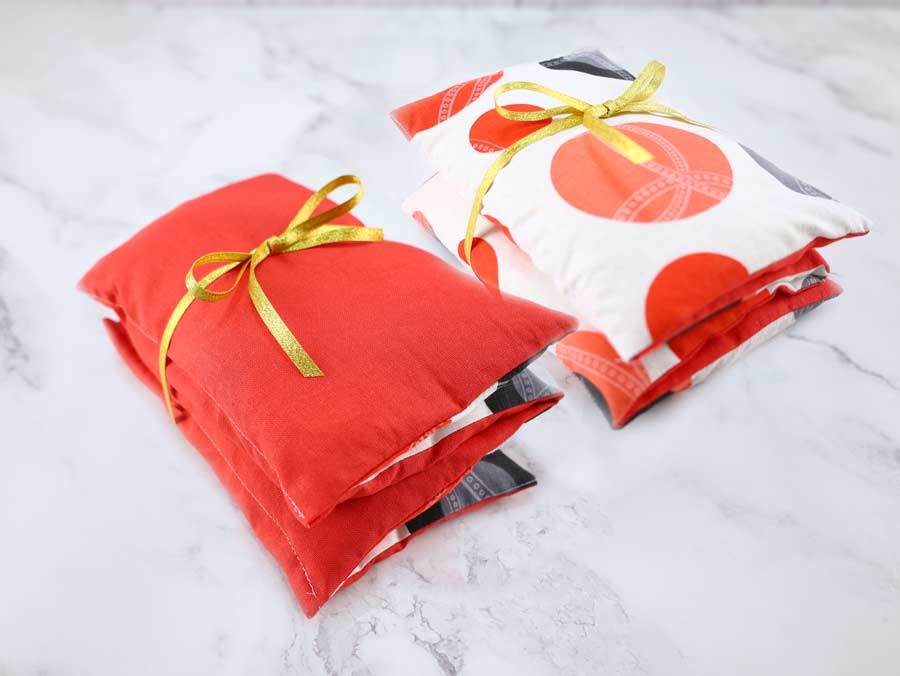
These rice heat pads make great gifts. Make sure you include instructions how to use them
I hope you enjoyed my rice filled heating pad tutorial and pattern. Let me know what you thing down in the comments – I love hearing from you!
These easy DIY rice heat pads are a great to have useful item, and you can even sew them up using fabric scraps (don’t you just love scrap busting projects like this?). The heating pads are one of those things you don’t know you need in your life until you actually get to use them. Then you just wonder how you lived without it.
They are such a great thing to have that they make useful gifts for friends and family.
All you need to do is fold it in fourths and add a ribbon!
Do you like this? Pin for later:
Wanna be friends? Click HERE and follow me on Pinterest
RELATED: