")
DIY Dog Bone Pillow Pattern | Headrest Pillow Tutorial (VIDEO)
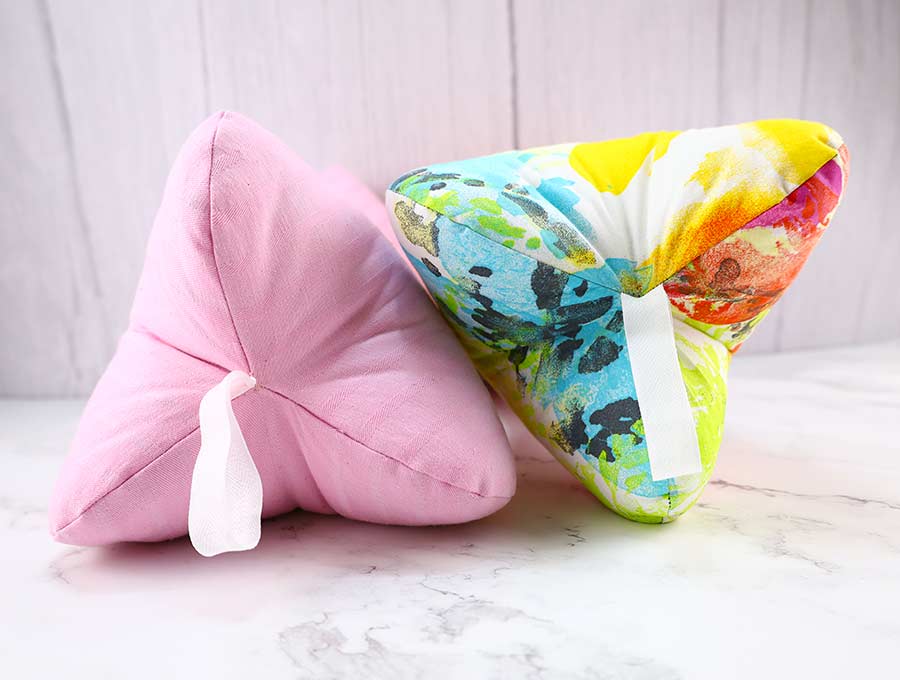
The only downside of relaxing on the couch or in bed and reading a book is a stiff neck. No matter how you set that pillow behind your head, somehow it doesn’t do much good and your neck ends up hurting anyways.
Well, I got sick of that, so I found a solution to the issue! I designed a dog bone pillow pattern that sews up in a flash as it has just 3 seams. So I made a bunch of comfy headrest pillows I gave away as gifts!

This therapeutic neck pillow is shaped like a dog bone for a reason, not just for appearance. When you put it behind your neck, it gives you good support and keeps your head in the right position. That means no more neck pain for you!
Everyone needs a headrest pillow like this one, so I decided to show you how to make one. Here’s are the step-by-step instructions.
Below you will find my step by step written tutorial with VIDEO instructions for all the visual learners.
We occasionally link to goods offered by vendors to help the reader find relevant products. Some of the links may be affiliate meaning we earn a small commission if an item is purchased.
Table of Contents
- 1 How to make a dog bone pillow
- 2 Supplies and tools
- 3 How to Sew a Dog Bone Pillow
- 3.1 Dog Bone Neck Pillow VIDEO TUTORIAL
- 3.2 Dog Bone Pillow INSTRUCTIONS:
- 3.3 STEP 1: Prepare the dog bone pillow pattern
- 3.4
- 3.5 STEP 2: Cut out the fabric
- 3.6 STEP 3: Transfer the V-shaped cuts
- 3.7 STEP 4: Stack the layers
- 3.8 STEP 5: Stitch the first two pieces
- 3.9 STEP 6: Pin the third fabric piece
- 3.10 STEP 7: (Optional) Add handles
- 3.11 STEP 8: Stitch
- 3.12 STEP 9: Clip the curves and turn it inside out
- 3.13 STEP 10: Stuff
- 3.14 STEP 10: Finish the therapeutic neck pillow
How to make a dog bone pillow
Supplies and tools
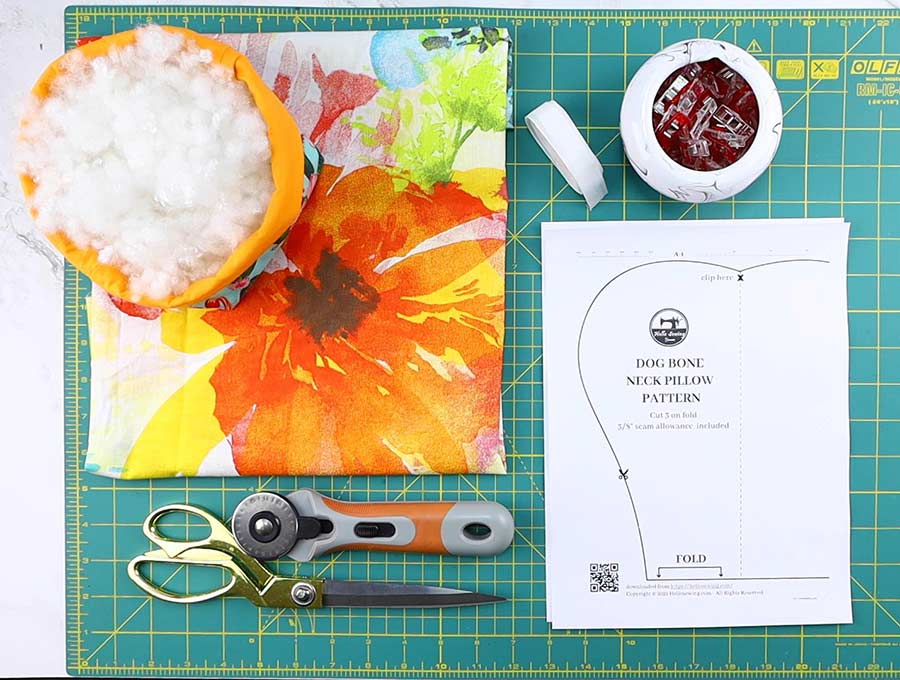
- fabric – 100% tightly woven cotton fabric
- poly-fill stuffing
- matching thread
- scissors (or rotary cutter and a cutting mat)
- ruler or measuring tape
- iron and ironing board
- sewing clips or pins
- hand sewing needle and thread
- sewing machine
DOWNLOAD: dog bone neck pillow pattern (Free PDF file)
Follow us for free patterns & tutorials! [easy-profiles]
How to Sew a Dog Bone Pillow
Watch the diy dog bone neck pillow video first and then follow the written step by step instructions below.
Please enjoy and don’t forget to Like and SUBSCRIBE over on YouTube to be kept up to date with new videos as they come out.
Dog Bone Neck Pillow VIDEO TUTORIAL
Dog Bone Pillow INSTRUCTIONS:
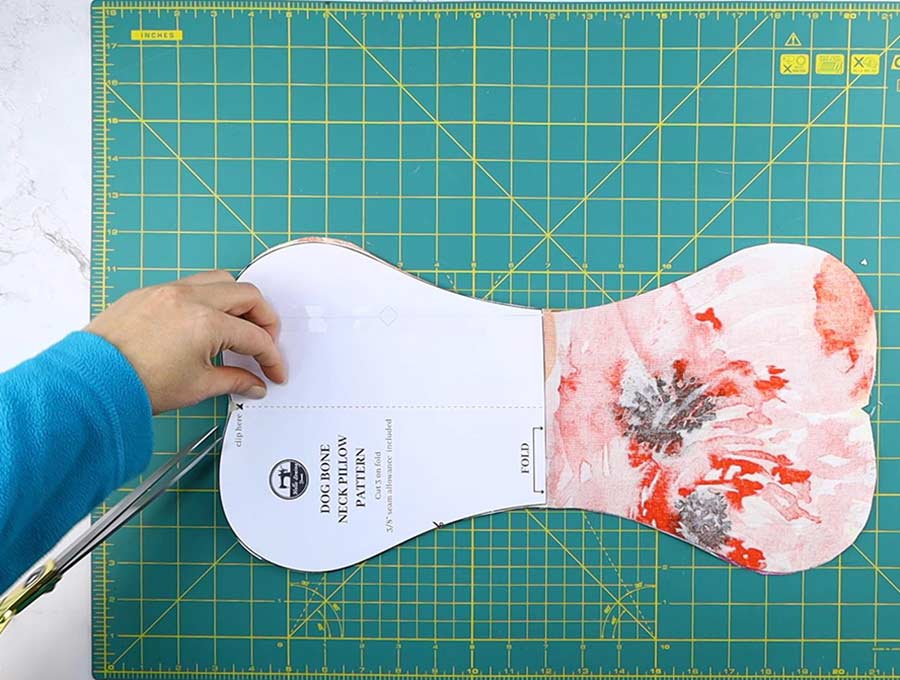
STEP 1: Prepare the dog bone pillow pattern
To make this headrest pillow, you’ll need to use a pattern. We have prepared a free downloadable one for you to make things easier.
Finished dimensions of the pillow are (L x W x H): 14 1/2″ x 7″ x 7″ or 37cm x 18cm x 18cm
Download the pattern and print it out in 100 percent size (US letter or A4) . Then out the template and get rid of all the excess paper.
You’ll notice that the pattern is shaped like half of a bone. You will need the entire bone shape to complete the pattern. To get this, just cut out two pieces of the pattern and tape them together at the short straight edge.
If you don’t like taping together a pattern, you can transfer it onto a folded paper and cut it out like that to get a whole template from one piece.
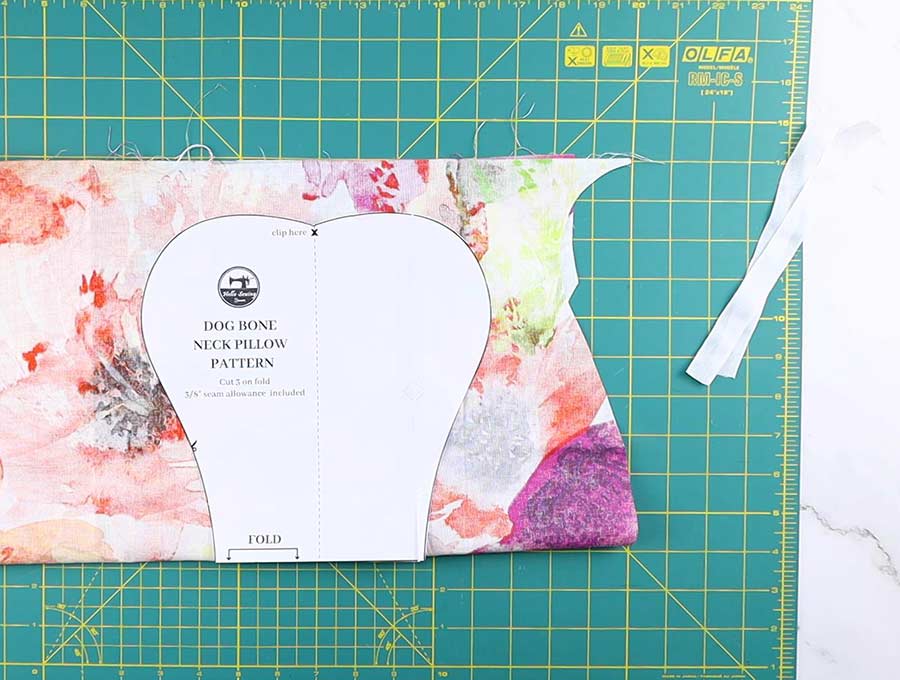
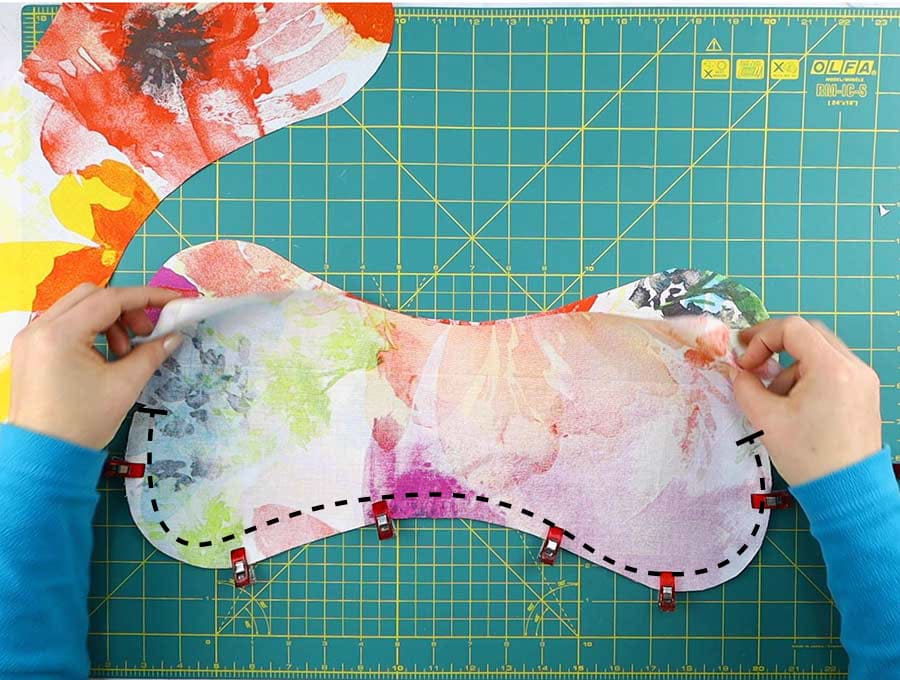
STEP 2: Cut out the fabric
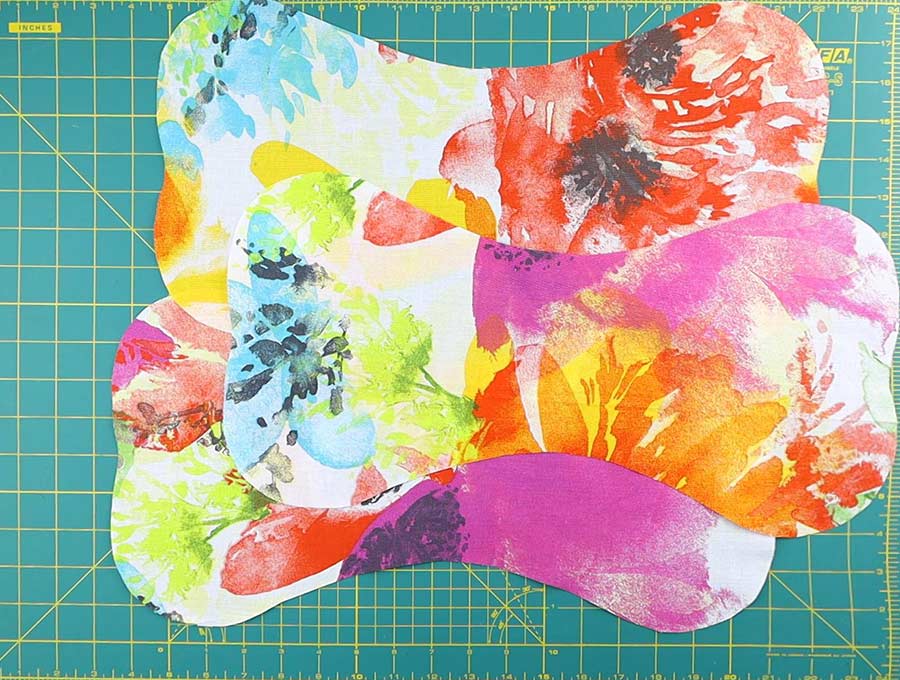
Fold the main fabric in half, and place it onto your workspace. Set the dog bone pillow pattern on the fold and cut around it through both layers. Unfold the fabric – you’ll end up with a dog bone shaped piece of fabric.
Repeat two more times to get three identical pieces of fabric.
STEP 3: Transfer the V-shaped cuts
Transfer the marking from the pattern, the dot near the junction of two curved lines, onto both sides of each piece of fabric. You can either use a fabric marker or cut small V-shaped cuts instead.
STEP 4: Stack the layers
Place the fabric piece onto your workspace so that its right side is facing up.
Put another fabric piece over it, with its right side facing down this time. Align all edges and pin the two layers together halfway from one V-shaped cut (marking) to the next.
STEP 5: Stitch the first two pieces
Now you’ll need to sew just one side of the pillow. Start your seam at the marking on one end and finish it at the marking on the other end of the fabric piece. Use a 3/8″ (1 cm) seam allowance.
STEP 6: Pin the third fabric piece
Once you finish sewing, fold the loose top layer over to the stitching line so that you get the right side of the fabric facing up.
Set the last fabric piece on top of the fabric sandwich with its right side facing down. Align the edges and pin the third piece to the remaining raw edges of the other two fabric pieces.
Leave a 3 inch gap for turning along the middle part of the bone.

TIP: I also fold and clip the piece I stitched previously to get it out of the way and so that I don’t sew over it by accident.
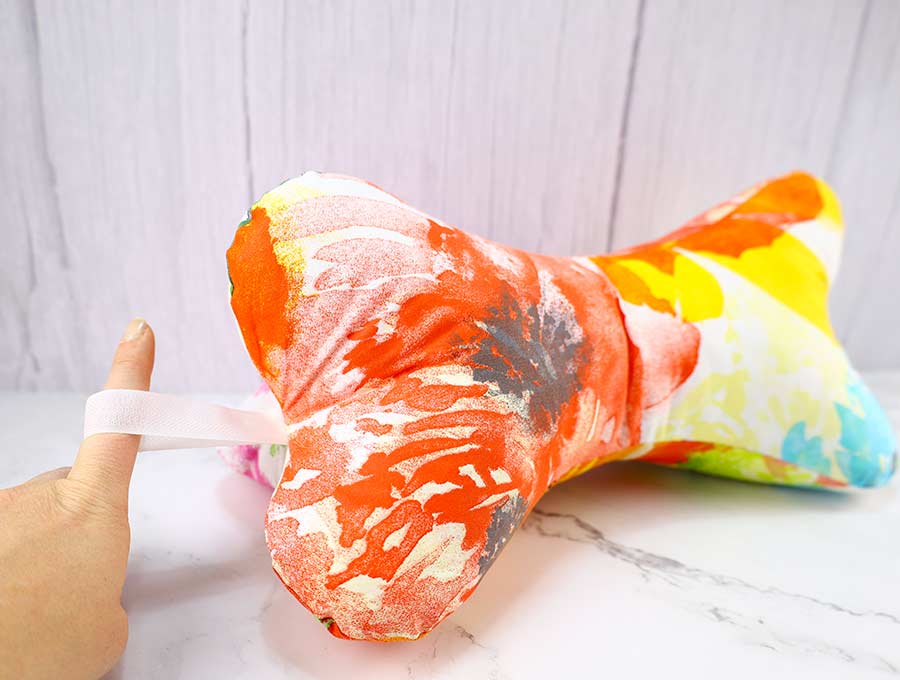
STEP 7: (Optional) Add handles
If you want your neck pillow to have hanging loops on either side, this step is for you. If you don’t want them, go ahead and skip this step.
Cut two pieces of ribbon of about 8 inches each and fold it in half. Tuck the ribbon between the fabric pieces. The raw edges of the ribbon should sit right on the V-shaped marking you transferred from the pattern. The fold of the ribbon should go towards the center of the fabric piece. Pin the ribbon in place.
You can put two ribbons on the pillow, one on each side or you can just put it on one side, it’s your call.
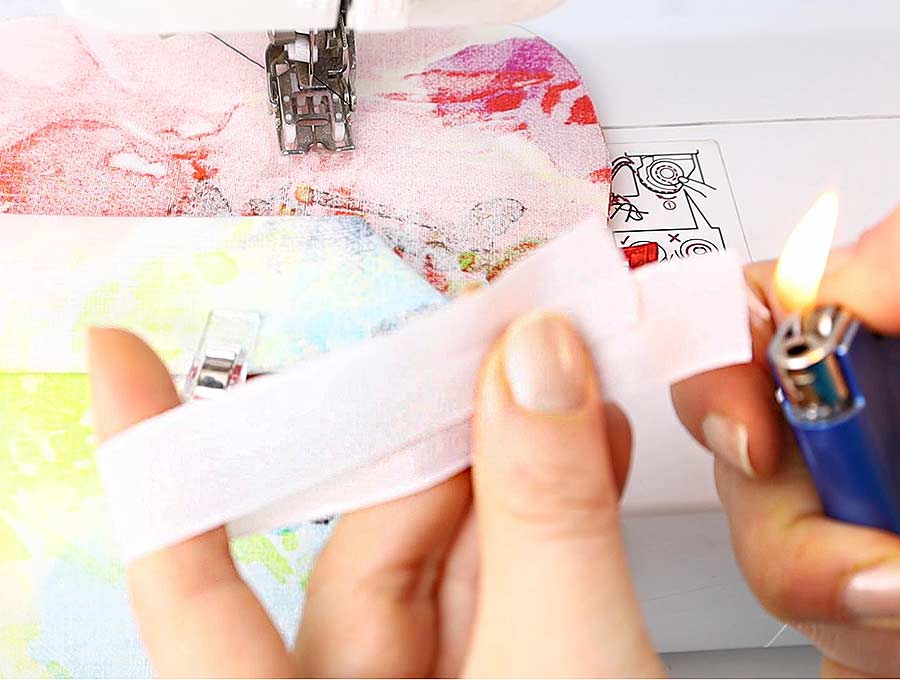
Tip – If you don’t have a ribbon but you still want a loop, worry not! Cut a strip of about 8 x 2 inches big and fold it vertically in half and press it flat. Unfold it and then fold each side to the crease. Fold the entire strip in half vertically one more time and press it. Sew along the entire strip and voila! There’s your ribbon!
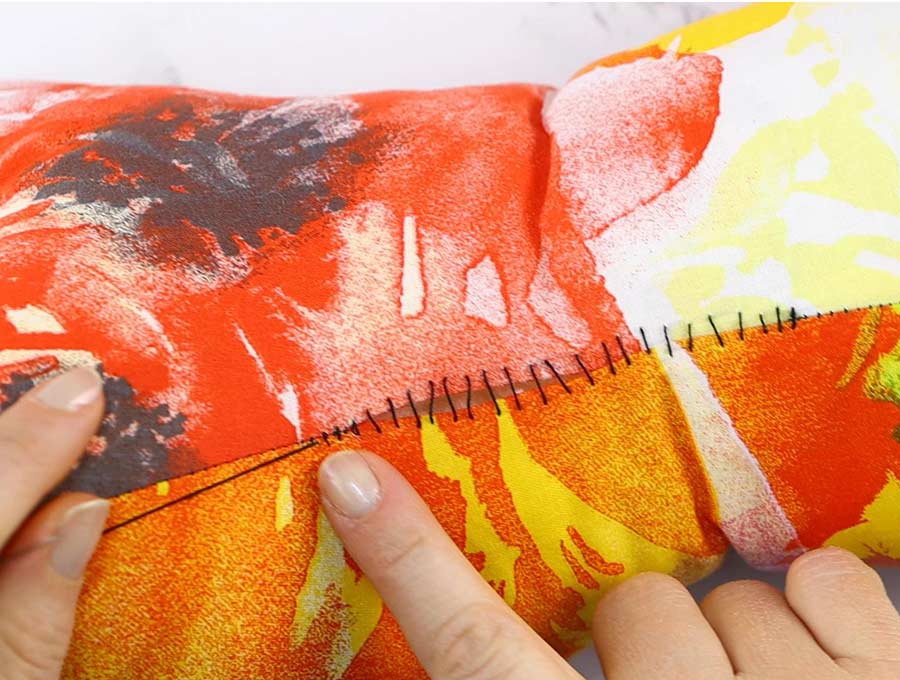
STEP 8: Stitch
Sew around the dog bone pillow and leave the gap unstitched. Start stitching from one end of the gap all the way around to the other end of the gap using a 3/8″ seam allowance. Make sure to backstitch at the beginning and the end, and also over the part where all three fabrics connect. This part is subject to a lot of wear and tear, especially if you decide to make handles, so reinforce it now.
STEP 9: Clip the curves and turn it inside out
Clip the curves about 1/2 inch apart allow the pillow to form properly later on. Turn the pillow inside-out through the opening you left earlier.
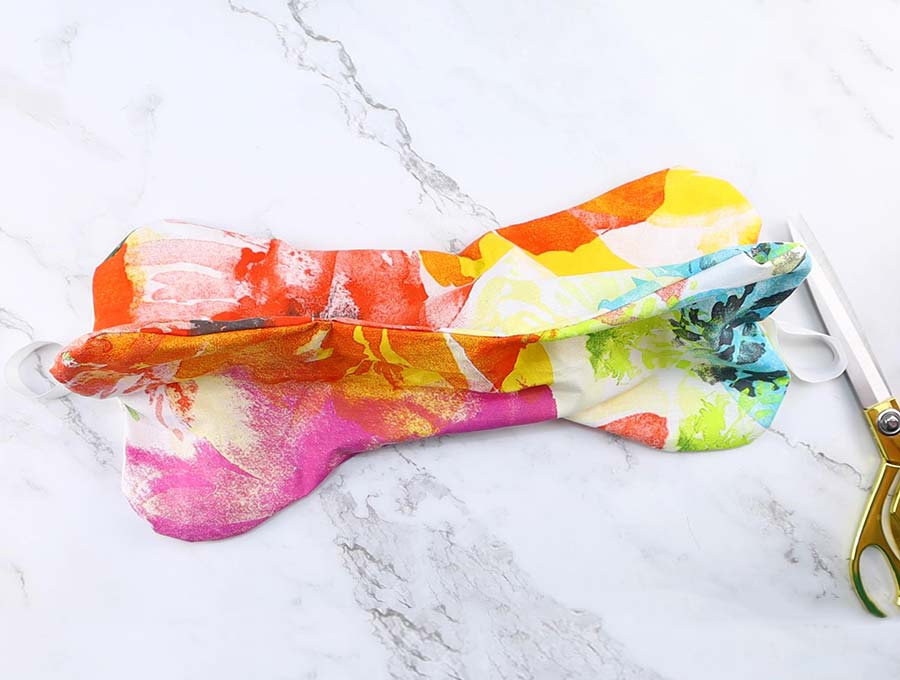
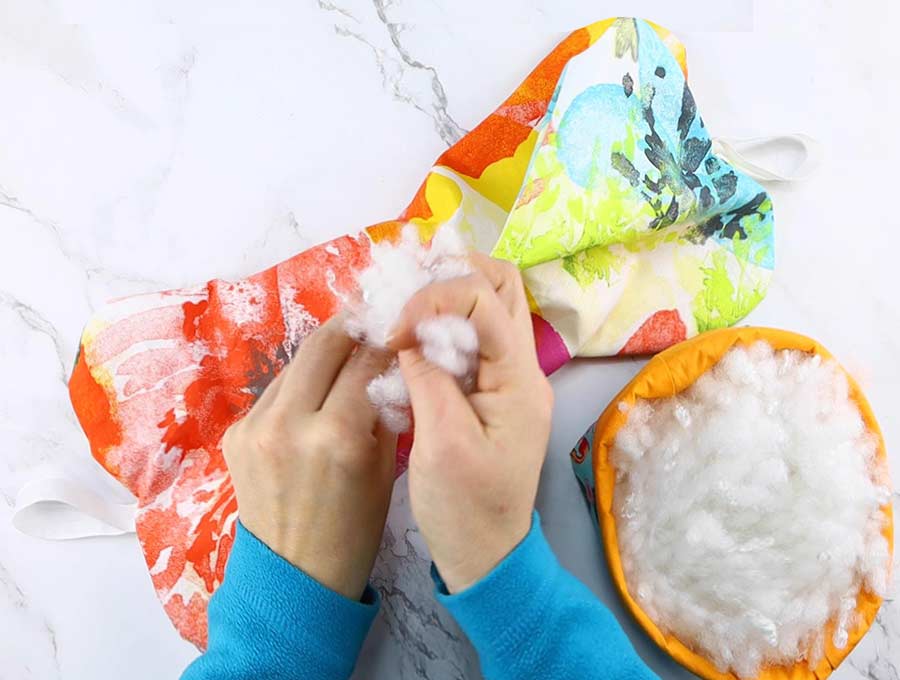
STEP 10: Stuff
Now use the poly-fill to stuff the pillow to your desired firmness. It takes a LOT of stuffing, probably more than you imagine at first.
The important thing about stuffing this pillow is how hard you’ll stuff it. The ends should be filled so that they are firm, but the middle of the pillow needs to be soft.
That way, your head will be secured in position when you put it on the pillow because the ends will hold it in place. At the same time, you won’t feel uncomfortable because the center is soft and fluffy.
STEP 10: Finish the therapeutic neck pillow
There’s only one thing that remains and your new pillow will be complete. Close the opening shut.
Take a needle and a thread and sew the opening by hand with a whipstitch (if you are in a hurry) or with a ladder stitch (if you are a perfectionist like me and want your stitches invisible).
Congratulations, you’ve finished the dog bone neck pillow!
What did you think about our therapeutic neck pillow tutorial? Did your new headrest pillow turn out well? Go ahead and make a few for your loved ones as well, they make great presents because everyone loves them! Enjoy your painless relaxing with your new pillow!
Do you like this? Pin for later:

Wanna be friends? Click HERE and follow me on Pinterest
RELATED: