
Secrets of a Dressmaker: How to Check a Pattern after Drafting or Alterations
In case you are working on a project based on a pattern which you have made out of scratch or on a ready-made one which you have altered, you should always perform a proper check before actually cutting the fabric for the garment or other sewing project you are working on. Checking it will save you a lot of money and keep you from serious disappointment if something turns out to be not quite right with your pattern and you have already cut the fabric based on it.
Here are the steps you need to follow in order to make sure that the pattern is correct and will actually serve the purpose of making the garment or other home project you are working for in the way in which you intended:
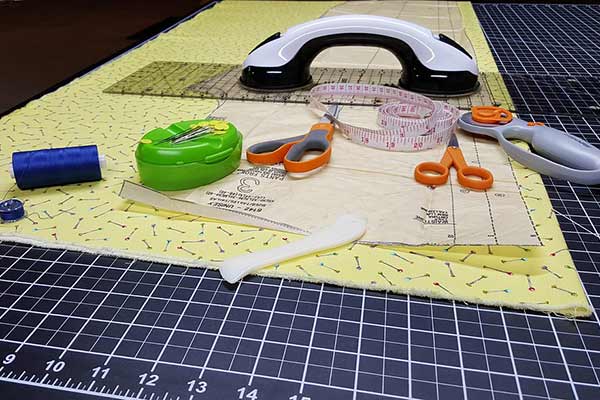
What you will need:
A tape measure or ruler, a set square, a pencil and the pattern pieces.
How to check the pattern:
- Iron all of the pattern pieces, especially if they have become creased.
- Cut the various pieces carefully outside of the drawing but as near as the edge of the markings as possible.
- Make sure that all pieces are marked and labelled properly, so that it is clear at all times which pattern is for what and goes where. For example – label a piece: “back sleeve” or “front sleeve”, so that you don’t get them mixed up and all confused when it comes to constructing and sewing your garment. Also, you can add the project or garment name on each piece from your pattern, so that you can always identify a missing piece or one which has become separated from the others for one reason or another.
- Make sure that the darts are properly marked with holes, notches or pencil markings.
- Ensure that all of the corners on the top and bottom edges of the pattern pieces are straight angles, in order to avoid ending up with a twisted and deformed garment when you sew the pieces together.
- Measure the side seam length of all back and front pieces of the pattern to ensure that it is the same for both. Use a measuring tape, ruler, or even better – place both pieces on top of each other to see if the notches line up evenly.
- If you are making a skirt or a pair of pants, it is essential to ensure that the waistband of the front and back pieces is the same and lines up, so that the height of the waist is consistent on both sides.
- If your garment has straight lines, always check if they are really straight on your design pieces. If you find that a line is curved outwards you can cut off a piece of the pattern so that you straighten it. If it is curved inwards you can tape some additional paper to your pattern piece, so that you ensure that it has a straight line.
- Remember to write the hem and seam allowance on each pattern piece. Do this as soon as you draft the pattern, so that you don’t forget or mix up which one requires a 1-2cm or other allowance where.
- In case you find that your pieces do not match correctly, make the proper alterations by either cutting some paper off of one of the patterns or adding an additional piece of paper with tape to the other, so that you get a proper angle and length. Still, if you find that the difference and mismatch is more than several millimeters, you should probably go back to drafting the pattern in order to find out where the difference comes from and to fix the problem.
For quick pattern checking follow the following simple steps:
- Hold up the different pattern pieces to your body in order to see if they are the right size.
- Always check that all corners are right angles.
- Put the pattern pieces on top of one another and run your fingers down along the seam to feel if there are any differences in the length of the seams where the two pieces will be sewn together.
However perfect a garment pattern you have found for your next project, you will most probably need to make certain alterations to it in order to ensure that the piece of clothing fits the body it is intended for properly, without any sagging, pulling, binding, wrinkling or straining. Making alterations does require some extra care and some basic sewing and garment designing knowledge. For example, you should always remember to make a corresponding alteration to the other parts of the pattern if you have made changes in one of them already. Also, you should be careful to keep the grainlines of the fabric and to not make changes so drastic that they will alter the original lines and style.
Related: https://hellosewing.com/best-sewing-machine-making-clothes-guide/
Whatever the reason is for your alterations or for you drafting your own unique pattern design, and however experienced a seamster you are, you should always take the time to make sure that it is correctly made before proceeding with your actual sewing project!