")
How to make a Quillow (Blanket in a Pillow)
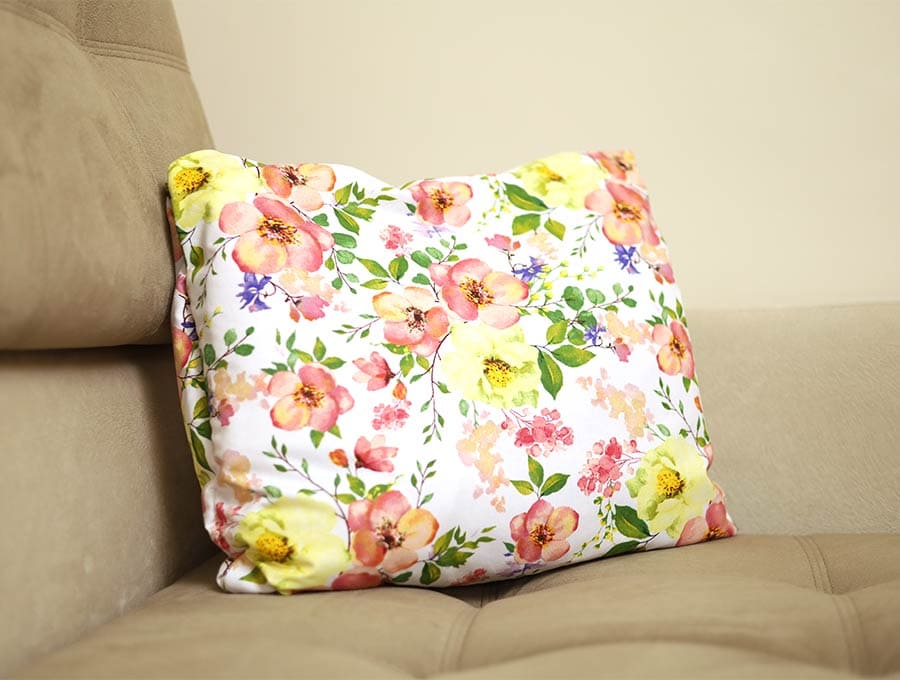
The quillow is basically a cover stitched to a fleece blanket that keeps it neat and tidy. This is an easy sewing project and creates a double use for a fleece blanket – a soft pillow when you are travelling that pops out to a warm soft blanket when you arrive. Covered in a cotton fabric the quillow is an attractive way to store fleece blankets in your linen cupboard. It’s called a quillow because some people create the cover by piecing quilting fabric, but you can use plain fabric if you like.
The quillow cover keeps a fleece blanket neatly encased so it looks like a cushion, and when you are ready to use it just flip the sides of the quillow cover and shake out your blanket ready to use. It’s perfect for traveling, for people of all ages and it makes a great present for elderly folk who like to keep their knee rug close. Having fleece blankets in quillows makes for a neat linen cupboard too and the best part is that because they are attached to the blanket in a clever way they never get lost. The visuals and step-by-step instructions make for an easy sewing project you’re going to find very useful.
Below you will find my step by step written tutorial with VIDEO instructions for all the visual learners.
We occasionally link to goods offered by vendors to help the reader find relevant products. Some of the links may be affiliate meaning we earn a small commission if an item is purchased.
Table of Contents
How to make a Quillow
DIY Quillow Supplies and tools
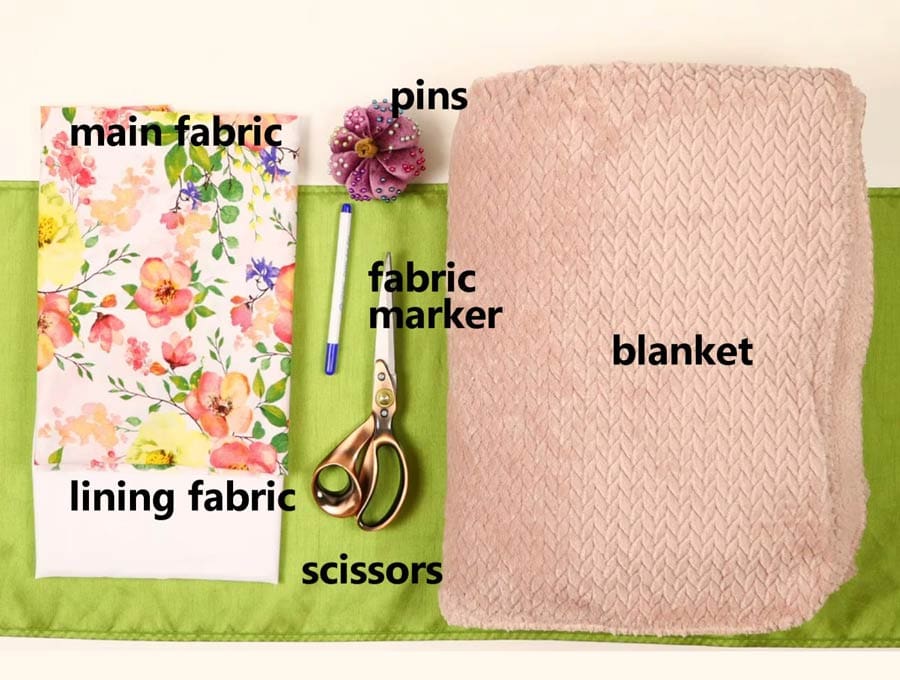
- a blanket or a large piece of fleece
- fabric – 2 pieces of 100% tightly woven cotton (one main, one lining)
- matching thread
- scissors (or rotary cutter and a cutting mat)
- ruler or measuring tape
- iron and ironing board
- sewing clips or pins
Follow us for free patterns & tutorials! [easy-profiles]
How to Sew a Quillow
Watch the diy quillow video first and then follow the written step by step instructions below.
Please enjoy and don’t forget to Like and SUBSCRIBE over on YouTube to be kept up to date with new videos as they come out.
DIY Quillow VIDEO TUTORIAL
INSTRUCTIONS:
Use a ready-made fleece blanket or buy a piece of fleece to use. The great thing about fleece is that you don’t have to sew the edges as it does not fray. Now, since fleece blankets vary in size you are going to need a tape-measure to get the exact size of your folded fleece blanket.
Below is a chart of the standard pillowcase sizes so you can fold your fleece blanket to a similar size. By being close to standard it just helps keep your linen cupboard better organized.
American, United Kingdom, European and Australian pillow sizes are:
- Standard 20 x 26 inches (51 x 66 cm)
- Queen 20 x 30 inches (51 x 76 cm)
- King 20 x 36 inches (51 x 92 cm)
STEP 1:
Fold the fleece blanket as you would normally fold a blanket – in half then half again and fold over the folded section in half and half again.
STEP 2:
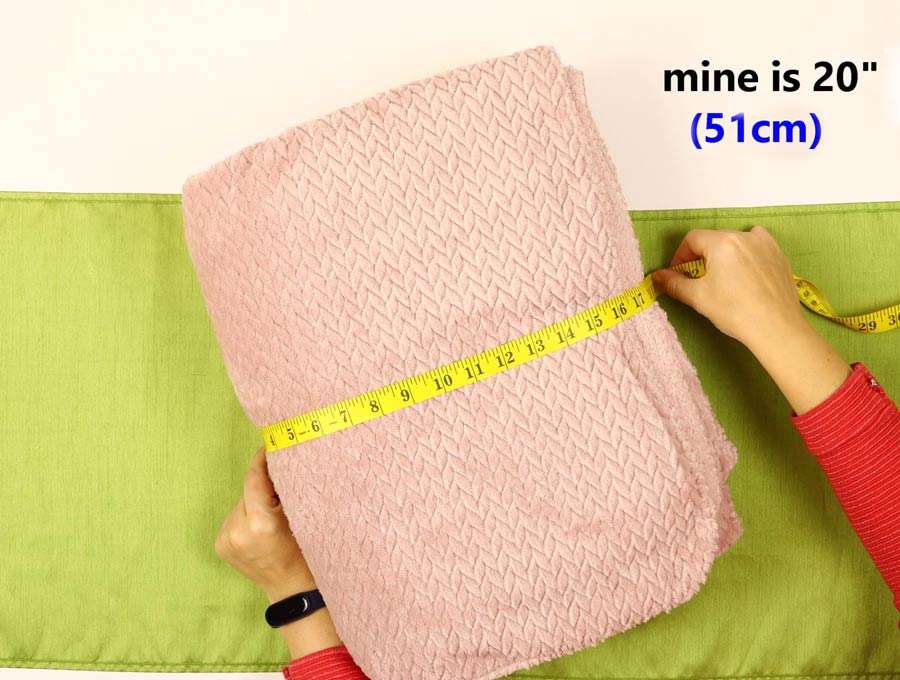
We measure our folded fleece blanket across the width, taking the tape measure down to the worktop on either side to allow for the height of the blanket – if it is says 20 inches add 1 inch (2.5 cm) so the blanket slips in easily.
Know that you’ll lose 3/8 inch (1 cm) to seam allowance on each side – ending up with a pillowcase of about 20 inches (51 cm).
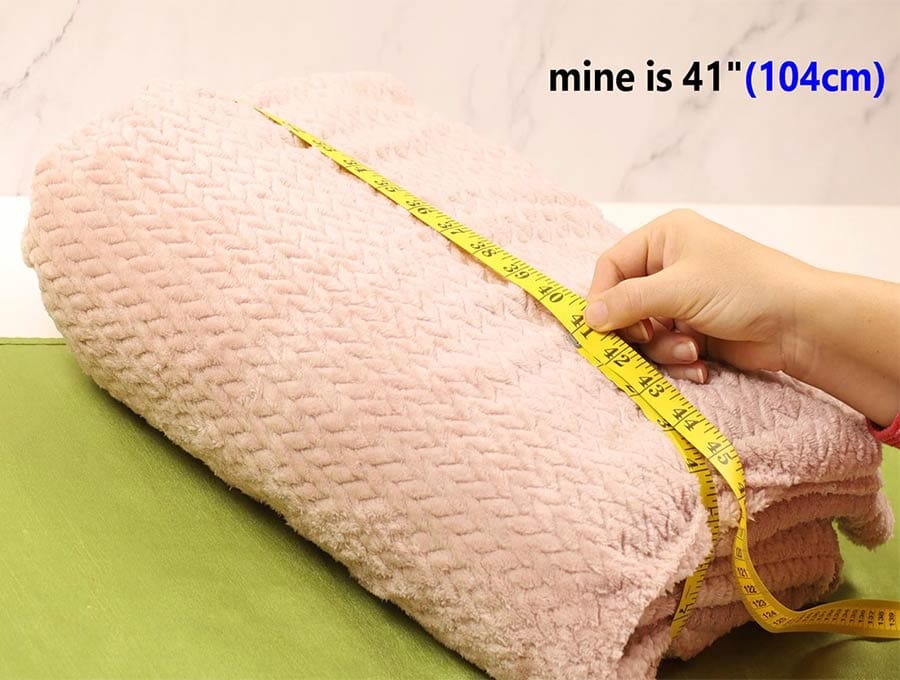
Then measure the longer side of the folded blanket in the same way and record that measurement – in my case it was 41 inches (104 cm) and add 9″ for a total of 50″ (127cm)
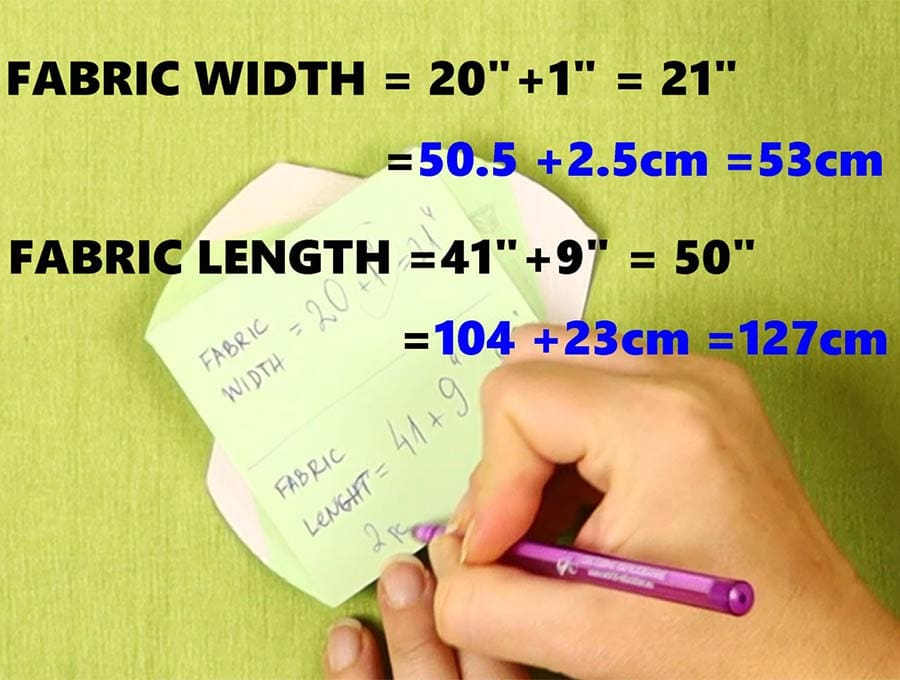
- FABRIC WIDTH: blanket width + 1″ (2.5cm)
- FABRIC LENGTH: blanket length +9″ (23cm)
STEP 3:
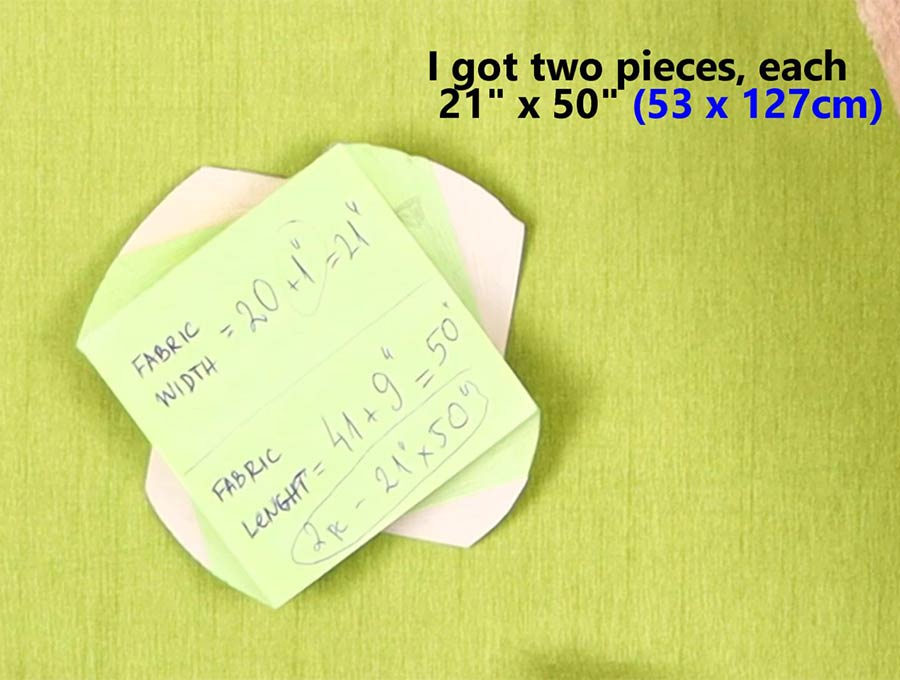
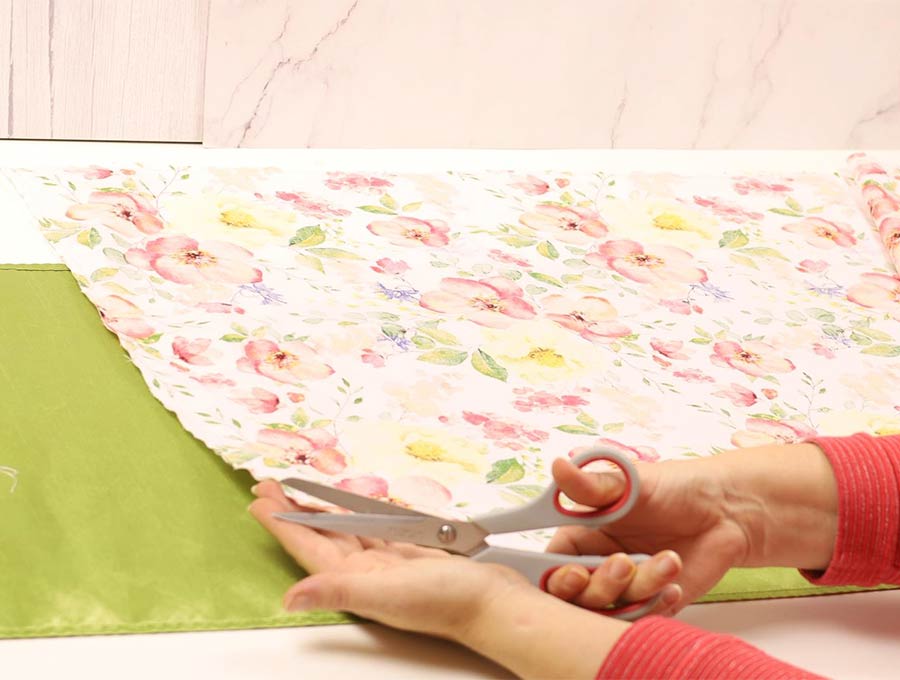
You can use a solid piece of fabric or piece together some cotton fabric offcuts until you have a piece that is sufficient to make a pillowcase. You will need two pieces. In my case it was two pieces of 21 x 50 inches each that is 53 x 127 cm.
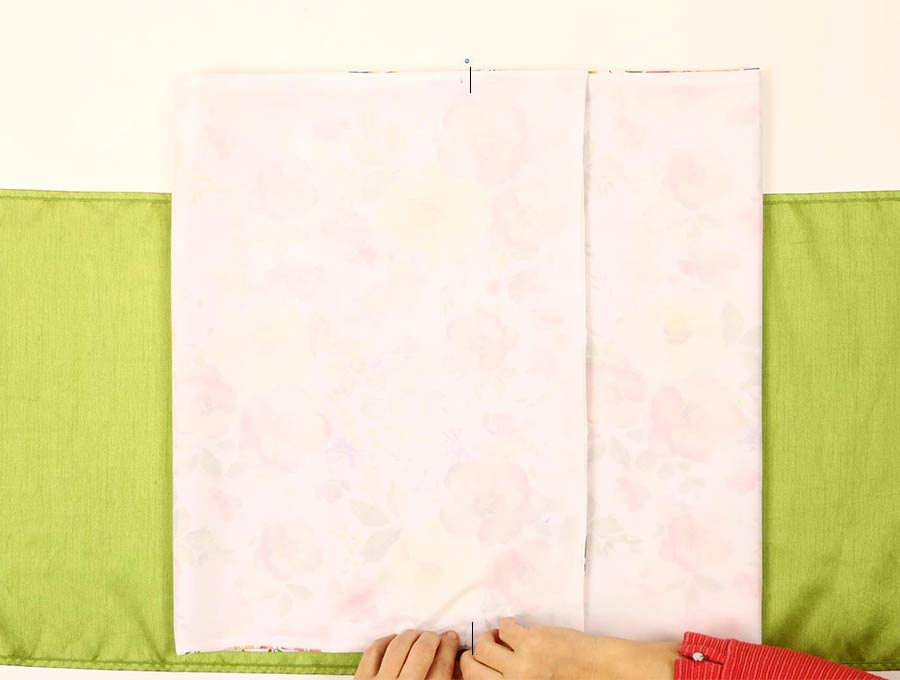
Step 4:
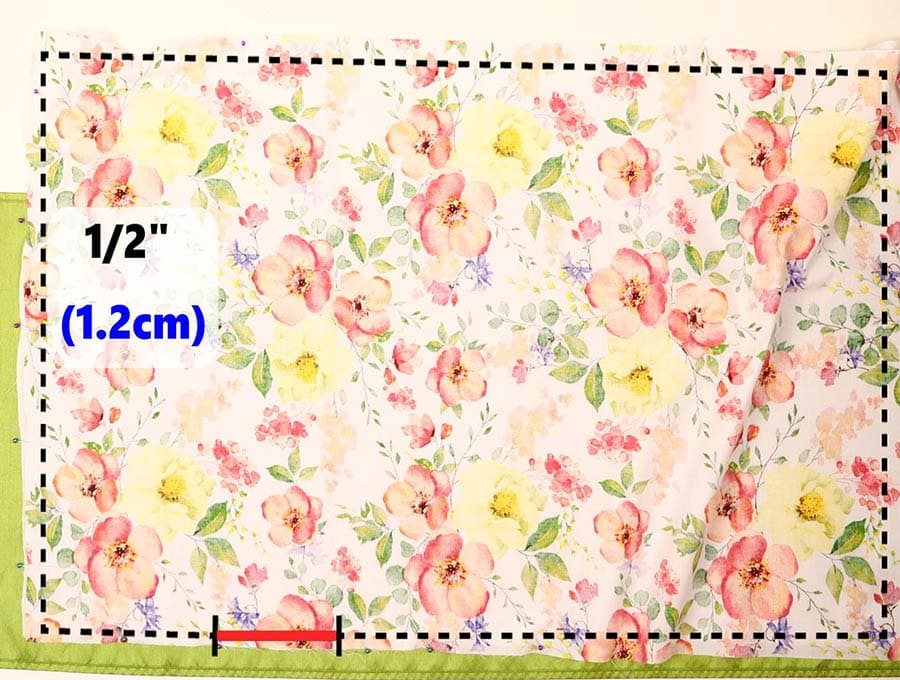
Pin the fabric right side to right side and stitch all around leaving a gap of around 3 inches (7.5 cm) on one of the longer sides.
Step 5:
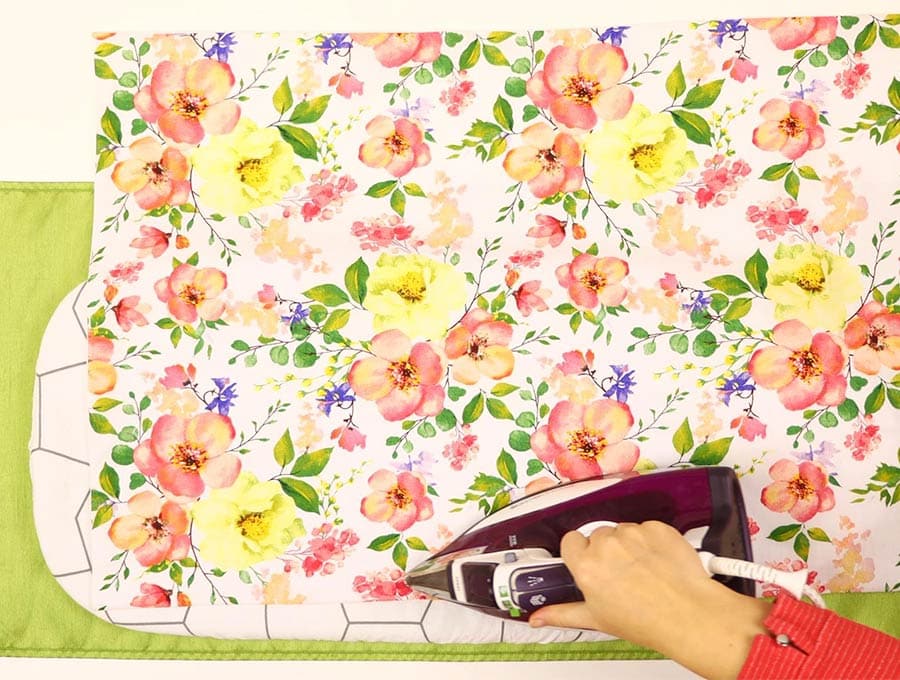
Snip off the corners to reduce bulk, then turn you fabric through the gap, poke out the corners neatly using a knitting needle or chop stick and turn in the raw edges of the gap before pressing the quillow case.
Step 6:
Fold the fabric in half and mark the middle.
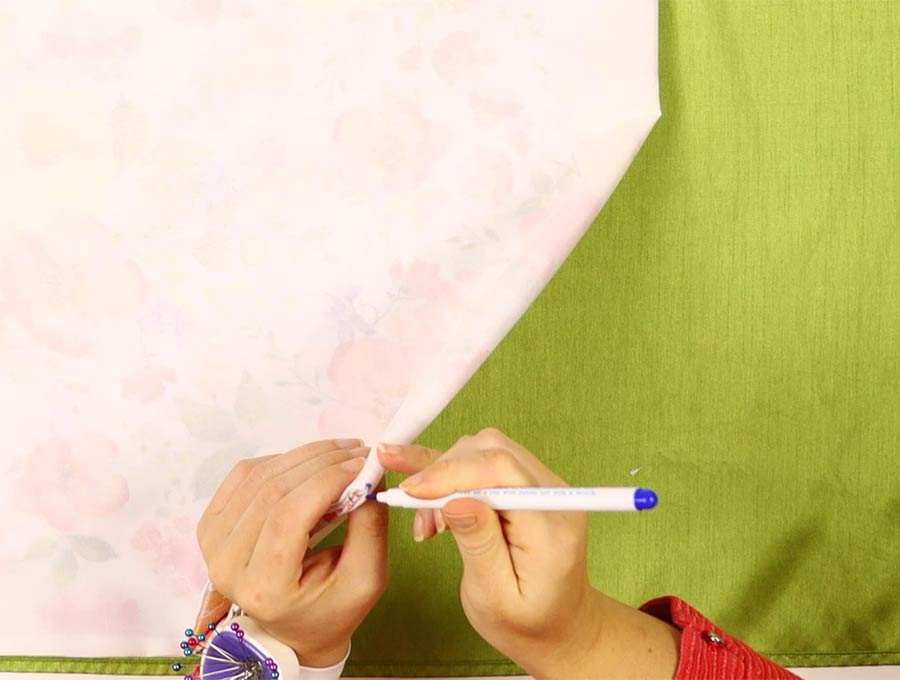
Now mark 4″ (10cm) in from each short side.
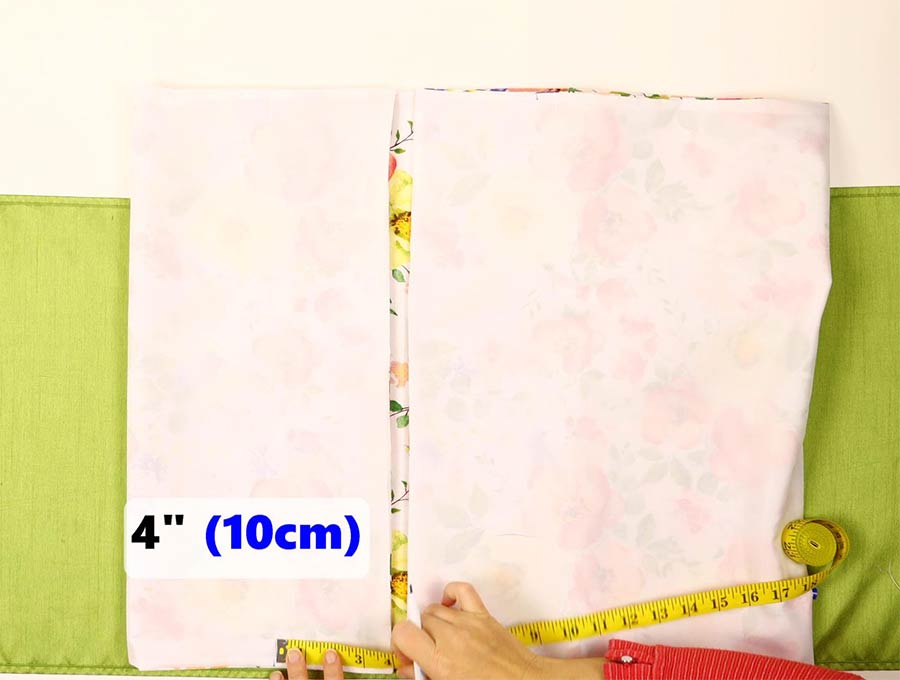
Fold to meet the center marks with the marks on each side so they overlap and pin to hold in place.
Step 7:
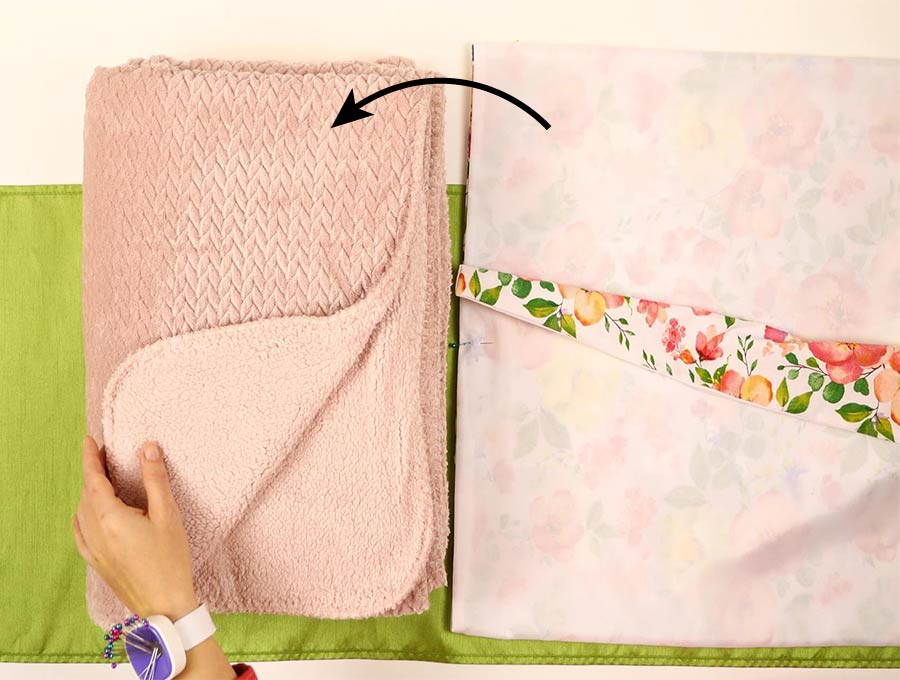
Take the corner of the blanket that has no folds and place the quillow cover over, with the open slit facing the blanket and pin roughly in place just to keep it attached.
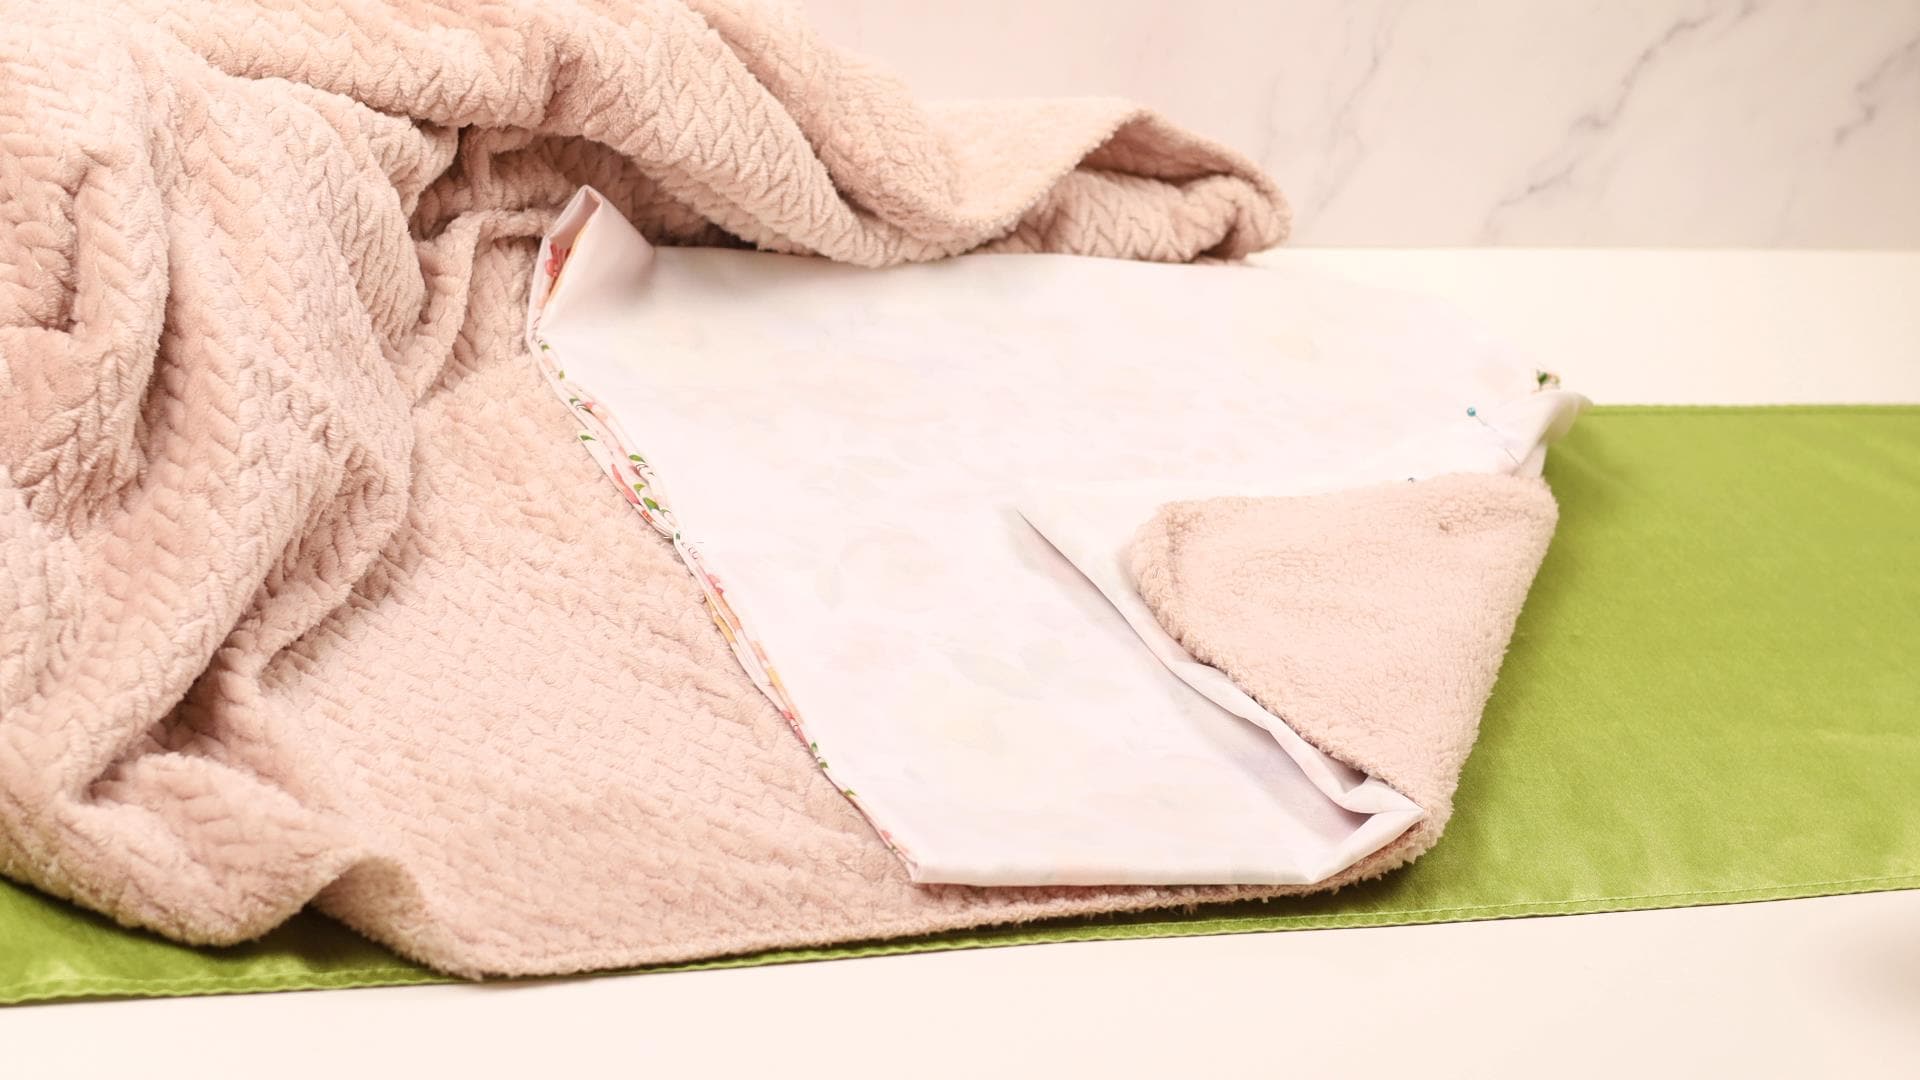
Step 8:
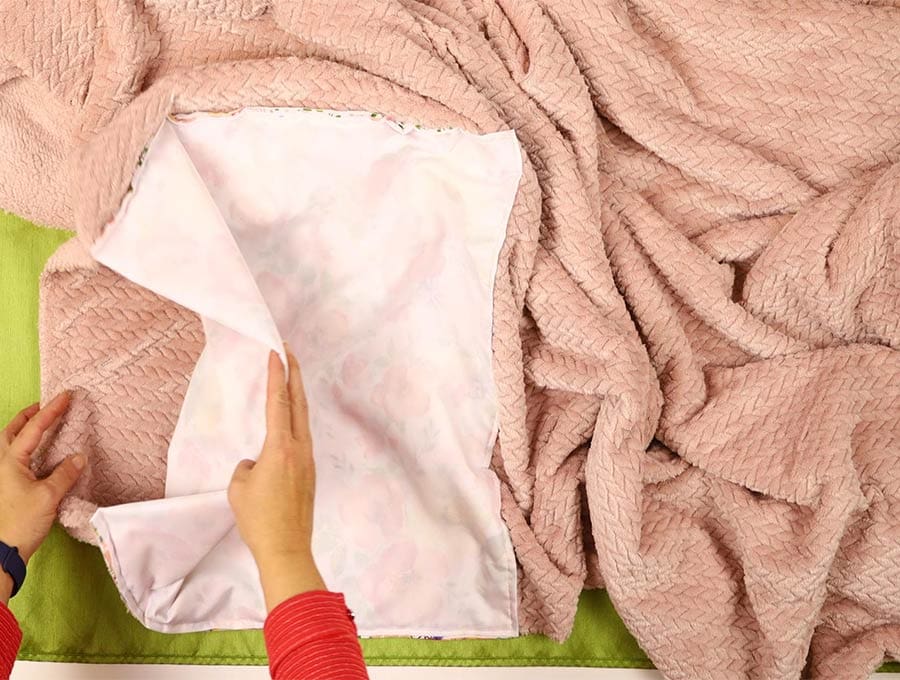
Open out the blanket and reposition the pins for the quillow cover to be flush with the edge of the blanket (or around 1 inch (2.5 cm) from the edges if you are using fleece), making sure the blanket underneath is flat and the quillow cover is neatly positioned. We do not sew the quillow cover right at the edge of the blanket as fleece is a soft fabric and could easily rip.
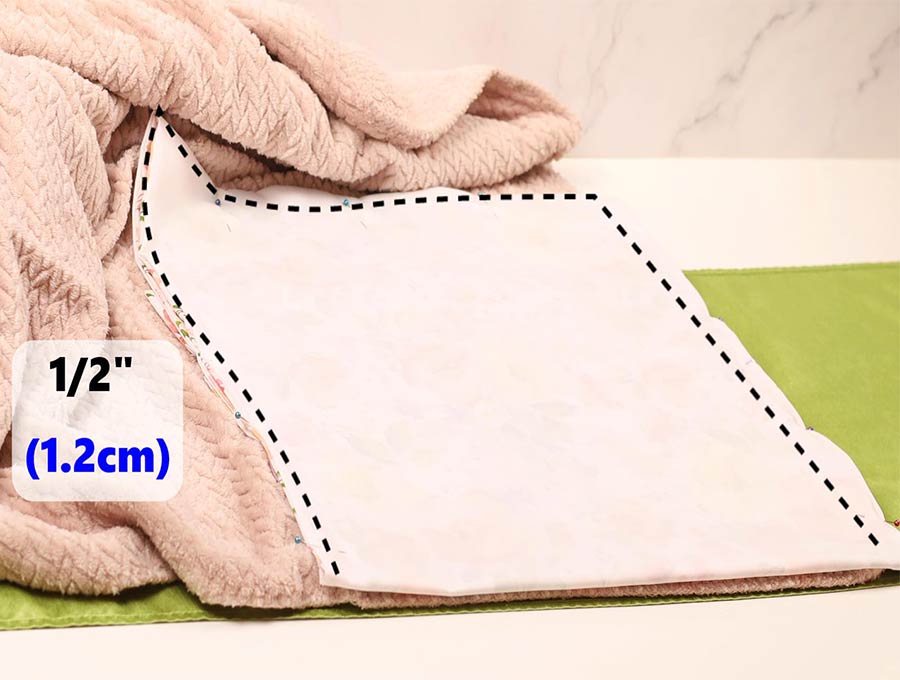
Step 9:
Stitch around three sides catching all the layers of the quillow cover. Remember you did not sew the turning gap closed but pressed the edges in? Now the stitching will cover that gap. Back tack at the start and finish of your stitching. Avoid stitching the fourth side which is the long side with the fold placed towards the edge of the blanket.
Step 10:
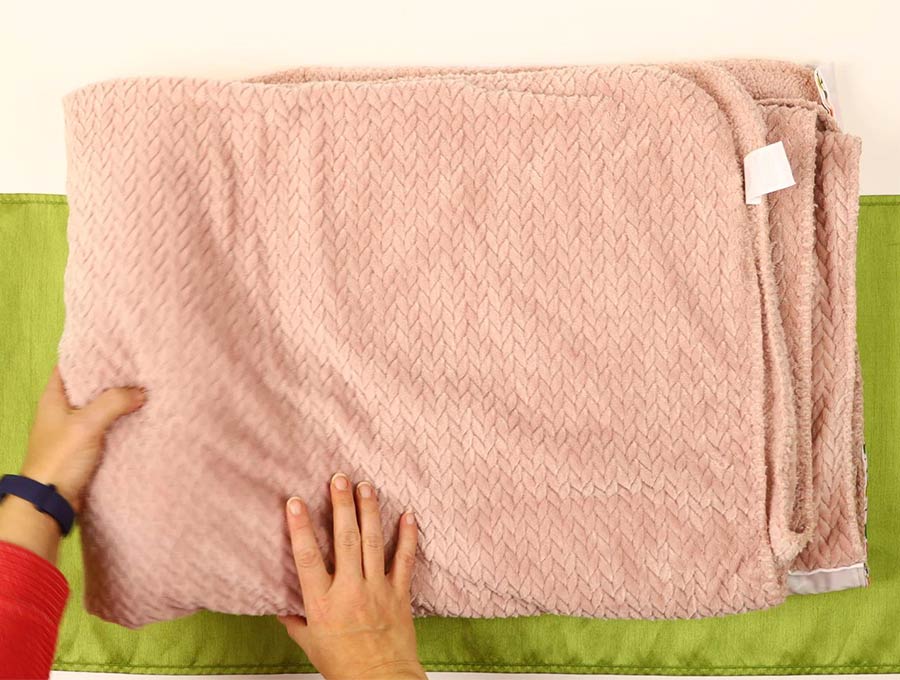
Fold the blanket as you did before, making sure the quillow piece is on the outside once the blanket is folded.
Step 11:
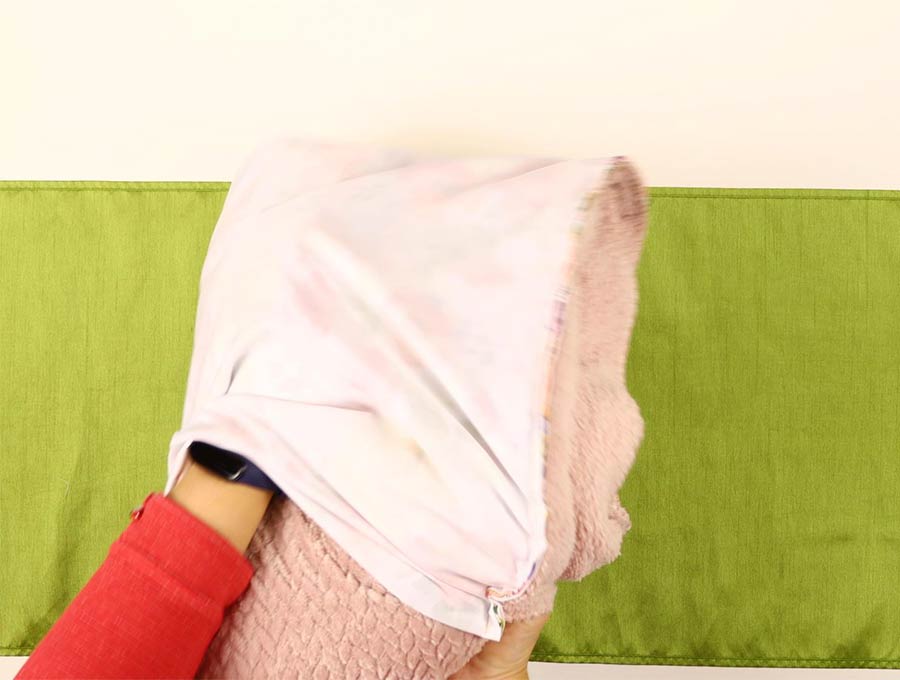
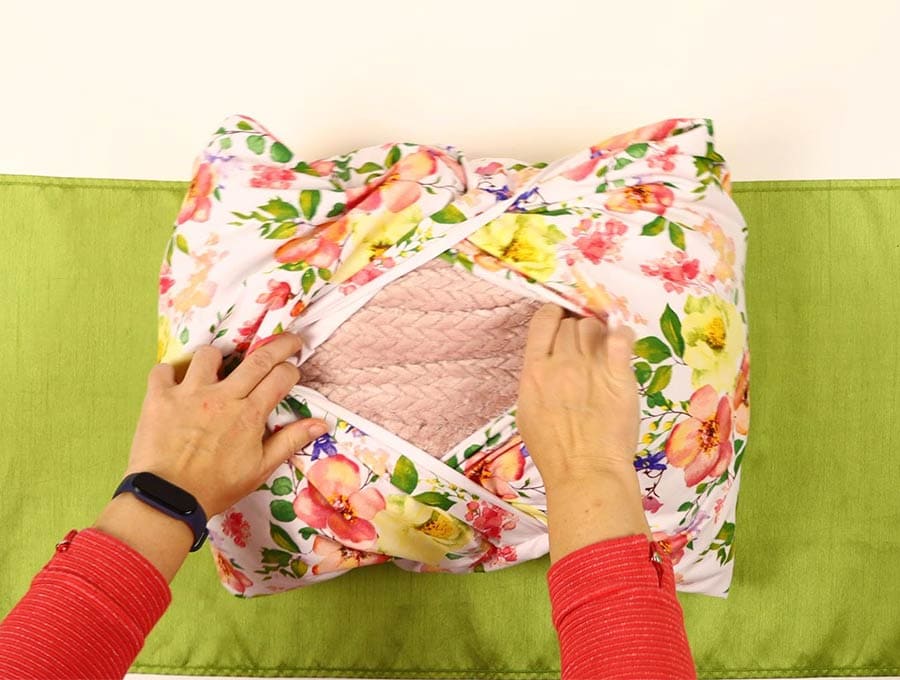
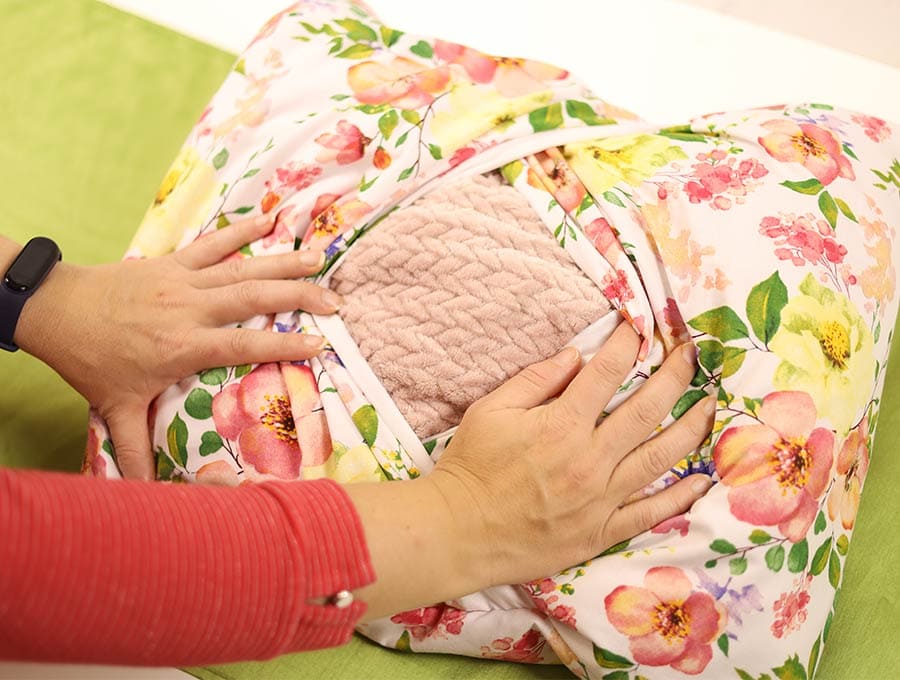
To fold reach inside the edge that wasn’t stitched and pull the fleece blanket through the quillow cover and arrange so it sits neatly.
Step 12:
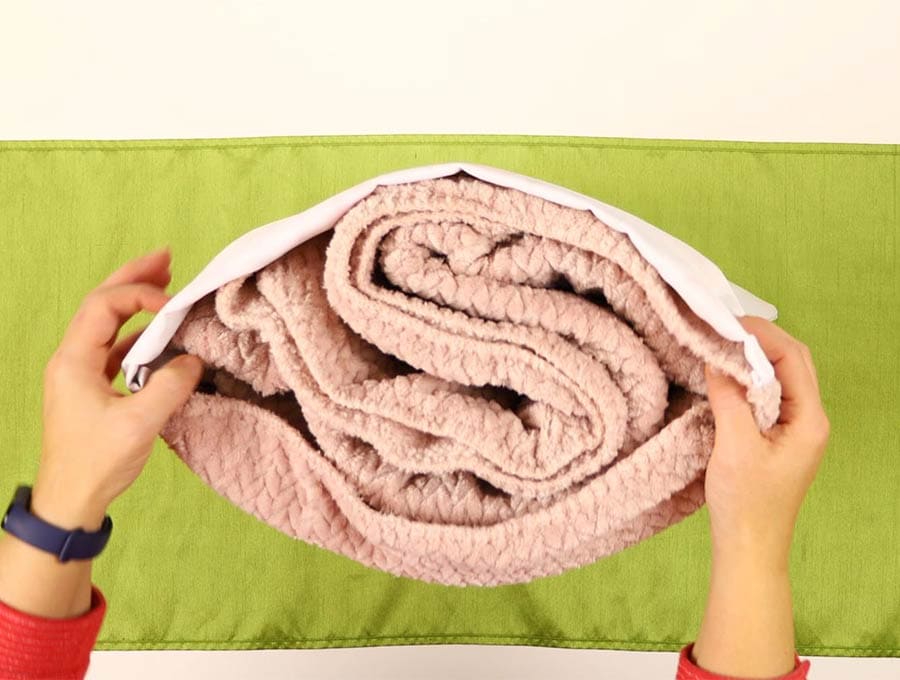
The folded flaps of the quillow are now on the outside and all you do is ease one flap over the blanket on one side and do the same with the flap on the other side – and there is your fleece blanket neatly inside the quillow cover.
And you will never lose the cover again because it is firmly sewn to the blanket.

If you enjoyed this step by step sewing project with the accompanying visuals then hit the subscribe button so you have new projects delivered straight to your inbox. You’re going to want to get sewing on these DIY quillows soon as they make incredibly useful presents, particularly for elderly folk who like to keep their fleece blankets handy next to the chair where they watch TV.
Do you like this? Pin for later:
Wanna be friends? Click HERE and follow me on Pinterest
RELATED:
Easy throw pillows you can make in a couple of hours MAX