
How to remove embroidery – both hand and machine stitched
Embroidery is a lovely decorative touch and it usually does its job of improving the overall appeal of a fashion piece quite well. But boy can they get ugly sometimes, or out of place, or it may be some store brand logo you actually don’t like.
Well, it can actually be dealt with and fixed most of the time. Removing hand embroidery on thicker fabrics usually leaves almost no traces, but thick or elaborate machine embroidery is next to impossible to remove without ruining the item. Of course, you can fix the damage with a patch. However, let’s take a look at the proper way to remove embroidery. All you need is a couple of appropriate tools, some time, and a great teacher who’ll help you learn how to do it.
Table of Contents
Required Tools
Alright then, now let me explain what kind of tools you’ll be needing for this kind of intervention project.
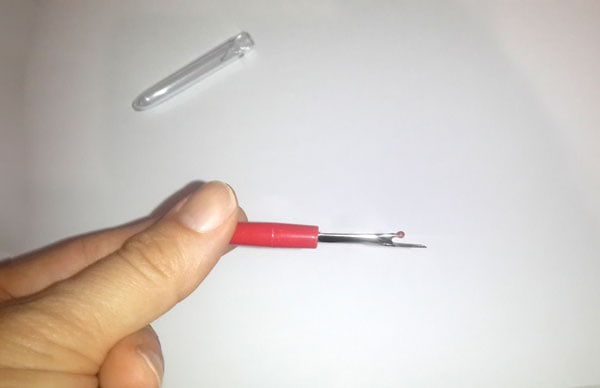
Seam ripper
Thisis first one on the list because it’s pretty much essential for embroidery removal. Although it can look like a brutal torture device, this handy tool is in fact incredibly useful and completely safe to use. If you wish to rip a stitch and disconnect two pieces of fabric which are sewn together, you absolutely don’t want to take a pair of scissors and cut them in two. Why? Because you’ll end up with a bunch of frayed threads and messy edges all over the place. Instead, just use this little baby and you’ll be able to remove the stitches neatly, precisely and quickly, without any unwanted side effects.
Tweezers
Next tool you’ll be needing isn’t as special as the previous one but it is quite helpful as well. I’m talking about a pair of tweezers. This tool is made from two thin pieces of metal, connected to each other at the end. Yeah, that was a joke, I’m not going to explain what tweezers are, you know that already. Anyways, you want to have them around when doing embroidery removal because you’ll need to grab those tiny threads when ripping seams and that task is much easier to complete with this tool instead with just your fingers.
Magnifying glass
This is another recommended tool to have for this kind of work. Embroidery stitches can get pretty small and removing them without this tool can be very eye straining, causing you to slowly worsen your eyesight and you don’t want that, no one wants that. Also, some embroidery threads are hard to identify with the naked eye, making you pull the wrong thread accidentally and achieving nothing by doing so. I have another suggestion for you, regarding this type of tool and you might just want to listen to it since it may save you some time and nerves. If you use a magnifying glass, obviously one of your hands will be preoccupied which means you’ll have to do all of the work with just one hand. This might get a bit bothersome and annoying but there’s a way around it. Nowadays, you can buy yourself those glasses that are actually magnifying glasses and then both of your hands will be free, without sacrificing your eyesight. The mentioned glasses are intentionally giant so that you can put them on even if you’re wearing normal glasses for your eyesight.
Lint brush/roller
And last but not least, you should have a lint brush, or a lint roller if you will, around while doing embroidery removal. This is basically a handle with a roll of adhesive paper on its end. It’s used for tidying up your work area and getting rid of all the tiny pieces of threads, materials, strings and similar pesky stuff. This tool is very useful when talking about embroidery removing because it can help you clear the piece you’re working on and take out all of the threads that are already disconnected from it but are still stuck to it due to static electricity. If you don’t have a lint brush, you can also use regular duct tape or scotch tape instead. It doesn’t have a handle but it does the same job pretty well.
I didn’t mention it before but you should also have your regular essential sewing tools ready, just in case you end up having to use them due to some unexpected situations. Better to be safe than sorry, am I right?
Now that you know which tools you’ll need, I’ll start explaining the actual process of embroidery removal.
Removing Embroidery from Clothing
There are two main different types of embroidery, one done by hand and the other done with the help of an embroidery machine. I’ll explain the hand kind first.
Removing Hand Embroidery
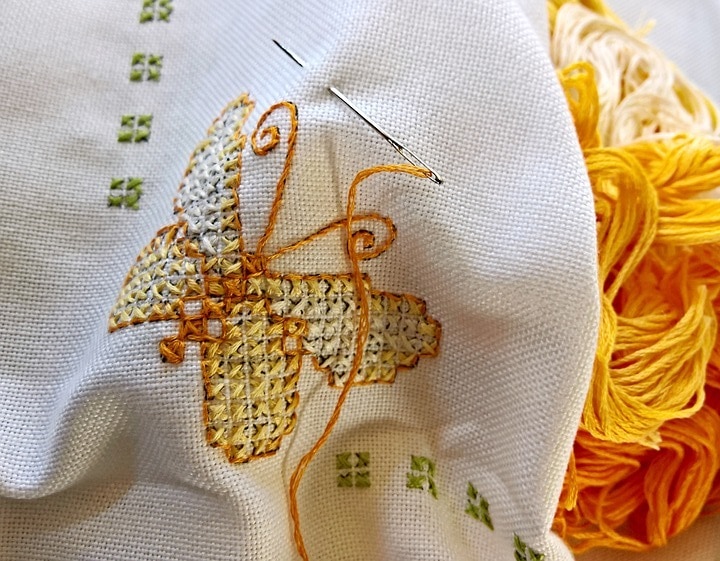
I’ll take an ordinary shirt with some embroidery as an example. Before you begin, flip the shirt inside out. This way you’ll be able to see the stitches better and therefore rip them more easily. Next up, take your hand and put it behind the embroidery you wish to remove. If you do so, you’ll avoid unwanted folding, improve stability and will be able to slice the seams more precisely.
After that, take your seam ripper and gently slide its end under the threads you wish to cut. I say threads because stitches usually consist of a few rows of thread and you need to rip them all. Move the ripper upwards so that its little blade breaks the thread in two. Don’t apply gorilla force because you may end up perforating the shirt itself accidentally.
Now take your magnifying glass or glasses and put them on so that you can see the threads more clearly. Flip the right side out and remove the logo or graphic along with the threads. Repeat around the entire embroidery and you’re done. Use your lint brush to get rid of all unwanted pieces of strings that got stuck to your shirt. Don’t forget to be cautious during the entire process, you wouldn’t want to ruin your clothes, you’re trying to improve them after all.
Removing Machine Embroidery
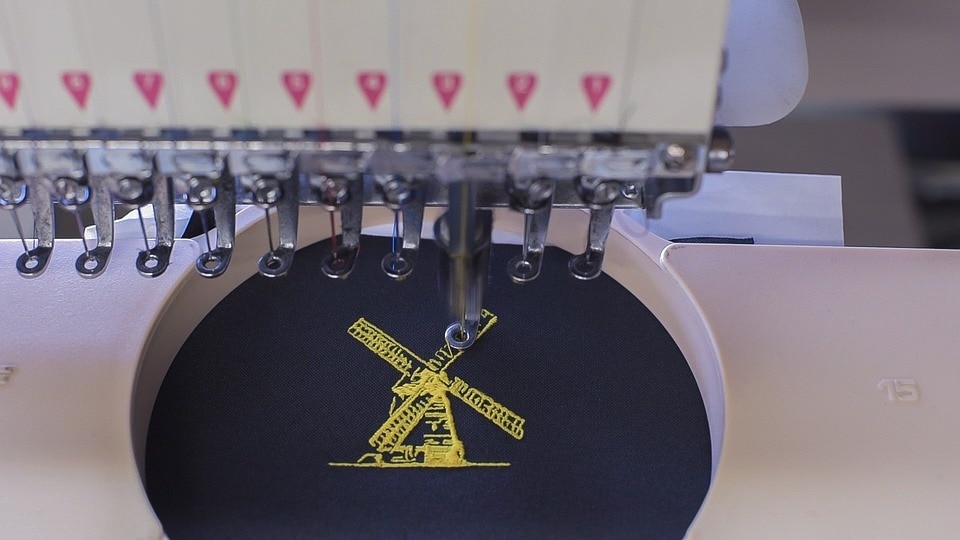
This one is a bit more tricky than the previous type of embroidery removal but don’t worry, I’ll show you how to do it properly without messing it up. Bear in mind that if it is too thick or elaborate, the stitches are too dense and it will inevitably leave unpleasant marks on the clothing. It does not matter whether you are using a cheap hat embroidery machine or one of the most expensive machines like these – if the stitching is dense, it is beyond rescue. However, if that is not the case, you can give it a shot!
You’ll start exactly the same as you would with hand embroidery removing, flip the shirt inside out and slide your hand behind the stitches you’ll be ripping in order to improve stability and precision.
Now you want to find a white bobbin which is much smaller than the stitches in handstitched embroidery. Once you’ve found it, gently slide your seam ripper under 30 or 40 stitches and slice them with a slow forwards motion. Be very careful not to grab a stabilizer thread with it. This thread is located between the stitches and the actual clothing and you must not cut it because its purpose is to prevent damage to your clothing.
After that, flip your shirt inside out and start pulling the embroidery strings with your tweezers. Once again, avoid using gorilla force and stop if you feel some resistance. That means you haven’t broken the stitches adequately so just go back and use your seam ripper again before continuing to pull the threads.
Repeat these steps until you’ve removed the embroidery entirely. Use your lint brush for tidying up.
Removing Embroidery from Nylon
Lastly, I’ll explain how you can remove an embroidery design from a nylon bag. This is perhaps even easier than the removal of handstitched embroidery from clothing but unfortunately leaves holes on the back which have to be covered with either another embroidery or with an applique. Just take your seam ripper, choose a starting point, slide the tool under the stitches and cut the embroidery thread. Continue doing this with the surrounding threads as well. Then turn the bag inside out and pull out the threads with your handy tweezers. Keep repeating this until you’ve removed the entire thing. Easy as that.
It would seem I’ve got nothing else left to teach you. You know how to remove both hand-stitched and machine stitched embroidery as well as embroidery done on nylon. Now you don’t have to avoid buying nice clothes just because they have embroidery details which you don’t like, instead you can just remove it and have your ideal fashion piece!