
Easy Microwave Potato Bag Instructions – Perfect Baked Potatoes in Minutes
Did you know that potatoes have almost all the nutrients your body needs? The ones it doesn’t provide are found in milk, so you could easily live off potatoes and milk!
Fun facts aside, if you love potatoes, you probably already know a lot of different ways to cook them up. And if you like clean, quick and neat methods, in particular, this microwave potato bag will be perfect for you!
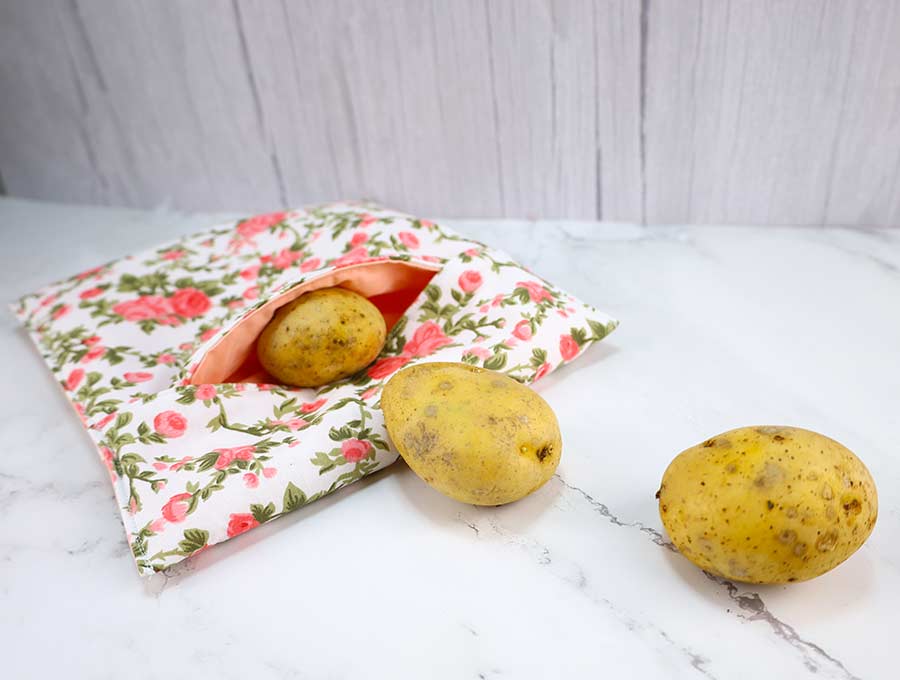
With a microwave baked potato bag like this one, you can cook potatoes easily, quickly, and without any mess! You can also use it to prepare other vegetables you like, or even bread and tortillas.
The great thing about this baked potato bag is how easy to make it is. It takes less than twenty minutes and you don’t even need a pattern! Here’s a step-by-step explanation of how to sew a microwave potato bag.
Below you will find my step by step written tutorial how to make a veggies bag you can use in the microwave. It’s complete with VIDEO instructions for all the visual learners.
We occasionally link to goods offered by vendors to help the reader find relevant products. Some of the links may be affiliate meaning we earn a small commission if an item is purchased.
Table of Contents
- 1 How to make a microwave potato bag
- 2 Baked potato bag Supplies and tools
- 3 How to Sew baked potato bag for the microwave
- 3.1 Microwave Baked Potato Bag VIDEO TUTORIAL
- 3.2 MICROWAVE POTATO BAG INSTRUCTIONS:
- 3.3 STEP 1: Cut the fabrics – no microwave potato bag pattern needed
- 3.4 STEP 2: Stack the fabrics
- 3.5 STEP 3: Start sewing the microwave potato bag
- 3.6 STEP 4: Turn and pin the microwave potato bag
- 3.7 STEP 5: Press and Topstitch
- 3.8 STEP 6: Mark the folds of the bag
- 3.9 STEP 7: Fold and finish the baked potato bag
- 4 Bonus: How to use the microwave potato bag:
How to make a microwave potato bag
Baked potato bag Supplies and tools
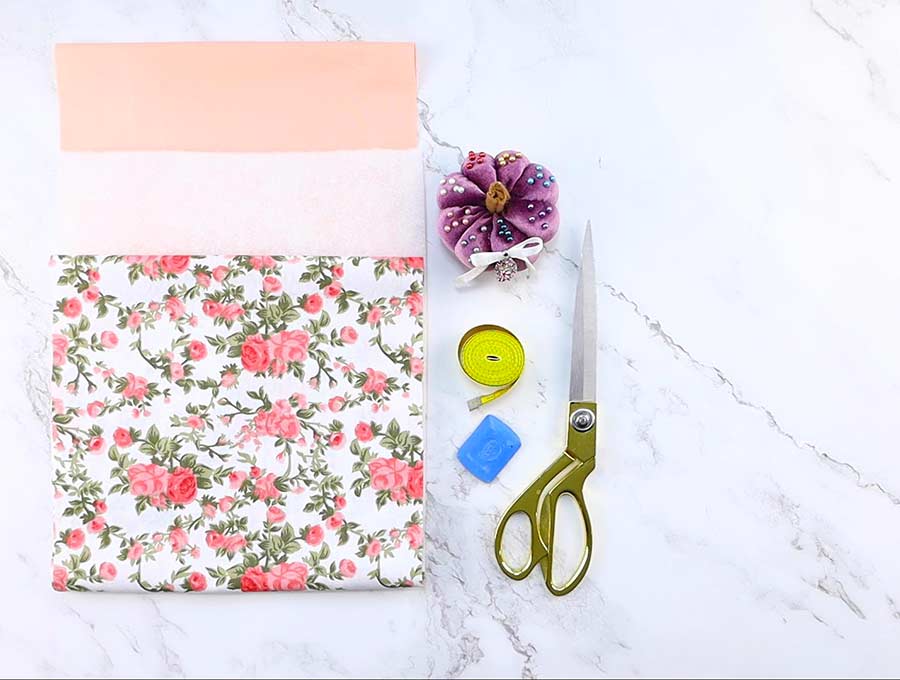
- fabric – 2 pieces of 100% tightly woven cotton (one main, one lining)
- batting – 100 % cotton
- matching thread – 100% cotton
- scissors (or rotary cutter and a cutting mat)
- ruler or measuring tape
- iron and ironing board
- sewing clips or pins
- sewing machine
Notes: EVERYTHING that goes in the microwave should be 100% cotton. Make sure not to leave the potato bag in the microwave without supervision.
Follow us for free patterns & tutorials! [easy-profiles]
How to Sew baked potato bag for the microwave
Watch the diy baked potato bag video first and then follow the written step by step instructions below.
Please enjoy and don’t forget to Like and SUBSCRIBE over on YouTube to be kept up to date with new videos as they come out.
Microwave Baked Potato Bag VIDEO TUTORIAL
MICROWAVE POTATO BAG INSTRUCTIONS:
STEP 1: Cut the fabrics – no microwave potato bag pattern needed
For this project, you will need to use 100% cotton in everything – fabric, batting and thread. This is extremely important because you’ll be putting them under a lot of heat, so if they aren’t pure cotton they could melt or even catch fire.
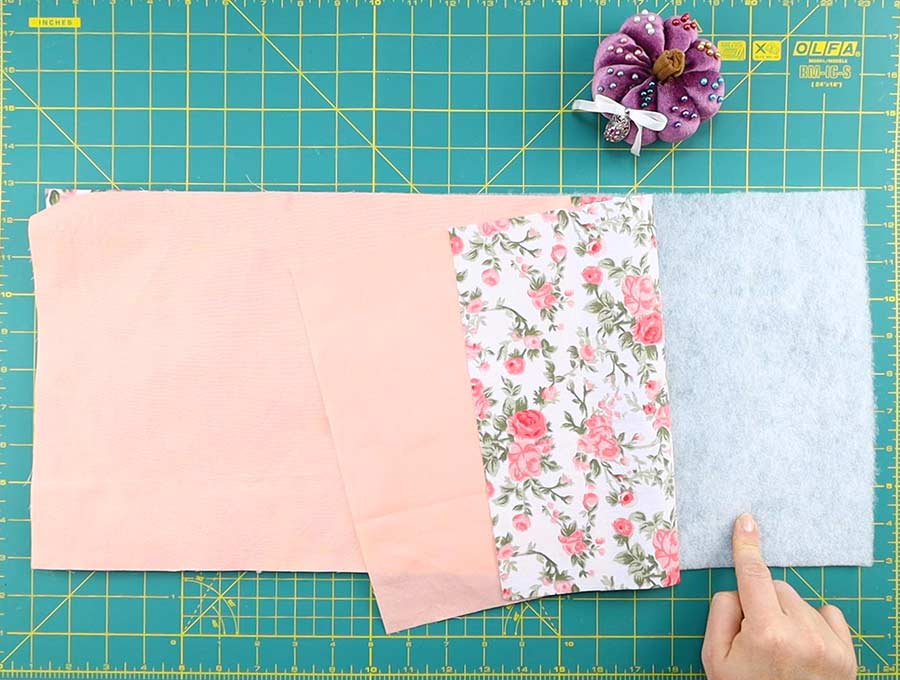
Take all three fabrics, the main, the lining, and the batting, and cut them into a 25 x 56cm (10 x 22″) piece each. These are all simple rectangles, so you don’t even need a microwave potato bag pattern to whip up this.
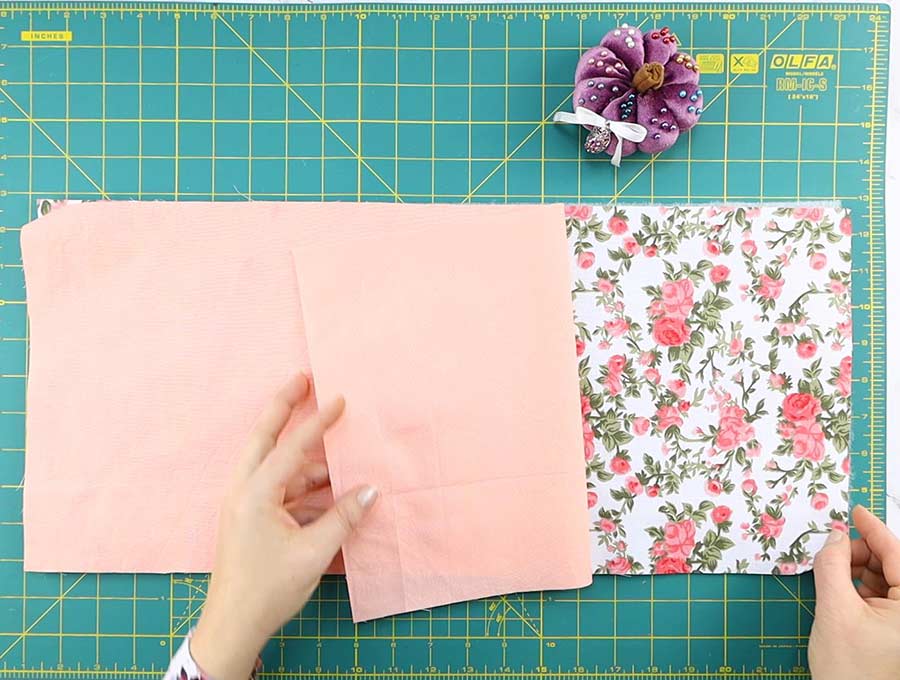
STEP 2: Stack the fabrics
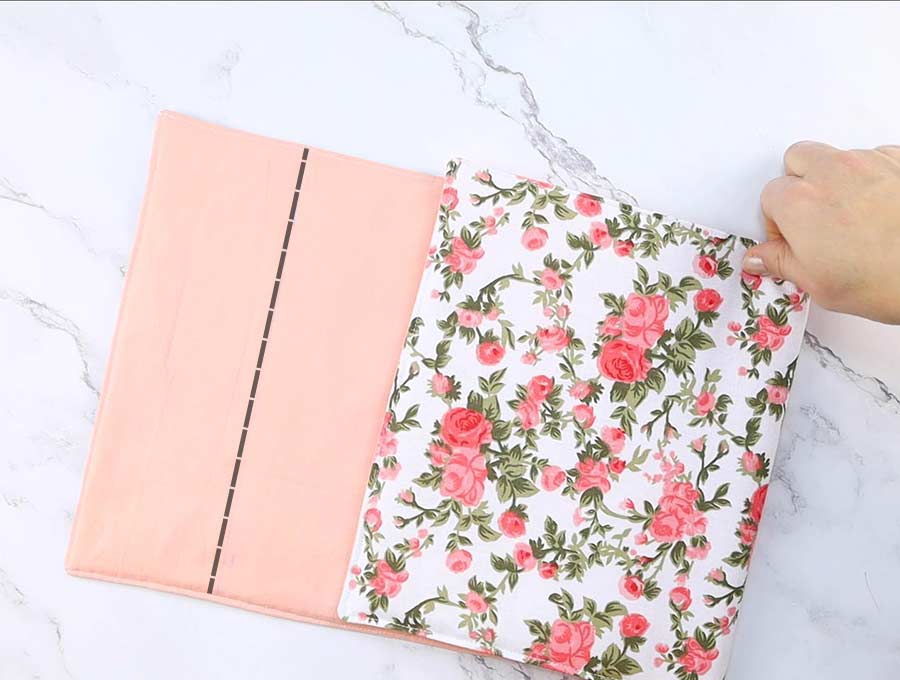
Take the batting piece first and place it onto your workspace so that the long sides are on the top and bottom, while the short sides are on the left and right.
Set the lining piece over the batting, making sure that the right side is facing up. Align all of the edges of the two layers.
The topmost layer will be the main fabric. Place it over the two layers so that its right side is facing down, towards the lining. Align all of the edges and secure the layers together with pins or clips.
STEP 3: Start sewing the microwave potato bag
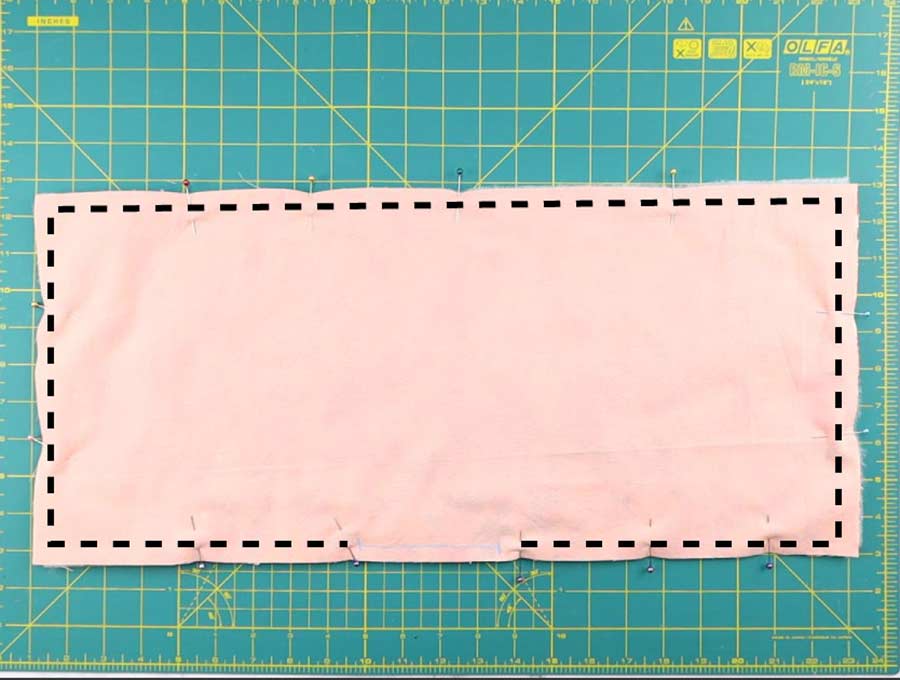
Take the fabric sandwich to your sewing machine and sew all around the edges with a quarter-inch seam allowance.
Be sure to do some backstitching at the beginning of the seam as well as the end of it. When you reach the corners, don’t break the thread. Stop the needle when it’s down and just pivot the fabric. Then keep sewing along the next edge.
You will need to leave a section of about two inches unstitched so that you can turn the bag inside-out. I suggest you leave that bit on one of the short edges of the bag.
STEP 4: Turn and pin the microwave potato bag
Before you turn the bag, clip the corners a bit with your scissors to prevent bulk on them when you turn them.
Use the opening you left unstitched to turn the bag inside-out. Pay attention to turn it properly, you need to grab the insides between the lining and the main fabric!
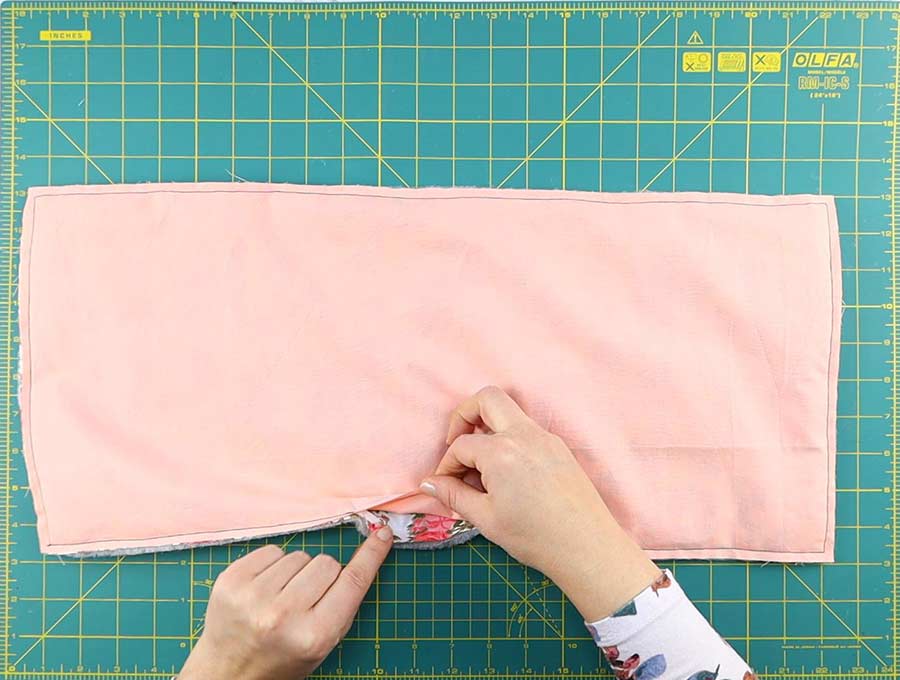
Push out all the edges and the corners.
Fold the raw edges of the gap in by 1/4 inch and pin the gap.
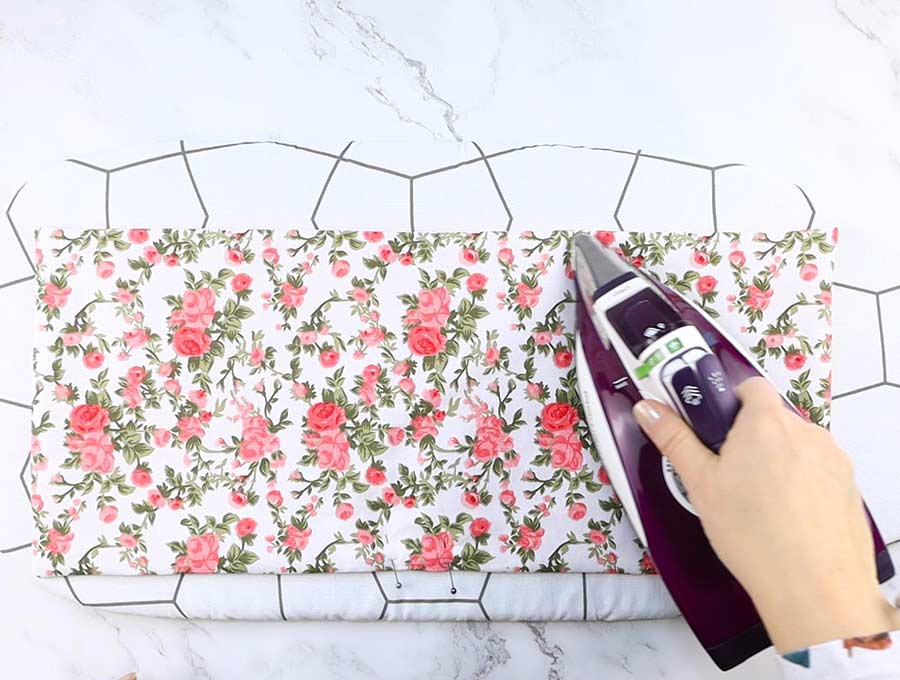
STEP 5: Press and Topstitch
Press the bag with an iron. Topstitch all around the microwave baked potato bag with a scant 1/8″ (3mm) seam allowance. This will also stitch the gap closed.
Alternative ways to stitch the gap closed
You can do this in two ways and both of them are equally good, so just go with the one you like more.
The first way to close the opening is to use a needle and a thread and sew the opening shut with a ladder stitch.
The second way is to use a sewing machine and make a seam over the opening. If you choose this method, don’t forget to fold the raw edges inward a bit and press them with your iron before you start sewing. Use an eighth-inch seam allowance for this stitch.
STEP 6: Mark the folds of the bag
Spread the bag on your workspace so that the short edges are on the left and right and that the lining is facing upward.
Take your measuring tape or a ruler and measure 19cm (7.5 inches) from the bottom of the bag. Make a vertical line at that point with a fabric pen or a sewist chalk.
Now measure 7.5cm (3 inches) away from the top edge. Draw a horizontal line here as well.

STEP 7: Fold and finish the baked potato bag
Pull the right edge of the bag towards the left, to the first marking you made, and make a fold. Then pull the left edge towards the right, to the other marking you drew, and make another fold.
Take some pins or clips and secure the folds in place.
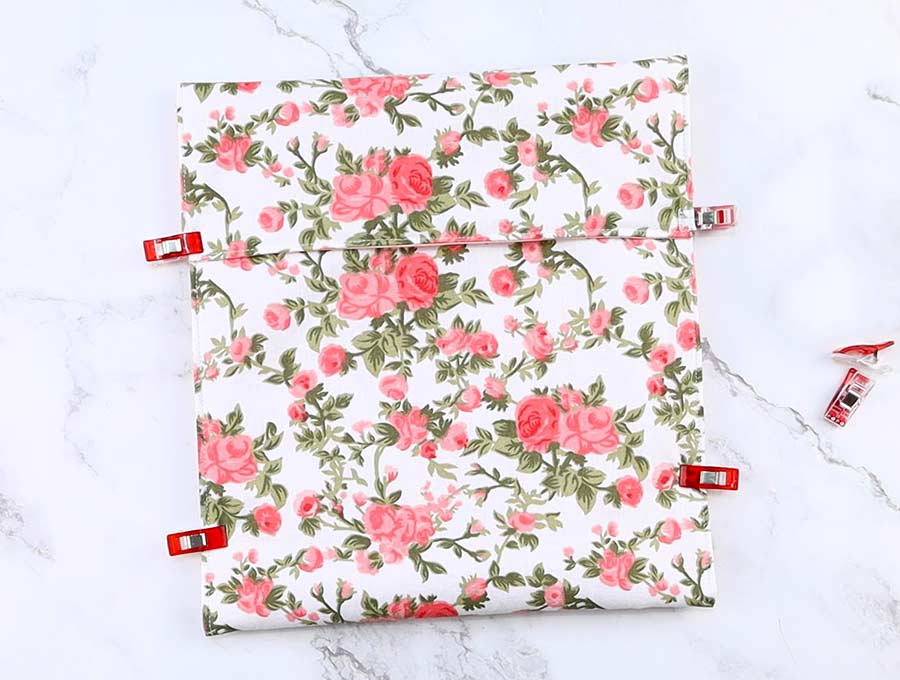
The last thing you’ll do is sew the folds in place. Make a seam along the two open edges to form the bag. You can use any stitch you want for this, even the decorative one.
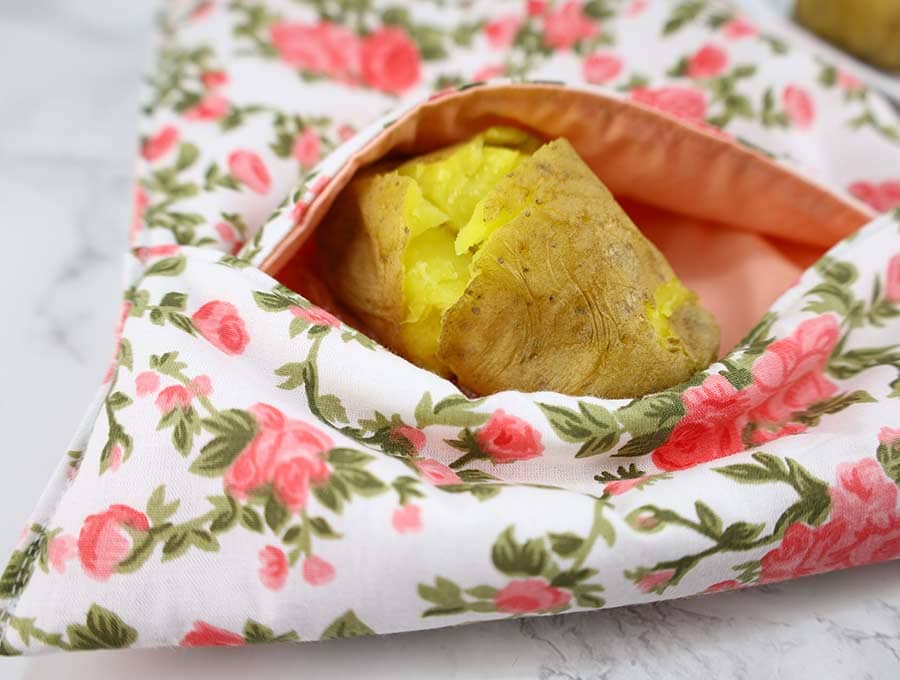
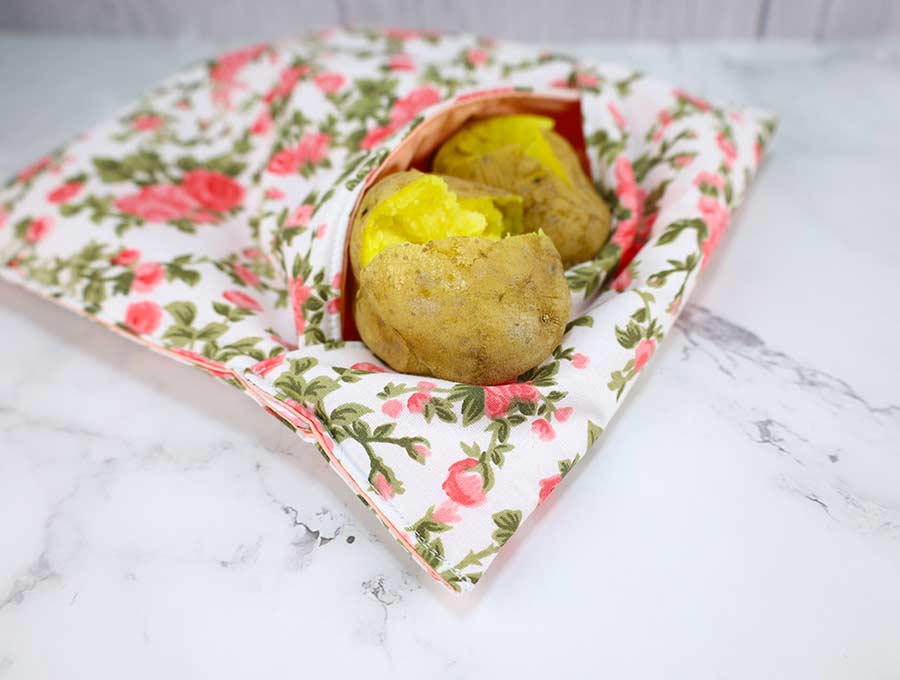
Your new microwave potato bag is now finished!
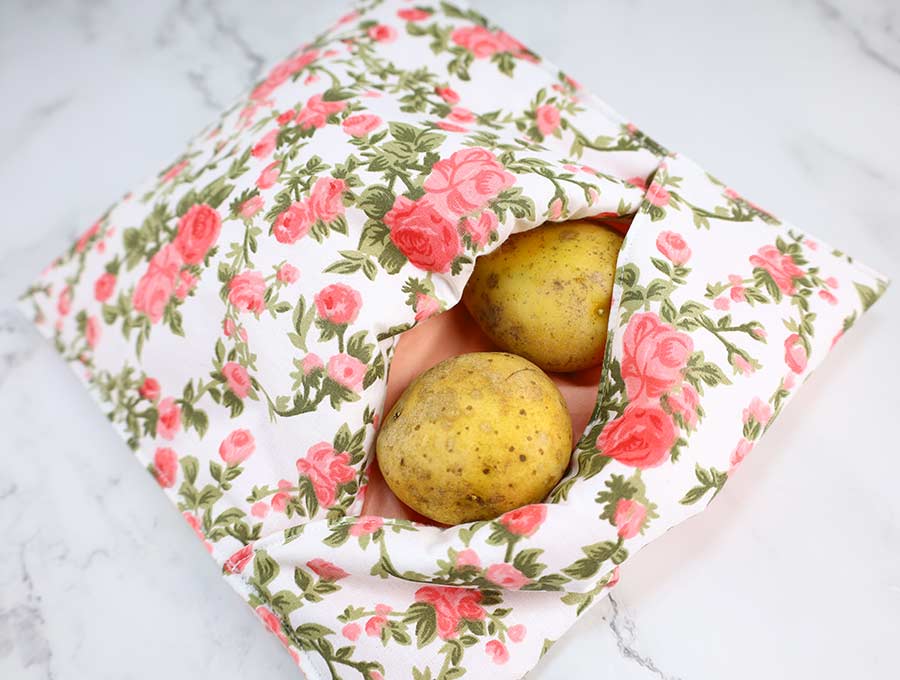
Bonus: How to use the microwave potato bag:
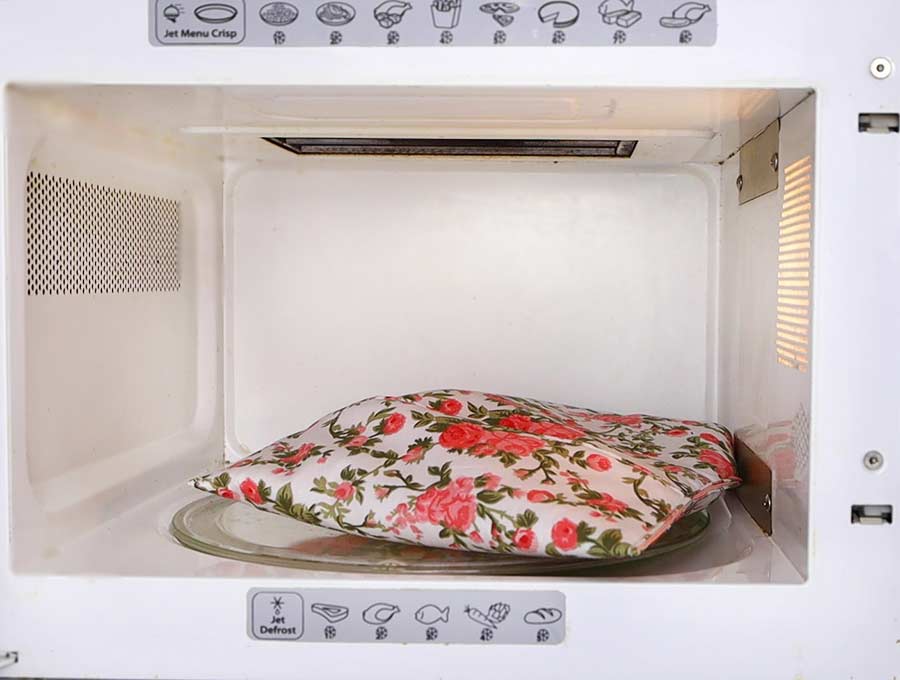
This bag isn’t just for preparing potatoes, you can also use it for other microwave specialties as well. It’s important that you don’t use the preset cycles on your microwave. Instead, set the temperature high and follow our list that tells how long you should cook certain foods.
Don’t forget to wash and dry the vegetables before preparing them. You can also use damp paper towels and wrap the vegetables in them to reduce clean-up times.
Cooking time:
- Dinner rolls – 15 seconds
- Tortillas – 1 to 2 minutes
- 3 Medium bread rolls – 20 seconds
- Winter squash – 4 to 5 minutes
- 2 Large corn cobs – 6 minutes
- 2 Large red potatoes – 8 minutes
- 2 Medium sweet potatoes – 10 minutes
Note: The last 4 items on the list shouldn’t be in the microwave longer than three minutes (ideally 2) at a time, so break up the preparing process into two or more sessions.
Did you like our tutorial? We hope you were able to make yourself a new microwave potato bag! Let us know if you have any ideas on how to improve this quick project in the comment section below. Enjoy those tasty microwave potatoes!
Do you like this? Pin for later:

Wanna be friends? Click HERE and follow me on Pinterest
RELATED: