")
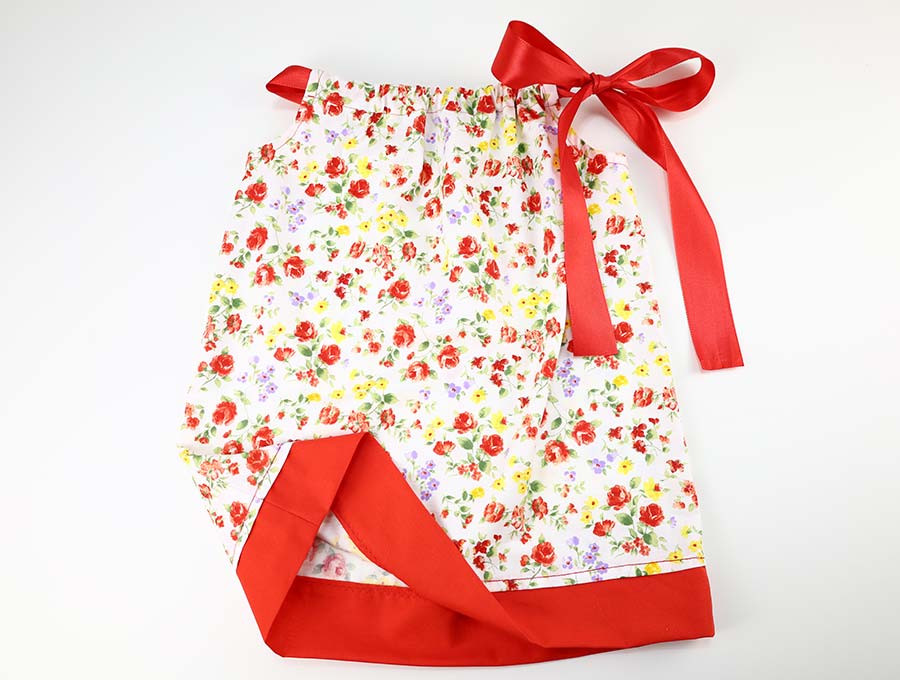
Free Pillowcase Dress Pattern and Size Chart (for Girls)
The so-called pillowcase dress, in a rainbow of color choices, is a timeless classic for little girls. It can be made with a bow that ties on one shoulder, or bows on both shoulders. Our easy step by step tutorial will show you both methods. It can have an extra band at the bottom, a panel of lace down the front, some iron-on sparkles, or buttons – the choices to pretty it up are as endless as your imagination, and the cute items you have in your fabric and haberdashery stash. I’ll show you how to make the dress using new fabric, but you can make the dress using an actual pillowcase.
Table of Contents
- 1 What is a pillowcase dress?
- 2 How to make a pillowcase dress
- 3 Pillowcase dress supplies and tools
- 4 How to Sew a Pillowcase dress
- 5 Pillowcase dress pattern size chart
- 5.1 PILLOWCASE DRESS INSTRUCTIONS:
- 5.2 STEP 1: Cut fabric
- 5.3 STEP 2: Layer fabrics
- 5.4 STEP 3: Cut out armholes
- 5.5 STEP 4: Sew the side seams
- 5.6 STEP 5: Attach bias tape
- 5.7 STEP 6: Sew the bias tape
- 5.8 STEP 7: Make casing for the ribbon
- 5.9 STEP 8: Sew
- 5.10 STEP 9: Hem the pillowcase dress
- 5.11 STEP 10: (optional) Create the tie
- 5.12 STEP 11: Thread and tie the tie
- 6 PILLOWCASE DRESS OPTIONS:
- 7 Pillowcase dress FAQs:
What is a pillowcase dress?
The pillowcase dress is just that – a dress made from a rectangular pillowcase with the seamed ends of the pillowcase cut off, armholes cut, bias bound, a seam at the top through which a sturdy tie is threaded, and a hem. All done! Of course, you don’t have to use a pillowcase – new pieces of fabric are just as easy to use – all you need is two rectangles.
Sewing for charity: Tips for making pillowcase dresses for Africa
Make these dresses for your girls, and their cousins, for friend’s or even for a charity, like Little Dresses for Africa, an organization that will be delighted to accept donations, and send the pretty dresses to underprivileged children in various African countries.
There are a few things to remember when making these dresses to send to Africa.
- Use a fairly sturdy cotton as these will be washed and worn many, many times.
- Remember to pack the same sizes together and use a permanent marker on an inside seam near the armhole to indicate size if you do not have a size tag. This helps for sorting and sending the clothes to the various villages.
- Do not leave any pins in the fabric – volunteers definitely don’t want pin pricks, and one doesn’t want to risk the children getting pin-pricks form their new dresses.
- Although ribbon looks pretty, please avoid using ribbon as it does not wear well. Rather use a fabric tie threaded through. These dresses will be worn by a child and handed down to various siblings so they need to last well.
Below you will find my step by step pillowcase tutorial tutorial with VIDEO instructions for all the visual learners.
We occasionally link to goods offered by vendors to help the reader find relevant products. Some of the links may be affiliate meaning we earn a small commission if an item is purchased.
How to make a pillowcase dress
Pillowcase dress supplies and tools
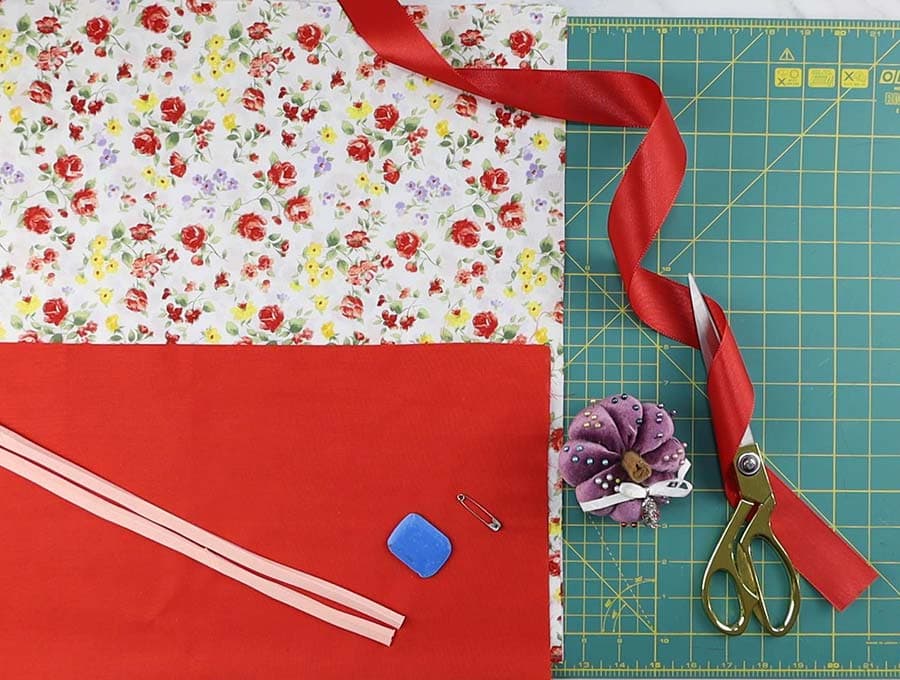
- fabric – 2 pieces of 100% woven cotton
- optional: contrasting fabric for the band
- 1/2″ single fold bias tape
- grograin ribbon
- matching thread
- scissors (or rotary cutter and a cutting mat)
- ruler or measuring tape
- iron and ironing board
- sewing clips or pins
- sewing machine
Follow us for free patterns & tutorials! [easy-profiles]
How to Sew a Pillowcase dress
Watch the diy pillowcase dress video first and then follow the written step by step instructions below.
Please enjoy and don’t forget to Like and SUBSCRIBE over on YouTube to be kept up to date with new videos as they come out.
Pillowcase dress VIDEO TUTORIAL
Pillowcase dress pattern size chart
All measurements in the following chart are in inches. Please be aware that the age is a rough guide only – children develop at different rates – a two-year-old may be taller and heavier than average, and therefore wear a dress suited to a 3-year-old, or a child may be petite and although 4 years old, may wear a dress with the measurements for a 3-year-old. Before cutting your fabric, measure the length of the child from the shoulder to where you would like the hem to reach, then you can work backwards from this, bearing in mind you will be losing around 2 inches for the seam at the top through which the fabric to make the bow will be threaded and for the hem. Personally, I think the dresses look prettier shorter rather than longer, giving them a snappy look. One also has to consider that children like to be free to move and shorter lengths just above the knee are more comfortable.
What makes this pattern so popular is that being sleeveless and a straight cut one does not have to worry too much about exact measurements as the dress skims the figure. Just makes sure there are a couple of extra inches more than the widest point of the child’s body. The length can be slightly adjusted by adjusting the ribbon tie – as long as it fits comfortably under the arm.
Use the size chart below to help you when selecting a suitable size fabric from your stash. You will need two rectangles of the required length and width
(all sizes in INCHES).
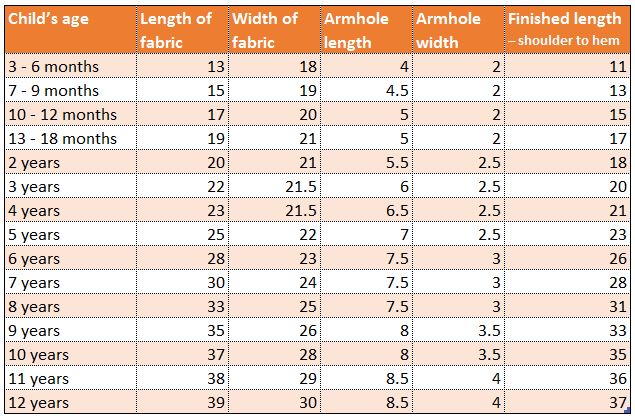
pillowcase dress size chart (INCHES)
PILLOWCASE DRESS INSTRUCTIONS:
STEP 1: Cut fabric
Cut out 2 pieces of fabric according to the chart for the size dress you are making after having checked the size of the child if is for someone in your family. If it for a charity they will give the dress to a suitably sized child.
STEP 2: Layer fabrics
Place the rectangles wrong side to wrong side. Let’s say you are making a pillowcase dress for a 4-year-old, your fabric will be 23 inches long by 21.5 inches wide
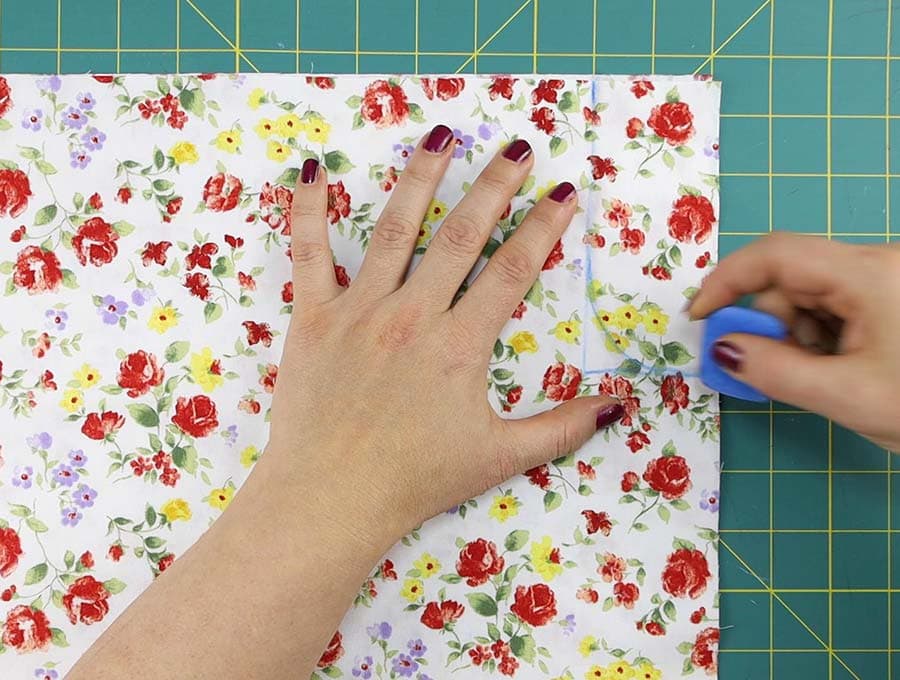
STEP 3: Cut out armholes
Using the template cut out the armholes, on the side opposite the fold, or you can measure the length of the armholes from the top of the fabric corner, and in from the side as seen in the diagram below, then round out the armhole at the bottom left corner, using the measurements from the chart according to the age of the child you are making the dress for.
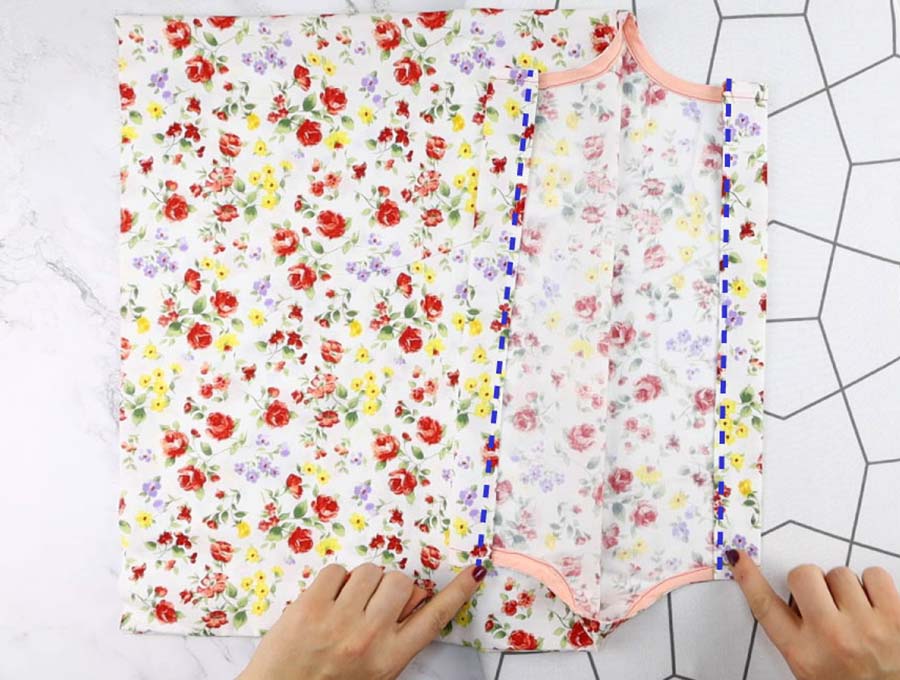
STEP 4: Sew the side seams
Once you have folded out the fabric it will already have the right sides facing, so you can use a serger for the edges and stitch a straight ½ inch seam down each side from the base of the armhole to the hem on the front side of the fabric
If you do not have a serger (overlocker), zigzag the side seams, or use pinking shears.
For a neater and sturdier finish do a French seam. For a French seam you will turn the fabric so the wrong sides are facing each other and you will stitch a ¼ inch seam on the right side of the fabric. Once done, turn so the wrong sides are outwards and stitch just over a ¼ inch seam on each side that will enclose the raw edges. To make it extra sturdy and make sure the seam lies flat, top stitch two rows on the right side of the fabric, making sure both the side seams face towards the front of the garment.
STEP 5: Attach bias tape
Attach the double fold bias tape to the armholes by folding out one side of the tape and stitch onto the wrong side of the armhole. Repeat for the other armhole.
STEP 6: Sew the bias tape
Fold over the bias tape, with the folded edge over the seam on the right side of the fabric and top-stitch into place.
STEP 7: Make casing for the ribbon
Fold the top of the dress front down ¼ inch (6mm) and press fold in place, then fold over again ½ inch (12mm). Repeat for the back of the dress.
STEP 8: Sew
Stitch as close to the edge of the seam as possible to create a casing for the tie that will be threaded through.
STEP 9: Hem the pillowcase dress
Complete the hem by turning in ¼ inch and then ½ inch and sew a close to the edge of the turn up as possible.
STEP 10: (optional) Create the tie
Time to complete the tie for the neck. Use ribbon, which you can easily replace, if for someone in your family. Our pattern uses bias tape which you simply sew in half along the length, then along the fold so it is nice and firm. You can also create a tie using the same or a contrasting plain fabric. To create a fabric tie cut a length 2.5 inches wide and the same length as the bias tape tie. Fold ¼ inch on either side of the length and press into place. Then fold the fabric tie in half lengthways, and tucking in the ends neatly, stitch across the end and along length, then tuck in the other end neatly and stitch across it, back tacking at start and finish of the tie.
STEP 11: Thread and tie the tie
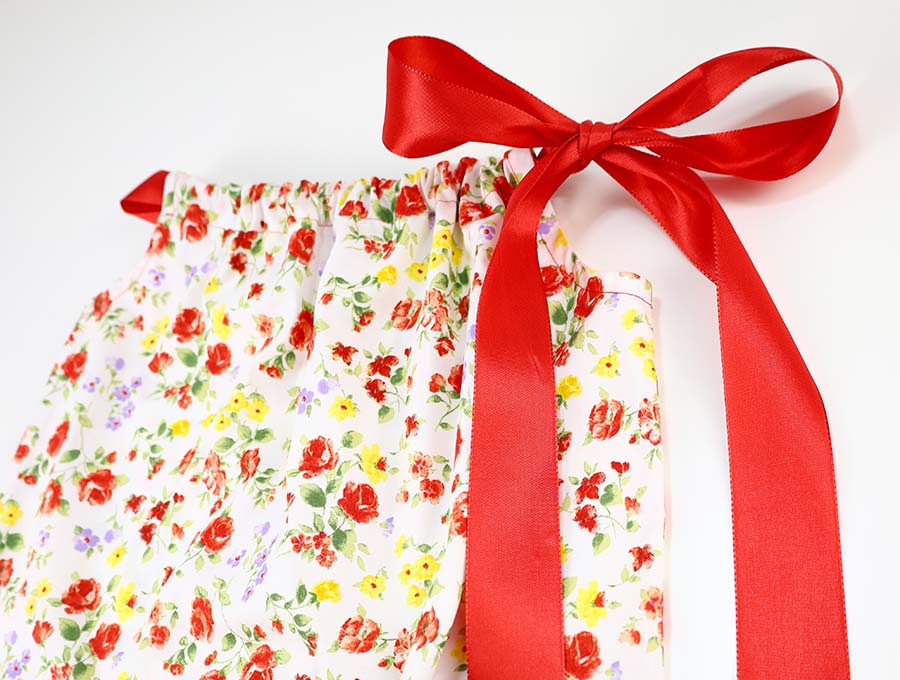
Thread the tie through the front and back of the dress using a large safety pin. Position the tie, then stitch vertically, back tacking at start and finish at the center of the front to hold the tie in place inside the casing. Tie the ends into a bow, and the dress is all done, unless you want to add some iron on sparkles or a couple of buttons down the front.
That’s it your pillowcase dress is ready!
PILLOWCASE DRESS OPTIONS:
- POCKETS: Add 1 or 2 pockets
- DOUBLE BOWS on the shoulders
- BAND: Add a band of fabric for an extra pop of color
- APPLIQUE OR LACE: Adding lace down the front of the dress is also an option, or an applique.
- EMBROIDERY: Other ideas for making the dress pretty is to add some machine embroidery or hand embroidery to the front bodice, or on the left- or right-hand side a couple of inches up from the front hem.
- IRON ON DESIGNS: If you want to add on the iron on sparkle designs, apply according to the manufacturer’s directions.
Pillowcase dress FAQs:
Q: How do I make double bows on the shoulders?
A: Cut your length of ribbon or fabric for the tie 1 ½ times longer than if you were doing one bow. Cut it in half, then follow step 10 to make two fabric ties. Obtain the central point of the front of the dress by folding in half and mark with an erasable fabric pen. Thread one length through the front make sure the ends are equidistant from the ends of the casing and vertically stitch into place, back tacking at start and finish, to ensure the tie does not pull out. Repeat with the back. Now tie two bows – one on each shoulder.
Q How do I add an extra border to the dress?
A: You can either cut your fabric lengths shorter and add on the extra piece to each side, using a serger (overlocker), pinking shears or a French seam, before seaming the sides of the dress. Then hem as usual.
The other option for adding a band to the dress is to stitch the contrasting band to the base of the dress by placing the wrong side of the dress to the right side of band and stitching to the base of both rectangles. Then after seaming the sides, when it is time to do the hem, fold the extra fabric upwards, pressing along the seam, and pinning into place at the correct length you desire the finished length to be, then fold ¼ inch of the fabric over and press, then attach to the right side of the dress by top stitching – this creates a firm hem area for the dress. Finish with a row of top stitching at the base of the band.
Q Can I add pockets?
A: By all means add a single, or double pocket on either side of the dress, or one higher up on the dress bodice on the left, or centrally placed on the bodice. Cut the pocket size you think will suit the size of dress, and finish the pocket top by folding over a ¼ inch then folding again a ½ inch seam, and stitch. Then press the ¼ inch seams for the sides and base, position on the dress and pin into place. Top stitch into place as close to the edge of the pocket as possible, back tacking at start and finish.
This project is a perfect one for using up those odd cute pieces of fabric you probably have been hoarding wondering when they would come in useful.
If you liked this pillowcase dress then subscribe for loads more easy and useful sewing ideas. If you made a pillowcase dress and donated it to a charity then please send us a photo!
Do you like this? Pin for later:
Wanna be friends? Click HERE and follow me on Pinterest
RELATED: