
Zipper pencil pouch bookmark // Pen and Pencil Pouch bookmark Sewing Pattern [VIDEO]
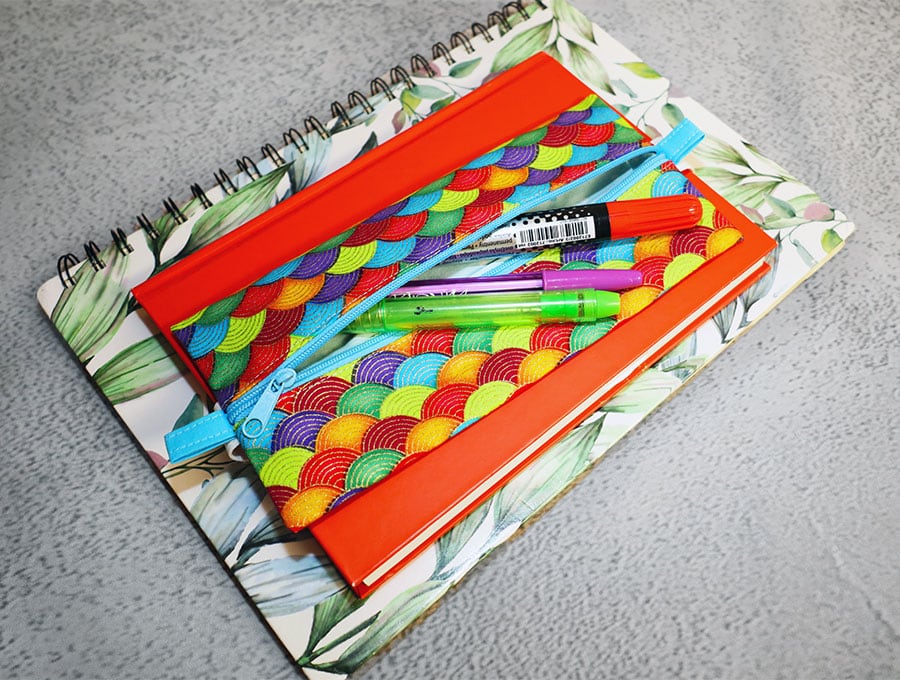
I often hop into bed then decide to write a few lines in my journal, only to have to hop out again to grab a pen! In this tutorial, we’ll sew a simple fabric pencil pouch that straps right onto the cover of your journal using elastic to keep your favourite pen or pencil within reach. Whether you’re a beginner or a seasoned sewist, you’ll have this finished in under an hour.
Some details to note before you start:
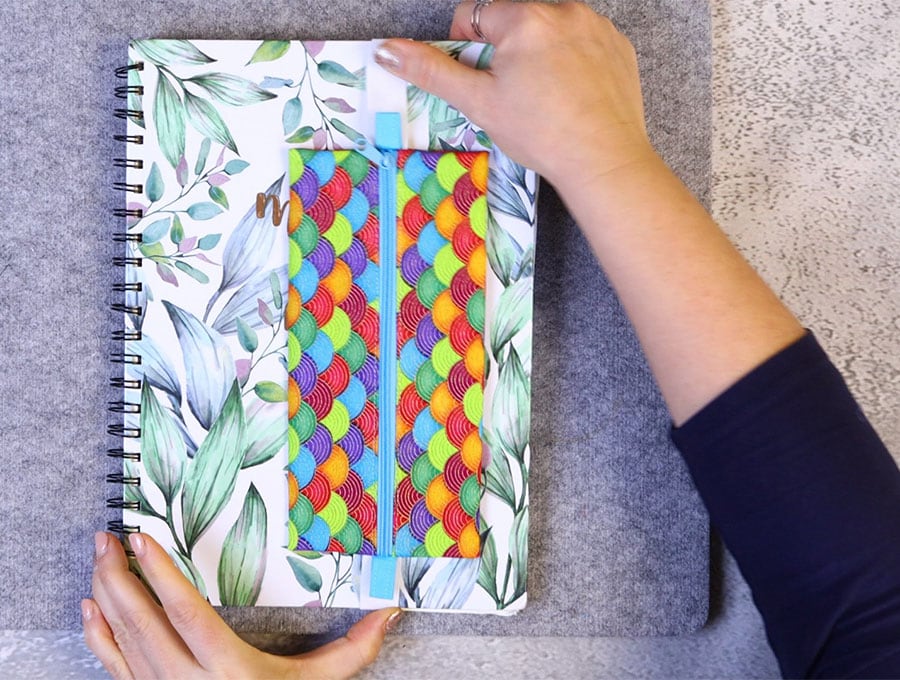
- The finished size is approximately 4 x 8 inches (10.12 cm x 20.3 cm)
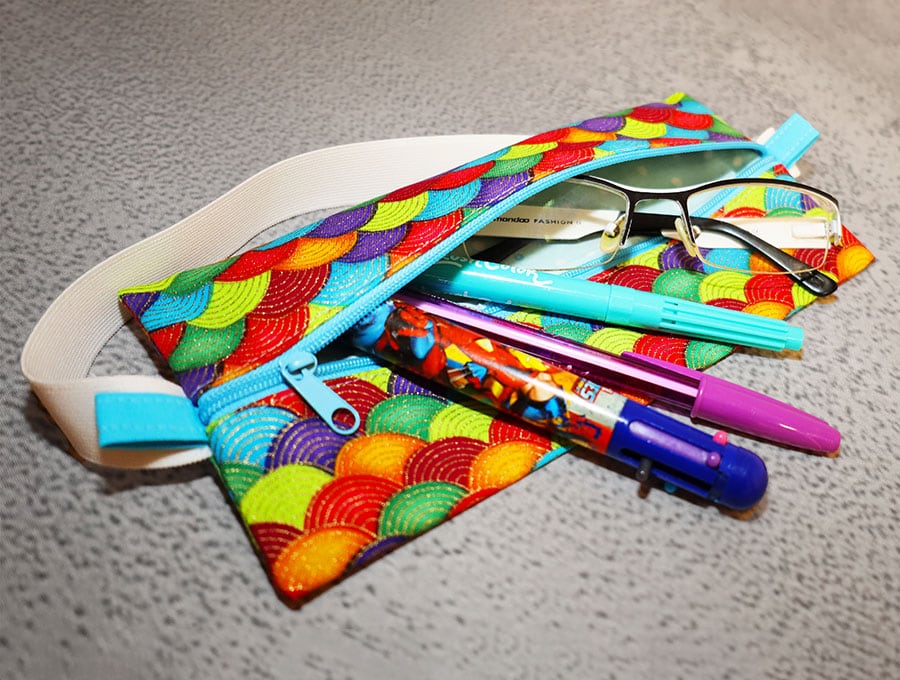
- It features a zipper pouch in which to store a pen, pencil, and earbuds, right there attached to your notebook.
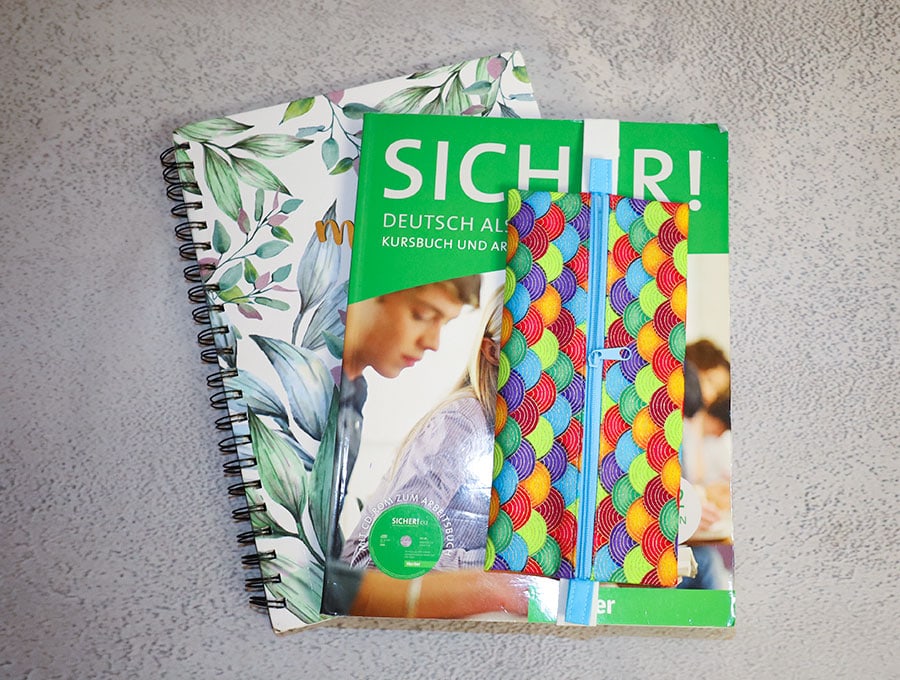
- It’s perfect to use with bullet journals.
- Fits notebooks and journals from an A5 size (5.83 x 8.27 inches or 14.8 x 21 cm) to a large A4/letter-sized notebook – all you need to adjust is the size of the elastic
If you have a few minutes and some left over fabric, elastic, a zipper and some interfacing then you can create a gift worth remembering when you make our Zippered Pencil Pouch bookmark. It keeps your place in a journal and keeps a pencil or pen in the pouch, ready to use.
Below you will find my step by step written tutorial with VIDEO instructions for all the visual learners.
We occasionally link to goods offered by vendors to help the reader find relevant products. Some of the links may be affiliate meaning we earn a small commission if an item is purchased.
Table of Contents
- 1 How to make the zippered pencil pouch bookmark
- 2 Supplies and tools
- 3 How to Sew a Zipper Pencil Pouch Bookmark
- 3.1 Zipper pouch bookmark VIDEO TUTORIAL
- 3.2 INSTRUCTIONS:
- 3.3 STEP 1:
- 3.4 STEP 2:
- 3.5 STEP 3:
- 3.6 STEP 4:
- 3.7 STEP 5:
- 3.8 STEP 6:
- 3.9 STEP 7:
- 3.10 STEP 8:
- 3.11 STEP 9:
- 3.12 STEP 10:
- 3.13 STEP 11:
- 3.14 STEP 12:
- 3.15 STEP 13:
- 3.16 STEP 14: Optional – only if you are using tabs
- 3.17 STEP 15:
- 3.18 STEP 16: Optional – tab placement
- 3.19 STEP 17:
- 3.20 STEP 18:
- 3.21 STEP 19:
- 3.22 STEP 20:
- 3.23 STEP 21:
- 3.24 STEP 22:
- 3.25 STEP 23:
- 3.26 STEP 24:
- 3.27 STEP 25:
- 3.28 STEP 26:
- 3.29 STEP 27:
How to make the zippered pencil pouch bookmark
Supplies and tools
- fabric – woven cotton (one main, one lining), medium weight home decor fabric for the outer
- fusible interfacing
- matching thread
- scissors (or rotary cutter and a cutting mat)
- ruler or measuring tape
- iron and ironing board
- sewing clips or pins
DOWNLOAD: Zipper pencil pouch bookmark pattern [Free pdf file]
or get the PATTERN + printable INSTRUCTIONS on Etsy
Follow us for free patterns & tutorials! [easy-profiles]
How to Sew a Zipper Pencil Pouch Bookmark
Watch the diy zipper pouch bookmark video first and then follow the written step by step instructions below.
Please enjoy and don’t forget to Like and SUBSCRIBE over on YouTube to be kept up to date with new videos as they come out.
Zipper pouch bookmark VIDEO TUTORIAL
INSTRUCTIONS:
STEP 1:
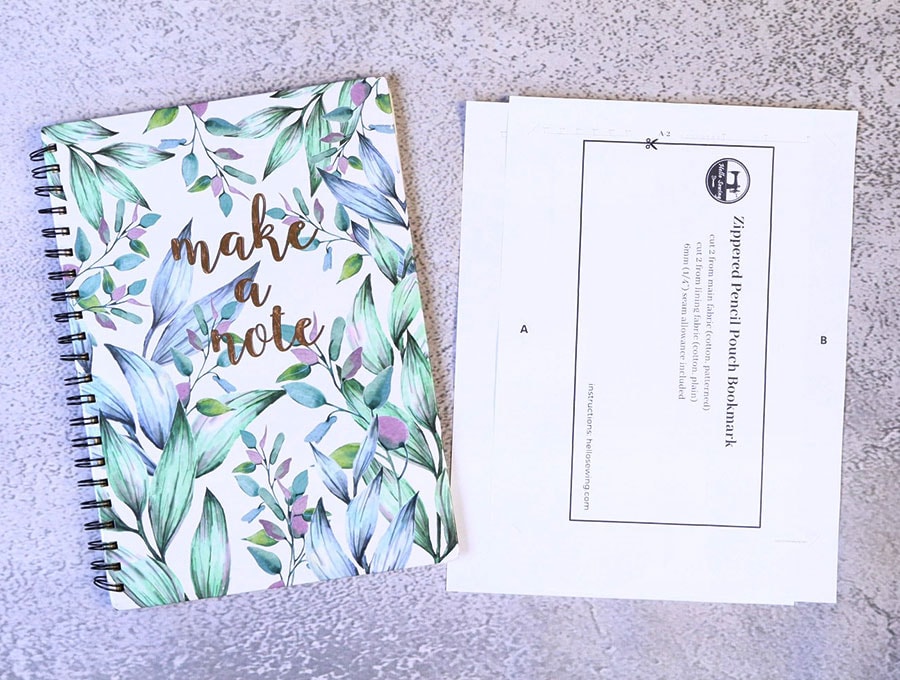
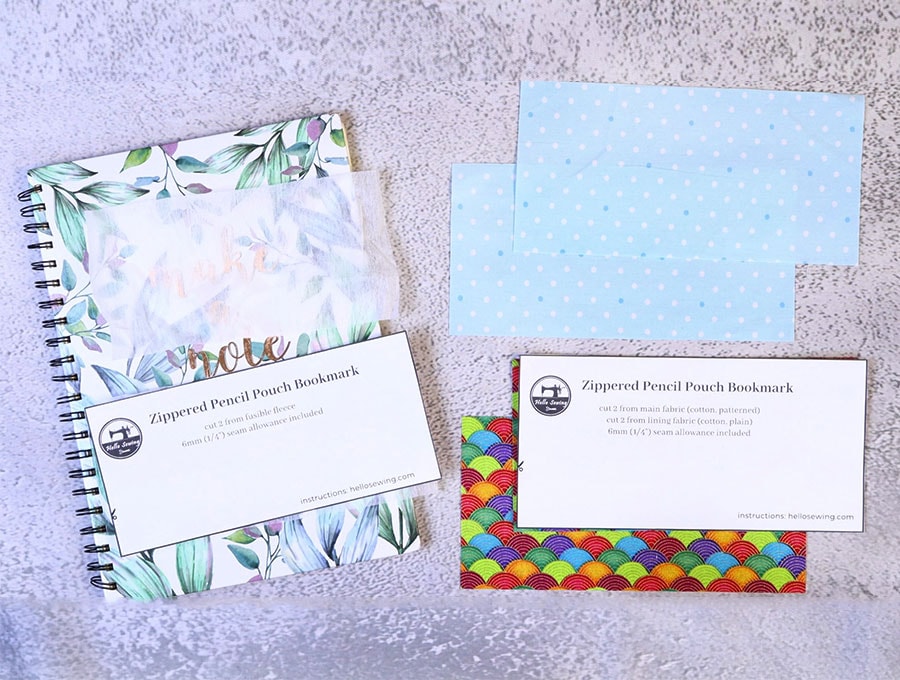
Print out the paper pattern from HelloSewing.com for the Zipper Pencil Pouch Bookmark.
There are 2 rectangular pieces. Cut them out. Alternatively you can cut using the measurements below:
You will need:
- 2 pieces of the main fabric 9 x 4.5 inches (23 x 11.5 cm)
- 2 pieces of the lining 9 x 4.5 inches (23 x 11.5 cm)
- 2 pieces of fusible interfacing 8.5 x 4 inches (21.5 x 10 cm)
- 2 tabs (optional) of 4 ¾ x 1 ½ inches (12 x 4.5 cm)
STEP 2:
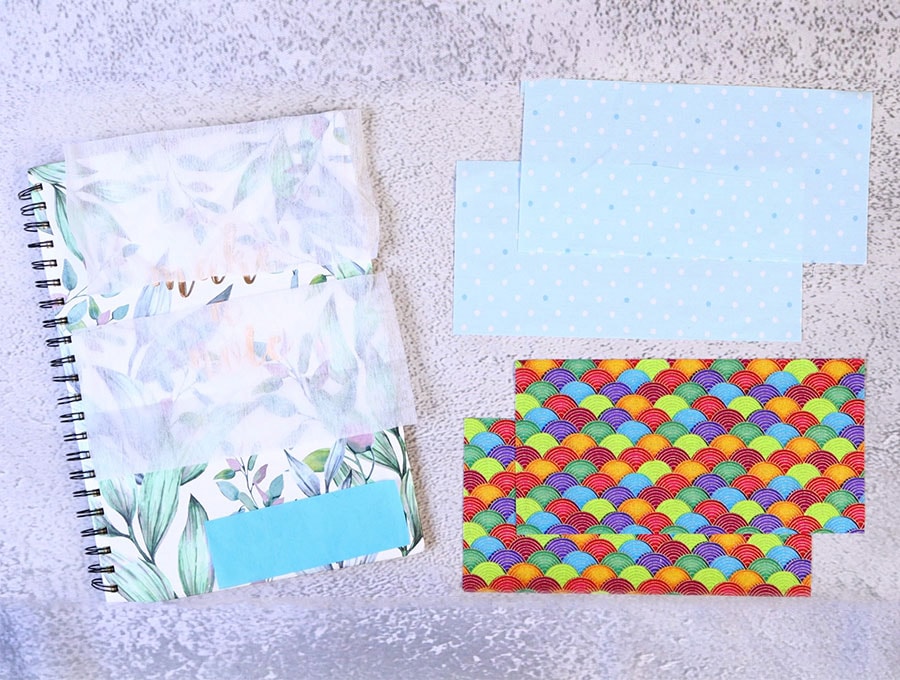
Choose your fabrics and cut the pattern pieces.
STEP 3:
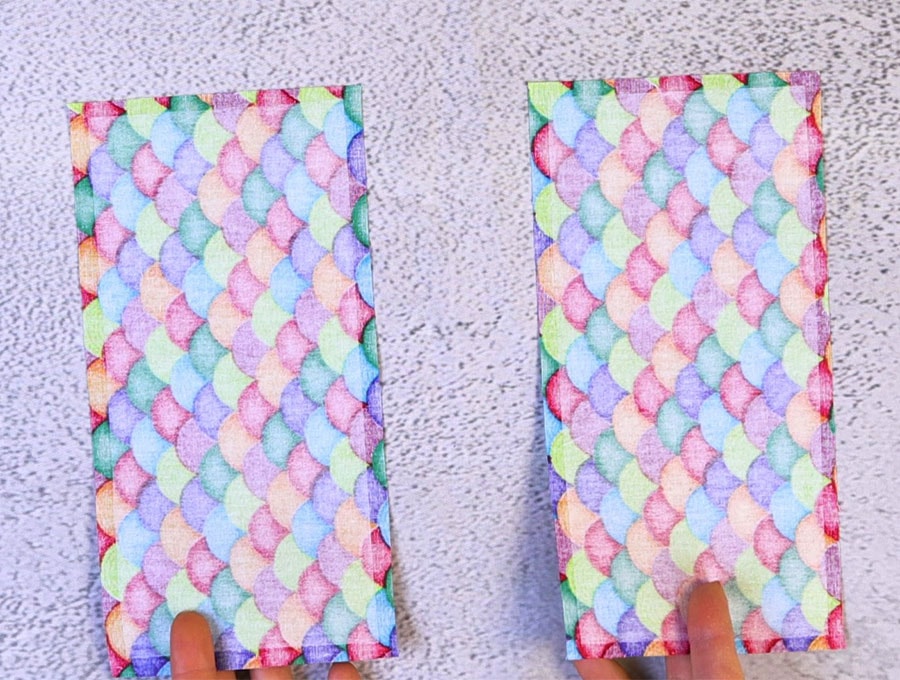
Place the two pieces of the main fabric wrong side up on your worktop.
Over each one place a piece of the fusible interfacing, sticky side down, then turn over carefully and iron on the right side of the main fabric to fuse the interfacing.
STEP 4:
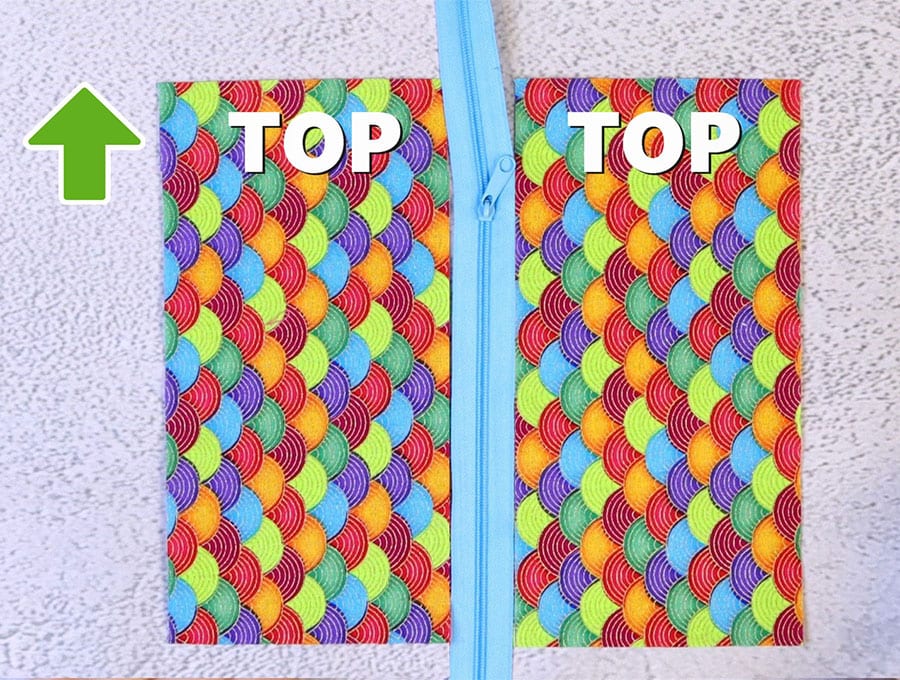
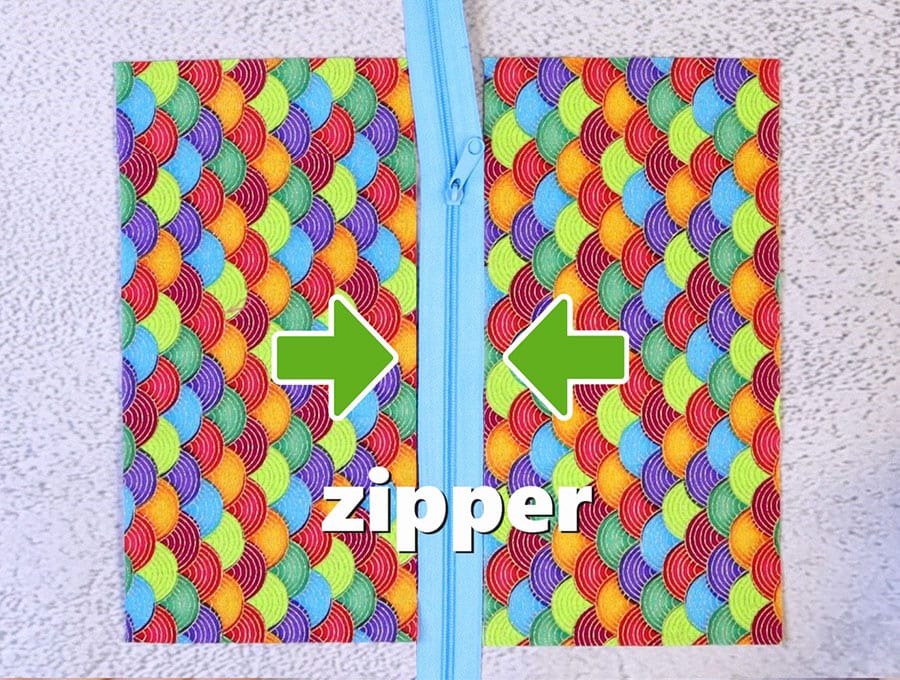
If using directional fabric rotate the pieces so the motifs are facing the right way and lay them with the short sides facing the top and bottom of the worktop, right side up, then place the zipper between the pieces, right side of the zipper upwards.
STEP 5:
Cut the zipper to 1 inch (2.5 cm) longer than the main fabrics and pull the slider to beyond the edge of the fabrics at the top so it won’t get in your way when sewing.
STEP 6:
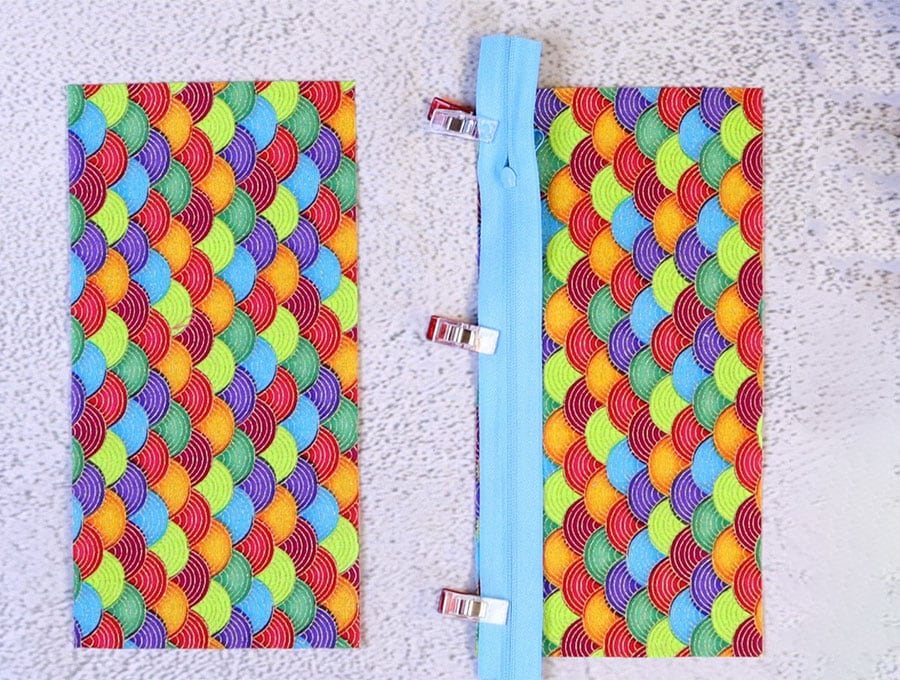
Flip the zipper over to the right and position it on the left edge of the right-hand side piece of fabric, then over it lay the lining, right side down. Pin in position.
STEP 7:
Stitch, using a zipper foot close to the teeth of the zipper, backtacking at the start and finish,
STEP 8:
Open out the fabric and fold the lining behind the main fabric to the right sides are outside, and the zipper is exposed. Press along the portion where you stitched.
STEP 9:
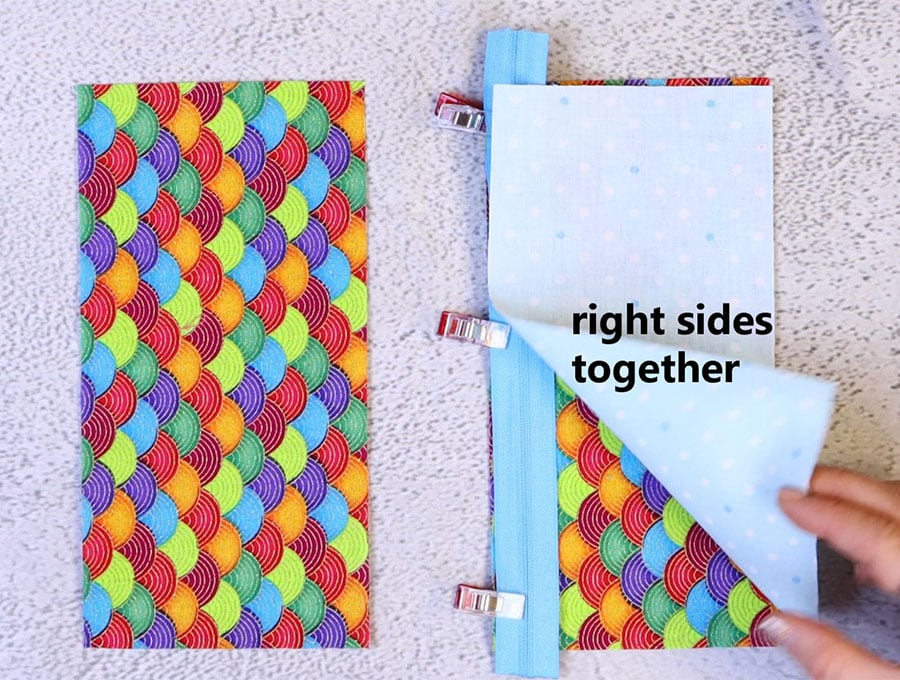
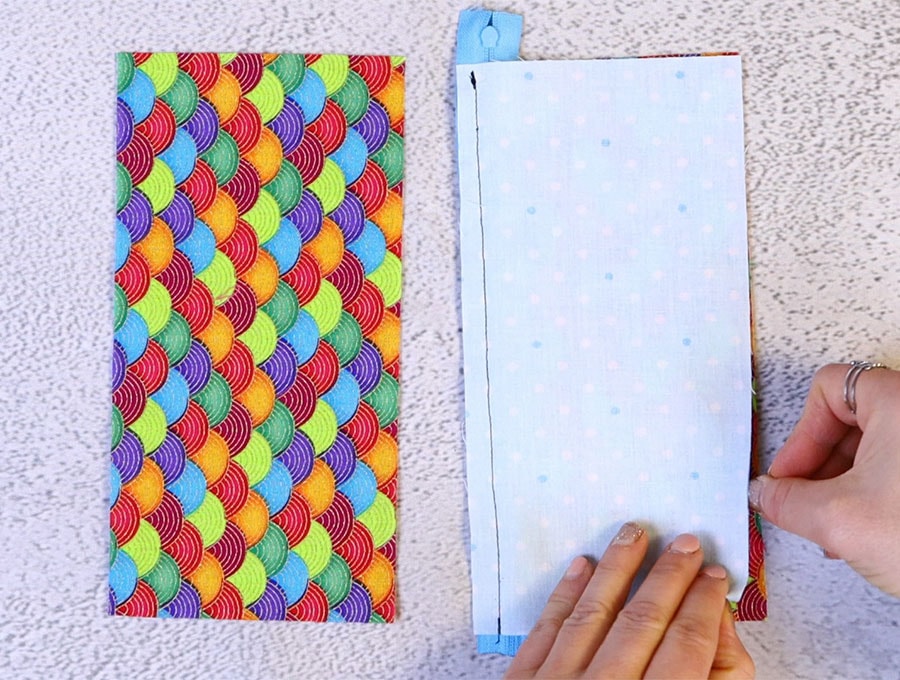
Lay the other unstitched piece main fabric down on your worktop right-side up, then over it place the other piece of main fabric with zipper attached right sides facing. The zipper will be facing the right. Over this place the piece of lining so both fabric pieces are in line with the edge of the zipper. Pin or clip in position.
STEP 10:
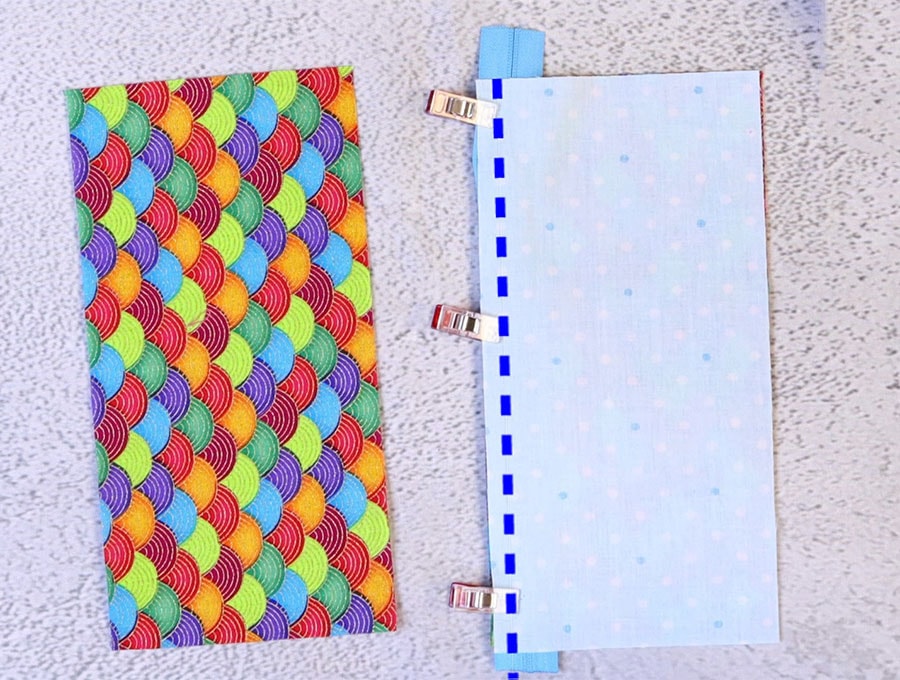
Using the zipper foot stitch close to the zipper teeth.
STEP 11:
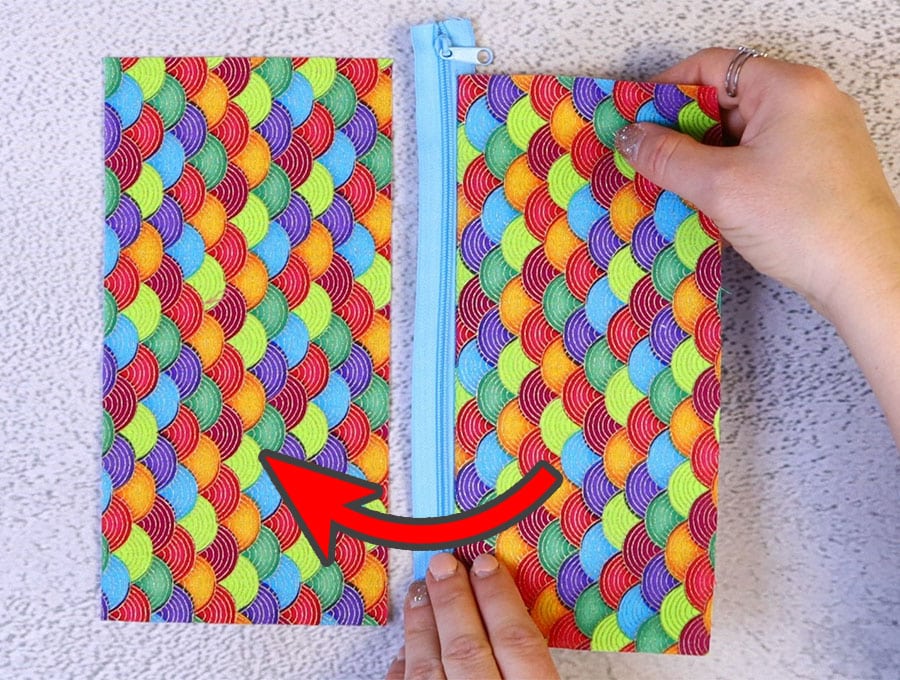
Open out so you have two lining sides on the back and the two main fabric pieces on the front.
STEP 12:
Give the whole item a press ensuring the fabric is pulled away from the zipper teeth and lied flat.
STEP 13:
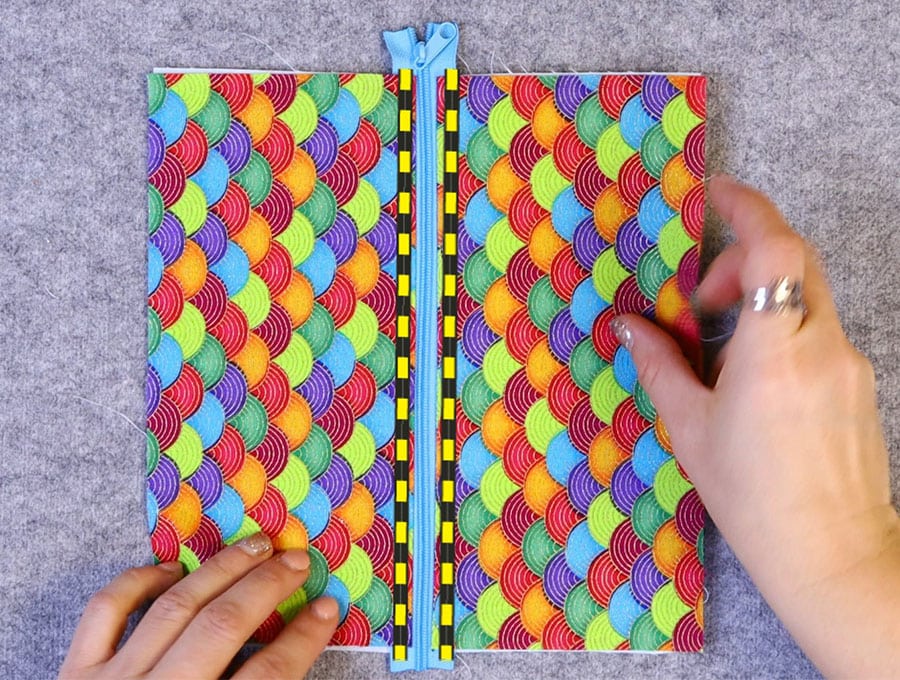
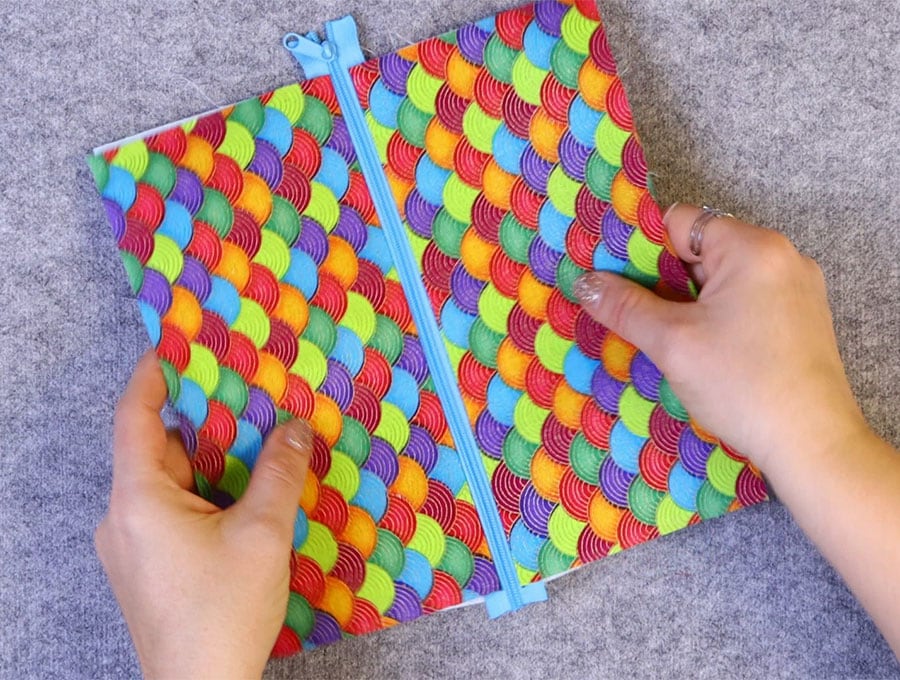
Topstitch on either side of the zipper, sewing across the open end at the bottom before proceeding up the other side. At the top slide the zipper pull down towards the middle of the fabric and stitch across the top.
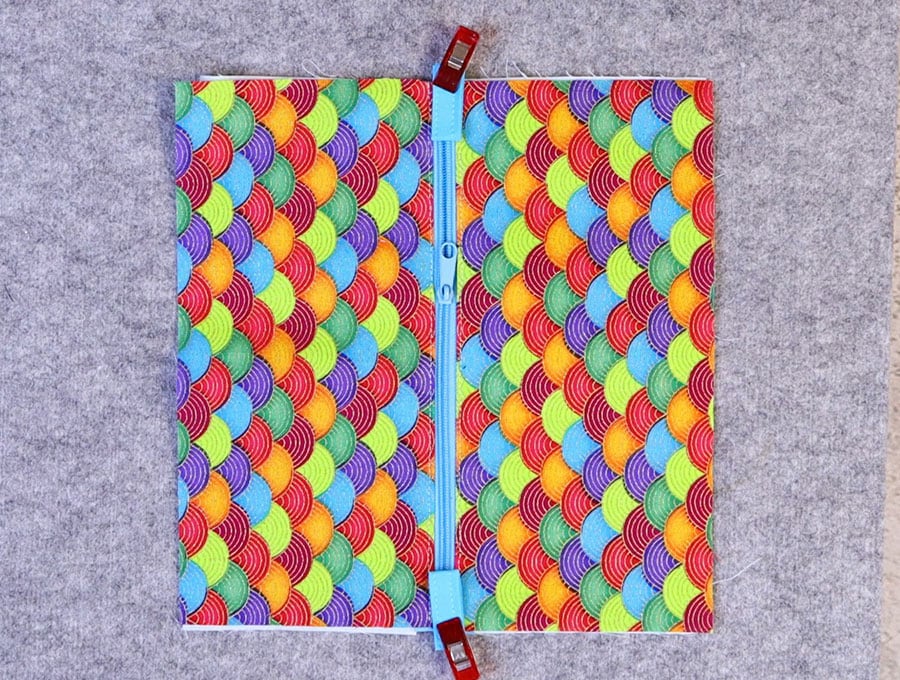
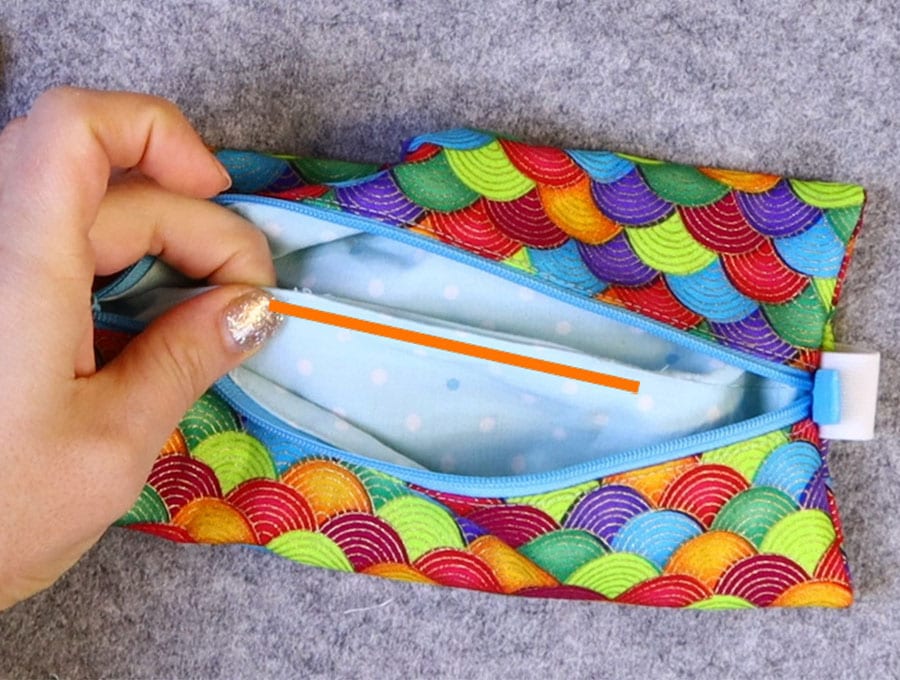
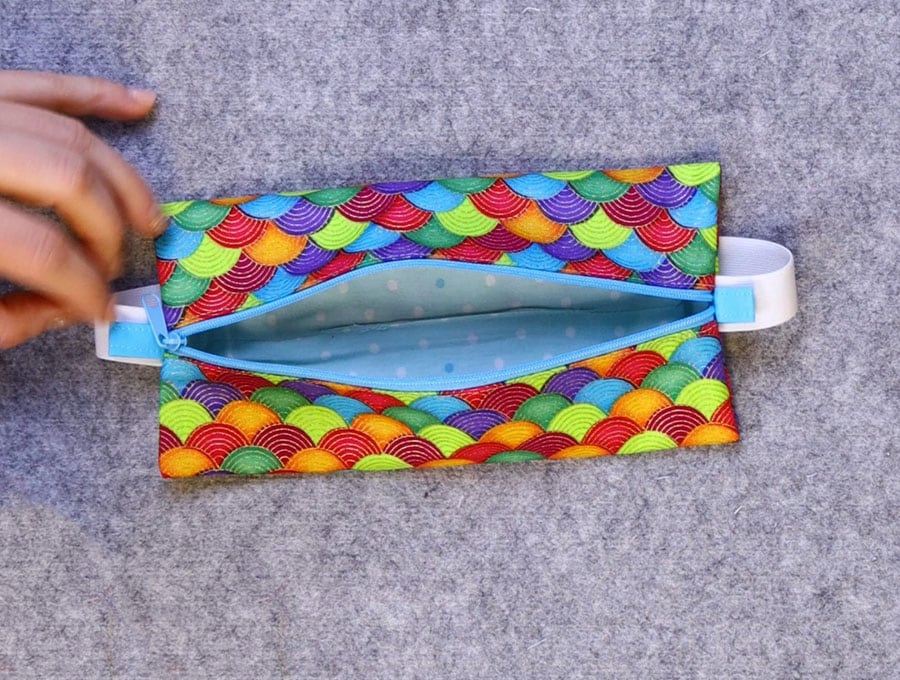
Here is how it looks when finished

STEP 14: Optional – only if you are using tabs
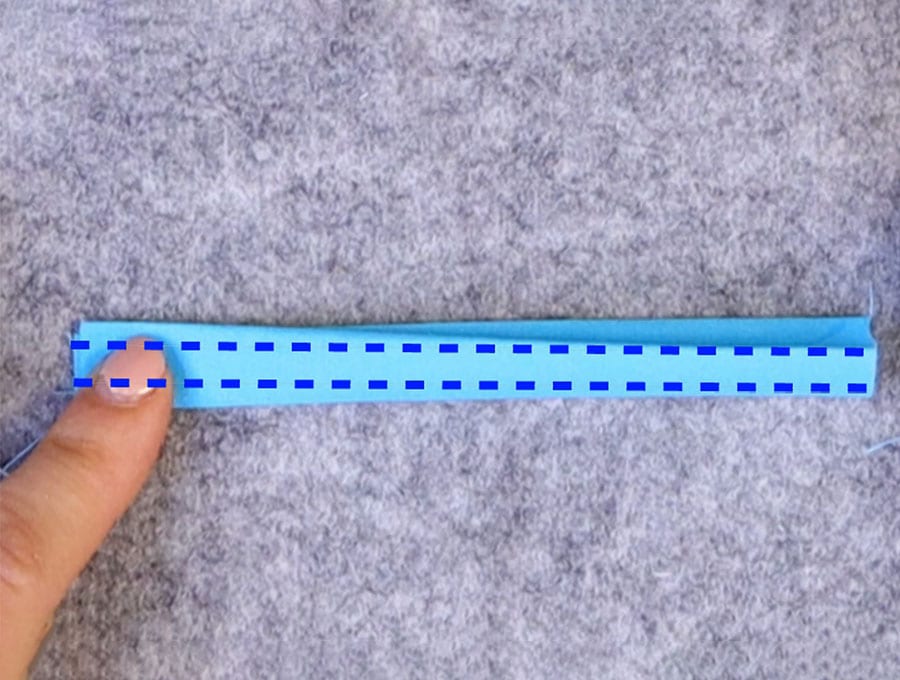
Sew your tabs by folding along the length of each, wrong side facing wrong side and pressing in the center fold.
Open out and with fabric right side down turn each side in towards the pressed center fold and press. Lastly turn the folded edges to meet each other and press before stitching on each side as close to the edge as possible.
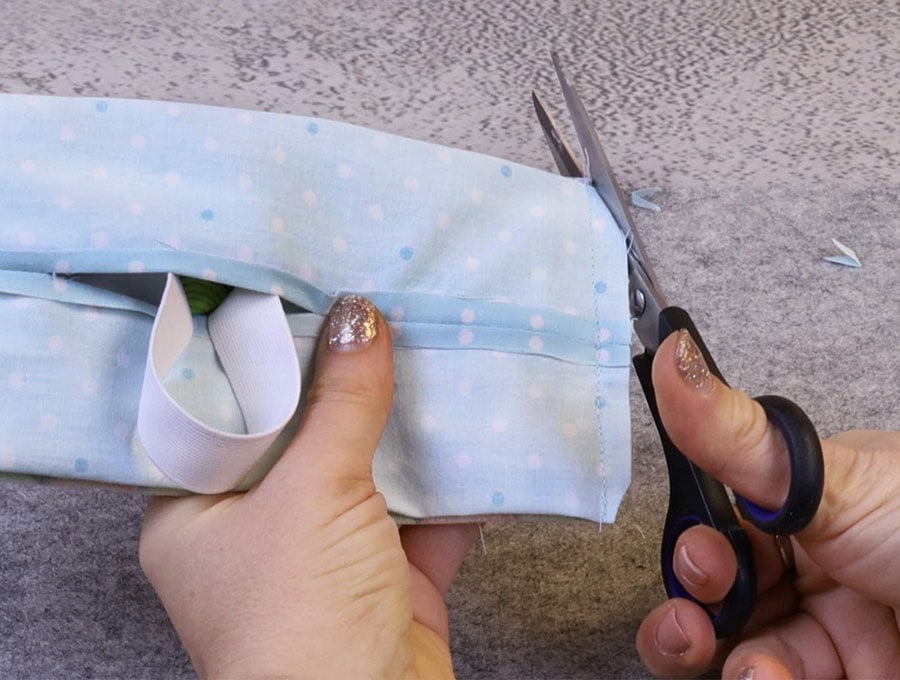
STEP 15:
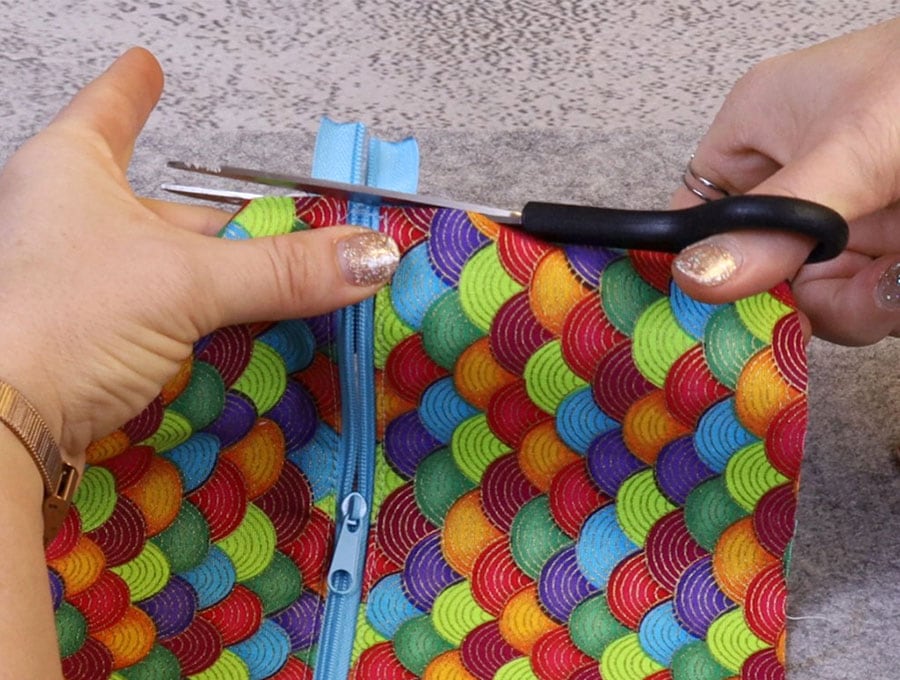
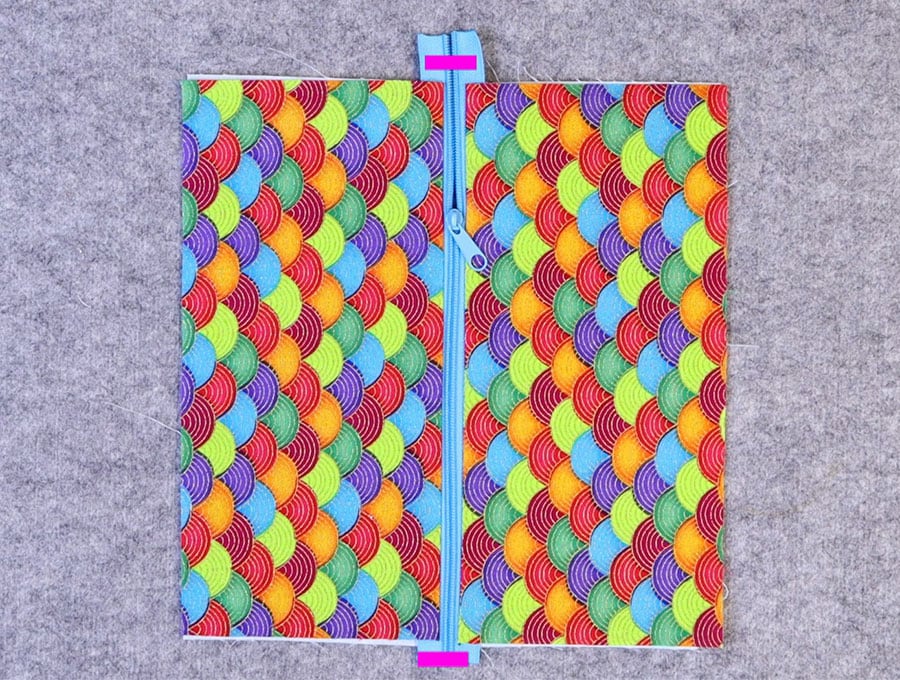
Take the main fabric pieces with the lining and zipper and trim the zipper ends in line with the fabric and seal the edges of the zipper with a quick pass of a lighter on each end.
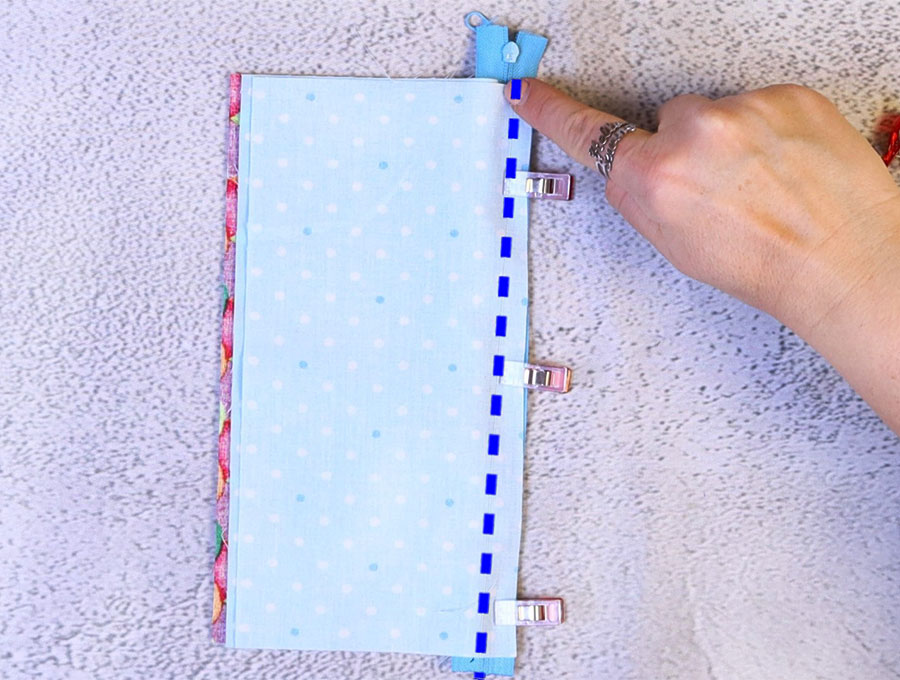
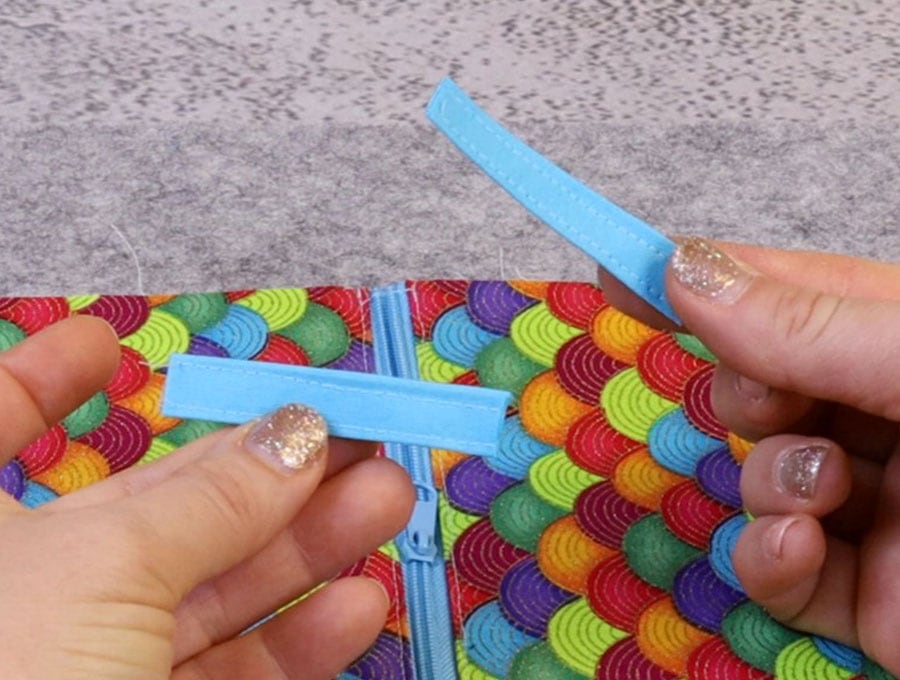
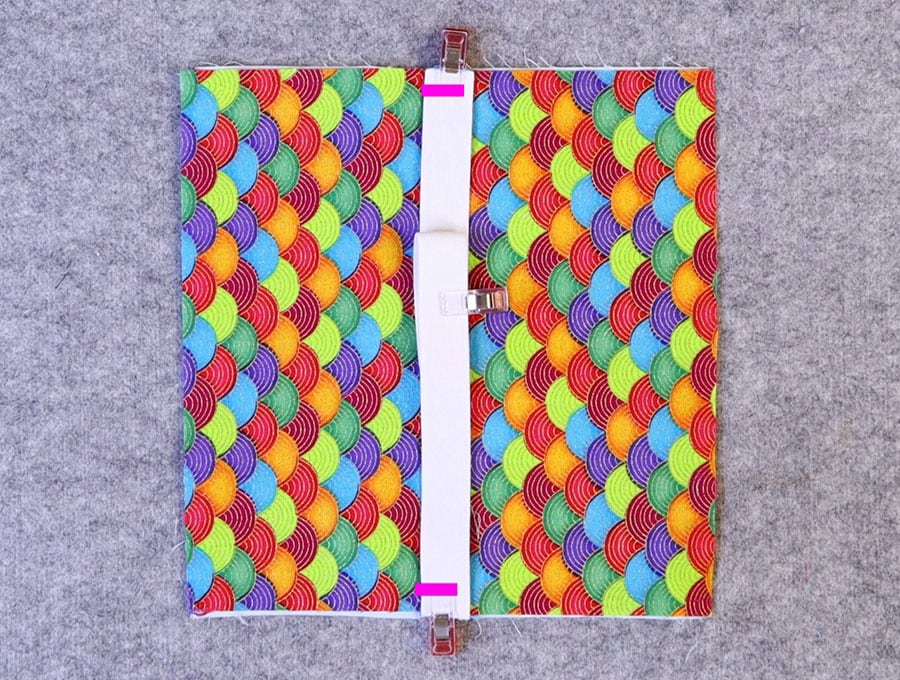
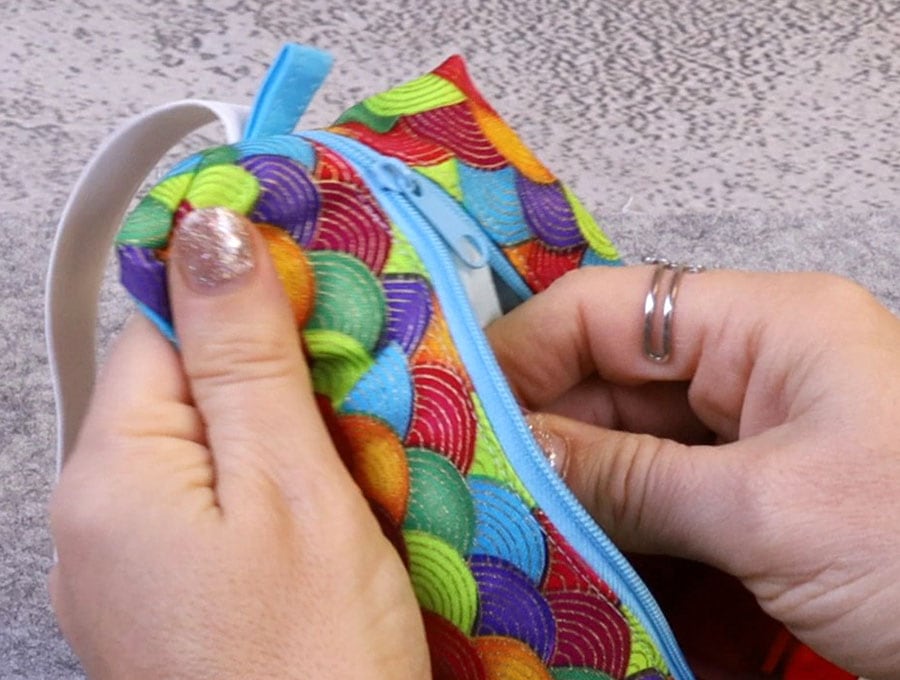
STEP 16: Optional – tab placement
To place the tab fold and align the raw edges with the edge of the zipper, at each end of the item, fold facing towards the middle of the zipper and pin or clip in place.
STEP 17:
Grab the elastic you need. For a large notebook you would need a piece of elastic 11 ¾ inches (30 cm) long.
STEP 18:

Align the ends of the elastic over the raw edges of the tabs and pin or clip in position. The elastic will be lying on top of the main fabric which is right side up.
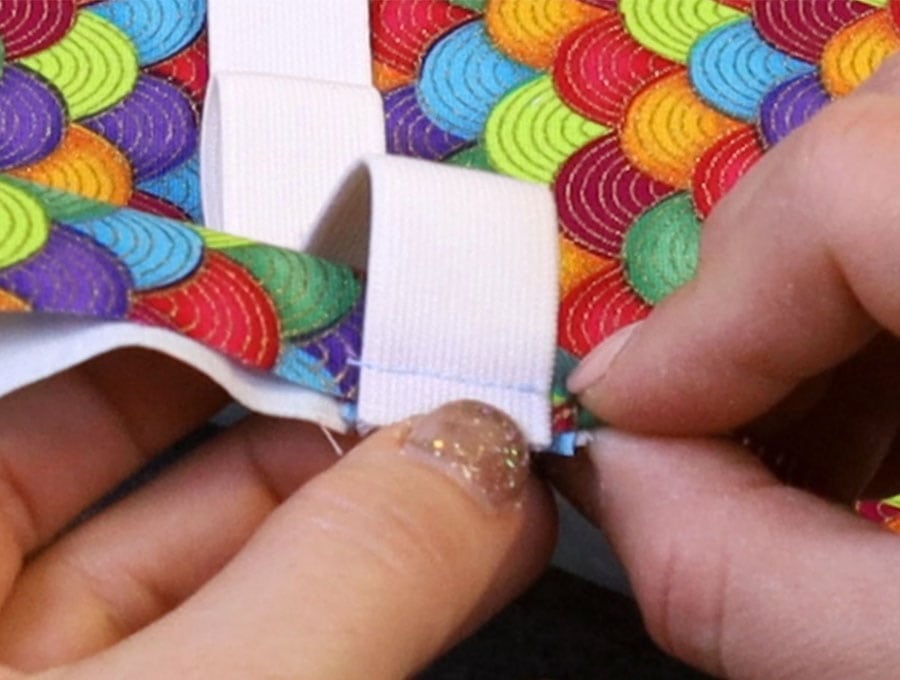
STEP 19:
Stitch along the ends of the elastic and tabs, backtacking to ensure they are firmly held in place.
STEP 20:
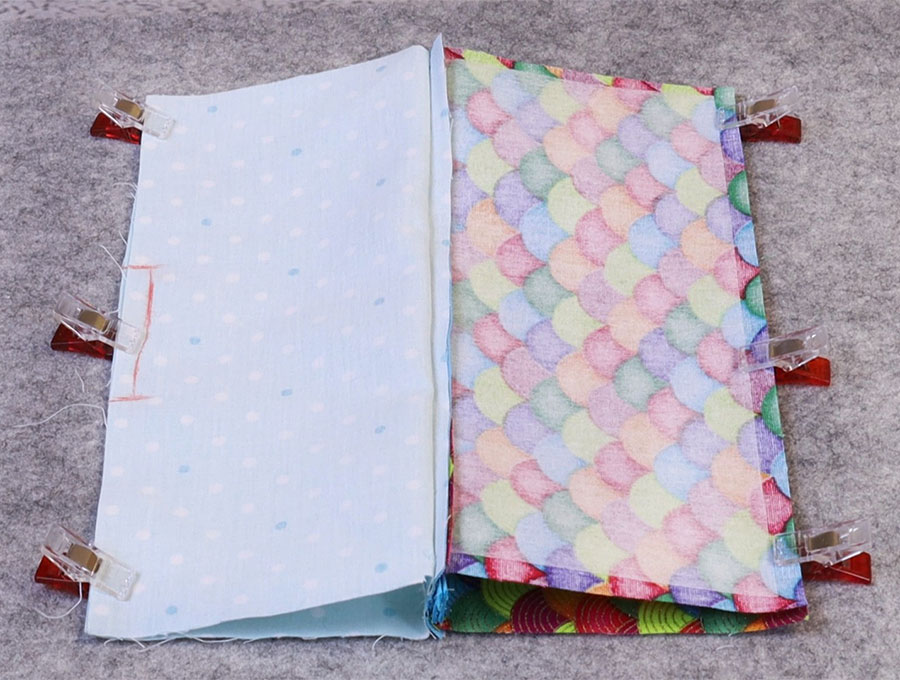
Fold the two right sides of the main fabric so they face each other and clip, then clip together the two pieces of lining .
STEP 21:
Mark a gap in the middle of the lining of around 3 inches (7.5 cm).
STEP 22:
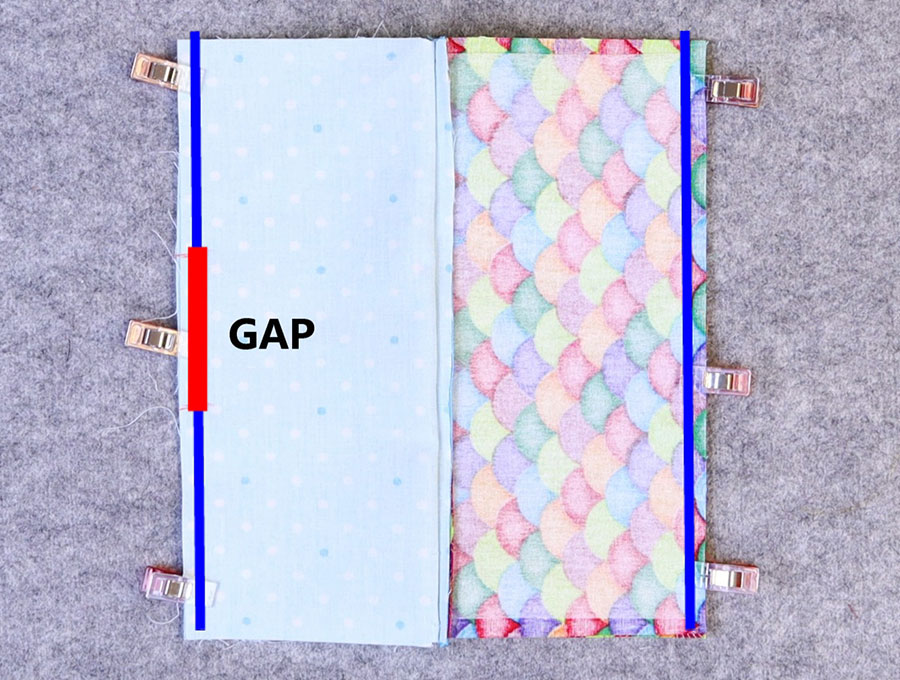
Stitch around the edge of the zipper pouch leaving a seam allowance of ¼ of an inch (6 mm) and backtacking on either side of the gap.
STEP 23:
Fold the raw edges of the gap back in line with the seam and finger press.
STEP 24:
Flatten the seam where the two main pieces join and the seam where the two lining piece join, then pin each seam in line with the middle of the ends of the zipper.

STEP 25:
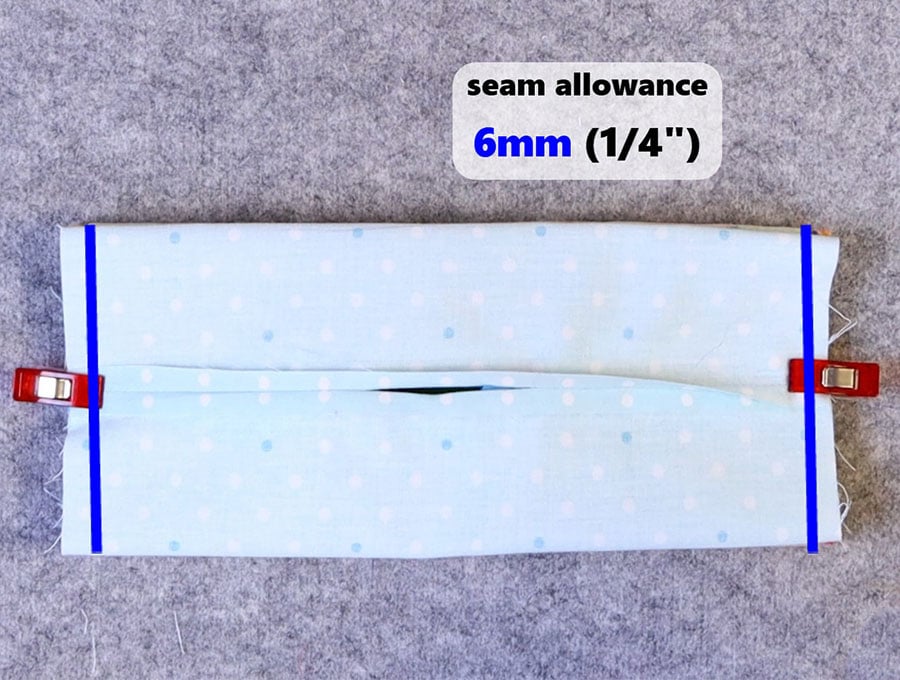
Make sure the zipper is still open so you can turn the pouch the right way out before stitching along the two ends, backtacking at the start and finish using a ¼ inch (6 mm) seam allowance.
STEP 26:
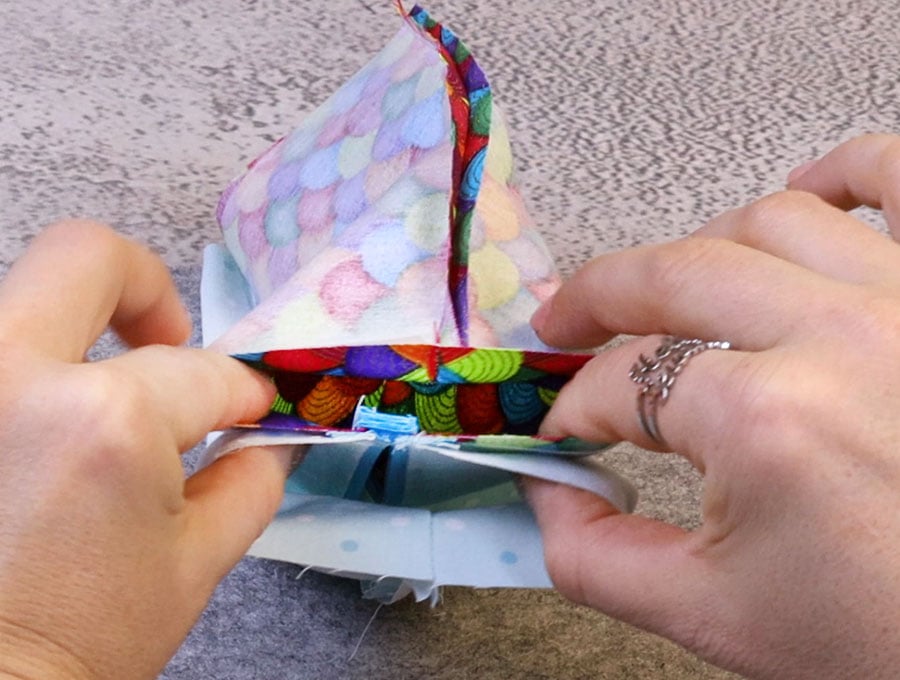
Trim off the four corners to reduce bulk then turn the whole pouch the right way our using a turning tool to press out the corners neatly. Push out the corners using a blunt object.
Flip the elastic so it sits behind the pouch.
STEP 27:
All that remains is to hand-stitch or machine-stich the gap in the lining to close it, then give the item a final press.
Ta-da. The zipper pouch is ready.
Journals are a popular gift, but when you combine the gift of a journal with the zipper pencil pouch bookmark, together with a pen and pencil, personalized to the interests of the recipient, it makes it so much more special. Like and subscribe to HelloSewing.com for more practical projects that don’t take long and won’t cost you a fortune. In fact, you’ll find almost everything you need in your sewing stash, and that is what we are all about – living sustainably.
Do you like this? Pin for later:
Wanna be friends? Click HERE and follow me on Pinterest
RELATED: