
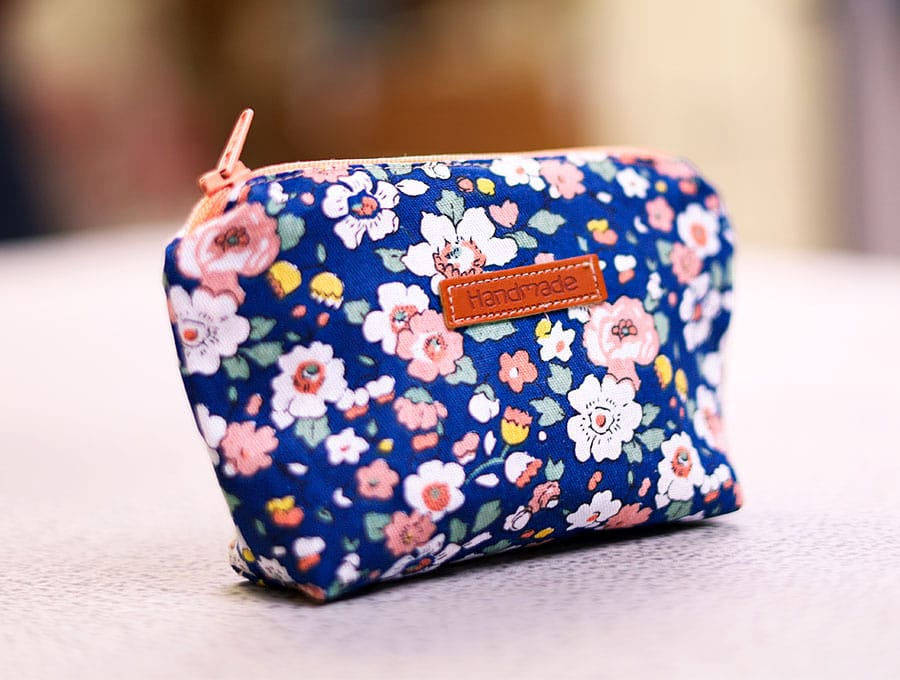
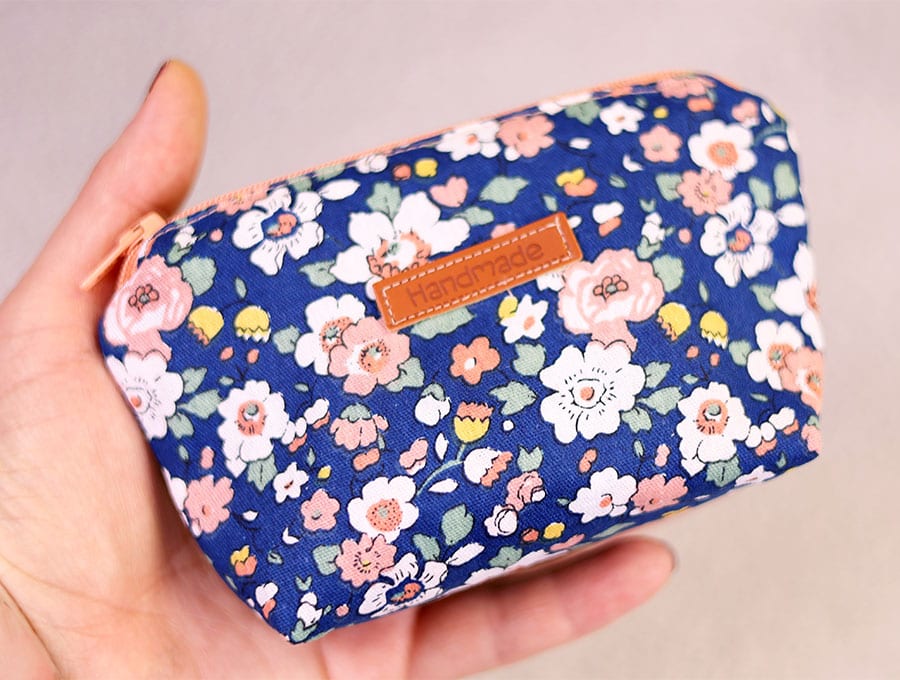
DIY Mini Zipper Pouch
What can you do with 10 spare minutes, two cute scraps of fabric and a small zipper? Create a mini zipper pouch that you can use to store small items so you can find them easily in your desk drawer at work or at home – think small sewing supplies, a quick fix make-up stash, pills or any one of a dozen things you need to keep handy. This mini zipper pouch has dozens of different uses.
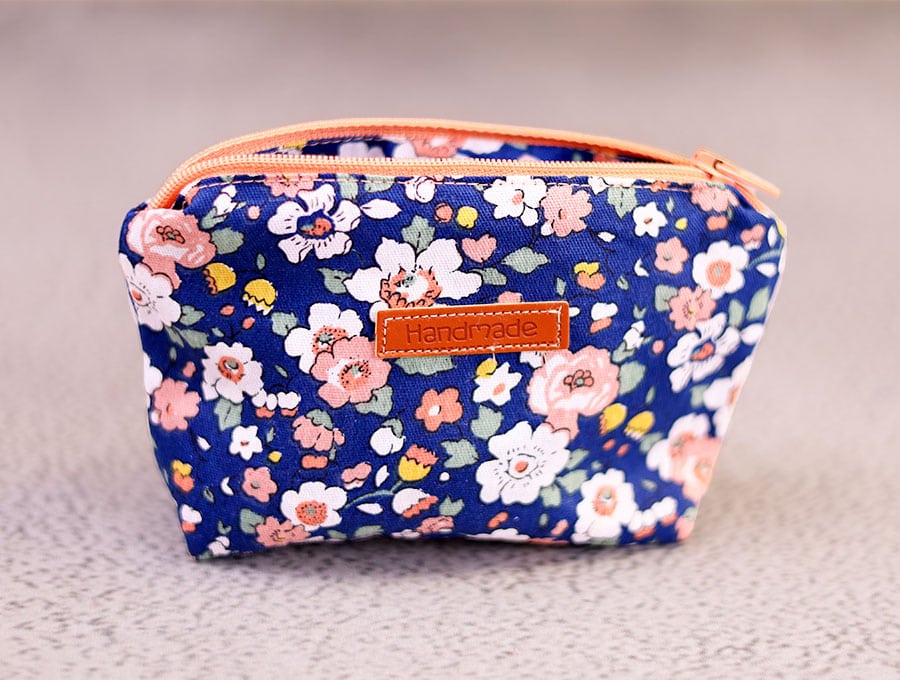
It’s quick, it is easy and is perfect little memory keepsake you can make for a whole family.
Below you will find my step by step written tutorial with VIDEO instructions for all the visual learners.
We occasionally link to goods offered by vendors to help the reader find relevant products. Some of the links may be affiliate meaning we earn a small commission if an item is purchased.
Table of Contents
How to make the Mini Zipper Pouch
Supplies and tools
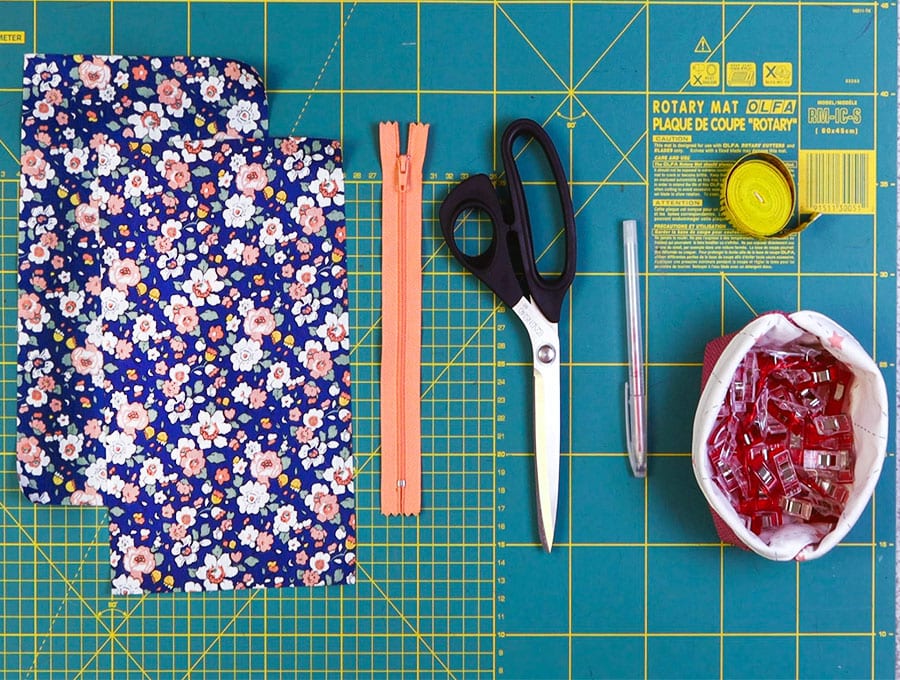
- 2 pieces of fabric for body of pouch 6 ¼ x 10 inches (16 x 25 cm) – one can be print for the outer and plain for the lining – or go for a print for both.
- 1 zipper of 7 inches (18 cm)
- matching thread
- scissors (or rotary cutter and a cutting mat)
- ruler or measuring tape
- iron and ironing board
- sewing clips or pins
Follow us for free patterns & tutorials! [easy-profiles]
How to Sew a Mini Zipper Pouch
Watch the diy Mini Zipper Pouch video first and then follow the written step by step instructions below.
Please enjoy and don’t forget to Like and SUBSCRIBE over on YouTube to be kept up to date with new videos as they come out.
Mini Zipper Pouch VIDEO TUTORIAL
INSTRUCTIONS:
STEP 1:
Fold each piece of the main fabric in half so you have 2 folded pieces of 6 ¼ x 5 inches, with the fold to the left on your worktop, right sides of fabric facing each other.
STEP 2:
Place your zipper, right side up into the fold of one of the pieces, the zipper pull will extend beyond the edge of the fabric, and the zipper end metal pieces will extend beyond the fabric. Clip in place.
STEP 3:
Stitch down the side of the zipper using your zipper foot.
STEP 4:
Fold the fabric away from the zipper, so the right sides are on the outside, leaving the other half of the zipper exposed.
STEP 5:
Take the next folded piece of fabric and flip so the fold is to the right, then slip in the zipper and line up the edges with the first piece you stitched and clip in place.
STEP 6:
Fold the fabric so the right sides of outer and lining show and the zipper teeth are exposed. Press to ensure the seams are flat.
STEP 7:
Top stitch along each side of the zipper, as close to the teeth as possible, still using the zipper foot. Backtack at the start and finish of each line of stitching.
STEP 8:
Open out the fabric so you have the lining to one side of the zipper and the main fabric to the other – right side to right side of fabric with the wrong side showing. Pull the zipper to halfway open.
STEP 9:
Clip or pin the edges, leaving a gap, through which to turn the pouch, on the lining side, of about 3 inches (7.5cm) in the middle of the 6 ¼ inch (16cm) side. Mark the gap with a fabric marking pen.
STEP 10:
Stitch around the whole pouch ¼ of an inch (6 mm) from the edge, backtacking on either side of the gap and across the zipper teeth. Remember the zipper sides will be lying on top of each other. To create a neat corner stitch to within ¼ inch (6 mm) of the corner, leave the needle down in the fabric, lift the pressure foot and swing the fabric 90 degrees, depress the pressure foot and carry on stitching.
STEP 11:
On one of the corners fold the fabric to line up the top and bottom seams and place a pin to hold the fabric in place. Measure 1 ¼ inches from the point of the corner and make a mark then draw a straight line across to create a triangle with the corner as the top point of the triangle, and the side of equal length. Repeat with the other three corners.
STEP 12:
Stitch across the 4 corners on the marked lines, backtacking at the start and finish.
STEP 13:
Trim the pointed ends of the tringles off ¼ inch (6 mm) from the stitch lines. Trim off the extra ends of the zipper that extend beyond the edges of the fabric.
STEP 14:
Finger-press the raw edges of the gap in line with the seam before pulling the pouch through the gap to turn it the right way out.
STEP 15:
Use a turning tool to help get the corners extended out neatly before turning in the edges of the gap and either machine or hand stitching the gap closed.
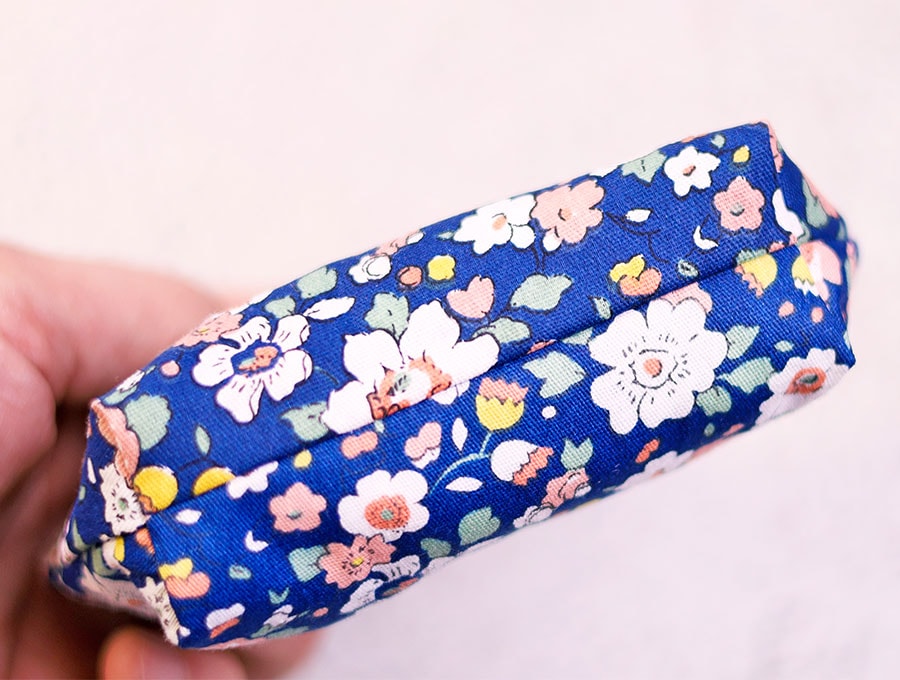
The bottom corners are boxed and the bottom looks like this:
STEP 16:
Tuck the lining inside the bag and smooth out, then give the mini zipper pouch a final press before filling it with whatever you need to store safely from USB sticks to coins, personal toiletries, make-up, coins or a few stationery items, even some luxury wrapped chocolates.
Like and subscribe for more easy tutorials like this one that help you turn those small bits of stashed fabric into useful little items you and your family could use. You can also make them as gifts or for markets.
Do you like this? Pin for later:
Wanna be friends? Click HERE and follow me on Pinterest
RELATED: