
Fold and Snap Shopping Bag // 2 in 1 Bag and pouch
Never Be Caught Without a Shopping Bag Again! Say goodbye to plastic bags and bulky totes cluttering your car and countertops. The fold and snap fabric shopping bag is the ultimate eco-friendly companion for every outing — compact, clever, and completely reusable.
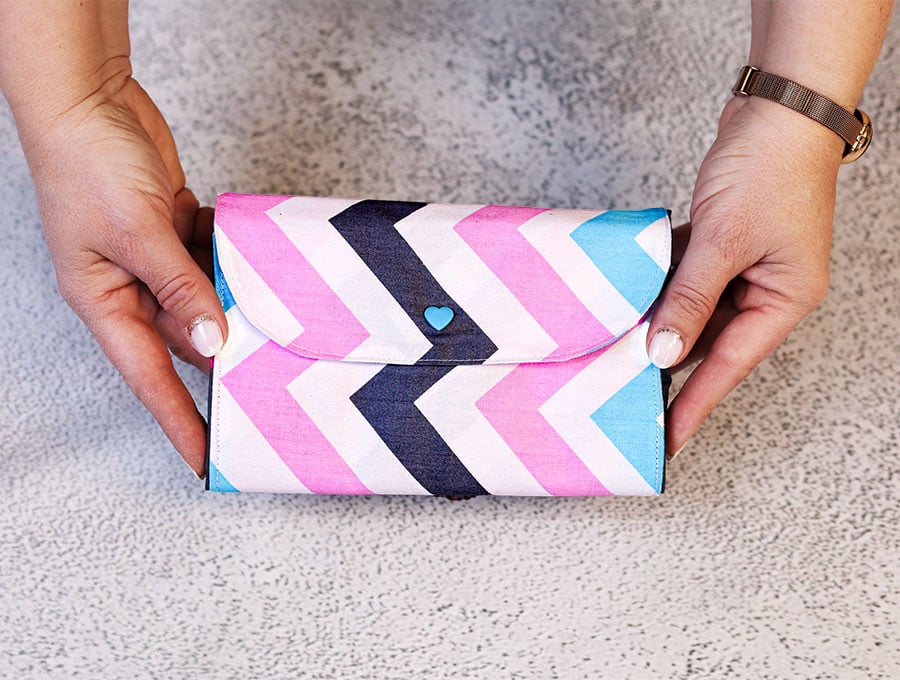
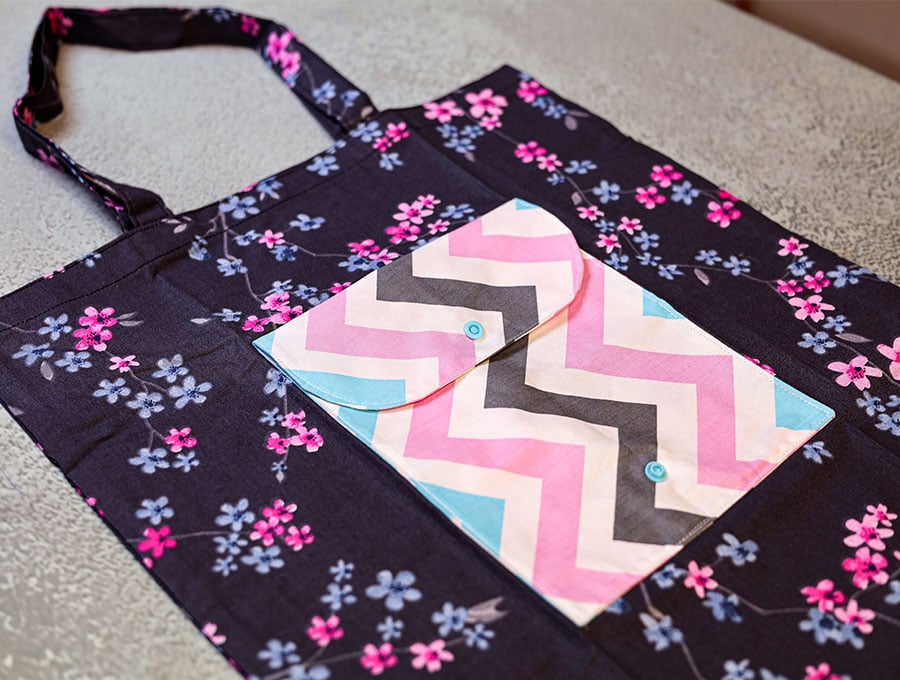
This ingenious little bag folds down into a neat, pocket-sized parcel and snaps shut, making it the perfect purse essential. Whether you’re making a quick grocery run or browsing the farmer’s market, it unfolds in seconds and is ready to carry your haul with ease.
Best of all, it’s wonderfully simple to sew. Grab the printable pattern below so you can whip one up in an afternoon using fabric scraps you already have on hand. Make a few as these make thoughtful, practical gifts too!
Below you will find my step by step written tutorial with VIDEO instructions for all the visual learners.
We occasionally link to goods offered by vendors to help the reader find relevant products. Some of the links may be affiliate meaning we earn a small commission if an item is purchased.
Table of Contents
- 1 How to make the fold and snap shopping bag
- 2 Supplies and tools
- 3 How to Sew the fold and snap shopping bag
- 3.1 Foldable shopping bag VIDEO TUTORIAL
- 3.2 INSTRUCTIONS:
- 3.3 STEP 1:
- 3.4 STEP 2:
- 3.5 STEP 3:
- 3.6 STEP 4:
- 3.7 STEP 5:
- 3.8 STEP 6:
- 3.9 STEP 7:
- 3.10 STEP 8:
- 3.11 STEP 9:
- 3.12 STEP 10:
- 3.13 STEP 11:
- 3.14 STEP 12:
- 3.15 STEP 13:
- 3.16 STEP 14:
- 3.17 STEP 15:
- 3.18 STEP 16:
- 3.19 STEP 17:
- 3.20 STEP 18:
- 3.21 STEP 19:
- 3.22 STEP 20:
- 3.23 STEP 21:
- 3.24 STEP 22:
- 3.25 STEP 23:
- 3.26 STEP 24:
- 3.27 STEP 25:
- 3.28 STEP 26:
- 3.29 STEP 27:
- 3.30 STEP 28:
- 3.31 STEP 29:
- 3.32 STEP 30:
How to make the fold and snap shopping bag
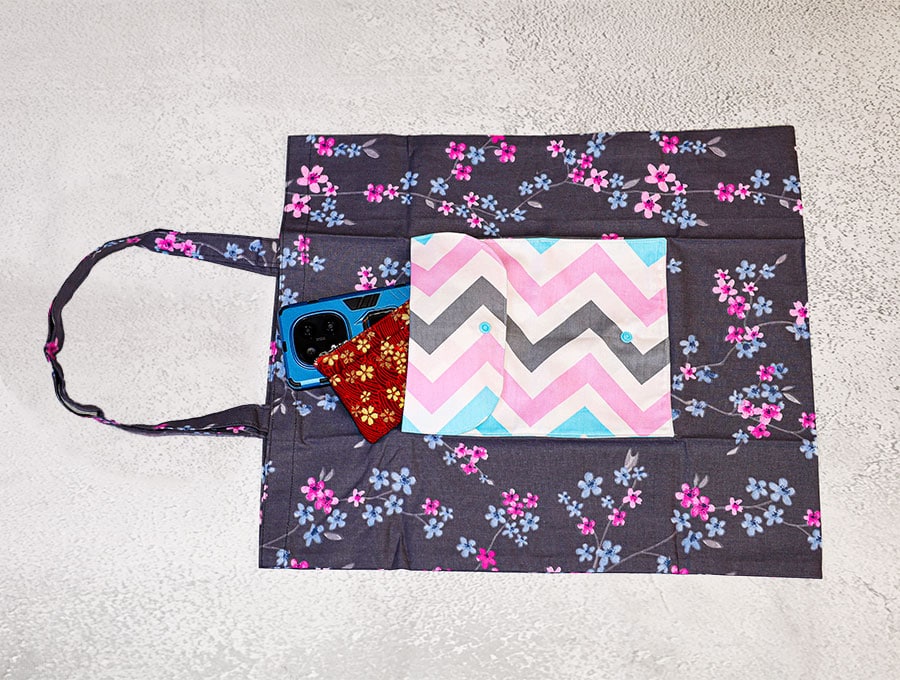
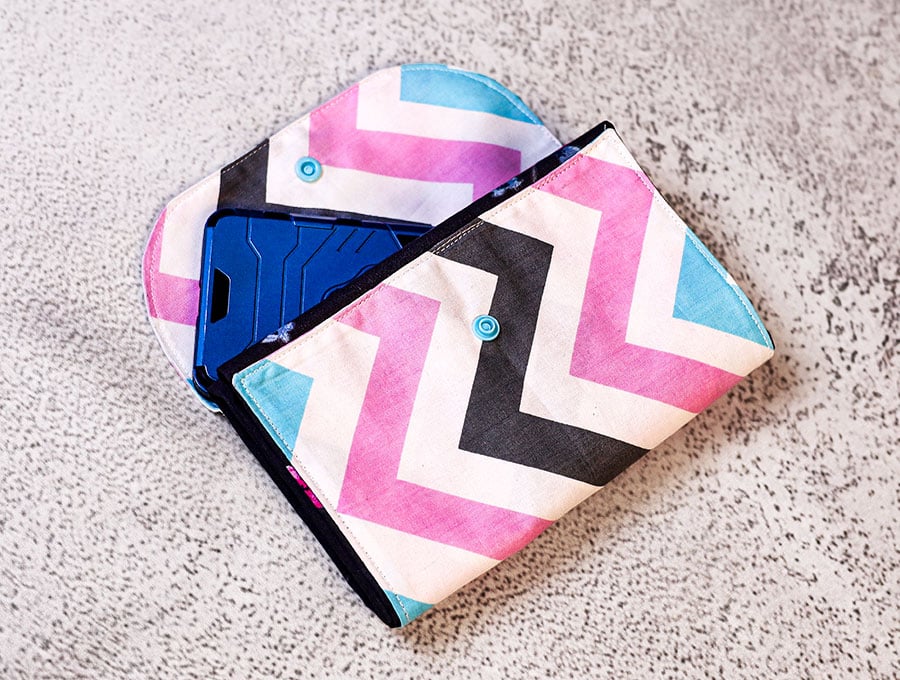
The best feature is that the pocket on the outside of the bag is usable and you can pop your phone or wallet inside, and when you fold it down to a snap pouch – there is still a small pocket that fits a large phone and a slim wallet!
Supplies and tools
- fabric – 2 pieces of woven cotton (one main, one pocket)
- matching thread
- scissors (or rotary cutter and a cutting mat)
- ruler or measuring tape
- iron and ironing board
- sewing clips or pins
- plastic snaps (you will need a sewing awl and snap pliers
- press studs
DOWNLOAD: Fold and snap shopping bag pattern [Free pdf file]
Follow us for free patterns & tutorials! [easy-profiles]
How to Sew the fold and snap shopping bag
Watch the diy fold and snap shopping bag video first and then follow the written step by step instructions below.
Please enjoy and don’t forget to Like and SUBSCRIBE over on YouTube to be kept up to date with new videos as they come out.
Foldable shopping bag VIDEO TUTORIAL
INSTRUCTIONS:
STEP 1:
Print out the free pattern at Hello Sewing.com onto A4 pieces of paper then join where indicated.
STEP 2:
Find a suitable fabric, fold and cut out 2 of the shopping bag handles by placing the pattern where it is marked fold onto the fabric.
The handles will be 4 x 26 inches (10 x 66 cm)
Cut out the main bag body to 18 x 40 inches (46 x 100 cm)
Cut out 2 pieces of fabric for the small snap pouch to 8 x 26 inches (20 x 66 cm)
STEP 3:
Place the fabric for the handles wrong side up on your worktop, fold over along the length and press each piece.
STEP 4:
Open out and fold each long side in towards the middle crease, and press again.
STEP 5:
Fold the long sides to meet each other, folded edge on folded edge, and clip in place.
STEP 6:
Stitch along each of the long sides of the bag handles 1/8 of an inch (3 mm) from the edge. Backtack at the start and finish.
STEP 7:
Place the two sides of the bag pouch right sides together, place the pattern over the pieces and transfer the marks for the gap, remove the pattern, then clip the two layers together.
STEP 8:
Stitch around the edge using a seam allowance of ¼ of an inch (6 mm), leaving a gap between the marks for the gap.
STEP 9:
Fold back the edge of the gap in line with the seam and finger press, then snip off a small triangle at the corners to reduce bulk and either use pinking shears around the curves or cut a few small V notches around the curves to allow the fabric to ease when you turn it the right way out.
STEP 10:
Turn the pouch the right way out by pulling the fabric gently through the gap. Use a turning tool to turn out the seams, turn the raw edges in, in line with the seam and clip in place.
STEP 11:
Give the pouch a press, then top stitch all the way around the edge 1/8 of an inch (3 mm) from the edge.
STEP 12:
Use a piece of cardboard with a line drawn 3/8 of an inch (1 cm) from the edge on one side and another line drawn 1 inch (2.5 cm) on the opposite side. This helps you press in a neat, even fold. Slide the cardboard into place on top of the wrong side of the main piece of fabric for the bag, and fold over 3/8 of an inch (1 cm) on each short side, and press in place.
STEP 13:
Next fold over 1 inch (2.5 cm) and press on each short side.
STEP 14:
Fold the fabric where you pressed the double fold in half to find the middle and mark, then mark 3 ½ inches (9 cm) one either side of the central mark. Repeat with the other end of the bag fabric.
STEP 15:
Slide the bag handle ends under the folded seam so they line up with the two outer marks, and pin in place. Ensure the bag handles are not twisted. The loop of the handle must face the main body of the fabric.
STEP 16:
Stitch along each end, as close to the folded seam as possible to hold the handles in place, backtacking at the start and finish.
STEP 17:
Now fold the handles up so they face away from the main body of the bag, and clip in place.
STEP 18:
Stitch along the top edge, securing the handles in position.
STEP 19:
Fold the bag in half along the length, right side to right side and give it a press.
STEP 20:
Open out the bag with the long sides of the fabric parallel to the top and bottom of your worktop. Fold the pouch piece in half along the length and press.
STEP 21:
With the right side of the body of the bag uppermost, lay the pouch piece, with the pressed center line over the pressed center line of the bag. The rounded corners should be nearest the handle towards the right-hand side of your worktop.
STEP 22:
Measure 3 ½ inches (9 cm) down from the top end (with the rounded corners) and make a mark on each side, then join the marks to create a line across the fabric – this marks the flap for the pouch.
STEP 23:
Measure so the pouch part, excluding the flap, is equidistant form the top and bottom of the bag, then pin in place up to the line for the flap.
STEP 24:
Stitch along the sides and bottom, only to the marked line for the flap. Stitch 1/8 of an inch (3 mm) from the edge, backtacking near the line at the top. You have now created what looks like a pocket with a loose flap-over at the top.
STEP 25:
Pin the sides of the bag together with the wrong sides inside, lining up the top seams. Then stitch ¼ of an inch (6 mm) from the edges on the right side.
STEP 26:
Trim off the excess fabric at the bottom and top corners, and any frayed bits along the sides, then turn the bag inside out, pressing out the seams with a turning tool, then give it a press to make sure the seams are flat.
STEP 27:
Stitch down each side 3/8 of an inch (1 cm) from the edge, backtacking at the start and finish of each side.
STEP 28:
Turn the bag the right way out, press out the corners with a turning tool then give it a quick press.
STEP 29:
Place the pouch piece facing down on the worktop, then fold in each side, so it is even with the pouch sides. Then fold from the bottom up, and once form the top down, with the handles tucked in, then flip over the pouch flap. You now have none of the fabric form the bag visible – only the pouch fabric.
STEP 30:
Make a mark in the middle of the flap about ½ an inch (1.3 cm) from the edge of the flap and a mark under that point on the main part of the pouch. Use your snap fastening tool to fasten a snap to the top flap, then unfold the bag, reach inside the pocket and fasten the other snap over the point you marked. Now you’re all done and the bag is ready to be neatly stored until it is time to go shopping.
A free printable pattern from HelloSewing assists you in making a shopping bag with its own neat pouch that allows you to fold the bag and snap fasten it so it’s a tiny neat package that can slip into a purse and be ready to roll out for action when you go shopping. If you are anything like me who takes a bag in the car, forgets it, gets into the shops and has to buy a bag, which goes against the idea of sustainability, then you need this fold and snap shopping bag. Make some for friends who also complain that they forget a shopping bag!
If you love this idea then please give us a like and subscribe – our subscribers get all the new projects delivered straight to their inboxes first, so they never miss out on our quick and easy practical sewing ideas.
Do you like this? Pin for later:
Wanna be friends? Click HERE and follow me on Pinterest
RELATED: