
DIY Straight Zipper Jacket Holder // Jacket Gripper for a Handbag or Backpack // Hands-free!
Slipping jackets. Hands always full. Nowhere to put that extra layer. Sound familiar?
So many of you told me how much you loved the Hanging Zippered Jacket Carrier, but also shared a few hiccups: not everyone has a long zipper on hand, and that twist at the end can be a bit annoying. So you asked for something simpler. A shorter zipper. An easier make. And yes — it absolutely can be done. Today I’ll show you a quick, no-fuss version that works beautifully. Even better, it’s perfect for turning a loved one’s shirt into something you can use and carry every day. One garment can make several, so everyone can have a small, meaningful keepsake. They’re fast, simple, and use only small scraps — you can make one in about 10 minutes.
These jacket holders are super simple to make and make useful little gifts for almost anyone. The best thing is they take about 10 minutes to make and use tiny pieces of fabric. Raid your fabric stash for some fabric scraps and let’s get started.
Below you will find my step by step written tutorial with VIDEO instructions for all the visual learners.
We occasionally link to goods offered by vendors to help the reader find relevant products. Some of the links may be affiliate meaning we earn a small commission if an item is purchased.
Table of Contents
How to make the jacket holder from a straight zipper
Supplies and tools
- fabric – scraps of woven cotton
- lobster clasp – 2.5 cm (1″) wide
- matching thread
- scissors (or rotary cutter and a cutting mat)
- ruler or measuring tape
- iron and ironing board
- sewing clips or pins
DOWNLOAD: Straight zipper jacket holder pattern [Free pdf file]
link not working? Try this ALTERNATIVE link
Follow us for free patterns & tutorials! [easy-profiles]
How to Sew a straight zip jacket gripper
Watch the diy zippered jacket holder from a stright zipper video first and then follow the written step by step instructions below.
Please enjoy and don’t forget to Like and SUBSCRIBE over on YouTube to be kept up to date with new videos as they come out.
Straight zipper jacket holder VIDEO TUTORIAL
MATERIALS:
Fabric: woven cotton, quilting cotton.
- (2pcs) 23 x 5 cm (9 x 2″)
- (2pcs) 7.5cm x 5cm (3 x 2″)
These are perfect for repurposing a loved one’s clothing as a memory keepsake. If you want to make a meaningful keepsake – this is a great project – you can make at least a dozen jacket holders from a single shirt and you can make a bunch quickly so all relatives can all have something that belonged to her to treasure
Notions:
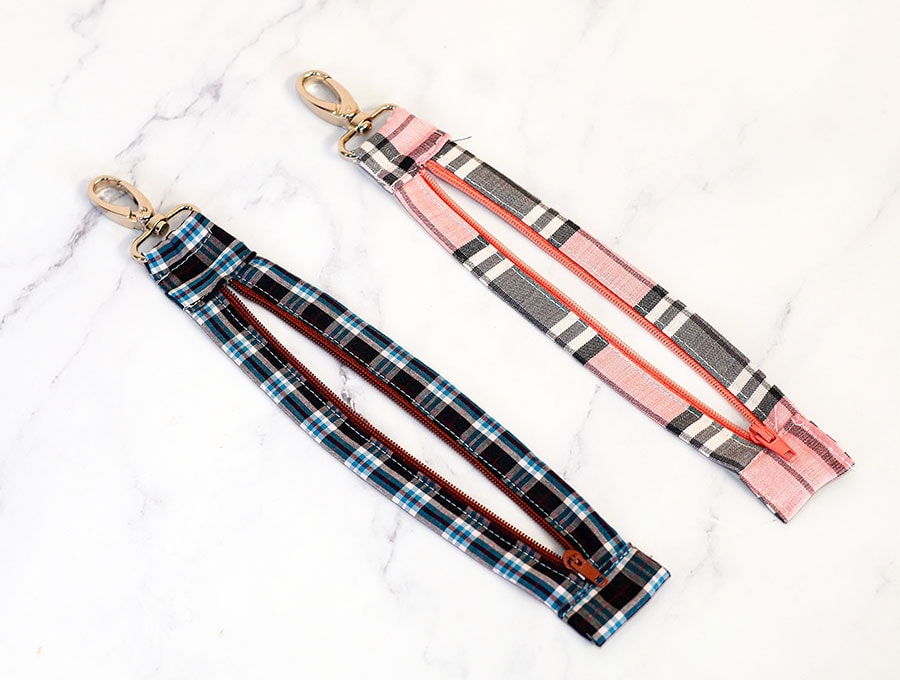
- #3 Zipper – 18cm long (7″)
- Swivel/lobster clasp – 2.5cm (1″) wide
INSTRUCTIONS:
STEP 1:
Take both large pieces of fabric and fold them bias style:
- With the wrong side up – fold the fabric in half lenghtways to meet the long raw edges and iron
- Unfold and fold both long raw edges to meet them in the midle, then iron
- Fold one last time along the central crease and iron
Do this for both pieces
STEP 2:
Open one of these fabric pieces and the zipper, and place the zipper tape inside. Pin in place. Repeat for the other side of the zipper.
STEP 3:
Stitch along both sides of the zipper using a zipper foot. Make sure you catch both sides of the fabric and . Backstitch at the beginning and the end
STEP 4:
Trim the excess fabric from both short sides of the zipper. Make sure to cut after the metal stoppers.
STEP 5:
Place the zipper with the wrong side up on your worktop. Take one of the smaller fabric pieces place the short side flush with the short side of the zipper. Turn the zipper around the fold both sides of the fabric towards the front of the zipper and pin in place.
Repeat for the other end of the zipper.
STEP 6:
Stitch across the short ends making sure to avoid the metal stoppers at the top and the bottom of the zipper.
STEP 7:
Open both fabric pieces and finger press the fabric on the sides
STEP 8:
Decide whether you want your jacket gripper to zip up or zip down.
Mine in the video zips up – to make it zip down just switch the places of the clasp and the binding.
STEP 9:
To make the binded edge- fold the short edge of the fabric once to meet the short edge of the zipper and fingerpress. Fold again and bring the fold right next to the metal stopper. Pin in place.
STEP 10:
Turn the zipper around so the other short side faces you. Insert the swivel/lobster clasp and push it to the middle of the fabric. Fold the short raw edge 6mm (1/4″) towards the wrong side and pin the end right next to the metal stopper. Pin in place.
STEP 11:
Stitch across both ends of the zipper – as close to the folds as possible. Make one additional stich about 1 cm (3/8″) above the stitch at the top. Backstitch at the beginning and the end of each seam.
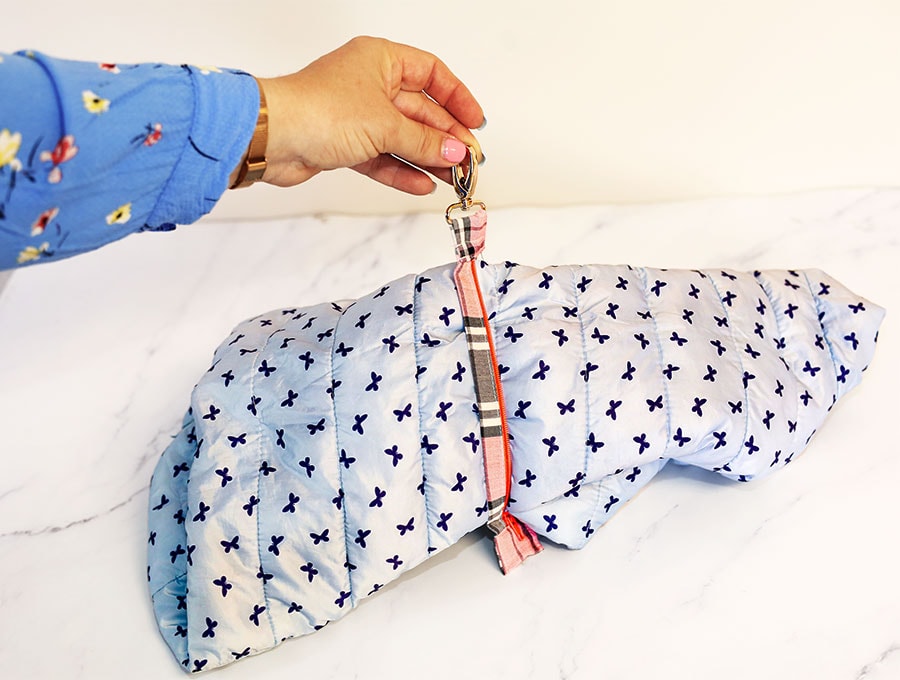
And just like that the jacket gripper is ready.
Clip it to your handbag or backpack and you will be prepared the next time you need a place for your extra layer of clothing.
If you want more projects and patterns just like this delivered weekly – make sure to subscribe to my newsletter and my youtube channel. It is packed full of useful and fun little projects anyone can make.
Do you like this? Pin for later:
Wanna be friends? Click HERE and follow me on Pinterest
RELATED: