
DIY Reversible Casserole Carrier // Pattern and Video
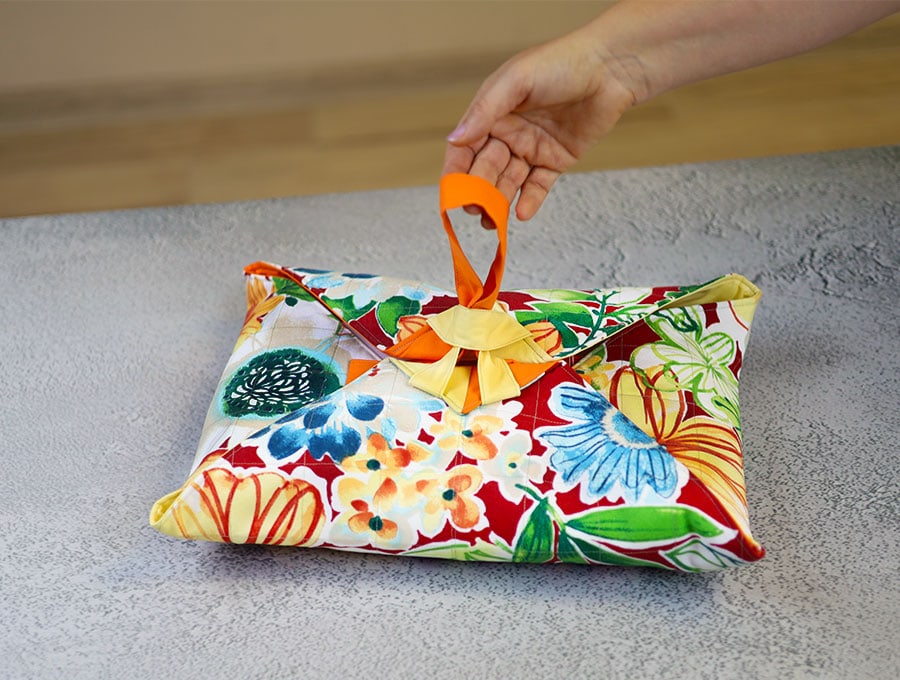
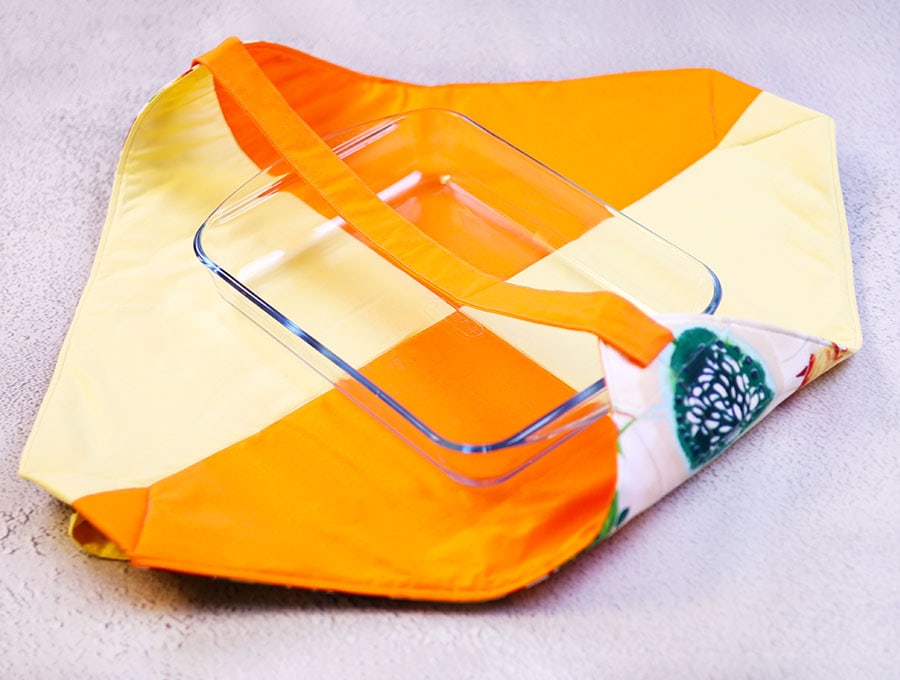
Roll up to a bring a casserole event with this reversible cover that is going to garner you plenty of compliments. If you have around 20 to 30 minutes then consider making this great reversible casserole carrier to take along a dish to a potluck, or to make as a gift. This cover fits a 13 x 9.5 inch (33 x 24 cm) casserole dish.
You can never start early enough in the year preparing gifts for special occasions and the festive season as time seems to telescope towards the end of the year, with the festivities rushing closer at an alarming rate.
Below you will find my step by step written tutorial with VIDEO instructions for all the visual learners.
We occasionally link to goods offered by vendors to help the reader find relevant products. Some of the links may be affiliate meaning we earn a small commission if an item is purchased.
Table of Contents
- 1 How to make the reversible casserole carrier
- 2 Supplies and tools
- 3 How to Sew a Reversible casserole carrier
- 3.1 Reversible casserole carrier VIDEO TUTORIAL
- 3.2 MATERIALS:
- 3.3 INSTRUCTIONS:
- 3.4 STEP 1:
- 3.5 STEP 2:
- 3.6 STEP 3:
- 3.7 STEP 4:
- 3.8 STEP 5:
- 3.9 STEP 6:
- 3.10 STEP 7:
- 3.11 STEP 8:
- 3.12 STEP 9:
- 3.13 STEP 10:
- 3.14 STEP 11:
- 3.15 STEP 12:
- 3.16 STEP 13:
- 3.17 STEP 14:
- 3.18 STEP 15:
- 3.19 STEP 16:
- 3.20 STEP 17:
- 3.21 STEP 18:
- 3.22 STEP 19:
- 3.23 STEP 20:
- 3.24 STEP 21:
- 3.25 STEP 22:
- 3.26 STEP 23:
- 3.27 STEP 24:
- 3.28 STEP 25:
- 3.29 STEP 26:
- 3.30 STEP 27:
- 3.31 STEP 28:
- 3.32 STEP 29:
- 3.33 STEP 30: Attaching the small handles
How to make the reversible casserole carrier
Supplies and tools
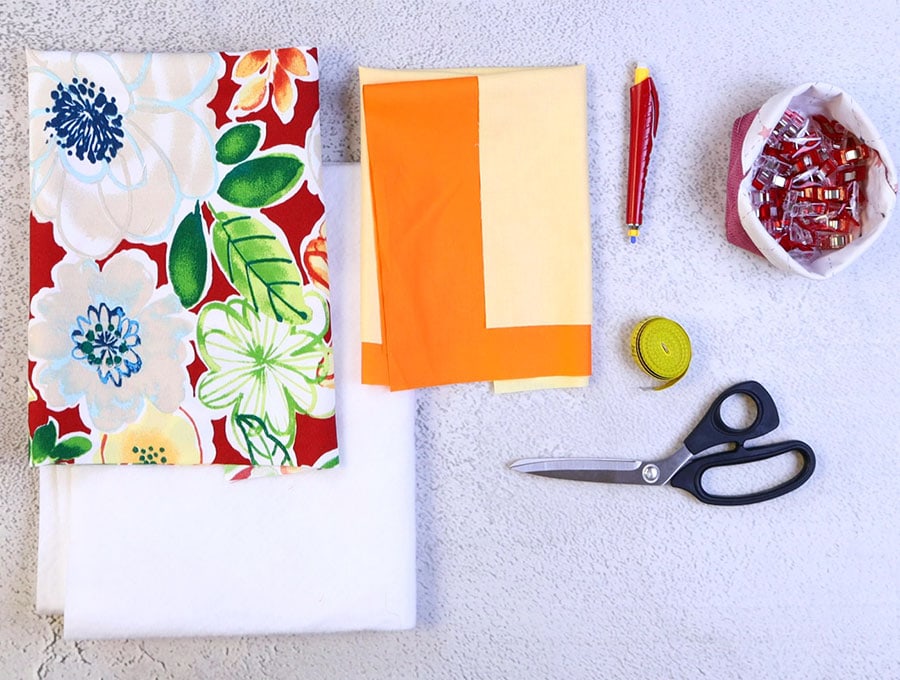
- fabric – 2 pieces of quilting or woven cotton (one main, one lining)
- fusible batting
- matching thread
- scissors (or rotary cutter and a cutting mat)
- ruler or measuring tape
- iron and ironing board
- sewing clips or pins
Follow us for free patterns & tutorials! [easy-profiles]
How to Sew a Reversible casserole carrier
Watch the diy reversible casserole carrier video first and then follow the written step by step instructions below.
Please enjoy and don’t forget to Like and SUBSCRIBE over on YouTube to be kept up to date with new videos as they come out.
Reversible casserole carrier VIDEO TUTORIAL
MATERIALS:
- 1 x Batting: 23 x 23 inches (58 x 58 cm)
- 1 x Outer cotton fabric: 23 x 23 inches (58 x 58 cm)
- 2 x contrasting pieces of cotton lining; 16 x 16 inches (40.5 x 40.5 cm) OR 1 piece of 23 x 23 (58 x 58 cm) in a print.
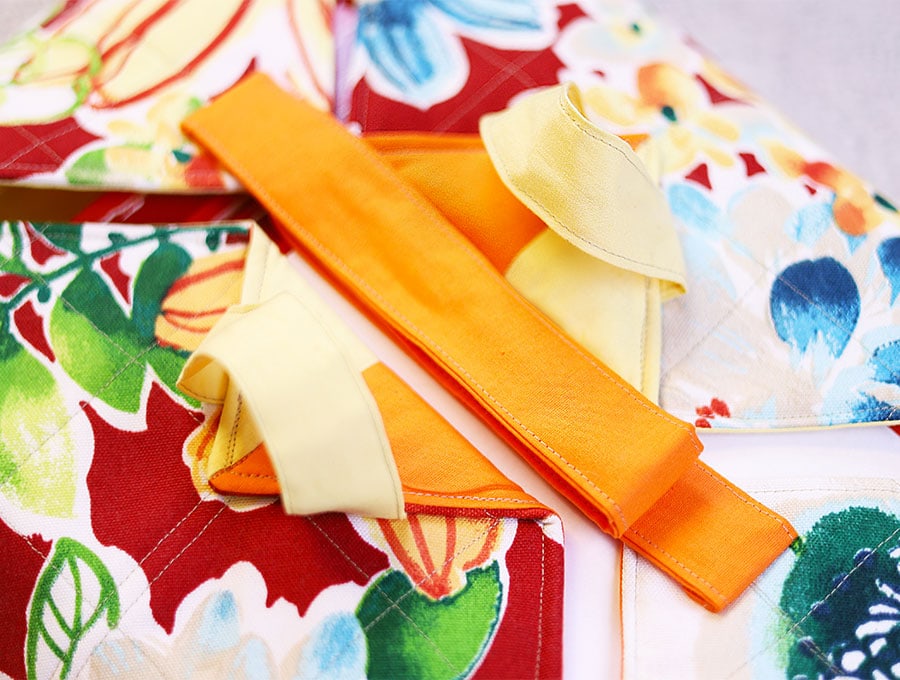
- 1 x Large handle: 5 x 22 inches (12.5 x 56 cm)
- 2 x small handles 4 ½ x 7 inches (11.5 x 18 m)
INSTRUCTIONS:
STEP 1:
Cut your fabrics and batting according to the cut list above.
STEP 2:
Start with the smaller handles and lay each piece on your ironing pad, with the long length horizontal to the top of the ironing pad, wrong side up. Turn each short end in about ¼ of an inch (6 mm) and press.
STEP 3:
Fold the pieces in half along the length and press, then unfold and bring each side in towards the pressed seam in the middle and press. Last fold over the folded long edges so they meet and press.
STEP 4:
Clip the open long edge on each piece and then set aside while you work on the long handles.
STEP 5:
Place the long handle piece wrong side up on the ironing pad. Turn each short end in about ¼ of an inch (6 mm) and press.
STEP 6:
Repeat Step 3 with the long handle, then clip.
STEP 7:
For the long handle and the short handles start on the one short end nearest the closed fold, then stitch 1/8 of an inch (3 mm) around the 3 open sides. When you come to a corner leave the needle down in the fabric, lift the presser foot, swing the fabric 90 degrees, depress the foot and continue stitching for a really neat corner. Backtack at the start and finish.
For the lining/reversible side you can use the 2 contrasting pieces or one large printed piece. If using one large printed piece you can eliminate next few steps and continue from Step 15.
STEP 8:
Place your two pieces of cotton lining fabric on a self-healing cutting mat and line them up right sides facing each other. Use a quilting or ordinary ruler to measure corner to corner on the diagonal and cut using a rotary cutter. If you don’t have one draw a line with fabric marking pen using the ruler as a guide. Cut the pieces in half on the diagonal.
STEP 9:
Open out and place the pieces – with the two colors opposite each other to form a rectangle. The fabric must be right side up.
STEP 10:
Now place on piece from the lower right-hand side, over the piece on the left so the right sides are inside. Take the piece on the right and place it over the piece at the top – right sides facing each other.
STEP 11:
Pin the pieces of fabric together along the diagonal, first the one at the bottom left corner then the one at the top right corner.
STEP 12:
Stitch the 2 sets of pieces together using a ¼ inch (5 mm) seam allowance. Backtacking at the start and finish of each set.
STEP 13:
Open out the seams and press, then place right side up to form a square. Fold the one piece over the other and pin in place after matching up the seams accurately.
STEP 14:
Stitch using a ¼ inch (6 mm) seam allowance, then open up and press the seam open. Set aside.
STEP 15:
Apply basting spray to your piece of batting, then over it place the outer fabric, right side up.
STEP 16:
Starting from the top left corner to the bottom right corner draw quilting lines 2 inches (5 cm) apart using a fabric marking pen. Then, working from the top right corner to bottom left corner continue drawing quilting lines 2 inches (5 cm) apart until the whole area has been covered.
STEP 17:
Start from the diagonals that cross in the center of the quilt and work from there outwards until the whole area has been quilted. The basting spray will keep the layer of outer cotton and the batting together.
STEP 18:
Give your quilted piece a light press with an iron.
STEP 19:
Lay the quilted piece on your worktop, right side up, and over it, right side down, place the lining piece with the contrasting colors, and clip around the edges.
STEP 20:
Stitch all around the edge of the square using a ¼ inch (6 mm) seam allowance, but leaving a gap of 5 inches (12.5 cm) in the center of one side. Remember to backtack on each side of the gap.
STEP 21:
Use your quilting ruler and rotary cutting knife to trim off any uneven excess fabric and batting on the 4 sides, making sure not to cut too close to the stitch line.
STEP 22:
Clip off a tiny triangle on each of the four corners to reduce bulk when turning the right way out.
STEP 23:
Trim off the batting at the gap in line with the seam – make sure not to cut into the outer or lining fabric when you do this. It will make sewing the gap closed much easier than with all the added bulk of the batting layers.
STEP 24:
Turn the casserole cover the right way out by pulling the fabric gently through the gap.
STEP 25:
Once turned, use a turning tool to press out the corners gently and to run along the seams so they lie flat.
STEP 26:
Turn in the raw edges of the gap in line with the seam and clip in place, then give the whole piece a light press with your iron.
STEP 27:
Stitch around the outside 1/8 of an inch (3 mm) from the edge, including over the gap, which will now be sewn closed. Backtack at the start and finish.
STEP 28:
With the outer fabric uppermost on your worktop, measure 1 inch (2.5 cm) from the left-hand top corner on the diagonal and make a mark. Pin the center of the long handle in place on the mark. On the bottom right corner also measure 1 inch (2.5 cm) from the corner and pin the other end of the handle in place.
STEP 29:
Stitch in a rectangular shape of ¼ inch deep at the end of each handle to hold it securely in place, back tacking at the start and finish.
STEP 30: Attaching the small handles
For the smaller handles pieces there are 2 options.
Option 1 for attaching smaller handles
- Flip the cover so you have the side with the long handle attached facing down on your worktop. Measure 2 inches (5 cm) from the corner where the long handle is not attached. Make a mark on each side of the corner. This will mark the position of the outer edge of the handle piece.
- Repeat the measurement and mark making on the diagonally opposite corner.
- Pin the ends of the handles in place, lining up the outer edges with the marks, and placing the ends ¼ of an inch in from the edge. The handles will need to be twisted to ensure the ends line up with the marks, making a loop.
- Once you have pinned both handles in place, stitch a rectangular shape around the ends, ¼ inch (6 mm) deep as close to the edges as possible, backtacking at the start and finish.
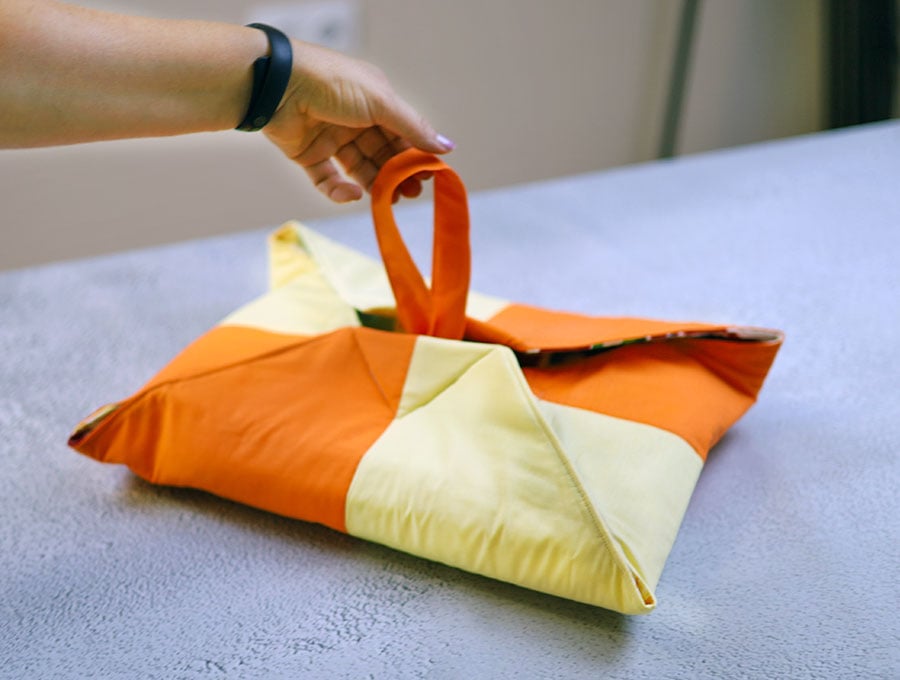
- Time to test your casserole cover. With the lining side uppermost, twist round the long handle so it lies over the top of the lining fabric, then insert the dish. Thread the long handle through the one small handle loop, and then through the other handle loop, drawing up the long handle so it creates an envelope that covers the casserole dish. Carry it using the loop of the long handle. You can also reverse it so the lining is outermost.
Option 2 for attaching smaller handles
- Flip the cover so you have the side with the long handle stitched on facing down on your worktop. Measure 2 inches (5 cm) from the corner where the long handle is not attached. Make a mark on each side of the corner. This will mark the outer edge of the handle piece.
- Repeat the measurement and mark-making on the diagonally opposite corner.
- Measure 2 ½ inches (6.3 cm) from the marked corners and make a mark on the central seam
- Fold the fabric back onto the outer side so you have a triangular piece and pin in the middle.
- Slip in the handle ends between the pinned and folded fabric, lining up the outer edge of the handle with the marks as for Option 1, and ¼ inch (6 mm) inside the outer edge. Pin in place.
- Stitch in a v shape from the one side of the folded triangle to the other, making sure to backtack at the start and finish and to backtack over the handle ends for added strength.
- Assemble as you did for Option 1.
If you enjoyed this easy tutorial then please like and subscribe for more easy and practical sewing ideas. Subscribers can share photos of how the casserole carrier turned out in the comments section – here at HelloSewing we always enjoy seeing our subscribers creative ideas.
Do you like this? Pin for later:
Wanna be friends? Click HERE and follow me on Pinterest
RELATED: