
DIY Pocket Prayer Keychain // Pocket Prayer Keyring Sewing Pattern
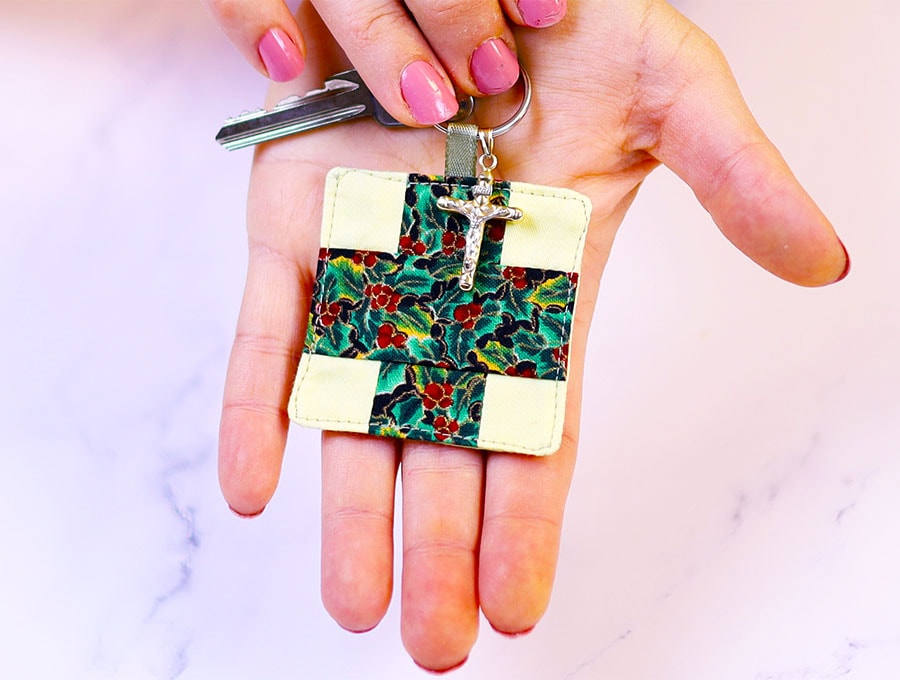
This pocket prayer keychain makes a lovely little gift. Each time the recipient picks up their keys they will be reminded of their faith. The pocket prayer keychain is there to help keep Christians safe as they offer a silent prayer for all they are grateful for in life and ask for protection on their journeys. It is a quick make with small scraps of material from your stash.
Below you will find my step by step written tutorial with VIDEO instructions for all the visual learners.
We occasionally link to goods offered by vendors to help the reader find relevant products. Some of the links may be affiliate meaning we earn a small commission if an item is purchased.
Table of Contents
How to make the pocket prayer keychain
Supplies and tools

- fabric – woven cotton scraps
- keyring – 2cm (3/4″) diameter
- matching thread
- scissors (or rotary cutter and a cutting mat)
- ruler or measuring tape
- iron and ironing board
- sewing clips or pins
Follow us for free patterns & tutorials! [easy-profiles]
How to Sew a Pocket Prayer Keyring
Watch the diy pocket prayer keychain video first and then follow the written step by step instructions below.
Please enjoy and don’t forget to Like and SUBSCRIBE over on YouTube to be kept up to date with new videos as they come out.
Pocket prayer keyring VIDEO TUTORIAL
Ways to use the pocket prayer keychain
You can print out a short verse from the Bible, or your own special prayer for the person, to accompany the keychain gift. My idea would be to laminate the verse or prayer and attach to the keychain, or to make it in the shape of a bookmark, laminate it, and add a silk tassel.
It is also possible to use a fabric paint pen and write a short quote on the 2 ½ x 2 ½ inches(6.3 x 6.3 cm) backing fabric – instead of patterned fabric use a plain fabric if you plan on doing this. Also take into account the amount of fabric lost for the seams – make sure it fits within the 2 inch (5 cm) square.
Some stores have fabric ready printed with verses to use on the back. Try Walmart, Amazon, Etsy sellers, speciality Christian gift shops online like Christianbook.com or Dayspring, Timeless Treasures or Fabric Traditions. Use Bible verse fabric as your keyword when searching, or inspirational fabric squares.
A popular quote people use is John 3:16
For God so loved the world, that he gave his only Son, that whoever believes in him should not perish but have eternal life
Another popular quote is from Psalm 46:1
God is our refuge and strength,
an ever-present help in trouble.
INSTRUCTIONS:
STEP 1:
Pick 2 pieces of fabric – one patterned and one plain for the best contrast. Cut the fabrics
- Cut 2 of 3 x 3 inches (7.5 x 7.5 cm) – 1 in patterned fabric, 1 in plain fabric (to create the cross)
- Cut 1 of 2 ½ x 2 ½ inches (6.3 x 6.3 cm) patterned fabric (for the back)
- Cut 1 of plain fabric (for the hanging loop)
STEP 2:
Take the larger 3 x 3 inches (7.5 x 7.5 cm) of patterned fabric, fold in half and finger press down the middle, then cut in half.
STEP 3:
Take the 3 x 3 inches (7.5 x 7.5 cm) piece of plain fabric, fold in half and finger press down the middle, then cut in half.
STEP 4:
Place one half of the patterned fabric vertically on your worktop right side up, then with the right side of half of the plain fabric facing down, place on top and pin together.
STEP 5:
Take the other plain piece and pin on the opposite side of the patterned piece.
You will need to fold back the fabric of the plain pieces in the middle so they do not overlap the edges before pinning. When folded out it will be one plain, one patterned and then one plain piece in a row.
STEP 6:
Stitch down each side you pinned 1/4″ (6 mm) from the edges, backtacking at the start and finish.
STEP 7:
Open out the 3 panelled piece and press with the stitched seams facing to the sides.
STEP 8:
Fold in half along the middle and cut so you have two 3 panelled pieces.
STEP 9:
Place the two pieces right sides up on your worktop with the three strips running horizontally, then in the middle place the other half of the patterned fabric you cut in Step 2, right side up.
STEP 10:
Fold the left-hand side piece over to the middle so the right sides face each other and pin on the left. Then fold the right-hand side piece to the middle and pin on the right side.
STEP 11:
Check that the cross being formed has the arms on each side of the center neatly lined up – you may have to adjust the fabric slightly up or down by altering the pins.
Before stitching down the sides 1/4″ (6 mm) from each edge fold back the extra fabric and pin so it does not get caught up.
STEP 12:
Stitch the two seams, then press the fabric so the cross lies flat.
STEP 13:
To make the hanging loop fold the 2 x 1 ¼ inches (5 x 3 cm) piece in half down the middle on the long side, finger press, then place wrong side up on your worktop before folding in each side to meet the middle fold.
Fold again so the two folded sides touch each other and pin.
Stitch as close to the double folded edge as possible, making sure both sides of the fabric are caught by the stitches.
TIP: If using a thin ribbon as a hanging loop – just cut the ribbon down to 5 cm (2″)
STEP 14:
Square up the fabric with the cross, using a quilting ruler and trim off any excess fabric.
STEP 15:
In the center of one arm of the cross place the hanging loop, folded in half, the loop facing in towards the center of the square and the raw edges of the loop to the raw edges of the cross itself. Pin or clip in place.
STEP 16:
With the right side of the cross facing up on your worktop place the 2 ½ x 2 ½ inches(6.3 x 6.3 cm) patterned piece of fabric over the top, right side to right side, lining up the sides and clip in place.
STEP 17:
Stitch round the square 1/4″ (6 mm) from the edge, leaving a gap of around 1 ½ inches (4 cm) at the bottom of the cross – opposite the hanging loop.
STEP 18:
Snip off the 4 corners to reduce bulk when turning taking care not to snip too close to the stitch line.
STEP 19:
Turn the pocket prayer item the right way out by pulling the fabric gently through the gap. Turn out the corners neatly with a turning tool and make sure the seams are turned out and lying flat before pressing. When you press, turn the raw edges of the gap inwards, in line with the seam.
STEP 20:
To finish off the item stitch 1/8″ ( 3mm) in, around the edge, including across the gap to close it, then trim off any loose threads.
STEP 21:
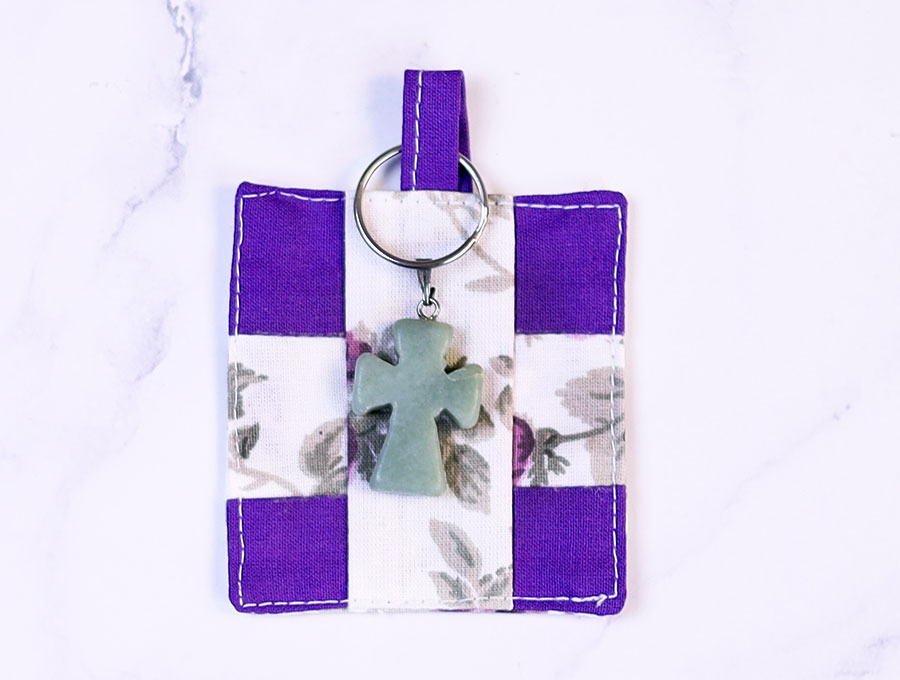
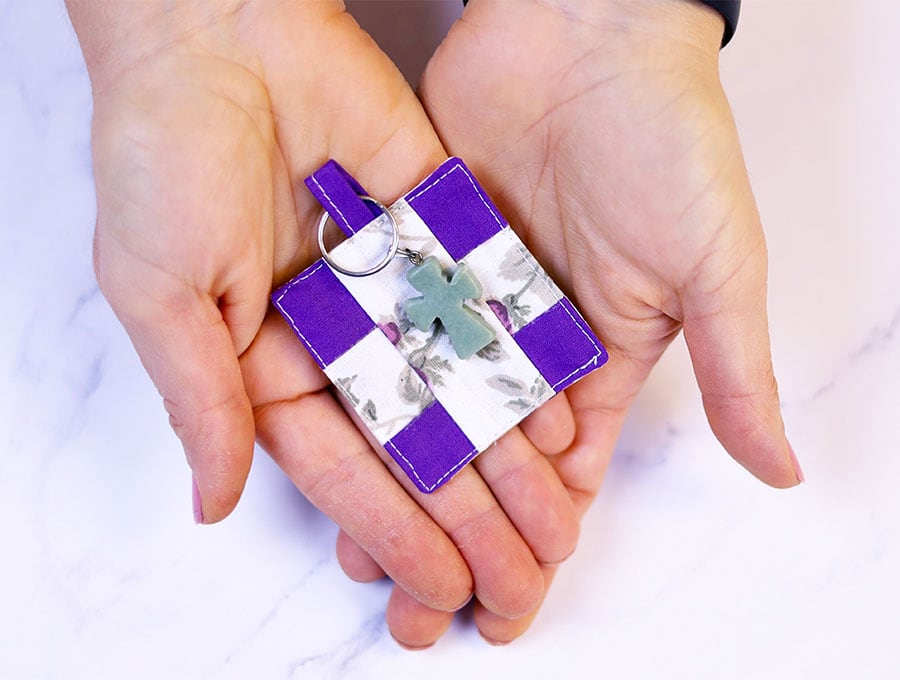
The last step is to attach the key ring to the loop and it is ready for use. If you wish you can add a Madonna or other religious icon to the keychain.
Here is a view from the back:
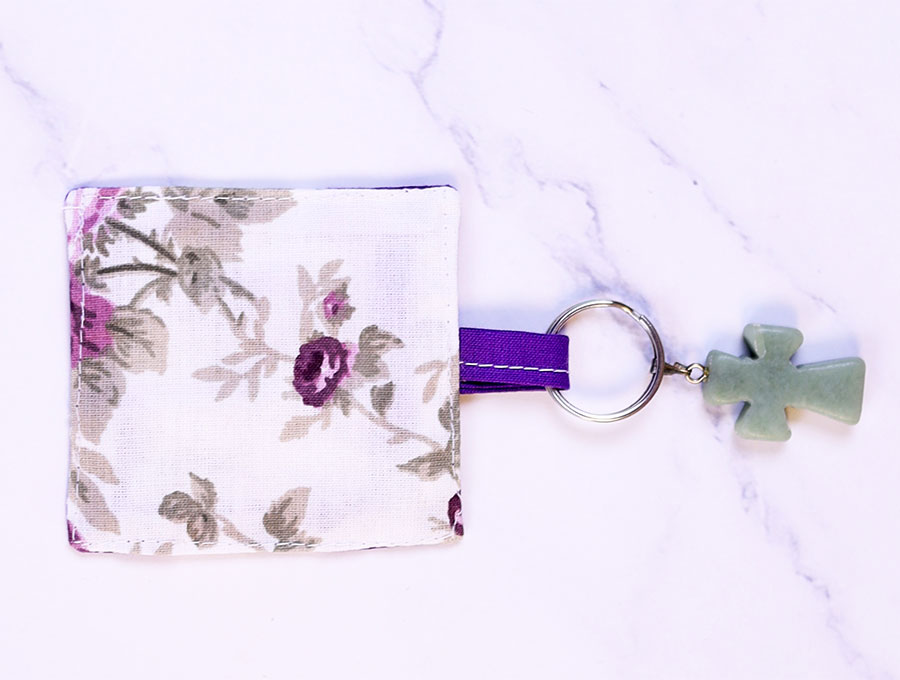
Keep faith close with the pocket prayer keychain, which is a quick make but can provide so much comfort when a person is most in need by fingering the fabric square and offering up a prayer for guidance and protection. With a cross on the front and a quote on the back, or a separate accompanying prayer, it’s a perfect gift for Christians this festive season as a reminder of what the season really means.
Do you like this? Pin for later:
Wanna be friends? Click HERE and follow me on Pinterest
RELATED: