
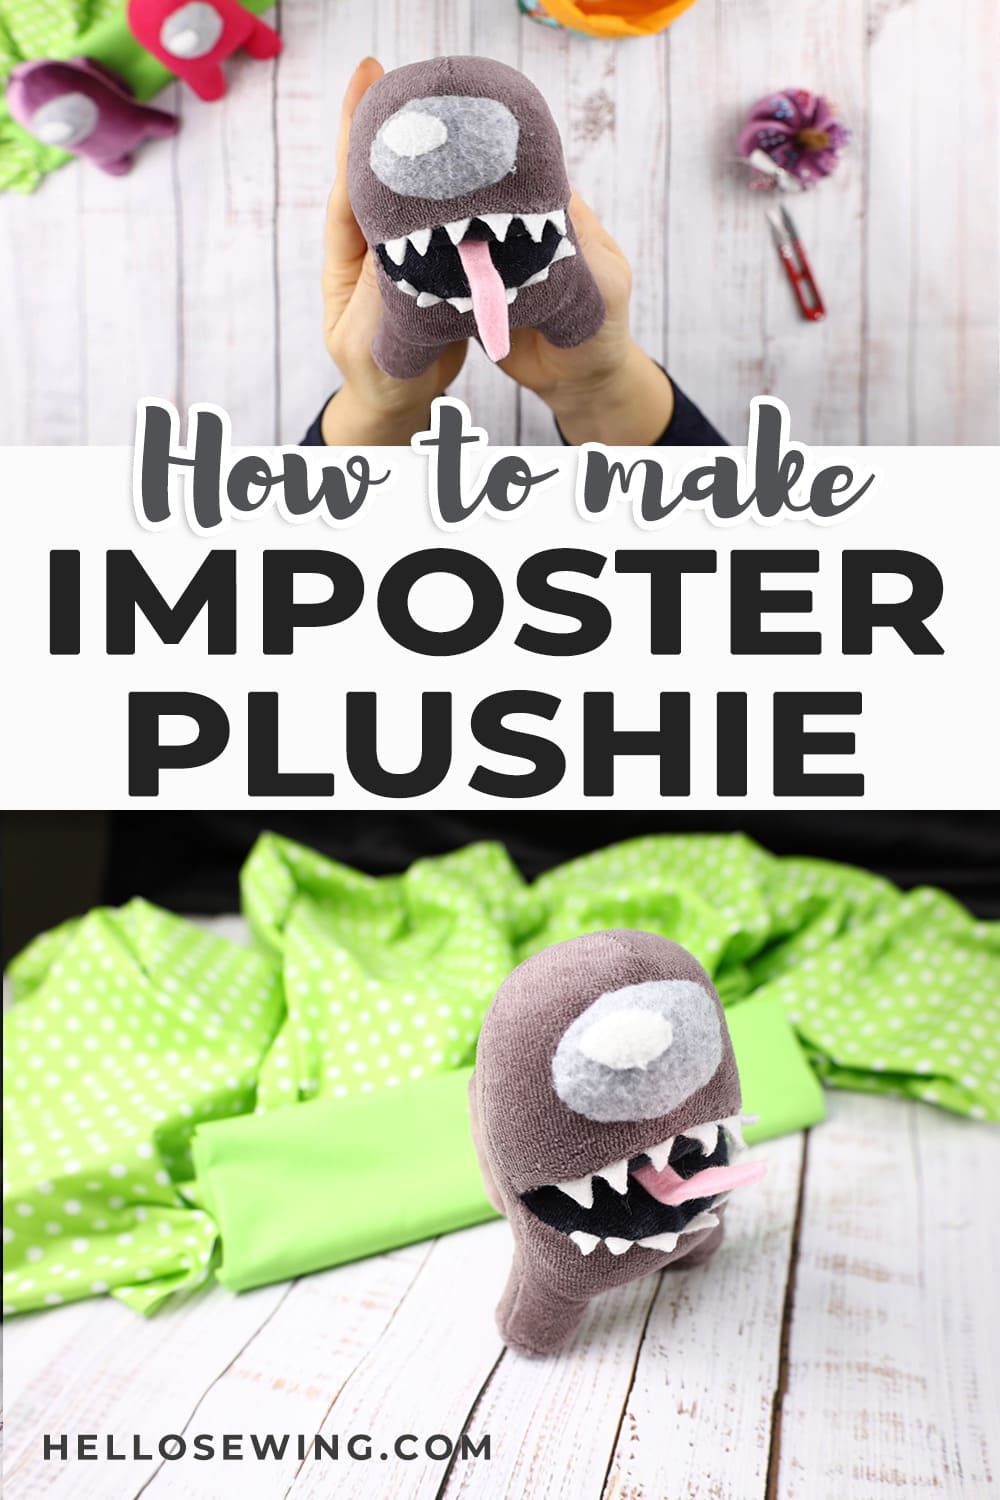
Among Us Imposter Plush Pattern and VIDEO Tutorial
Some time ago, my son asked me to make him an Among Us plushie. Among Us is a video game he and his friends love playing, so I gladly obliged and made him the plushie. He loved it, and now he wants more! But this time, he wanted something a bit different. He wanted the Among Us Imposter plush.
You see, in the game, the players are all a part of one crew. One of them is an imposter, but the others don’t know who he is. The players need to figure out who the imposter is by voting at the end of each round. The imposter needs to eliminate the crewmates without being discovered.

The Among us imposter looks just like the other crewmates until he’s discovered. Then he shows his true appearance, with large teeth and a long tongue.
This means that its pattern is a lot like the regular among us crewmate pattern, with the addition of the open mouth, the teeth, and the tongue. He can be any color of the crewmates, which are blue, red, yellow, cyan, purple, green, pink, and orange.
If your kid is a gamer, this project is perfect for you! You can surprise them with a unique and creative gift that they’ll love for sure. Keep reading to learn how to make Among Us imposter plush!

Below you will find my step by step written tutorial with VIDEO instructions for all the visual learners.
We occasionally link to goods offered by vendors to help the reader find relevant products. Some of the links may be affiliate meaning we earn a small commission if an item is purchased.
Table of Contents
- 1 How to make an Among Us IMPOSTER plush
- 2 Supplies and tools
- 3 How To Sew Among US IMPOSTOR plushie
- 3.1 IMPOSTER PLUSH VIDEO TUTORIAL
- 3.2 INSTRUCTIONS:
- 3.3 STEP 1: Prepare the Among Us plush template
- 3.4 STEP 2: Cut out the fabric
- 3.5 STEP 3: Fold and pin
- 3.6 STEP 4: Start sewing the imposter plush
- 3.7 STEP 5: Make the oxygen tank
- 3.8 STEP 6: Make the main body
- 3.9 STEP 7: Sew the oxygen tank onto the body
- 3.10 STEP 8: Finish the Among Us imposter
How to make an Among Us IMPOSTER plush
Supplies and tools
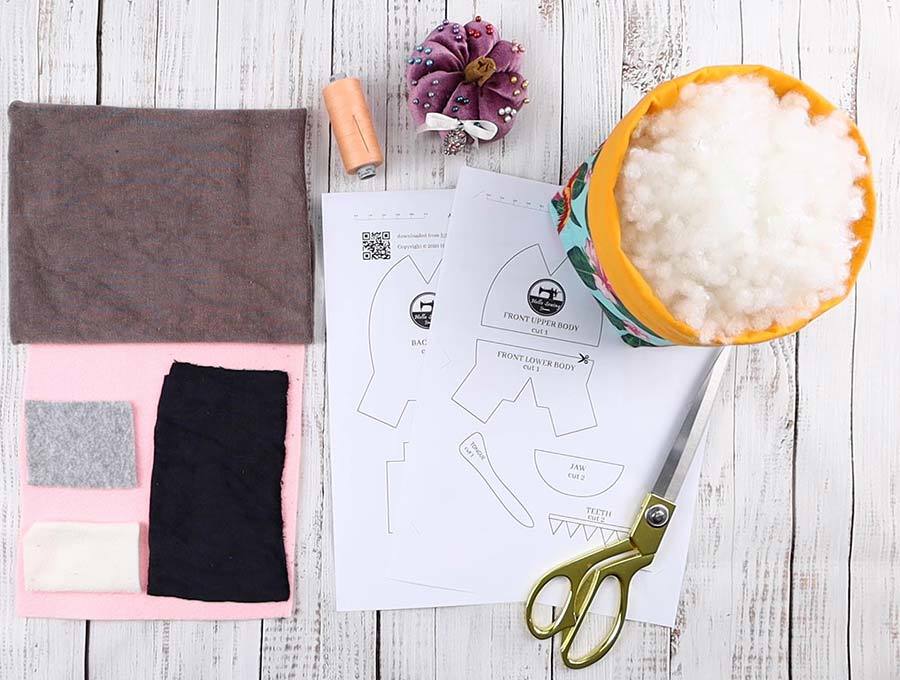
- main fabric – minky, velvet or fleece in the color of your choice 15″x 10″- purple, blue, cyan, green, red, orange, yellow, brown
- light grey/light blue, pink and white fabric – little scraps for the visor, tongue, glint
- matching thread
- among us plush template (free download below)
- polyester stuffing
- scissors
- sewing clips or pins
- fabric pen or simply a sharpie
- handsewing needle and white thread
- sewing machine or you can entirely handsew this plush toy!
DOWNLOAD: among us imposter pattern (Free PDF file)
Follow us for free patterns & tutorials! [easy-profiles]
How To Sew Among US IMPOSTOR plushie
Watch the diy imposter plush video first and then follow the written step by step instructions below.
Please enjoy and don’t forget to Like and SUBSCRIBE over on YouTube to be kept up to date with new videos as they come out.
IMPOSTER PLUSH VIDEO TUTORIAL
INSTRUCTIONS:
STEP 1: Prepare the Among Us plush template
The first thing you need to do before you can start sewing anything is to prepare the among us plush pattern.
Download our free pattern and print it out. Choose the 100% size and don’t scale anything. Cut out the template and remove any excess paper.

STEP 2: Cut out the fabric
Wash the fabrics well and iron them before you cut them. You need to do it so that the imposter plush doesn’t deform after washing.
Once you have done that, you can trace the fabric. Use the pattern you printed out earlier as a guide for drawing out the cutting lines onto the fabrics. The seam allowance isn’t included in the template, so be sure to add a quarter-inch to the cutting lines. Don’t add the seam allowance to the glint, tongue and teeth fabric pieces.
- MAIN FABRIC: all 3 pieces for the body, and two for the feet. You will also need one piece for the oxygen tank front, and one for its back.
- GREY: The piece for the visor will be from the light grey fabric
- WHITE: glint and teeth
- LIGHT PINK: tongue
- BLACK: 2 pieces for the jaws
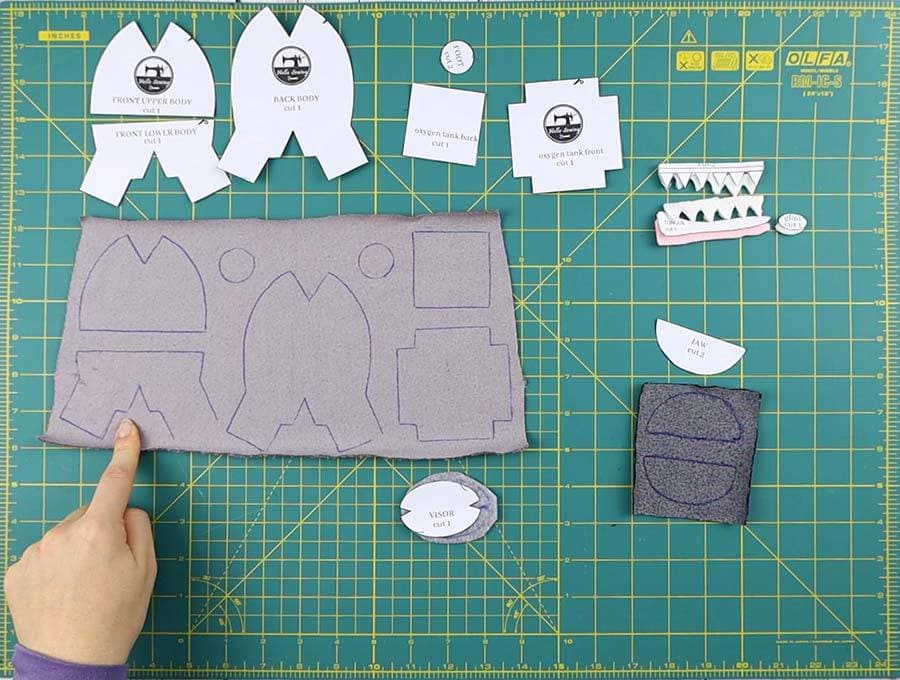
When you finish drawing out the cutting lines, cut the fabrics.
You will have eight pieces of fabric ready after this step.
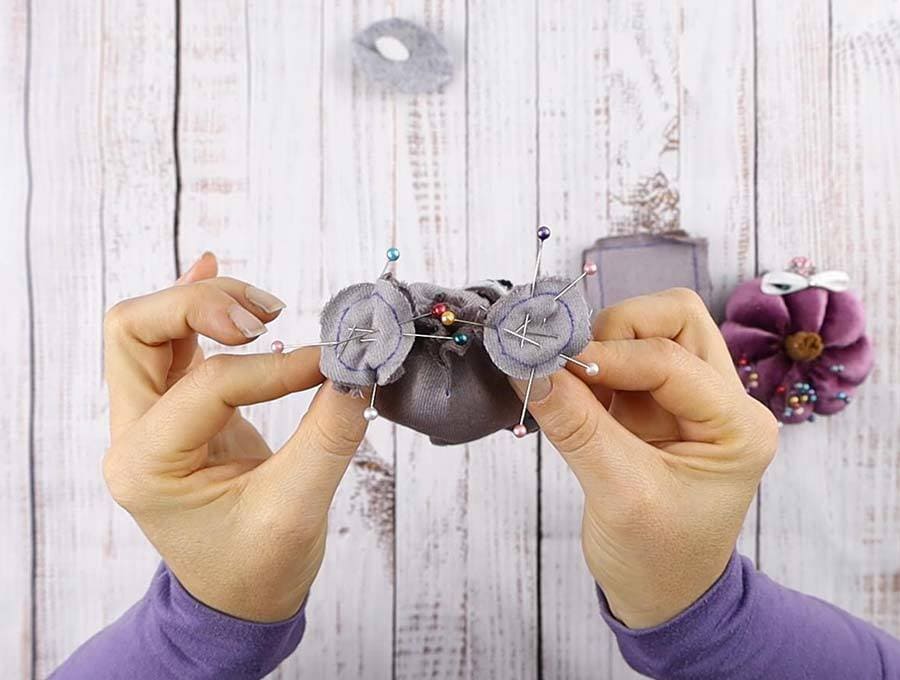
STEP 3: Fold and pin
Now you will need to pin the darts. Start with the pieces for the oxygen tank.
Take the oxygen tank back piece and fold it in half diagonally. Keep its right sides in while folding the fabric pieces.
Next, the main body back piece and put it onto your workspace so that the leg parts are at the bottom and the right side is facing up. Then fold the entire piece in half from left to right. Pin the darts in the same manner as with the oxygen tank parts.
Do so for the front upper and the front lower body pieces as well.
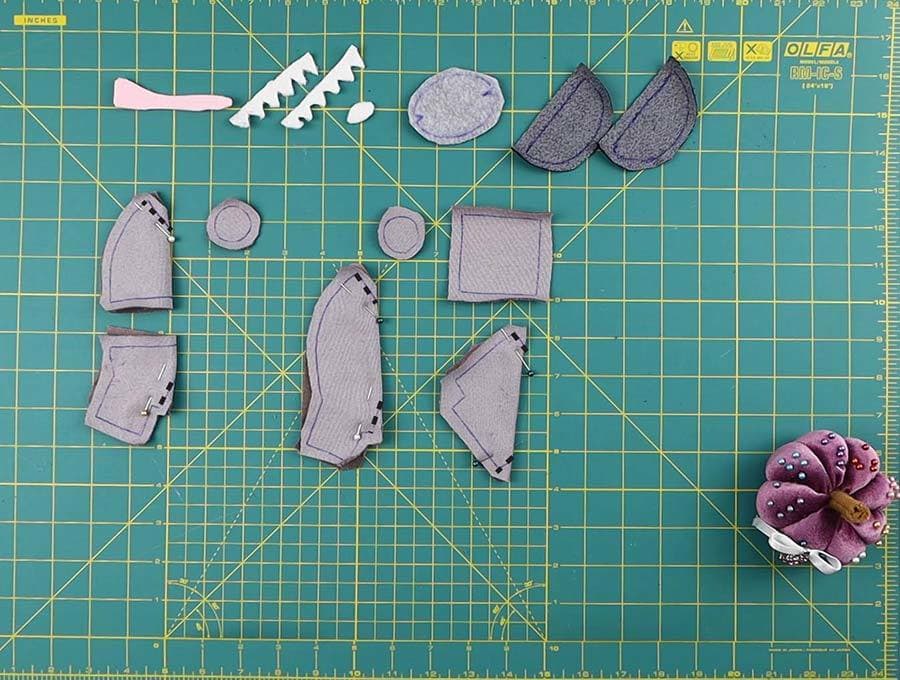
TIP: When you fold the pieces, you will need to pin the darts. Since these pieces are a bit small, the darts are also small. To sew them without the pin getting in the way, you’ll need to use a neat trick I learned.
Once you run the pin through the darts, check if it’s right on the mark and that it’s going through the markings. Now grab both layers firmly and take out the pin slowly. Put it back about a quarter-inch below the darts. That’s the trick, now you can sew without taking the pin out.
STEP 4: Start sewing the imposter plush
- Sew the visor and glint
Grab the glint fabric piece and the visor piece first. Place the glint on the top left of the visor. Don’t forget to mind the seam allowance of the visor. Check the pattern and you’ll see the recommended spot for the glint.
Take a needle and a white thread and sew the glint to the visor. Keep your stitch as close to the edge of the glint as possible. Use whip stitch and thread the knot once you finish.

- Sew the darts on the visor
Fold the visor in half and keep its right side inside. Sew both darts by backstitching. Make a knot on the beginning and the end of the seams.
- Prepare the oxygen tank front and the main body front
Sew the darts on the front oxygen tank piece. After that, sew the darts on the front body piece as well.
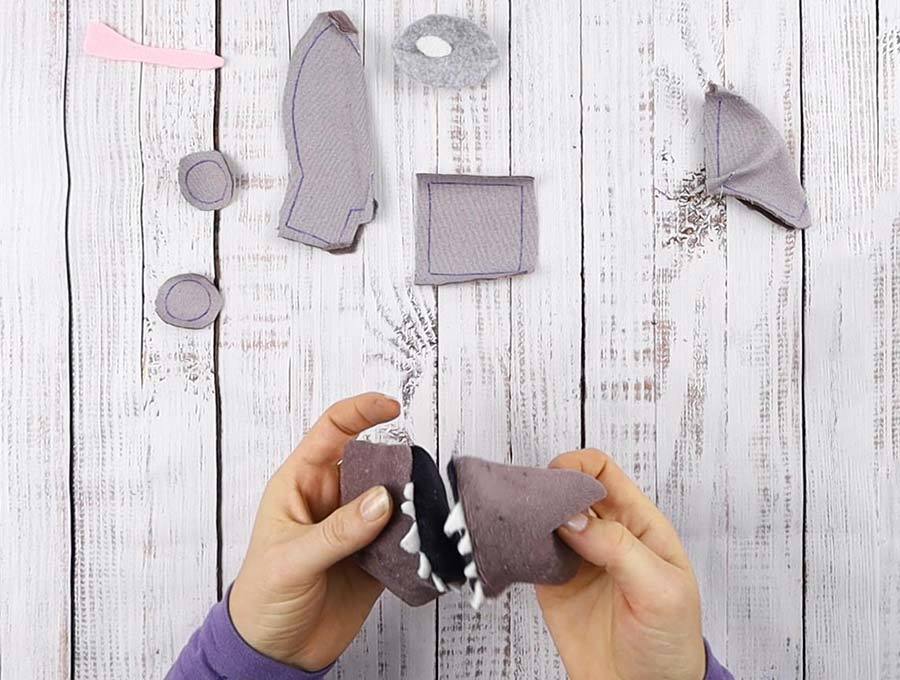
- Prepare the mouth, teeth, and tongue parts
Cut out the two jaw pieces from a black fabric for the mouth. Cut out two sets of teeth from white fabric. One set should have six teeth. Lastly, cut out the tongue.
- Sew the mouth to the main body front
Place one set of teeth along the curved edge of the lower body. Make sure that they are facing away from the seam allowance lines. Put the lower jaw on top in the same manner. Make a stitch along the curved edge to sew the layers together.
Sew the second teeth set and jaw piece in the same manner. This time, instead of the curved edge on the lower body, sew the pieces onto the upper straight edge of the upper body.
To complete the mouth, sew the two straight edges of the two jaws together. As you reach the middle of the mouth, tuck the tongue in so that it faces away from the seam allowance markings. Then sew over the tongue and continue your stitch until you reach the end.
- Pin the body parts
Place the two main body parts onto each other. Keep their right sides in and pin them together.
- Prepare the other oxygen tank piece
Unfold the second tank piece and fold it to the other side diagonally. Sew the darts and trim the dart seam allowance down to half its length.

STEP 5: Make the oxygen tank
Put the back and the front tank pieces onto each other and align the edges. Sew all around the tank, but leave a one-inch opening unstitched.
Turn the tank inside-out and fill it with polyester stuffing. Don’t make it too tight though!
Use a needle and a thread to close the opening shut with a ladder stitch.

STEP 6: Make the main body
Sew the two main body parts together. Don’t stitch the feet shut! Also, leave an opening between the legs for the stuffing.
Handsew the feet pieces to the legs.
Turn the body inside out and fill it with the stuffing. Make sure to fill it well and to push enough stuffing into the legs as well.
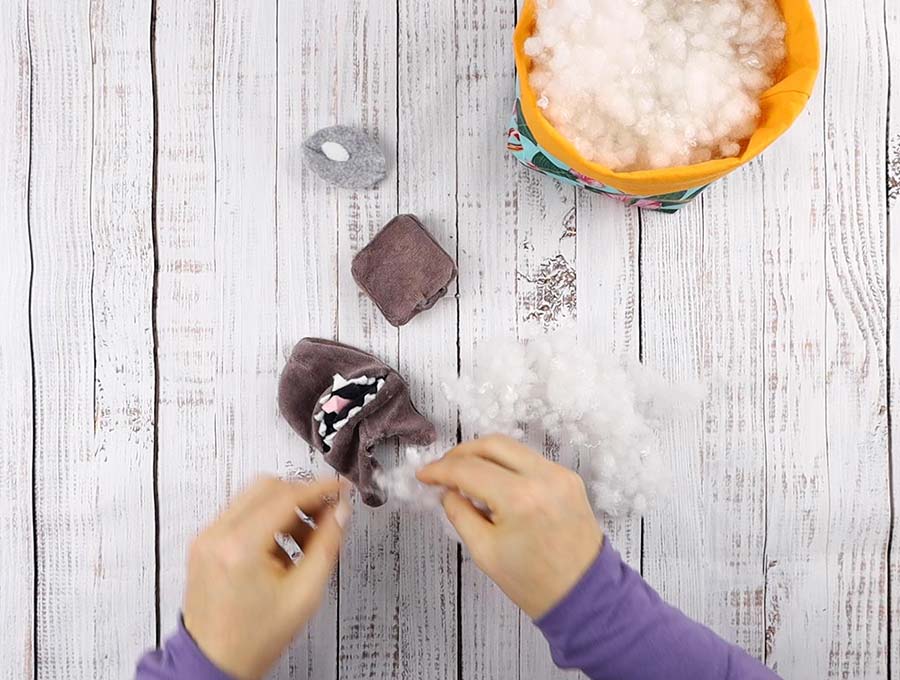
Use a ladder stitch to close the opening of the plush imposter.
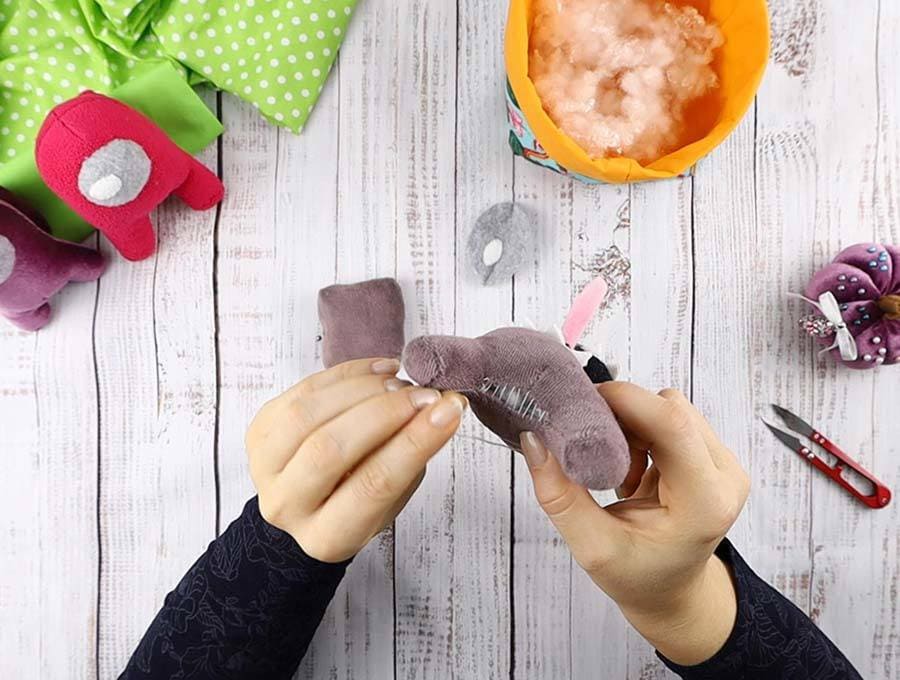
STEP 7: Sew the oxygen tank onto the body
Pin each side of the tank to the back of the plush. Sew the tank to the body with a whipstitch, going all around the tank sides.
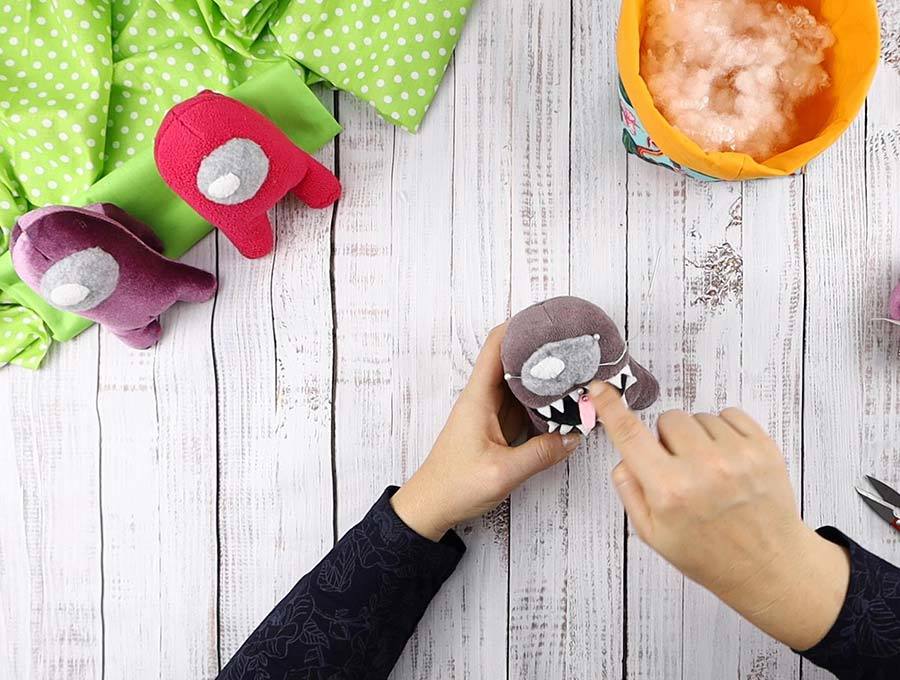
STEP 8: Finish the Among Us imposter
Make a running stitch around the visor. Don’t knot the thread, just pull it a bit to gather the stitch. Keep the thread attached to the needle. Fold the seam allowance a bit and pin the visor to the head center horizontally.
Sew around the visor, stop before you finish, put some polyester stuffing under the visor, and finish the stitch.
The imposter is ready for mischief!
Did you like the imposter tutorial? Tell us your thoughts in the comment section below. Now that you know how to make your own imposter plush stuffed toy, try making the entire crew! Your kid will love having them and you’ll have fun sewing them! Everyone wins!
Do you like this? Pin for later:
Wanna be friends? Click HERE and follow me on Pinterest
OTHER STUFFED TOYS: