
Among Us Crewmate Plush Pattern + VIDEO Tutorial
My teen came to me asking me if I can sew him up an Among us plushie. Say whaat? Actually, sew him something? He is usually not asking me to sew stuff for him, so I jumped at the chance. I have never heard of AMONG us game, but he informed me that it has been around for few years now and it is gaining popularity ever since the first lock down. Quickly he informed me about all the AMONG us characters – the crewmates and the impostors, what a dead body is and we got to pick up the colors. I pulled out the suitable fabrics out of my stash and we got together to choose a color for the among us crewmate plushie he asked for.
If you are playing the game, you already know the variety of colors these characters have, but it was all new to me – blue, cyan, pink, purple, green, red, orange and bright yellow. He looked around and decided on purple standing crewmate. Great! He then proceeded to tell me more about the game, the crewmate’s tasks, what SUS is, and how crewmates can vote out the Impostor. These little creatures are not difficult to sew at all, even from complete beginners. If you can sew a straight stitch, you can make this adorable standing crewmate plush. If you can’t – just watch my video – I’ll show you every little step. And finally -if everything else fails then ask mom or granny to do it for you.

Below you will find my step by step among us crewmate plush pattern and written tutorial with VIDEO instructions for all the visual learners.
We occasionally link to goods offered by vendors to help the reader find relevant products. Some of the links may be affiliate meaning we earn a small commission if an item is purchased.
Table of Contents
- 1 How to make a Standing Crewmate Plush
- 2 Supplies and tools
- 3 How To Sew a Crewmate plushie
- 3.1 Sewing the standing crewmate VIDEO TUTORIAL
- 3.2 INSTRUCTIONS:
- 3.3 STEP 1: Prepare the standing crewmate template
- 3.4 STEP 2: Trace standing plushie pattern pieces onto fabric
- 3.5 STEP 3: Cut out the fabric
- 3.6 STEP 4: Pin first darts
- 3.7 STEP 5: Sew
- 3.8 STEP 6: Sew the oxygen tank
- 3.9 STEP 7: Sew the body of the crewmate plushie
- 3.10 STEP 8: Turn right sides out
- 3.11 STEP 9: Stuff body and tank
- 3.12 STEP 10: Sew the gaps closed using ladder stitch
- 3.13 STEP 11: Sew tank to the body
- 3.14 STEP 11: Attach the visor to the head of the crewmate
How to make a Standing Crewmate Plush
Supplies and tools
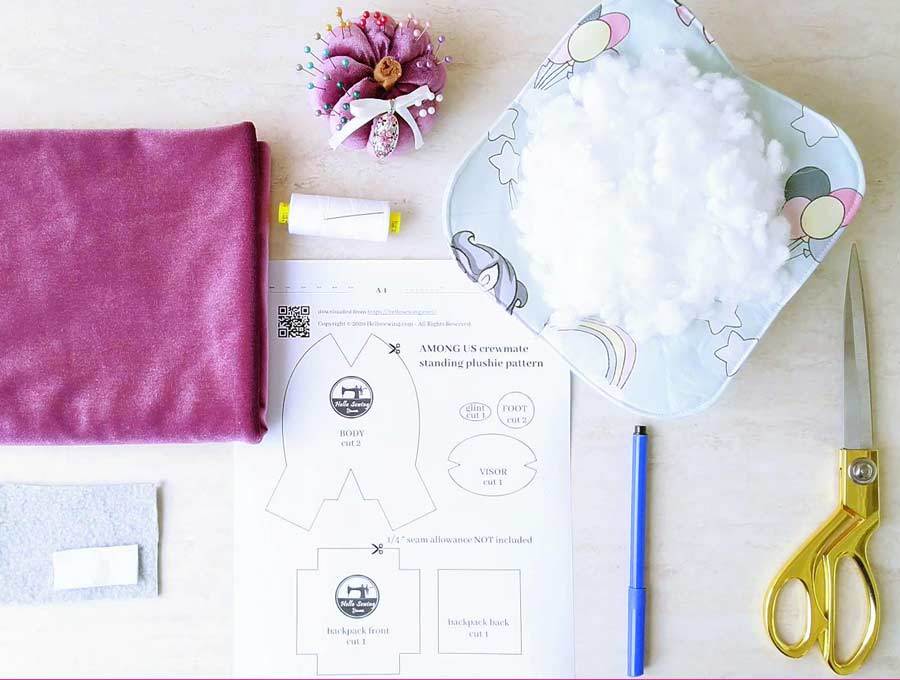
- main fabric – minky, velvet or fleece in the color of your choice 15″x 10″- purple, blue, cyan, green, red, orange, yellow, brown
- light grey/light blue and white fabric – little scraps for the visor and glint
- matching thread thread
- among us plush template (free download below)
- polyester stuffing
- scissors
- sewing clips or pins
- fabric pen or simply a sharpie
- handsewing needle and white thread
- sewing machine (or you can handsew these)
AMONG US character standing crewmate PATTERN
DOWNLOAD: among us crewmate plush pattern (Free PDF file)
Follow us for free patterns & tutorials! [easy-profiles]
How To Sew a Crewmate plushie
Watch the diy standing among us crewmate video first and then follow the written step by step instructions below.
Please enjoy and don’t forget to Like and SUBSCRIBE over on YouTube to be kept up to date with new videos as they come out.
Sewing the standing crewmate VIDEO TUTORIAL
INSTRUCTIONS:
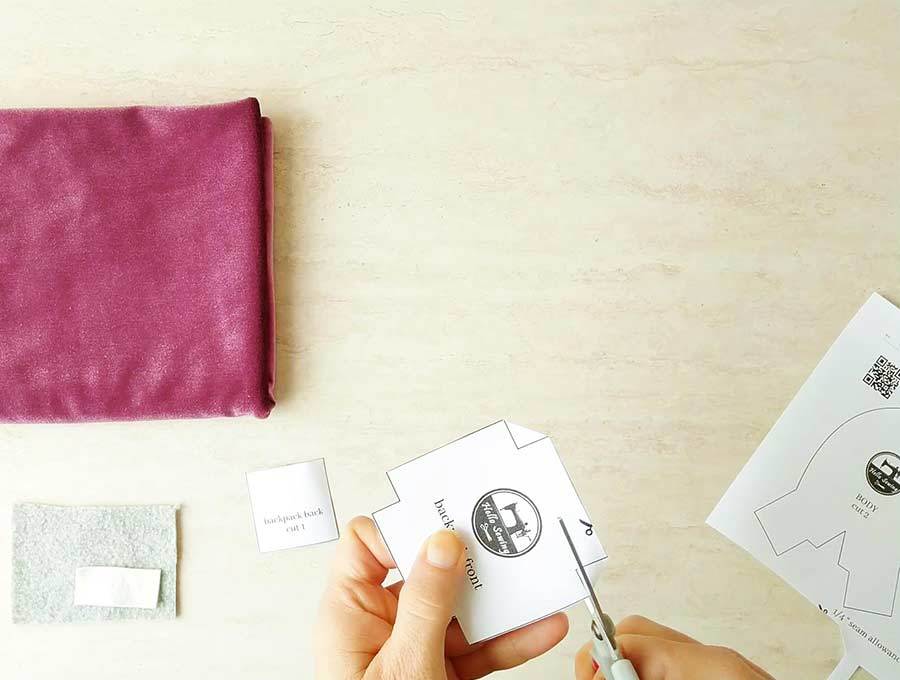
STEP 1: Prepare the standing crewmate template
Download the among us standing plushie pattern from the link to the template above. Print it at 100% (no scaling at all) on one piece of paper. Cut out pattern pieces, trimming any excess paper.
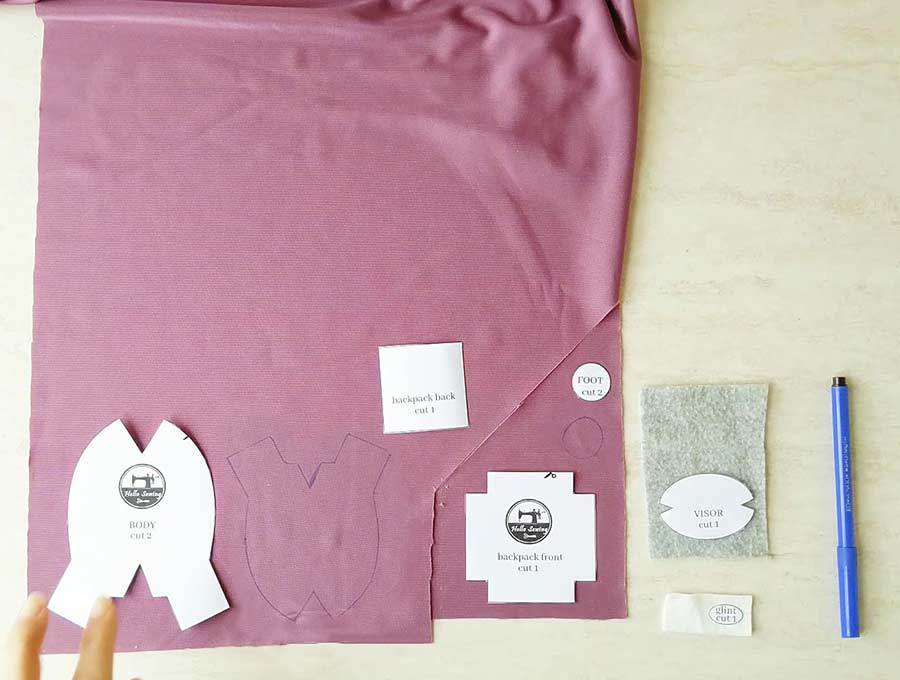
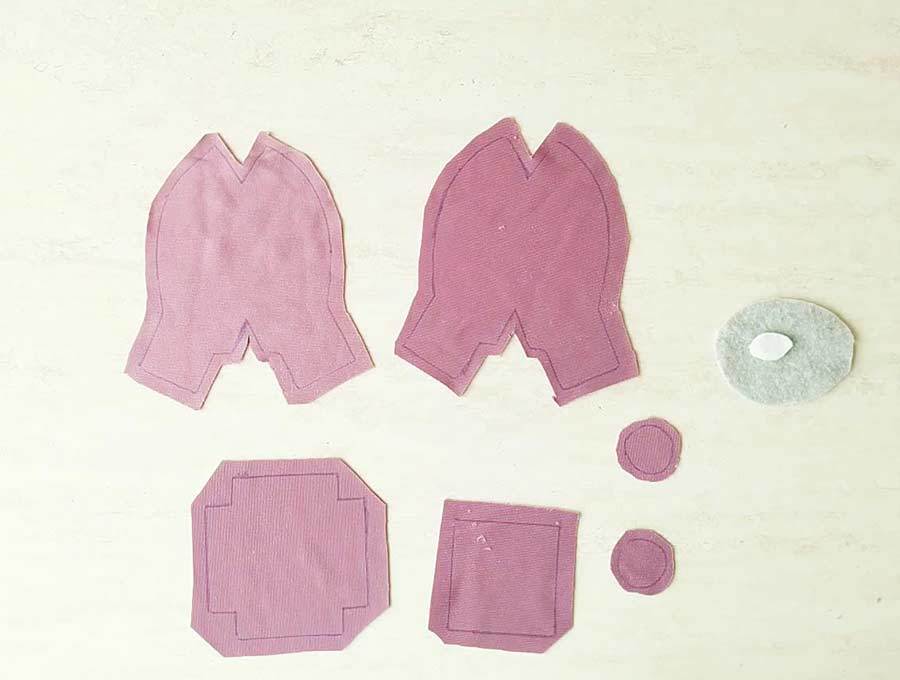
STEP 2: Trace standing plushie pattern pieces onto fabric
Trace plush pattern on the back of the fabric. Note that the seam allowance is not included in the pattern, so you will have to leave 1/4″ seam allowance around each piece to account for the seam allowance. Trace as follows:
- MAIN FABRIC: main body part (x2), foot (x2), oxygen tank-front, oxygen tank-back
- LIGHT GREY/BLUE FABRIC: VISOR
- WHITE FABRIC: Glint
The only fabric piece you will cut according to pattern (without adding seam allowance) is the glint.
STEP 3: Cut out the fabric
Cut 1/4″ from pattern lines (except for the glint, that you cut according to pattern). If you’ve traced everything correctly, you will have 8 fabric pieces to work with.
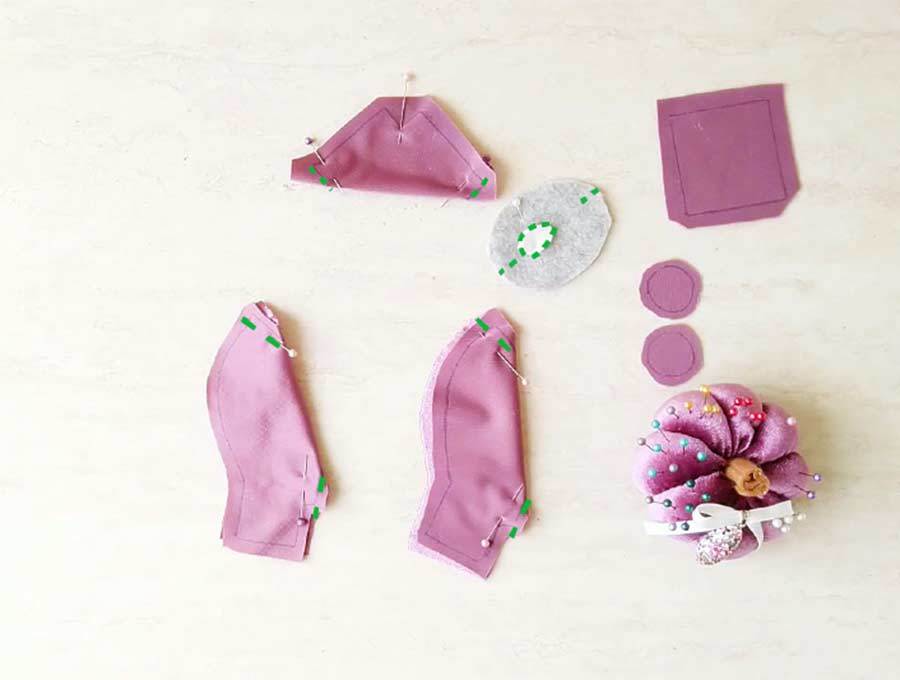
STEP 4: Pin first darts
You will need to pin the first darts on the oxygen tank front and both main body parts.
- Fold oxygen tank in half diagonally, with the right sides facing and pin darts.
Let me share one tip with you that will help you pin and sew darts precisely. Take a pin and push it near the top of the dart line through both layers of fabric. Check whether the pin went through the dart line on the back layer. If that is not the case, pill the pin a little bit and adjust the back layer. Check again whether the dart lines are aligned. If they are, hold the fabric tightly pull the pin out and pin the fabric about ¼ inch from the dart line so that you can sew without removing the pin.
These darts are so tiny that using this trick really helps
- Fold main body pieces in half with pretty (right) sides together and pin darts. If you have the time you can use the trick I shared above.
STEP 5: Sew
Now stitch the glint to the visor, and the darts of the visor, main body part and the oxygen tank. Do it in the following order.
- Sew glint to the visor. Place the glint on top left of the visor accounting for the seam allowance. See pattern for suggested placement. Thread white thread into the needle and knot the end. Push the needle under the glint and pull it from above, as near to the edge of glint as possible. Use whip stitch to attach the glint to the visor
- Fold visor in half and sew both darts. The pretty (right side) should be inside the fold. Use backstitch to sew both darts. Knot your thread at the beginning and end of each seam.
- Sew the two darts we pinned that were part of the front part of the oxygen tank
- Place main body parts on top of each other (right sides facing) and pin them together. Don’t sew the feet yet as we need to attach the feet circles to the legs.
- Also leave the middle of the bottom side as we will use this opening to turn the crewmate body around and fill it with stuffing.
- Sew the oxygen tank darts. Unfold oxygen tank, fold diagonally to the other side, pin and sew the darts. Trim seam allowance of the darts down to 1/8 inch to reduce the bulk.
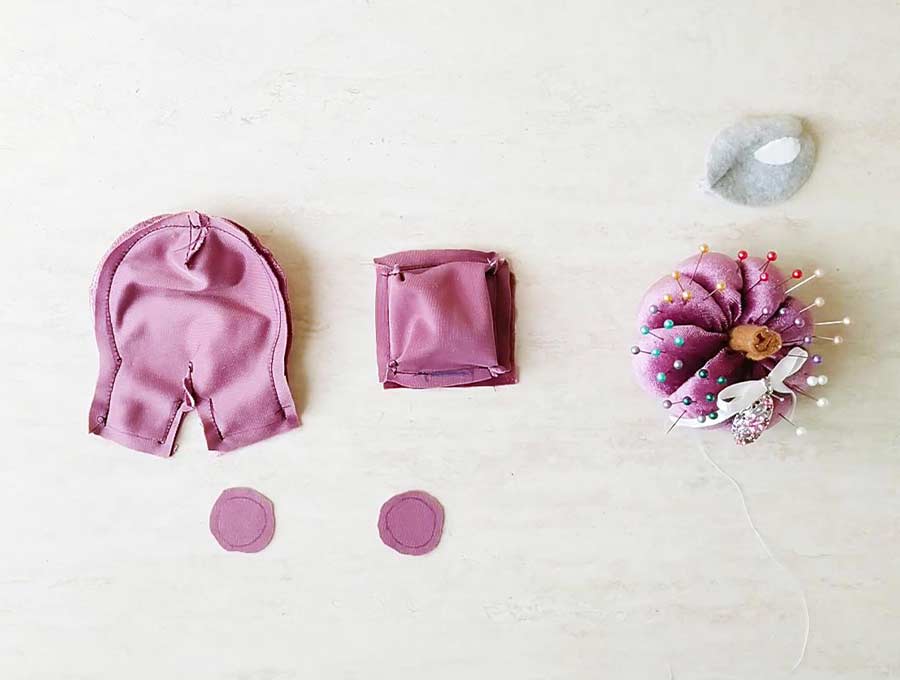
image also shows fully sewn oxygen tank
STEP 6: Sew the oxygen tank
Pin oxygen tank back to the front part and leave 1-inch gap for turning. I usually mark this gap either with double pins or with a fabric pen. Sew around either using a backstitch or your sewing machine to speed up the sewing process a bit.
STEP 7: Sew the body of the crewmate plushie
Sew the plushie main body parts as shown and be careful to leave 3 gaps unstitched or you’ll have to use the seam ripper later (been there, done that)
Pin the feet to the crewmate body and handsew using a backstitch. The feet are so tiny that I don’t recommend sewing them on a machine even if you have one, as it will be much difficult

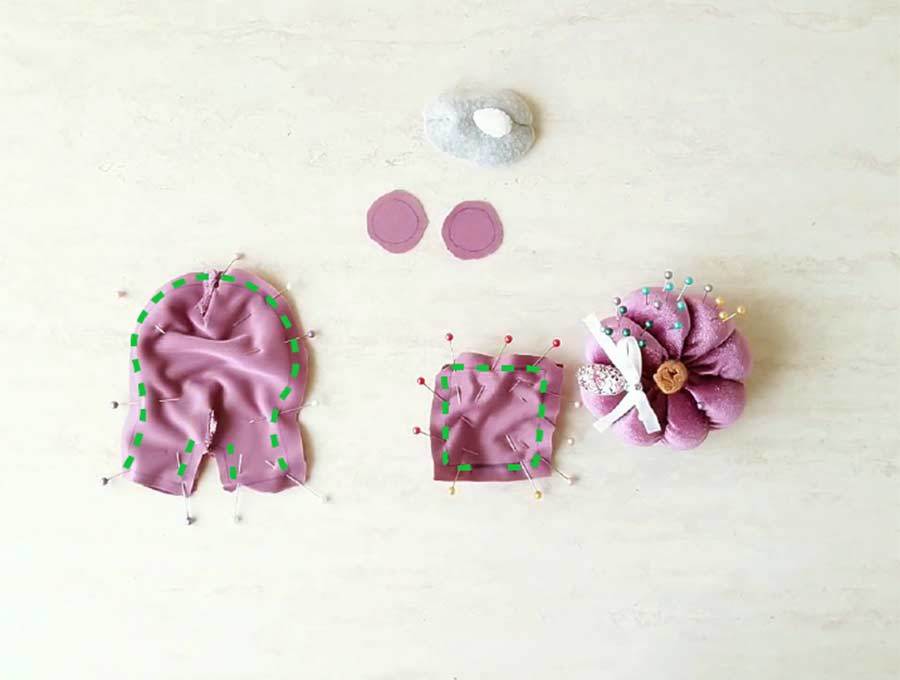
STEP 8: Turn right sides out
Turn the oxygen tank around
Turn the standing crewmate body right side out
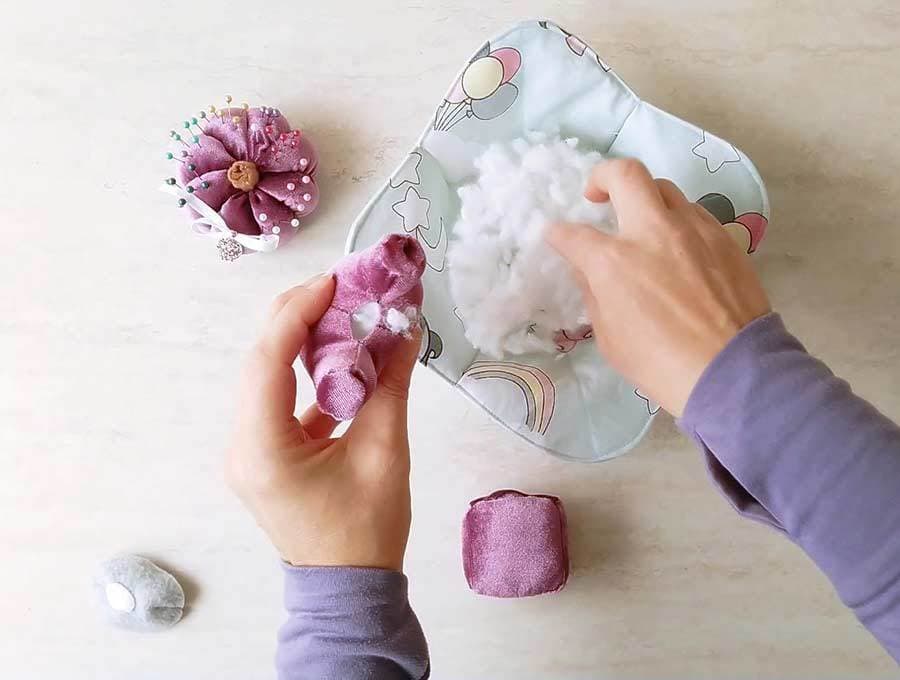
STEP 9: Stuff body and tank
Fill in the oxygen tank with the polyester stuffing. Do not fill it too tight, just enough.
Fill in the standing plushie body with the stuffing. Make sure to stuff it well and fill in the legs well – you will be surprised at how much stuffing it can take. What I like to do and it helps stuff easier and faster is to roll a handful of stuffing with my hands to deflate it a bit and then to fill it using my fingers. Watch the video to see how I do it. I have made quite a bit of stuffed animals (this sock monkey was the last stuffed animal I made) so I can now do it in my sleep, but if you are new to that you might learn a trick or two that will help you get through this part faster.
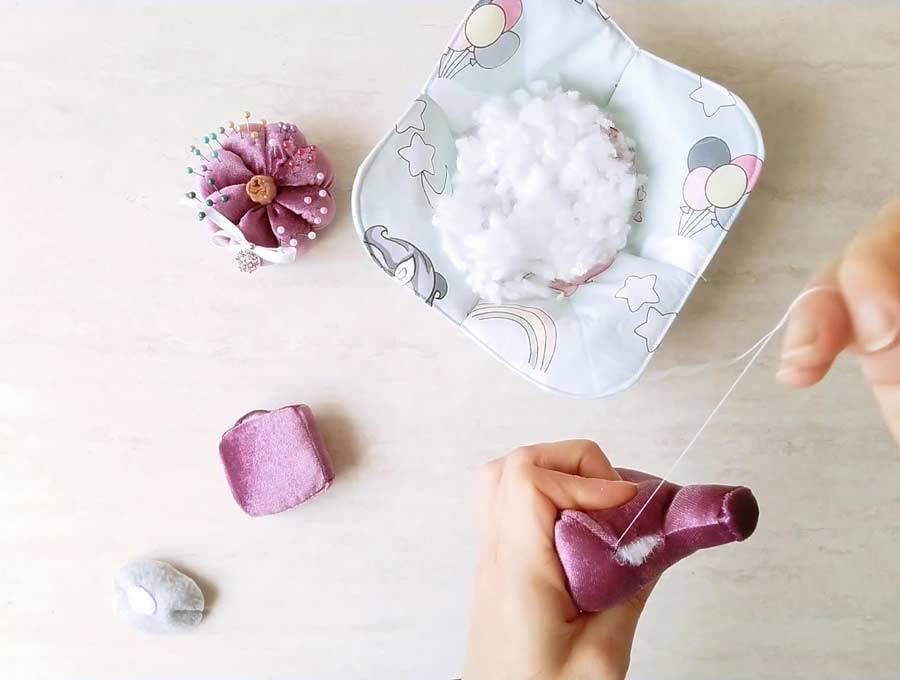
STEP 10: Sew the gaps closed using ladder stitch
Sew the openings of the tank and the body using a ladder stitch. If you are new to this stitch watch the video carefully (you can slow it down in YT if you prefer). When you have stitched the gap, pull the thread to close the gap. Stitch a couple of times, then push the needle through the loop of the thread twice to make a knot. Push your needle through the plushie an inch or so from the end of the stich. Cut the thread and it will disappear inside the body
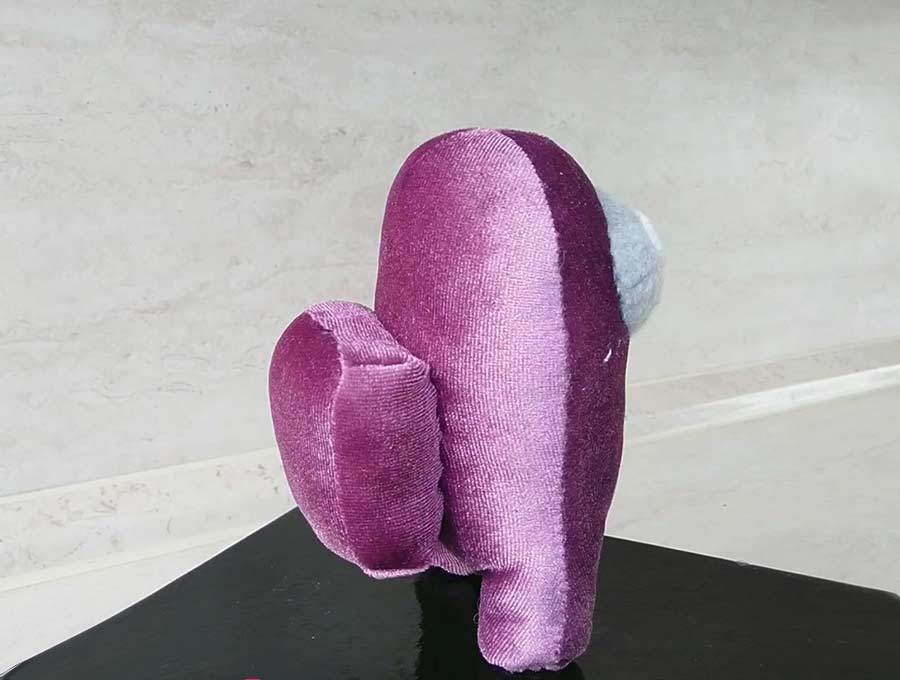
STEP 11: Sew tank to the body
Pin the tank to the back of the crewmate using 4 pins – one on each side. Sew both parts together using a whipstitch (the most basic stitch)
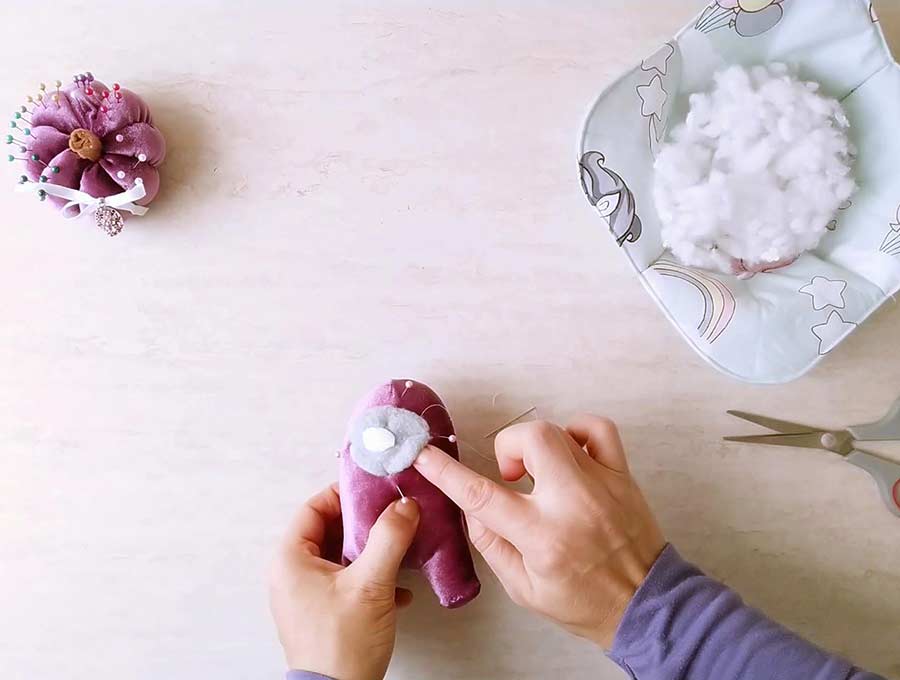
STEP 11: Attach the visor to the head of the crewmate
Make a running stitch around the visor and do not knot or pull the needle out of the thread. Pull the thread to gather the visor seam allowance slightly so you can fold it under. With the needle still attached to the thread, pin the visor to the head of the crewmate. Make sure it is centered horizontally. Now sew around the visor to attach it to the body. Stop 1/2 inch from the beginning, stuff the visor with a bit if polyester stuffing and then proceed to sew it closed.
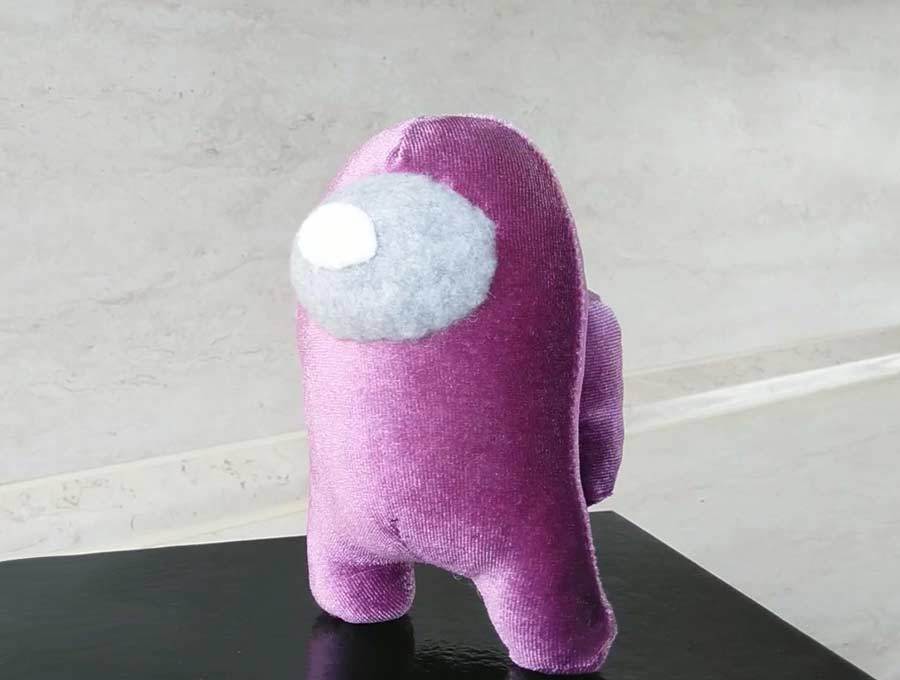
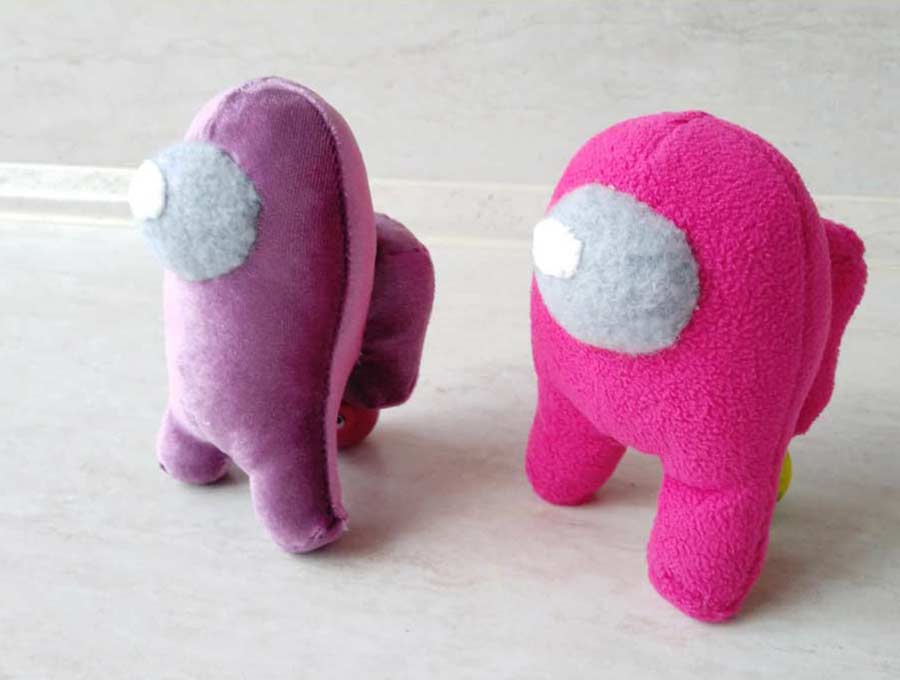
Voila! The purple among us plushie is ready.
It’s adorable, isn’t it? My standing crewmate looked so lonely that I decided to make him a pal (pink crewmate). They spend all their time together, taking up tasks and looking for the Imposter among us. They seem stuck as he is nowhere to be found.
Shh.. I must have admitted I am yet to made it, but it breaks my heart to do it. Do you think I should make the Impostor plushie and if yes – what color will suit him best?
UPDATE: Thanks for voting. Here’s the Impostor plush pattern
My crewmates keep searching so hard to find it that I think they deserve to find him. Let me know your thoughts in the comments. I would love to know what you think.
Did you make the Among us standing crewmate plushie? I made the crewmate plushie pattern with as little parts to sew as possible so that even a complete beginner can make it. At the same time, I tried to keep the original look. The first crewmate I made had his feet too far apart from each other, and looked like he was squatting, and his oxygen tank a bit too high on his back. Don’t laugh at me – I thought it was a backpack… The teen pointed the flaws immediately and I fixed them. Ahh.. you live and learn.
- Which is your favorite crewmate color?
- How long have you been playing AMONG US?
- Do you prefer to be a Crewmate or the Impostor?
Do you like this? Pin for later:

Wanna be friends? Click HERE and follow me on Pinterest
RELATED:
- Impostor plush pattern
- Free felt animal patterns – more than 25 super cute designs