
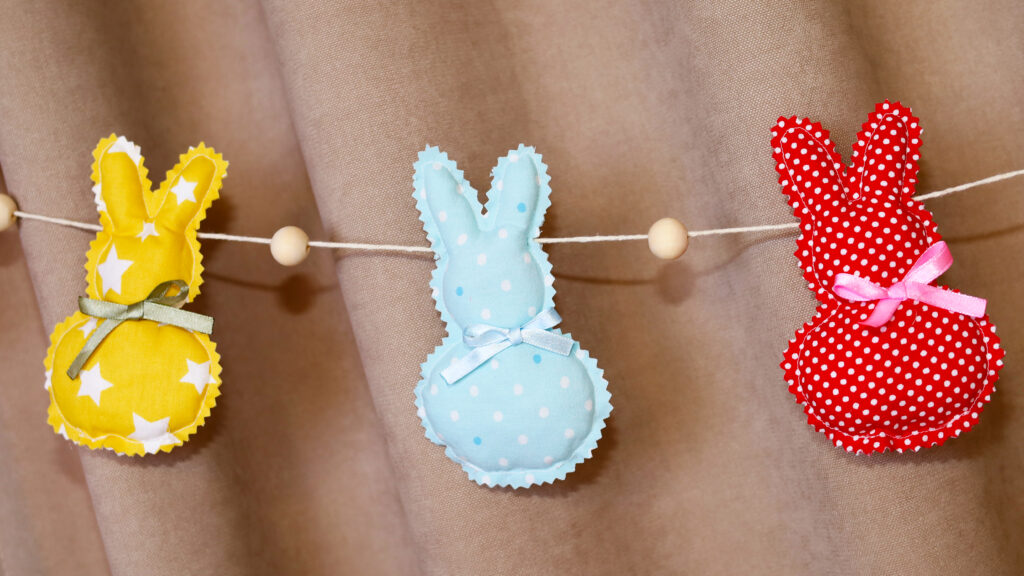
DIY Bunny Garland / Easter Bunnies Garland
How to make the cutest Easter bunny garland! Those adorable bunnies are super easy to make and so so cute! Let me show you how you can sew them either by hand or with your sewing machine.

We occasionally link to goods offered by vendors to help the reader find relevant products. Some of the links may be affiliate meaning we earn a small commission if an item is purchased.
Table of Contents
How to make bunny garland
Supplies and tools
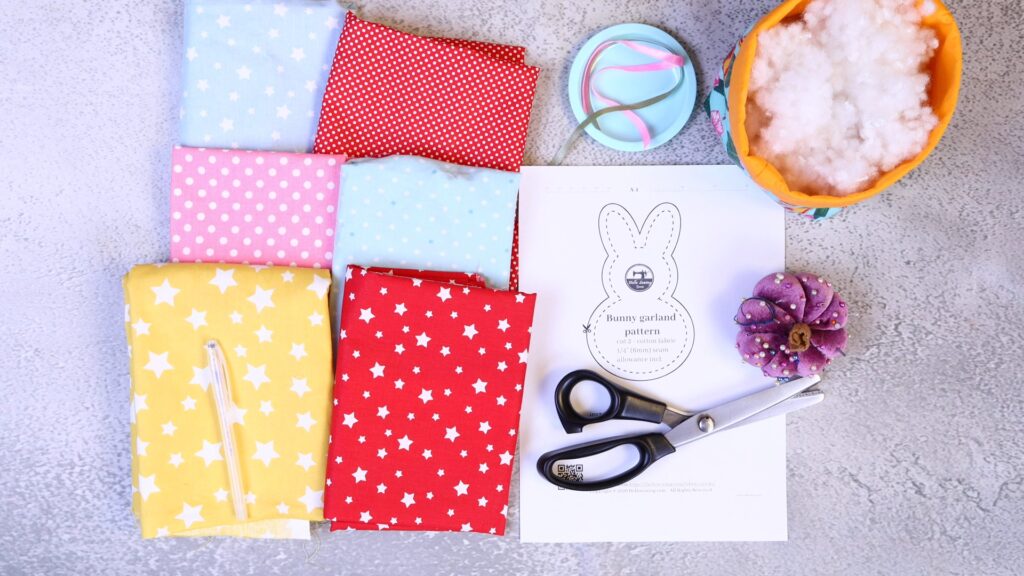
- fabric – scraps of quilting cotton in coordinating colors
- small pom-poms for the tails
- polyester stuffing
- scraps of thin ribbon for the bows (optional)
- matching thread
- scissors (or rotary cutter and a cutting mat)
- ruler or measuring tape
- chopstick or another blunt object for pushing out the seams
- heat erasable pen (optional)
- iron and ironing board
- sewing clips or pins
DOWNLOAD: Bunny garland pattern [Free pdf file]
Follow us for free patterns & tutorials! [easy-profiles]
How to Sew a Bunny Garland
Watch the diy bunny garland video first and then follow the written step by step instructions below.
Please enjoy and don’t forget to Like and SUBSCRIBE over on YouTube to be kept up to date with new videos as they come out.
Bunny garland VIDEO TUTORIAL
INSTRUCTIONS:
STEP 1:
Download and print the pattern at 100% (no scaling). Trim according to the inside (dashed) line.
If you want your bunnies bigger, trim to the solid line.
STEP 2:
Fold the fabric in half (or place the fabric scraps wrong sides together).
STEP 3:
Place the bunny garland pattern on top and mark around it with a heat erasable pen. Also mark a small gap at the bottom.
STEP 4:
Stitch all around the bunny either by hand or with your sewing machine. Backstitch at the beginning and end of the seam, leaving the gap unsewn.
STEP 5:
Lightly stuff the bunny, starting from the ears. Use a chopstick, a straw or a hemostat to fill the ears then fill the rest of the body.
STEP 6:
Push the stuffing away from the gap and pin in place.
STEP 7:
Stitch the gap closed.
If you are sewing by hand, tie a knot at the end of your seam.
STEP 8:
Roll the stuffing around to distribute it evenly.
STEP 9:
Use pinking shears to trim 6mm (1/4″) away from the seam.
TIP: if you don’t have pinking shears, you can use your regular scissors.
STEP 10:
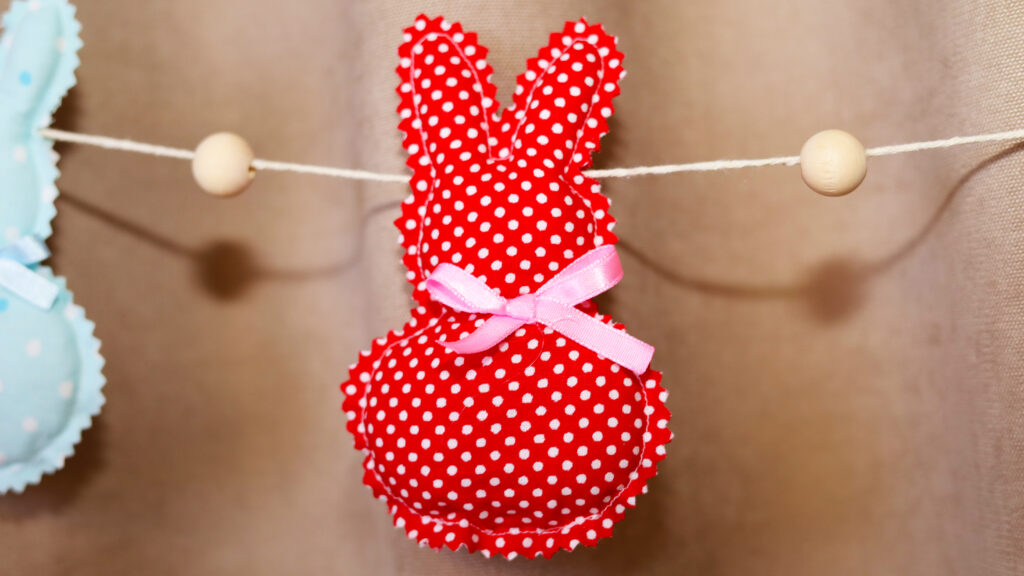
Using a glue gun glue down the pom pom tail at the back side of the bunny.
STEP 11:
Make a little bow using a thin ribbon and glue it on the front side of the bunny. You can place is either at the center of the neck, or 1/3 from the side of the neck.
STEP 12:
Repeat the steps above to make more bunnies. I recomend making at least 6 bunnies.
STEP 13:
Take a long needle and long cotton thread. Thread the needle, grab some wooden balls, pom poms or large buttons. I used wooden beads that were 20 mm (3/4″) each. You can use slightly larger 25mm (1″) or slightly smaller beads.
Determine the desired length of garland you want – this will help you determine how many bunnies and wooden beads (or buttons) you will need.
I found it easiest to place the string on the worktop and arrange the bunnies and the beads to my liking and only then to get started threading them onto the twine.
Stringing the garland: Thread the first bead, then take one of the bunnies and push your needle from side to side at the base of the ears. Leave about 8-10cm (3-4″) between them
I kept the twine attached to the spool while I threaded the wooden beads so I can adjust the size and spacing as I go. I also ensured the end of the twine was several inches long on either side after all the bunnies and the beads were threaded.
How do you display the bunny garland?
They look great in all different types of home decor. Some ideas for how to use your bunny garland and style them in your home:
- Hanging from a mantel
- Hanging on a wall
- Nursery decor
- On a shelf
- Curtain tie backs: You can also use one or two bunnies on a string to tie back curtains
How do you display or use the individual bunnies?
Great question – the possibilities are endless. To give you a few ideas:
- Toys for the little kids
- Easter egg fillers
- displayed on a tray
- on a shelf
- in front of the books to add interest
Voila! The bunny garland is ready!
Do you like this? Pin for later:
Wanna be friends? Click HERE and follow me on Pinterest
RELATED: