Skip to content
91

How to Make a Bucket Hat – Reversible Bucket Hat Pattern (VIDEO)

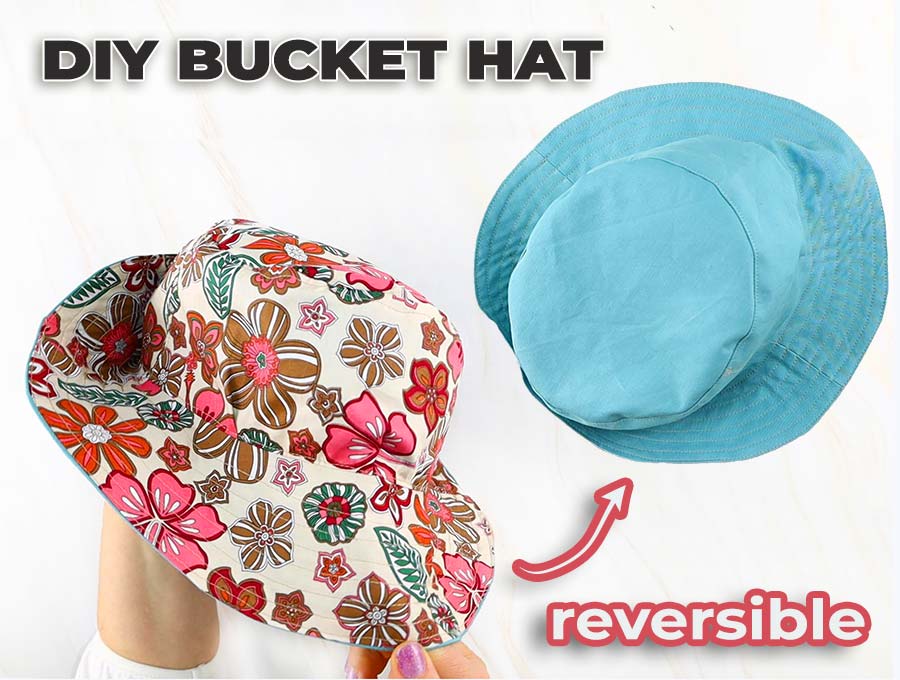
Learning to make the professional looking DIY bucket hat from our bucket hat pattern is an easy afternoon project. Finding bucket hats for children and adults can take some trawling through stores or online, and then they maybe don’t have your color or size so our DIY bucket hat is the answer – in the size you want, and the color and fabric you choose.

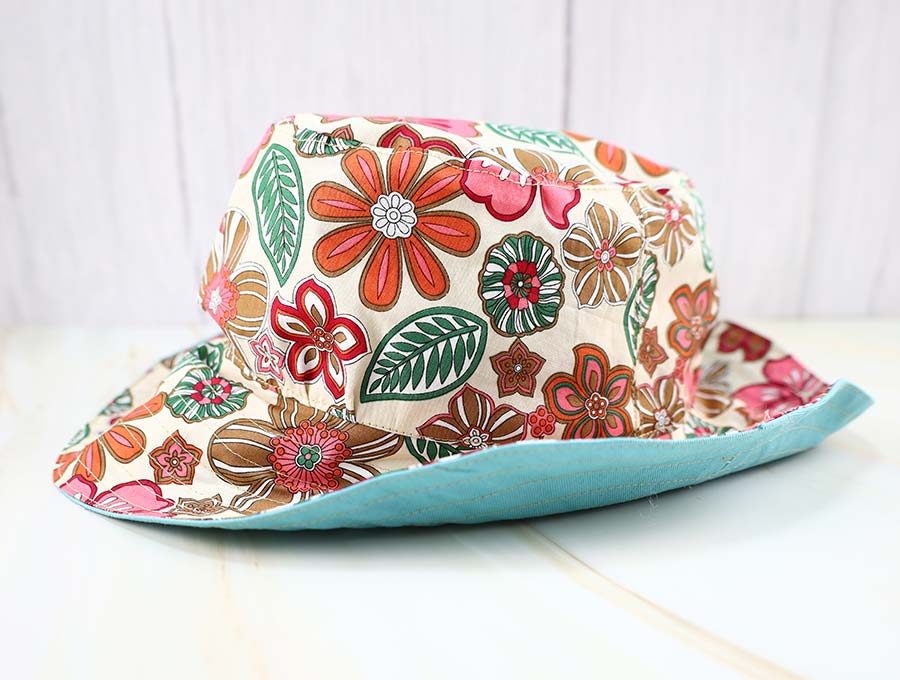
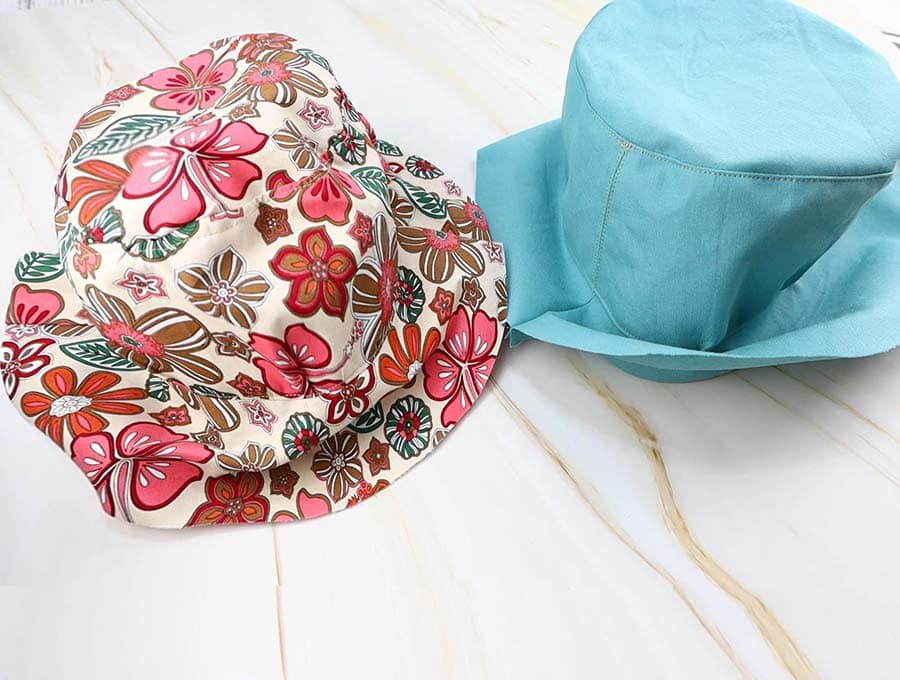
diy bucket hat view from the side

The DIY bucket hat pattern is fully lined and has stitching on the rim – a tough little hat that will last a long time. Once you have made one bucket hat you are going to want to make more for your family or as useful gifts. They’re much cheaper than buying bucket hats and we all know how fast children can outgrow or lose hats – they seem to discard them at random. So, equipped with our pattern you’ll be able to make bucket hats for everyone, from teens to seniors, and even for your partner’s fishing trips. Choose the appropriate fabric designs for the ages, and you’ll have a happy outdoor tribe.

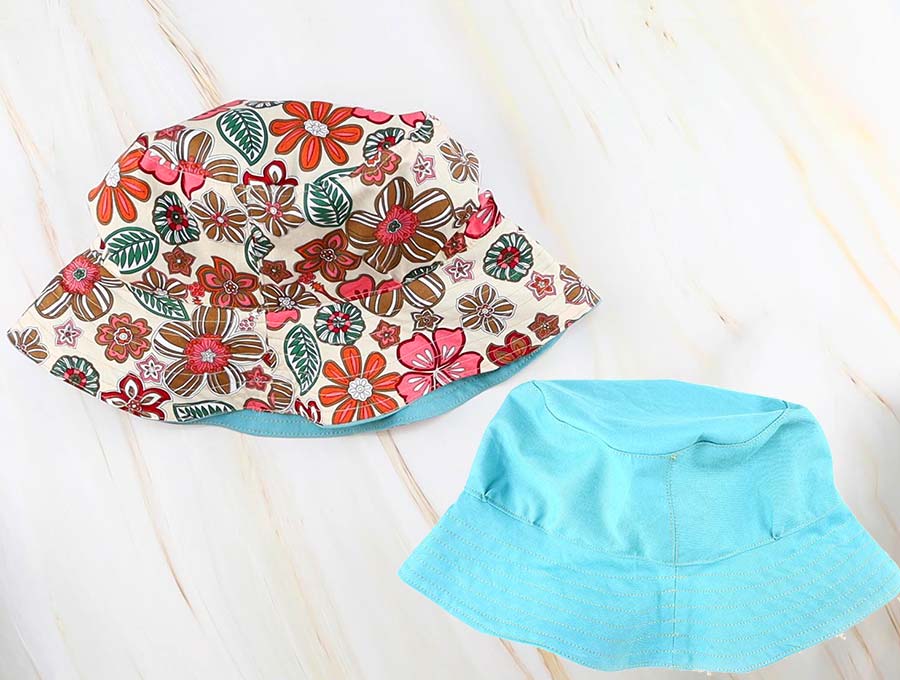
reversible bucket hat DIY

Below you will find my step by step written bucket hat tutorial with VIDEO instructions for all the visual learners.

We occasionally link to goods offered by vendors to help the reader find relevant products. Some of the links may be affiliate meaning we earn a small commission if an item is purchased.

How to make a bucket hat

Supplies and tools

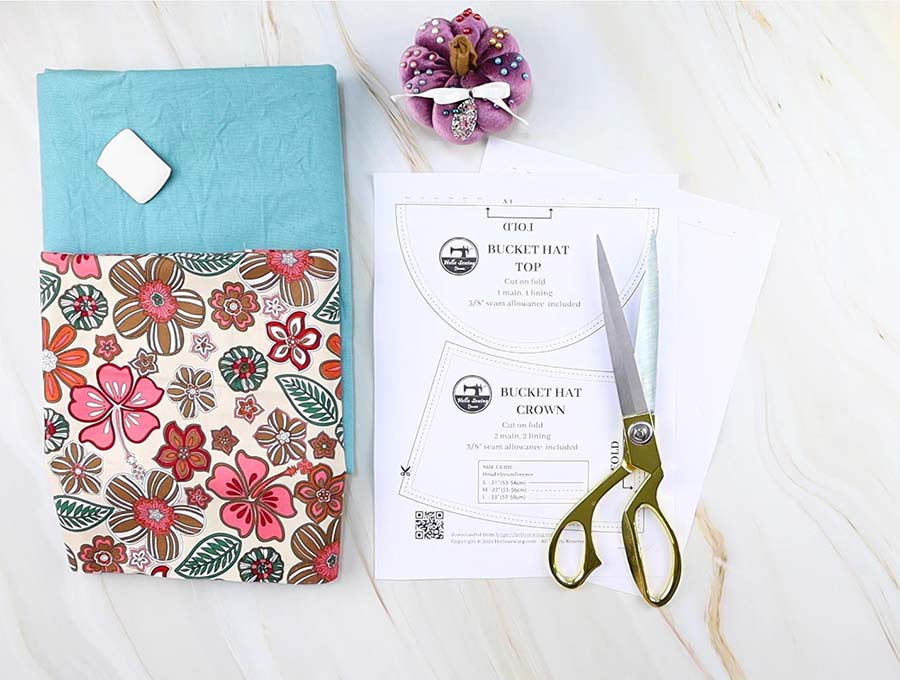
bucket hat template and supplies to make it

DOWNLOAD: bucket hat pattern (Free PDF file) – DO NOT print from the browser! The hat will be huge. Download it on your computer, open with Adobe Reader or a similar program and print from there. Make sure you print at 100% (no scaling) and check the test line to make sure the pattern printed correctly! Even 1/8″ (3mm) difference will result in a very big hat

the seam allowance is 3/8″ (1cm) unless otherwise indicated and is included in the pattern.

IMPORTANT: If you can’t download the bucket hat template it may be your browser that is blocking the pop up download. In that case try a different device (phone, PC) or a different browser. You will also receive the pattern by email so make sure to also check your SPAM and PROMOTIONAL folders as sometimes attachments end up there.

Follow us for free patterns & tutorials!

How to Sew a Bucket Hat

Watch the diy bucket hat video first and then follow the written step by step instructions below.
Please enjoy and don’t forget to Like and SUBSCRIBE over on YouTube to be kept up to date with new videos as they come out.

DIY BUCKET HAT VIDEO TUTORIAL

How much fabric do I need to make a bucket hat?

This is a great way to use up those smaller pieces of fabric you have left over from previous projects – you will need just 14 inches (35 cm) of fabric that is just 36” wide for the outer fabric of the hat and another piece also 14 inches (35 cm) for the lining. If you are careful with cutting and depending on your fabric width and hat size, you can even get two hats out of this piece of fabric.

Alternatively you can use 2 fat quarters (one main, one lining) for the smaller size hat.

Many years ago patterns would dictate that you lay out the fabric, pin all the pattern pieces in places and then cut. This resulted in some wastage. Nowadays for home sewing projects you cut and move the fabric as needed to make the most of what you have.

REVERSIBLE BUCKET HAT INSTRUCTIONS:

STEP 1: Printing the bucket hat pattern

Open up our PDF bucket hat pattern and print on A4 size paper after you have selected the ‘No scaling’ or print at 100% option. DO NOT PRINT directly from the browser. Download the pattern on your computer and open it up with Adobe Reader or similar PDF reader program and print from there. This will ensure you have the right size pattern pieces.

A 3/8 inch (1 cm) seam allowance is already included on the bucket hat template, so you do not have to calculate this in afterwards. The bucket hat pattern includes a test square –it will say 3” x 3” and by holding your measuring tape or ruler against it you will soon see if the bucket hat template has printed to the correct size.

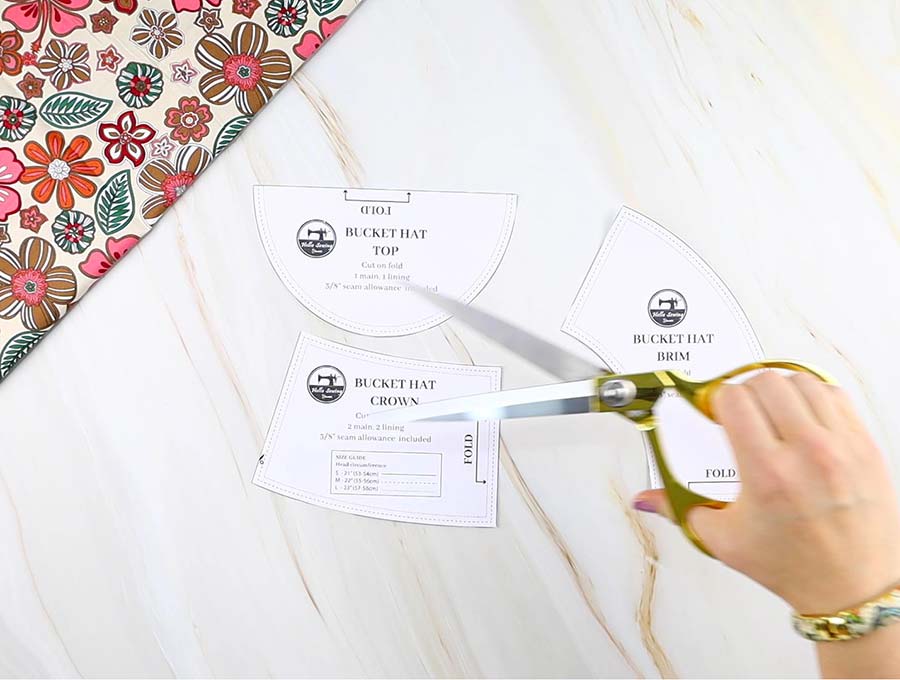
diy bucket hat pattern pieces trimmed

STEP 2: Cut out the fabric pieces

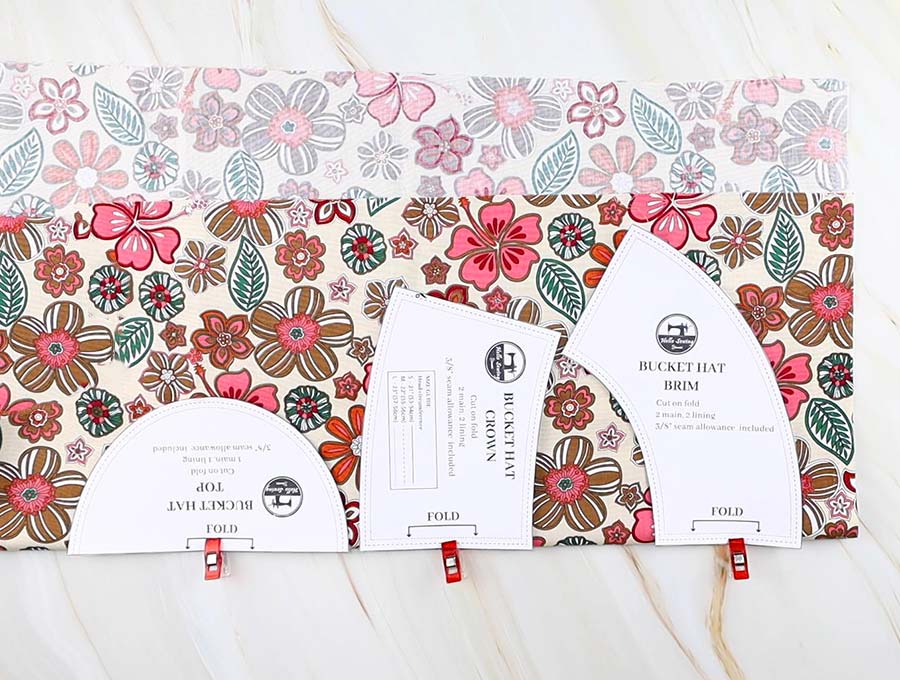
Place all bucket hat pattern pieces on the fold of the fabric as indicated on the pattern. Starting with the crown side pieces cut 2, then cut 2 pieces for the brim and lastly cut the single slightly oval crown piece.

bucket hat placement on fabric

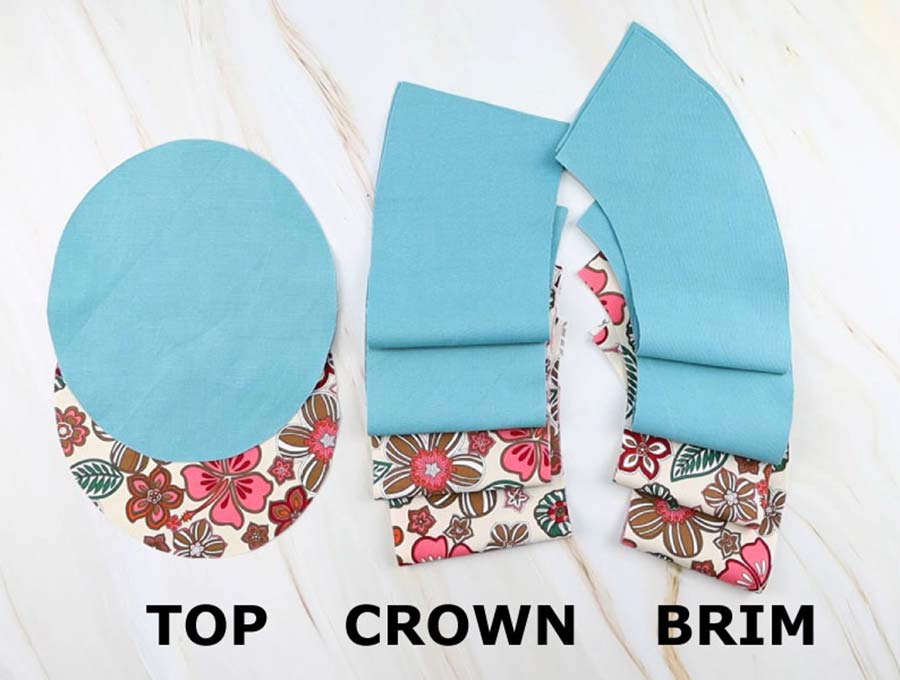
With your outer fabric follow these same so you have all the outer and all the lining pieces cut and ready to sew. You’ll end up with a total of 10 fabric pieces (5 for the lining, and 5 for the outer)

diy bucket hat fabric pieces

TIP: You can squeeze this hat out of a narrow 14″ fabric piece. Open you fabric out –if it is 36” wide it will have a crease down the middle where it was folded onto the cardboard inner. If you are using a wide piece with no fold line then place it on your cutting table with the 14” vertically and 36” or 44” horizontally. Fold the sides in to meet the center and then proceed according to the instructions. 

STEP 3: Stitch the brim pieces

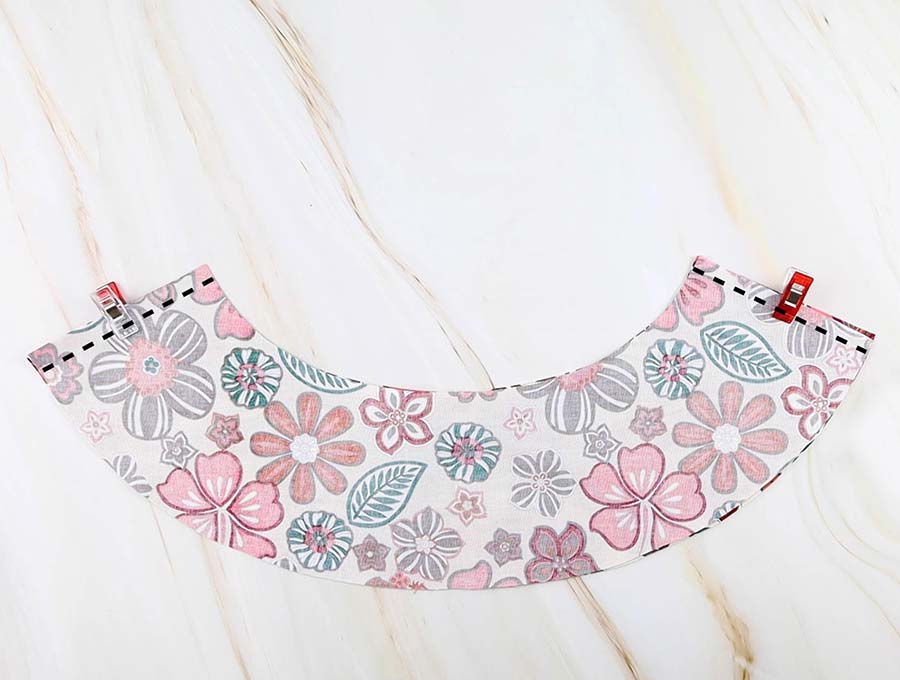
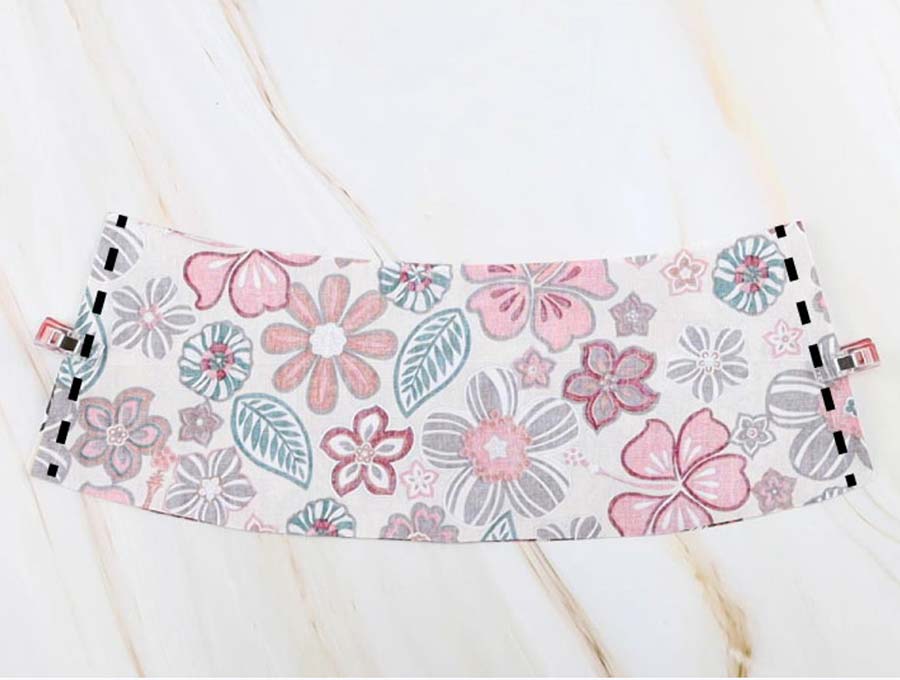
We start with the lining for the brim, opening out the two semicircles and placing them right side to right side and stitching the side seams using 3/8 (1cm) seam allowance.

bucket hat - brim stitching lines

STEP 4: Press seams of the brim pieces

Once you have stitched all bucket hat pieces together, open up the circle you have created and iron the seams open, on the wrong side.

STEP 5: Stitch the crown

Take the two crown pieces of the hat and place them with right sides facing each other and stitch along each side of the the two side seams using the same seam allowance.

Open out the crown and fit it onto your head, or on the person you are making it for to check for fit. If t is too loose use your quick unpick tool on the seam and then stitch them both seams just a little further into the fabric to make it slightly smaller, if you have the opposite problem and it is too tight you will unpick and stitch with a smaller seam allowance, so that the hat fits comfortably.

stitching lines for the crown of the diy bucket hat

STEP 6: Press and topstitch the crown

Now you are ready to carry on by pressing (or fingerpressing if you’d like) the side seams open.

To create a professional look run a row of topstitching on either side of each seam.

sewing bucket hat - all brim and crown pieces sewn

STEP 7: Mark the top in quarters

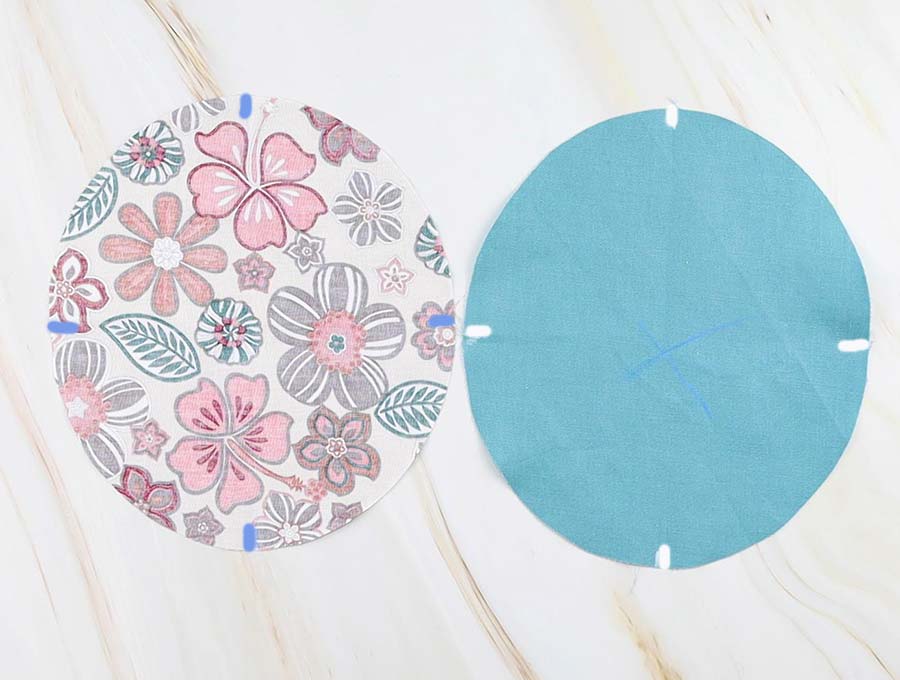
Place the oval crown piece on your table. You will notice it is not a true circle, but slightly oval. Swing the piece around so the longer part is vertical. Fold in half vertically and mark the side creases. Unfold and fold to the other side, then fingerpress to create creases and mark them with a fabric pen. The oval top in now marked in quarters.

making of the bucket hat - top with marked quarters

STEP 8: Pin the crown to the top

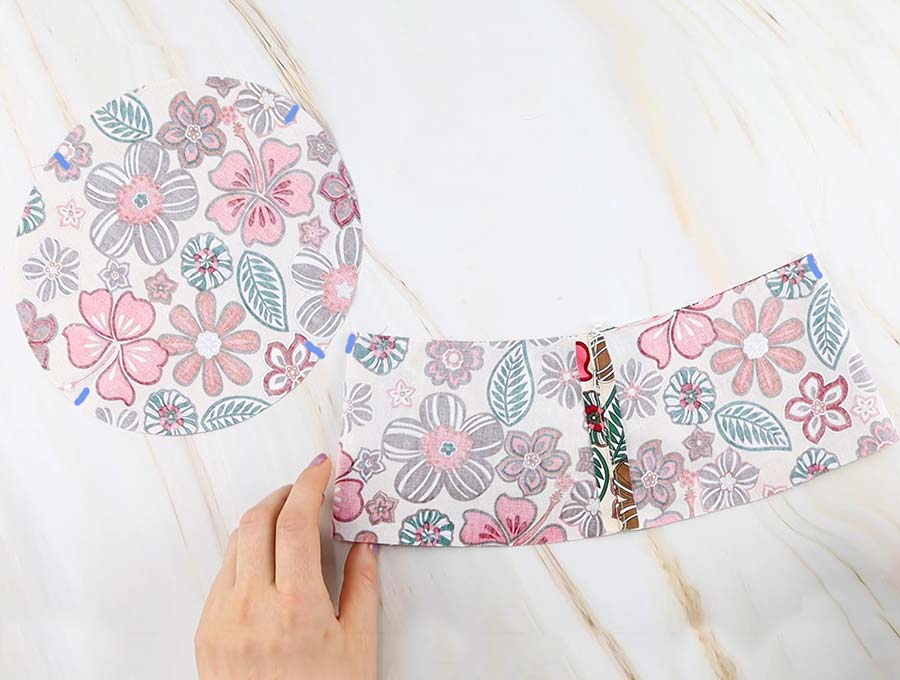
Take the crown piece you’ve sewn and find the center by each side by folding seam to seam.

Mark with a pin or a fabric marker in both places. Now take one side with the pin – it doesn’t matter which side and line it up with the hat front which will be the top of the oval. Pin the other center to the bottom side of the oval and the seams to either side. Now it just remains to keep pinning until the pieces fit together nicely.

making the bucket hat - marking quarters on top and crown

You can make a nick with the scissors here and there to help fit the oval piece into the circular piece you have stitched.

pinned crown to top of the bucket hat just before stitching

STEP 9: Stitch crown to the top

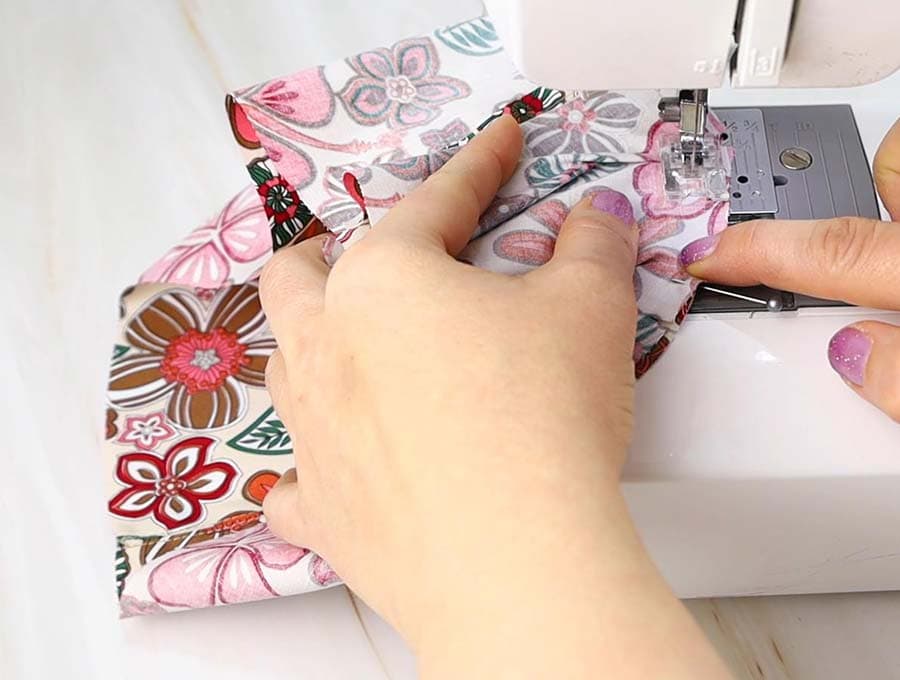
Now you are ready to stitch, taking care not to run over any of the pins, so the top of the hat is joined to the sides. Use 3/8″ (1cm) seam allowance.

sewing the bucket hat - crown to top

Once this is done, press the seam down to the crown. You can either use your iron, or just your fingers to help the seam allowance fold towards the crown. Topstitch all around the hat to catch that seam allowance that is facing downward form the crown.

bucket hat: sewn top to crown

STEP 10: Pin the brim to the crown+top piece

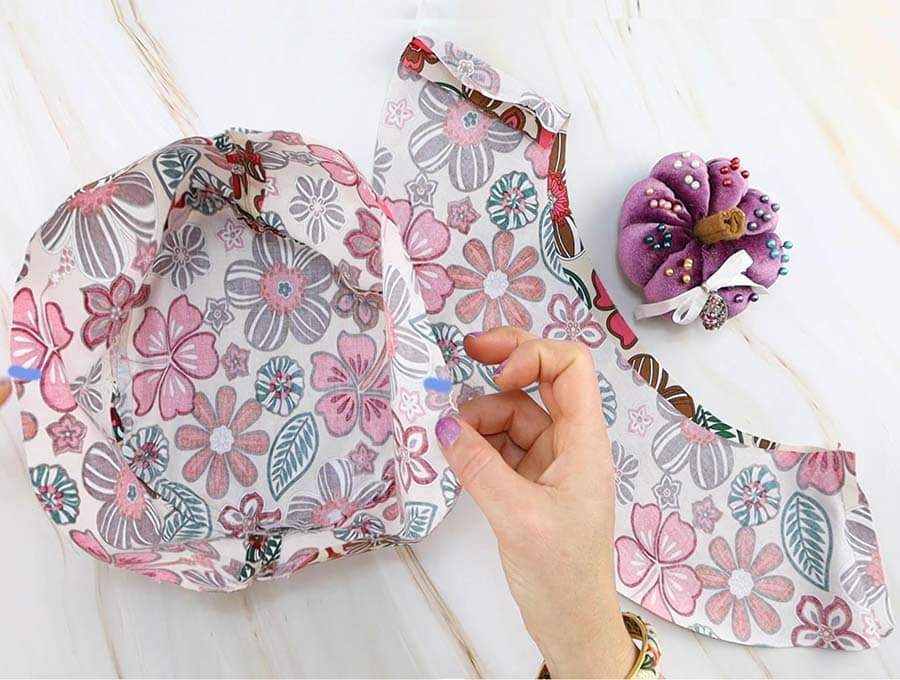
Time to fit the brim to the other part of the hat. Fold seam to seam , then crease and mark the centers of each side (as you did with the crown piece in step 8).

Line up the brim seams with those of the crown and pin them together on the wrong side of the fabric. Then pin the middle to the middle of each side and pin around the bucket hat making sure they are eased into each other smoothly.

making of the bucket hat - matching brim and crown

STEP 11: Stitch the brim to the hat

Stitch along where you have pinned with 3/8″ (1cm) seam allowance, and when you are done you’ll what is starting to look like a hat. This time you will turn the seam upwards toward the crown –the last time you turned it downwards. Run a row of top stitching along the outside to ensure the extra fabric is caught securely.

STEP 12: Make the outer hat

Repeat steps 3 to 10 with the outer fabric, to create two hat shapes.

*In the video I opted to sew in all crown pieces first, then all brim pieces, etc so you can see both lining and outer next to each other. While there is more than one way to skin a cat (or sew this hat), if you are just getting started, I definitely recommend you to make the lining first and then repeat for the outer layer.

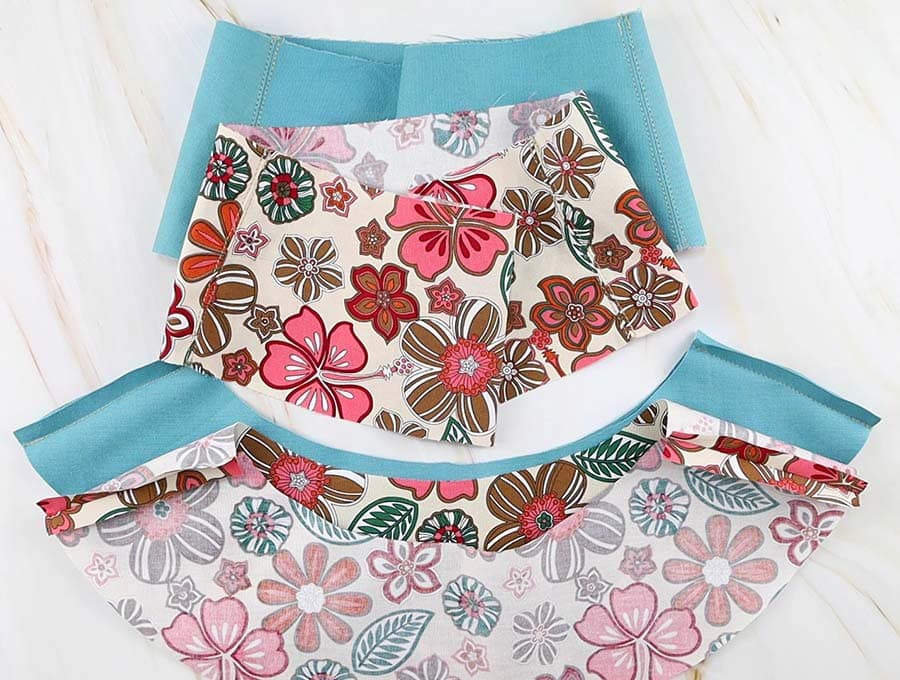
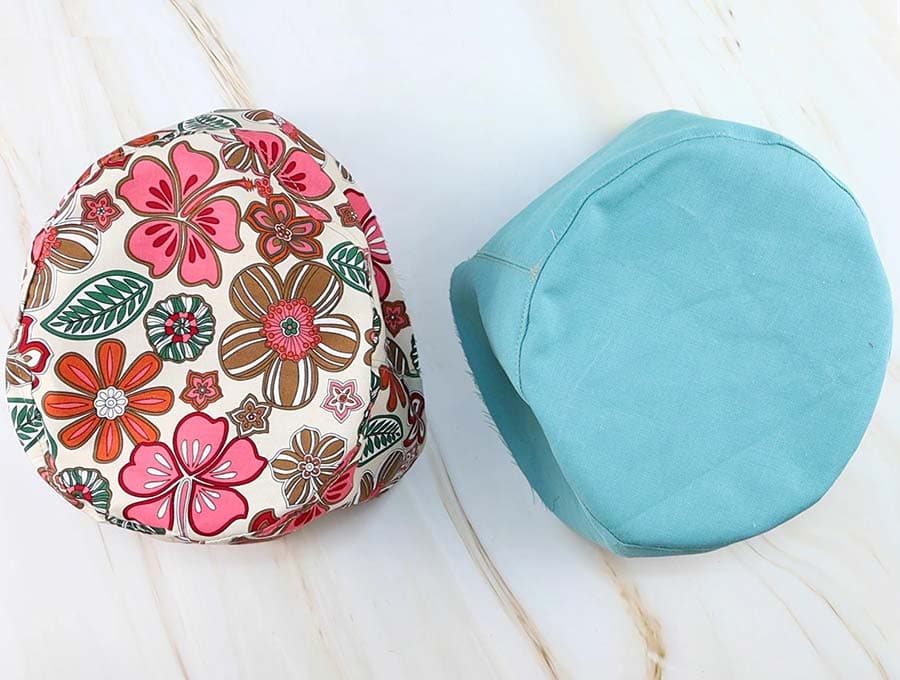
bucket hat - lining and outside layers

STEP 13: Join the two bucket hats

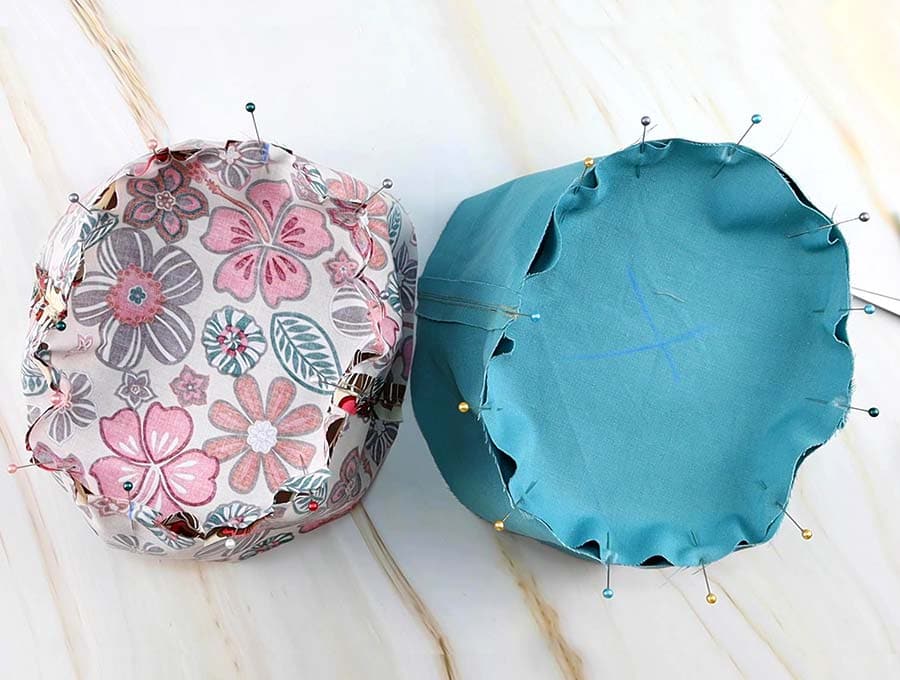
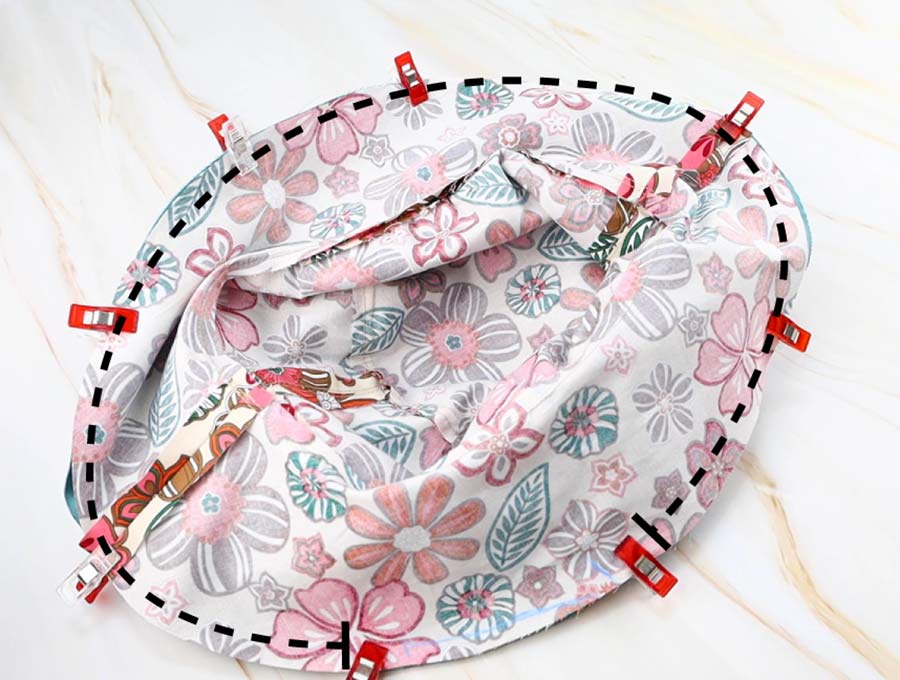
Place the two hats right side to right side and match up the seams of the lining with the outer fabric and pin in place then work around the brim pinning the two brims together.

bucket hat sewing both hats together

STEP 14: Topstitch the brim of the hat

Stitch around the brim with 3/8″ (1cm) seam allowance, leaving a small gap of around 3 inches (10 cm) to reach into and turn the hat right way out by pulling through the gap.

STEP 15: Nest the lining inside the outer hat

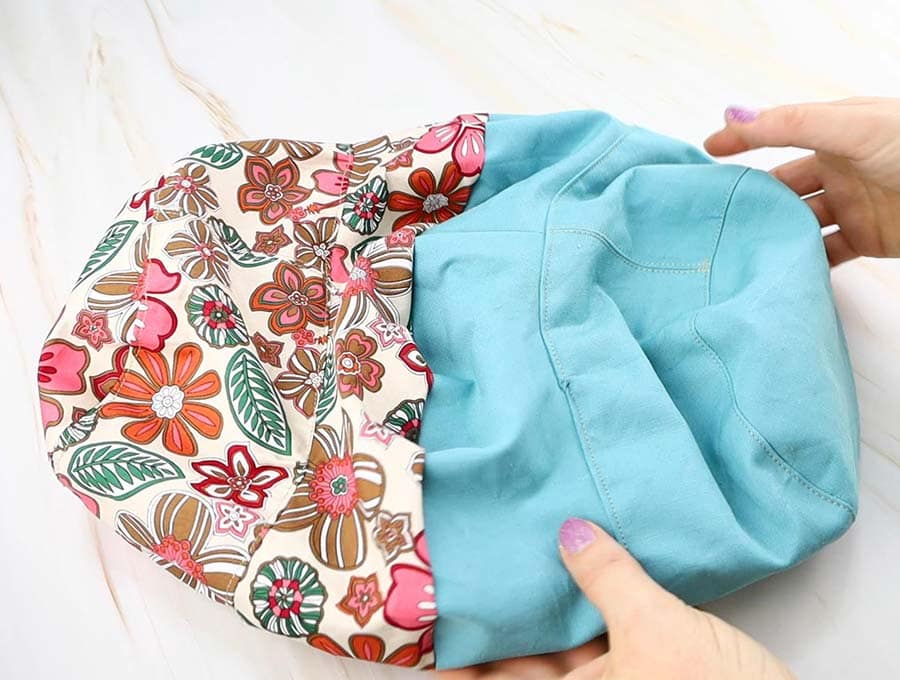
Fit the lining into the crown, and line up the brim, making sure the lining is slightly towards the inside of the hat, as you don’t want the lining showing on the outside of your bucket hat.

Pin in place and press the brim seams flat. Use your iron – I know many of you may be tempted to skip this step, but good pressing ensures a professional result – so I really recommend pressing the seams well. The fabric in the gap will naturally fold inwards – just make sure the turn-in is consistent with the seam allowance.

bucket hat stitched together

STEP 16: Topstitch the brim

Topstitch the outer brim catching the lining underneath so it stays in place.

STEP 17: Stabilize the brim

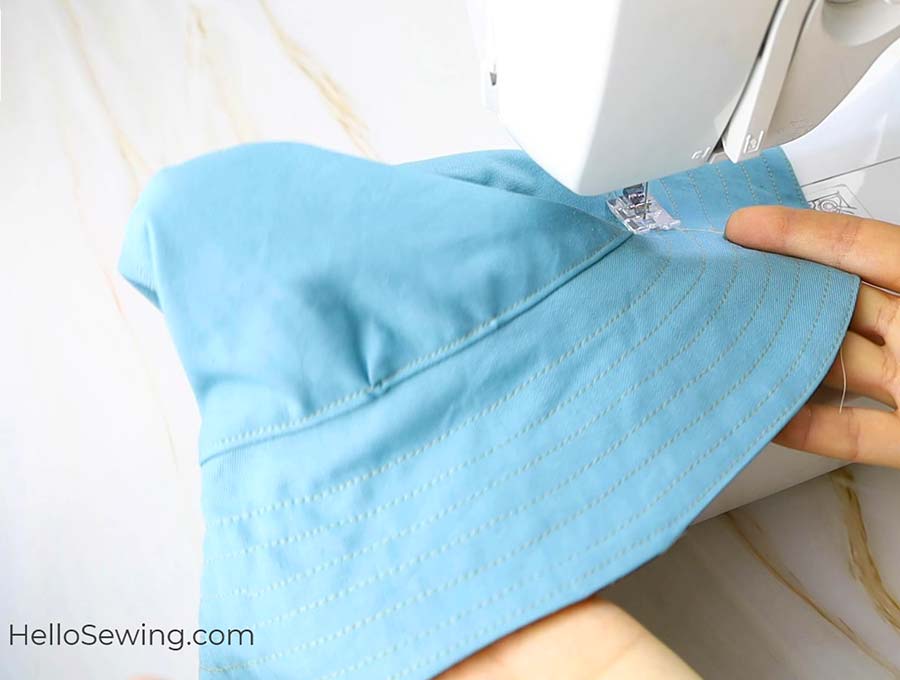
Now top-stitch concentric circles around the brim. Before you start this measure the width of the brim and work out how many circles you will need spaced around 1⁄2 inch (1.25cm) apart and mark them with a fabric pen. You may want to space them a little closer (3/8″ or 1 cm) – just so you can work in the circles without leaving a big gap nearest the crown. These stitch lines help to stabilize the hat and you will most probably need 5 or 6 of them.

stitching concentric circles on the brim of the bucket hat

And you are done. How you liked this step by step tutorial how to make a bucket hat

Once you have the technique you can produce these practical DIY bucket hats at a much faster pace than the first one. You will never have to search for a bucket hat again as everyone in the family will have at least one. With the UV rays getting more intense you really can’t afford to go outside without a hat. Why not go searching through your fabric stash for some suitable pieces to start your production line of bucket hats?

Bucket hat FAQs, Tips and Troubleshooting:

Q What fabric should I use?
A  A medium weight canvas or denim is always popular or a fairly stiff cotton.

Q Is this bucket hat reversible?
A  It can be reversible, particularly if you choose a plain fabric and contrast with a patterned fabric for the lining.

Q  Can I add a fastening to stop the hat blowing off?
A  Yes you certainly can. Add a cord (fitted with a toggle to adjust the length) and stitch it to the inside of the hat, on the side seams of
the crown side piece.

Q  Shouldn’t I be adding interfacing to stiffen the hat?
A.  Although this is not necessary you can add interfacing – use a medium weight fusible one on the lining if you feel the fabric you have
chosen may not be firm enough. Mostly it is just the brim that needs the extra firmness to stop it flopping.

Do you like DIY Bucket hat pattern and tutorial? Pin for later:

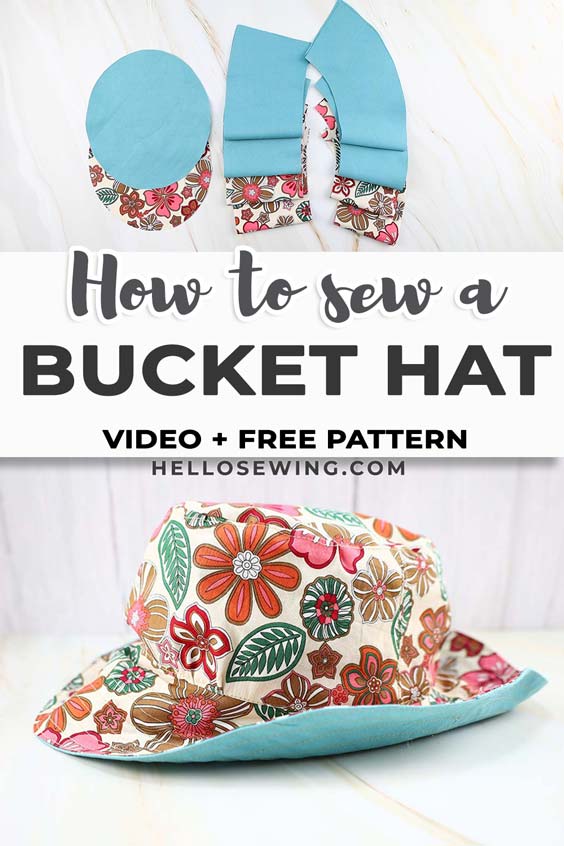
How to sew a bucket hat

Wanna be friends? Click HERE and follow me on Pinterest

RELATED:


Click Here to Leave a Comment Below 91 comments
Marie B. - April 13, 2021

I always enjoy your sewing projects because your tutorials break it down so it feels less intimidating. I can do this! How fun to make some one-of-a-kind bucket hats for my grandkids!

Reply
Adrienne Dold - April 14, 2021

Nice tutorial and pattern. Just a quick suggestion/question: When you add the ties, maybe if you add a buttonhole next to the tie on each side you can pull the tie to the other side and still keep the hat reversible??? I will have to experiment and see if this works.

Reply
    Jody - May 28, 2021

    You could also put in a grommet (eyelet) and pull though a piece of cording with knots on each end. Use as needed to wear for reversible hat.

    Reply
ann patterson - April 18, 2021

Thanks going to try my hand . LIKE THANK YOU

Reply
Donna @ Modern on Monticello - April 21, 2021

This project makes me wish I knew more about sewing. Such a great project! Thanks for taking the time to share it. #HomeMattersParty

Reply
Shelbee on the Edge - April 21, 2021

What an adorable hat! I love bucket hats for spring and summer. The floral print you chose is beautiful. And how great that it is reversible with a solid side, too!

Shelbee
http://www.shelbeeontheedge.com

Reply
Chickenruby - April 22, 2021

Such a fab pattern, thanks for joining in with #pocolo and hope to see you back soon

Reply
Darlene - May 1, 2021

How do you adjust for size?

Reply
    Helen - May 3, 2021

    The pattern has three sizes – S, M and L. If you need to adjust it just a little, use a smaller/larger seam allowance.

    Reply
Jayne @ Sticky Mud and Belly Laughs - May 2, 2021

What a fab tutorial. I will be giving this one a try!
Thanks for sharing with #MMBC. 🙂

Reply
    Helen - May 3, 2021

    Thank you, Jayne. I appreciate your kind words!

    Reply
Ann Olsen - May 2, 2021

Hello, I just prunes the pattern off and noticed the small hat is the solid lines, this seems reverse of what it should be as it appears bigger than the large dotted line. Is this correct, smaller hat is the outside lines? Thank you.

Reply
    Helen - May 3, 2021

    Hi Ann, the solid outside line is size L, dotted line is size L. It was a mistake in the size guide of the first version of the pattern and has been fixed already. Please download the pattern again (if you are already a subscriber, just enter your details again in the form)
    Happy sewing

    Reply
    Ann Olsen - May 9, 2021

    Thank you, I didn’t see your comment until after I made the hat. Was making one for my 3 yr old granddaughter, but the hat fit me! So I used the smaller pattern and a bigger seam allowance to make a smaller hat. Guess my daughter and grand daughter will have matchimg hats.

    Reply
Patty - May 4, 2021

I can’t get the pattern to download. Is there something I’m missing?

Reply
    Helen - May 6, 2021

    Perhaps your browser is blocking the pop up form. Try another browser or device

    Reply
spirit - June 3, 2021

I’ll be going for this later this week!! My sister is turning 30 and has fallen in love with indigo dying. I’m going to make her a bucket cap out of layered muslin that she can dye!

Reply
Jane - June 5, 2021

Can the brim be made wider?

Reply
Judy - June 15, 2021

I must have misunderstood your directions. You said we could use 2 fat quarters (one main, one lining). I bought them but can’t figure out how to get all the pieces on the folds. Any hints?

Reply
Kathy - June 22, 2021

I downloaded the pdf and printed it but can’t get it to print the right size.

Printing it Portrait, the pattern is way too big and printing it Landscape is much smaller but I’m afraid to cut the fabric in case it’s too small.

Neither square is one inch – both are smaller than one inch.

Can you help?

Kathy

Reply
    Helen - June 24, 2021

    You need to check your printer settings. Make sure you select 100% or NO SCALE.

    Reply
Lindsay Baumeister - June 23, 2021

SO excited to make this and follow the simple tutorial but i cannot work out how to get my pieces out of a fat quarter…i feel like i’m playing Tetris (badly!). Can you give me any guidance here please?

Reply
Natasha - June 24, 2021

Hi! Im in the middle of this tutorial and I am having a little trouble. I couldnt tell from the video when you attach the brim to the top hat piece, are you attaching the side of the brim with the smaller diameter oval or the larger one? I feel like it would be the smaller side but my brim is much wider than my top piece so when I try to pin it together, I end up with a bunch of bunched up fabric. Any suggestions would be helpful! Thank you!!

Reply
    Helen - June 26, 2021

    I’m not sure I understand your question. Is it step 8 of the written guide you are referring to? If so – you need to attach the seams of the brim with the sides of the oval

    Reply
Ron - July 3, 2021

AWESOME PROJECT & TUTORIAL! I’ve already made two of these hats for myself and I love them…one is from an old pair of blue jeans. Keep the cool ideas coming!

Reply
Kat - July 19, 2021

Thank you for such a great tutorial! I’m going to try to make this today.
XOXO,
Kat 🙂
http://www.calicocali.com

Reply
Heather Janes - July 21, 2021

My daughter and I made this yesterday and it is BEYOND CUTE! Your pattern was perfect, the video SO helpful, perfect one day project. 🙂 I would love to send send you a picture! Thanks again!

Reply
rozinette - August 6, 2021

hi, i don’t think you mentioned having any social media tags but i still wanted to share my finished piece with you, i actually like it a lot! thank you for the tutorial and pattern pieces (:
https://twitter.com/SRZZZZ98/status/1423406501293662213?s=20

Reply
Cecilia - September 6, 2021

Thank you so much for this pattern. I just finished your knot bag and this will be great for the left over material. Great xmas gifts for granddaughter

Reply
Cass - September 9, 2021

Hi! Loving this pattern – quick question: Do you know the head circumference of the largest size – I have a 60cm head (I know – I was AFAB and mine is larger than the average man, let alone woman!). Depending on that, do you have any suggestions on how to slightly size up a pattern. I mean, I am probably being a bit lazy here and all bc it is probably not that hard to figure it out myself… thanks!

Reply
    Helen - September 9, 2021

    Hi Cass – the largest size is L for up to 58 cm head. I would add 1/4″ (6mm) all around the pattern pieces, except on the fold of the top. I haven’t tested that so I suggest you you cut just one of each pattern pieces out of muslin and try the fit
    Also – don’t print direct from the browser. Download the file on your computer and print the pattern using Adobe reader or a similar program and measure the test line
    Hope that helps

    Reply
      Sue - October 31, 2021

      I also have a large head, would this pattern work if I enlarged it on my printer. Maybe to115%
      Thanks

      Reply
        Helen - November 1, 2021

        Sue, I haven’t tried that, but if you try it out, be sure to let us know how it works!

        Reply
Yammie - September 25, 2021

Thank you so much for sharing your pattern I’ve been looking around for a while as I lost my other pattern . Now kids are older they wanted me to make more for them. Just one question am I allow to sell what I made from this pattern?

Reply
Samaria Coffman - October 26, 2021

How much fabric do you need? Less than half a yard?

Reply
AJ - November 9, 2021

is the “fold” indicator on the brim at the right end of the piece? after cutting it out correctly and stitching the brim pieces together, i noticed that the narrower curve (which would correspond to the front of the hat) occurs where the two pieces are stitched together – but per the instructions, that seam matches up on the sides of the hat.

i assembled the hat per the instructions, and it definitely looks as though the brim is a quarter-turn off from the crown of the hat.

Reply
    Helen - November 10, 2021

    The fold marking is correct. It’s a design choice and creates the shape of the hat.
    Also the top is slightly larger than the crown needs to be eased into the crown and then the crown needs to be eased into the brim.

    Reply
AJ - November 10, 2021

hi – i think both the brim and the crown pieces have the fold marking at the wrong end. if the pieces are cut as you have them labeled, and then assembled with the seams on the sides of the head, you’re matching up the tighter curve on the top piece (front & back of the head) with the wider (side) curves of the crown & brim. it isn’t as noticeable with the crown piece because the curve difference isn’t as pronounced, but it’s very noticeable on the brim.

Reply
    AJ - November 10, 2021

    (i apologize for the multiple postings – i didn’t see my first comment published and assumed it hadn’t gone through, and then kept playing around with the pattern pieces!)

    Reply
      Helen - November 10, 2021

      No worries. The comments need to be manually approved due to the amount of spam we receive otherwise
      Happy stitching 🙂

      Reply
Pauline - March 24, 2022

ID to me know make your reversible hat but can’t find the pattern to download. Have scrolled thru it twice. Can you email it to me?

Reply
    Helen - March 24, 2022

    It’s in the supplies and tools section, just above the video

    Reply
Dawn Willoughby - March 28, 2022

Can I please get a toddler/child size pattern for the bucket that? I appreciate your talent.

Thanks in advance

Reply
    Helen - March 29, 2022

    I don’t have a child sized version of this pattern

    Reply
PAULine - March 29, 2022

Thank you. I found it!

Reply
Karen - April 1, 2022

I have tried repeatedly to download the bucket hat pattern. It doesn’t come through. What am I doing wrong?

Any help would be most appreciated.

Thanks
Karen

Reply
    Helen - April 2, 2022

    Hi Karen,
    Perhaps your browser is blocking the pop up. You can try another device (computer, phone, tablet) or another browser.
    If everything else fails, send me an email and I’ll get you a copy

    Reply
Karen - April 5, 2022

I’m excited to try this pattern! I’m calling it a “fishing hat” for my granddaughter as she loves to fish. Are all pieces that are on the fold cut on the “right” side of the fabric with the wrong sides touching? Thank you!!

Reply
    Helen - April 7, 2022

    Hi Karen! Yes, they are. Watch the video once again, everything is shown there step by step

    Reply
Karen - April 5, 2022

Are all pattern pieces cut on the right side of the fabric? and those on the fold cut with wrong sides together? Thank you!
Can’t wait to make this hat!!

Reply
Renée - May 2, 2022

I’ve made two of these hats already and they are fantastic! Everyone wants one now lol. Thanks so much! Instructions are easy to read and follow. Love the video tutorial too!

Reply
Florence Pennington - May 17, 2022

I have tried to get the PDF twice and nothing has been mailed.

Reply
    Helen - May 19, 2022

    That’s strange. Did you check you spam folder or promotional folder. Sometimes the emails land there.
    The pattern should also load as a pop up in the browser.
    If you still can’t get it, shoot me an email and I’ll send it to you

    Reply
Margaret Perry - May 18, 2022

Thank you so much for a great pattern and tutorial. I made 9 Adult hats for Xmas presents and the recipients (husband and kidults) loved them. I have just been asked to make another one (gift) for a 60cm head, glad I read through the comments to learn I just need to upsize the pattern by a 1/4 of an inch, thanks again.

Reply
ANNIE BRASS - May 22, 2022

Thanks I enjoyed your awesome tutorial!! Great job!!

Reply
    Helen - May 23, 2022

    I’m so glad to hear you love it. Thank you, Annie

    Reply
Robin - May 25, 2022

I saw where to increase the size of the hat a woman enlarged it by 25%, I believe. Can I assume that works for making smaller to fit a child’s head, reduce it’s size?

Thank you, I love it so much and wish to make my granddaughter one!

Reply
    Helen - May 25, 2022

    Hi Robin
    I don’t have a pattern for a child size, and I’m not sure reducing the pattern so much will work out as I haven’t tested it.
    If you decide to give it a go, make a muslin first to check for the fit and let us know how it turned out

    Reply
Lisa - June 7, 2022

Lovely! It’s been years.
Most clothing patterns say to see 3/4 inch seams.
Is this the case here also?

Reply
    Helen - June 8, 2022

    Hey Lisa, The seam allowance is 3/8″ (1cm) as indicated on the pattern and in the tutorial

    Reply
Lynn@DIY Barbie Blog - June 9, 2022

Thanks for the great tutorial and inspiration! I tried reducing the pattern to Barbie size and made one, it turned out cute:@)

Reply
Anne - June 13, 2022

Thanks so much for this pattern. The video was a huge help. I’m so happy with how my hat turned out that I’m about to make a second one.

Reply
    Helen - June 13, 2022

    That’s wonderful, Anne. I’m so glad you liked the pattern and tutorial.
    Thank you so much for sharing your experience with us!

    Reply
sue - June 24, 2022

A brilliant pattern and tutorial! very easy to follow and sewed like a dream. Thanks!!!

Reply
Renee - June 29, 2022

I cannot find but one size. I thought it came in 3 sizes. Made one today and it is to big.

Reply
    Helen - July 2, 2022

    Did you download the pattern? It is in 3 sizes marked by different lines (solid, dotted, dashed)
    Also – never print direct from the browser. download the pattern on your computer, open it with Adobe Reader or another PDF reader and print from there (100%, no scaling)

    Reply
Liz - July 19, 2022

Thank you for this great pattern.

Reply
Terry - August 23, 2022

Thanks for the great pattern. Very easy to sew. With the first one I hadn’t looked at your instructions. The only thing I did differently is I sewed the two hats together around the brim and instead of leaving a 3″ open( in my opinion ,hard to get and even seem on the curved edge) I opened up the liner side seem . Turned the hat inside out, worked like charm.

Reply
    Helen - August 24, 2022

    Great tip – there is always more than one way to skin a cat! So glad you found the one that works for you
    Thanks for sharing, Terry

    Reply
bette - August 27, 2022

I wanted the bucket hat pattern and it didnt come in my email

Reply
bette - August 27, 2022

STill havent gotten the pattern I looked in all my boxes

Reply
    Helen - August 28, 2022

    Hi, did you check your spam folder? If not, try a different email
    If everything else fails send me an email I will send you the bucket hat pattern manually

    Reply
      bette - August 31, 2022

      please send me the pattern for the hat as I have tried everything and still didnt get it Thank you

      Reply
        Helen - September 3, 2022

        sure! Send me an email via the form on the website

        Reply
Rosanne Breloski - August 31, 2022

Bucket hat was as easy as the directions stated. Purchased an eyeglass holder from dollar store. I sewed 2 small buttons at the side seams on both sides(print side/solid side, 4 buttons total). The loops on the eyeglass holder loop over the buttons, making the hat and cord totally reversible. Saw in a retail store a hat that had button holes to make the cord reversible. A fabric tab and snap on each end of the cord was sewn. A purchased toggle went in the middle.

Reply
    Helen - September 3, 2022

    Great idea. It’s lovely to hear yours turned out great

    Reply
Evelyn l. Walker - August 31, 2022

I have a girlfriend & a Godson + myself to make this for.thank you

Reply
Valerie - September 3, 2022

Your tutorial is definitively the best one on the market. I have (grown up) twins.I made my first bucket hat two days ago following another tutorial (in my native language): it was a disaster. The second one I made yesterday following your tutorial: the second bucket hat is perfect! Thank you Helen!

Reply
    Helen - September 3, 2022

    I’m so glad to hear it turned out great! I hope it gets lots of use!

    Reply
Tina Henakin - September 8, 2022

Thanks for the hat pattern, I liked it and started making it

Reply

Leave a Reply:

Send this to a friend