")
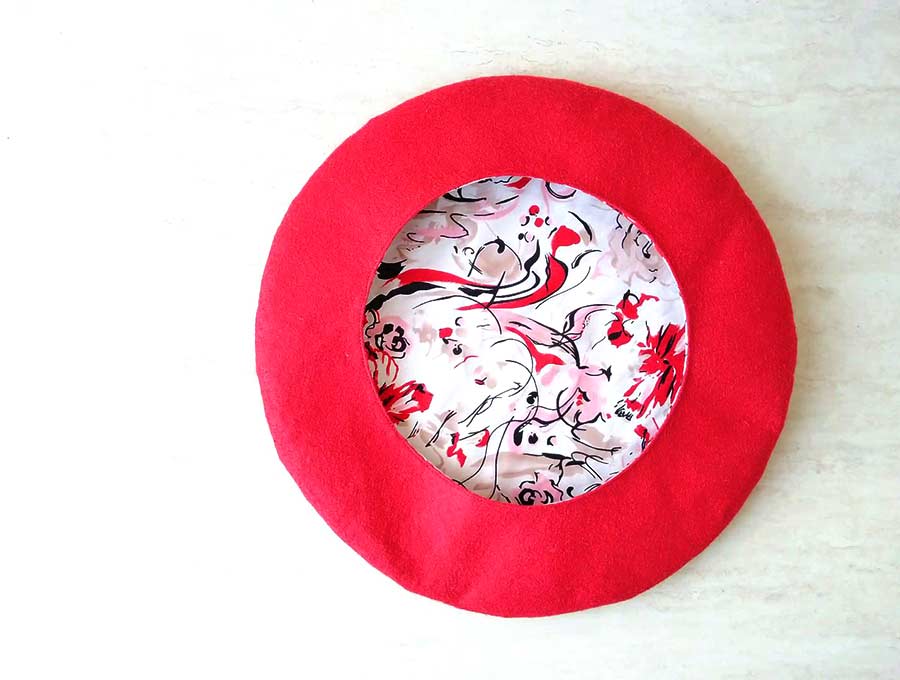
How to Make a Beret (FREE French Beret Hat Pattern + VIDEO)
Do you know what will never go out of fashion? French berets. They were popular 30 years ago and they are still popular today because they are so stylish and fashionable! The only problem with them is that you can find only the expensive ones or the low-quality ones. That’s why I decided to sew my own DIY beret at home! Why not put my skills to use, right?
The first time I tried to make it, I thought it would be difficult and complicated. Turns out, it’s easy, fun, and doesn’t even take all that long. In fact, a sewing beginner could finish this project easily as well!
Now get your pretty head ready for a new hat because I’m about to show you how to make a beret!
Read on for my step by step french beret tutorial with VIDEO instructions for all the visual learners.
We occasionally link to goods offered by vendors to help the reader find relevant products. Some of the links may be affiliate meaning we earn a small commission if an item is purchased.
Table of Contents
- 1 How to make a beret out of felt
- 2 Supplies and tools
- 3 How to Sew a Beret Hat
- 3.1 DIY BERRET VIDEO TUTORIAL
- 3.2 INSTRUCTIONS:
- 3.3 STEP 1: Prepare the beret hat pattern
- 3.4 STEP 2: Cut out the fabric
- 3.5 STEP 3: Assemble the main body and the lining
- 3.6 STEP 4: (Optional) Make a stem
- 3.7 STEP 5: Assemble the beret
- 3.8 STEP 6: Sew the lining and the main fabric together
- 3.9 STEP 7: Turn the beret around and close the opening
- 3.10 STEP 6: Finish the French beret
How to make a beret out of felt
Supplies and tools
- main fabric – 1/2 yard of wool felt
- lining fabric – 1/2 yard of woven cotton or rayon
- matching thread
- scissors (or rotary cutter and a cutting mat)
- ruler or measuring tape
- iron and ironing board
- sewing clips or pins
- sewing machine
DOWNLOAD: beret sewing pattern (Free PDF file)
Follow us for free patterns & tutorials! [easy-profiles]
How to Sew a Beret Hat
Watch the diy beret hat video first and then follow the written step by step instructions below.
Please enjoy and don’t forget to Like and SUBSCRIBE over on YouTube to be kept up to date with new videos as they come out.
DIY BERRET VIDEO TUTORIAL
INSTRUCTIONS:
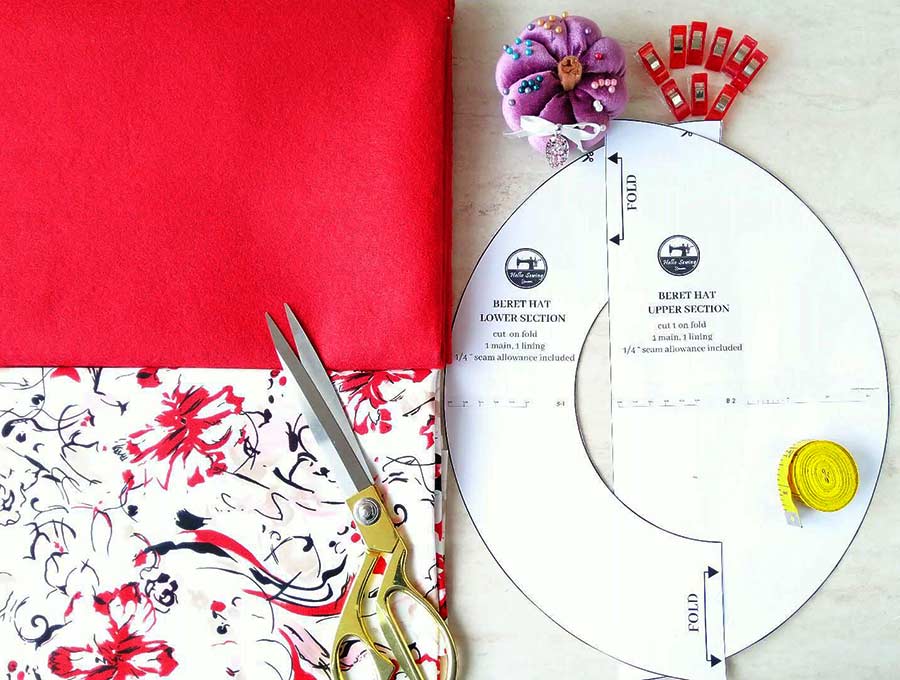
STEP 1: Prepare the beret hat pattern
This french beret pattern or baret pattern consists of two parts. One for the main body, and the other for the bottom of the beret. When you put those two together, you get the final pattern.

NO PRINTER? Here’s how to make your own beret pattern
If you don’t have a printer, or you’ve run out of ink, you still can make this beret hat. Either zoom our beret sewing pattern to 100% and trace it from your monitor using a SOFT TIP pencil, or make your own pattern.
Start by drawing out a circle with a diameter of approximately 12 inches, on a piece of paper. Then cut that circle out and cut it in half along the diagonal. The first piece will be your beret sewing pattern upper piece. You will need to cut out an opening in the second paper piece to make the lower (bottom) section of the pattern.
To make the bottom section of the beret pattern, first, measure out your head circumference. Then take that number and divide it by 3.14. The number you get will be the diameter of the bottom circle.
Draw the circle onto the second beret pattern piece and cut it out. Your finished pattern should look like a ring or a small hoop.
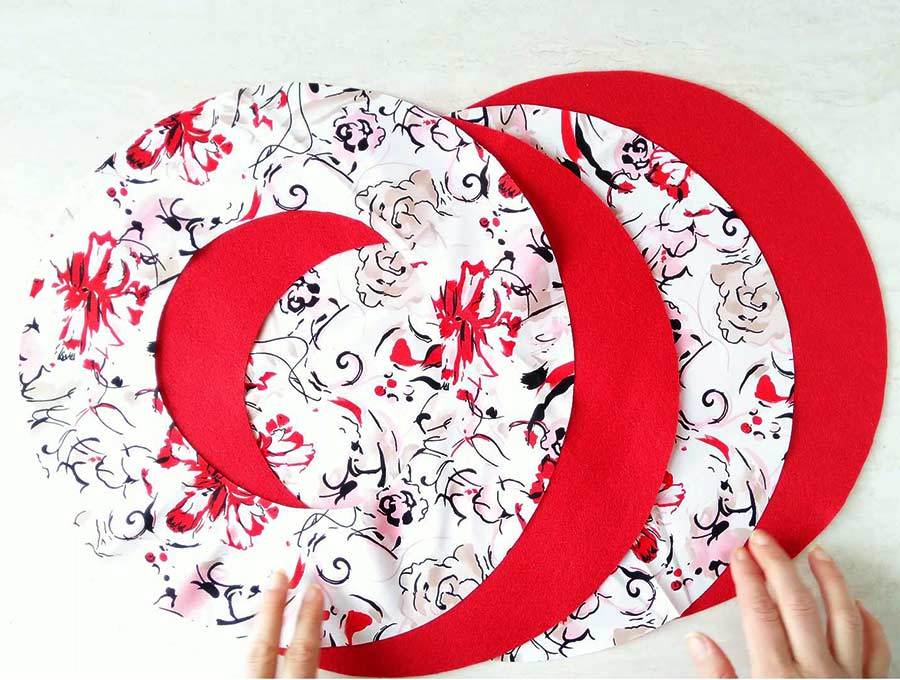
STEP 2: Cut out the fabric
Fold the fabric in half and place the beret sewing pattern on the fold.
Use the beret pattern pieces to cut out two pieces out of the main fabric and two pieces out of lining. From each fabric cut one piece according to the upper section, and one according to the lower section pattern.
TIP: As with any other sewing project, don’t forget to treat the fabrics before using them! Wash them thoroughly and press them flat. That way, you’ll prevent it from deforming later on when your project is complete. No one likes a disfigured beret!
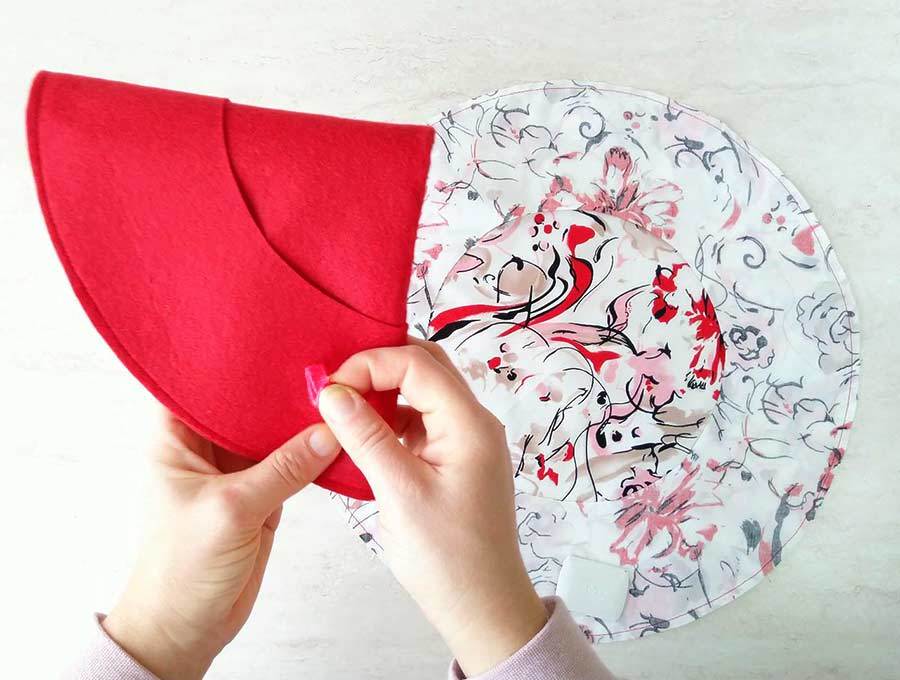
STEP 3: Assemble the main body and the lining
Take the two pieces of main fabric and place them on each other with their right sides facing one another. Align the edges and pin the two together.
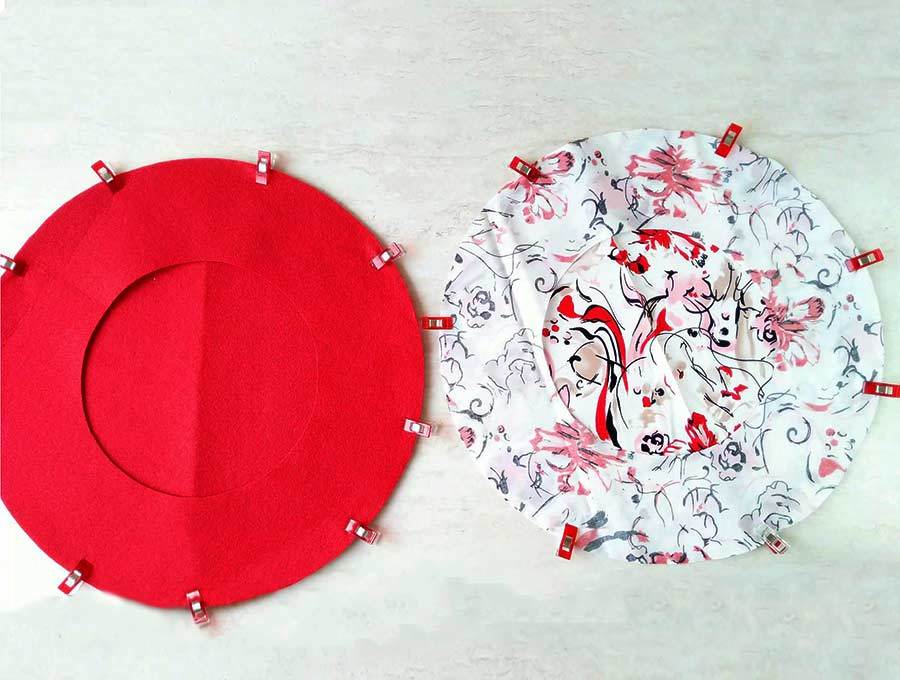
Sew all around them with a quarter-inch seam allowance.
Do the same thing with the two lining pieces.
Turn both pieces right sides out and press the seams flat with your iron. Be careful about the heat settings, you’ll be dealing with materials that are sensitive to too much heat!
TIP: Test your heat setting on a small scrap of fabric
STEP 4: (Optional) Make a stem
You can learn how to sew a beret without this step just fine. But it adds a bit more originality to your finished beret, so I suggest you don’t skip it.
Cut a small strap of felt for the stem. It should be around two inches long and a quarter inch wide.
Fold it so that it forms a loop. Use a needle and a thread and sew the two ends together by hand.
Now just sew it onto the center of the beret main fabric, on the right side.
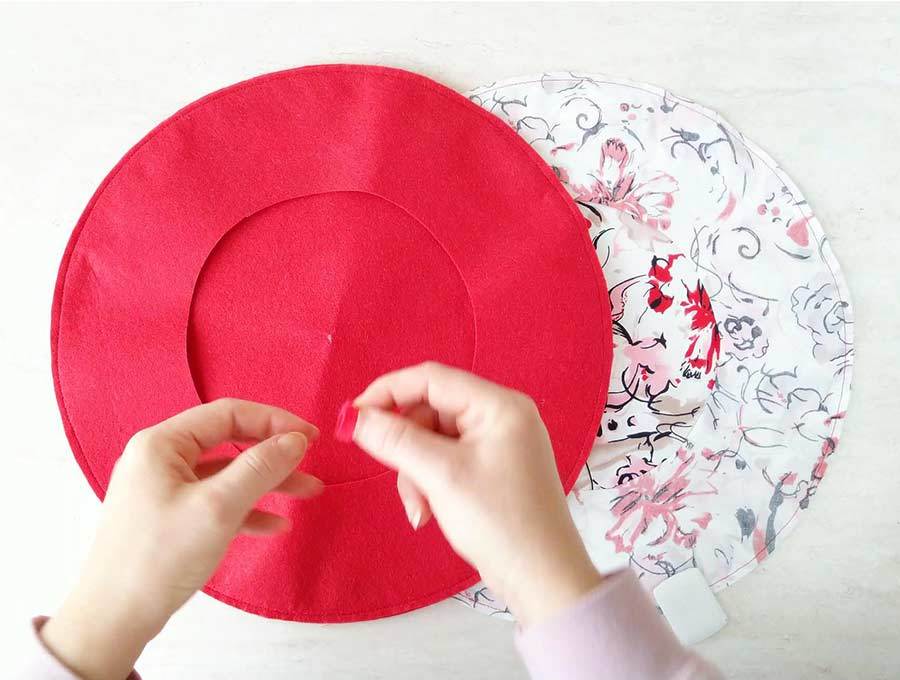
To find the center, fold the fabric in half and then fold it in half one more time. The tip of the cone you’ll get is the middle of the entire circle. Mark it with sewist chalk or a piece of a dry bar of soap. When you unfold the entire thing, you’ll have a mark on the center.
STEP 5: Assemble the beret
Trim the seam allowance on the inner circle of the lining by 1/4 ” (6mm) to prevent the lining from peeking out. This allows for a turn of cloth from the main fabric and is definitely I step I strongly advise you not to miss. I’ve made a beret without trimming the lining but I just couldn’t keep the lining from showing, so I ended up topstitching around the inner circle.
Cut small notches all around the outer curve on both pieces of fabric. Keep the cuts about half an inch apart.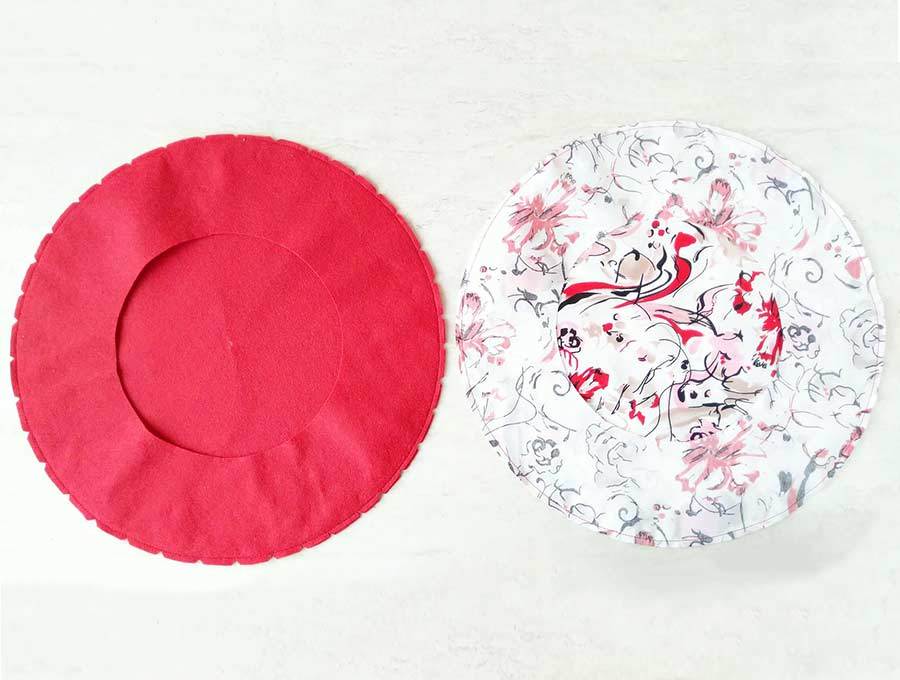
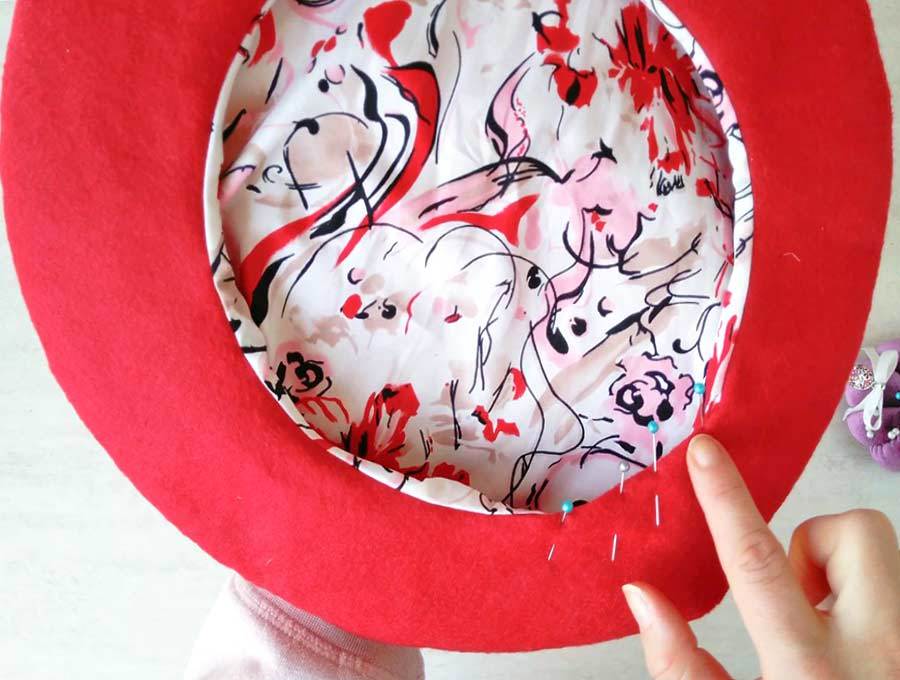
Put the main fabric piece into the lining piece with their right sides together. Align the edges and pin everything in place.

STEP 6: Sew the lining and the main fabric together
Sew the main and lining together with a quarter-inch seam allowance. Leave a section of about 2-3 inches unstitched to turn the beret inside out in the next step.
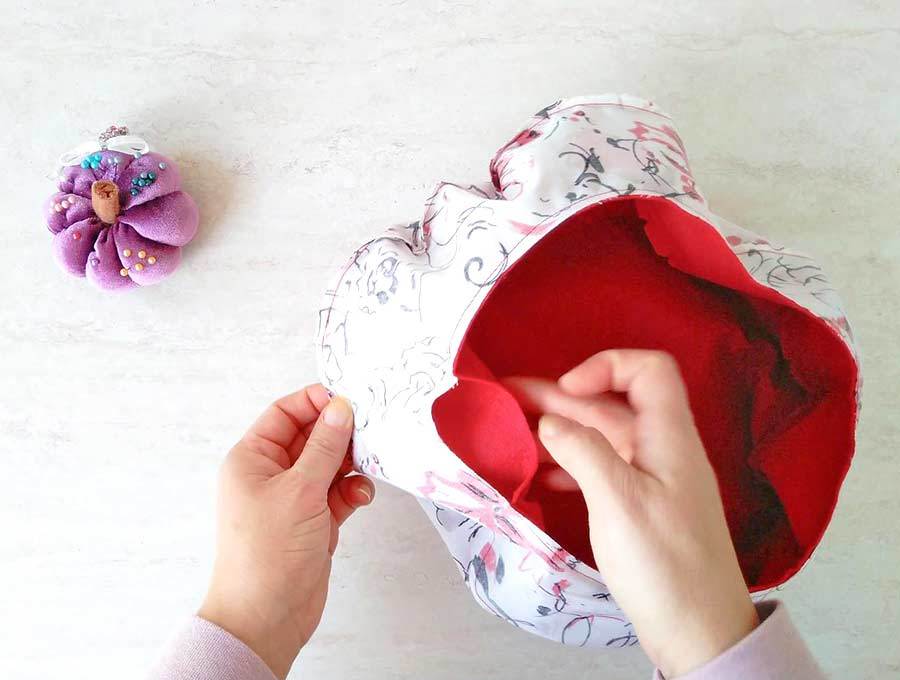
STEP 7: Turn the beret around and close the opening
Turn the beret inside-out through the opening you left.
Use a needle and a thread to close the opening shut using either a slip stitch or a ladder stitch.
STEP 6: Finish the French beret
Press your seams flat. Give the whole thing a good press.
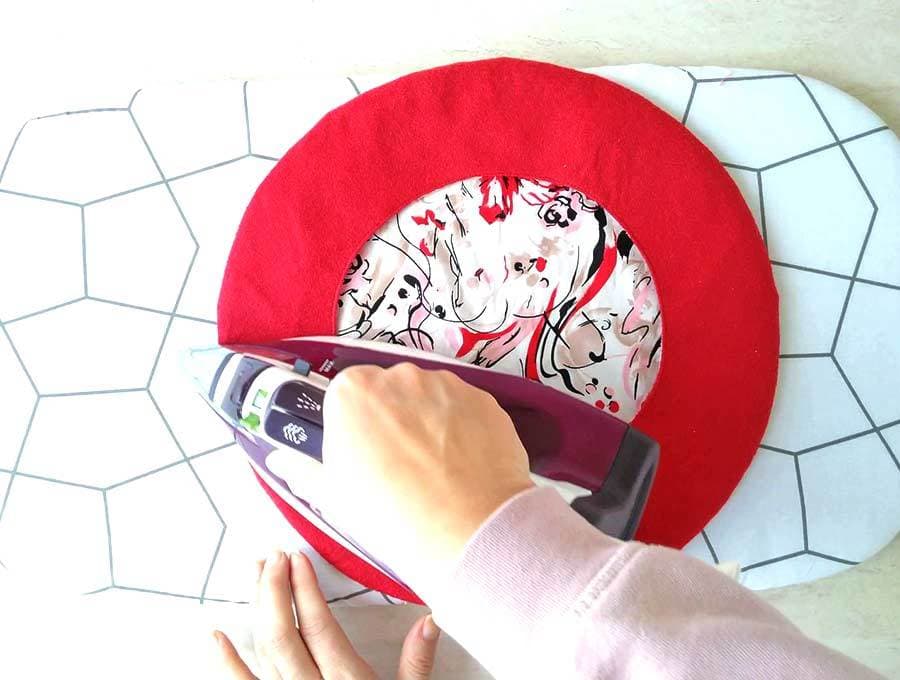
(optional) If the lining is still peeking out, you can topstitch along the inner circle as well.
And that’s how to make a berret! Now dress up and show the world your new french beret hat!
Did you use my beret sewing pattern to make yourself a French berre? How did it fit you?
Was the tutorial useful and fun? Now that you know how to make a beret out of felt, try making a few for your fashionable friends or family members! It’s a great idea for a handmade Christmas present, right? They’ll surely love the gift! Have fun wearing your new French beret!
Do you like this DIY beret hat tutorial? Pin for later:

Wanna be friends? Click HERE and follow me on Pinterest
RELATED: