
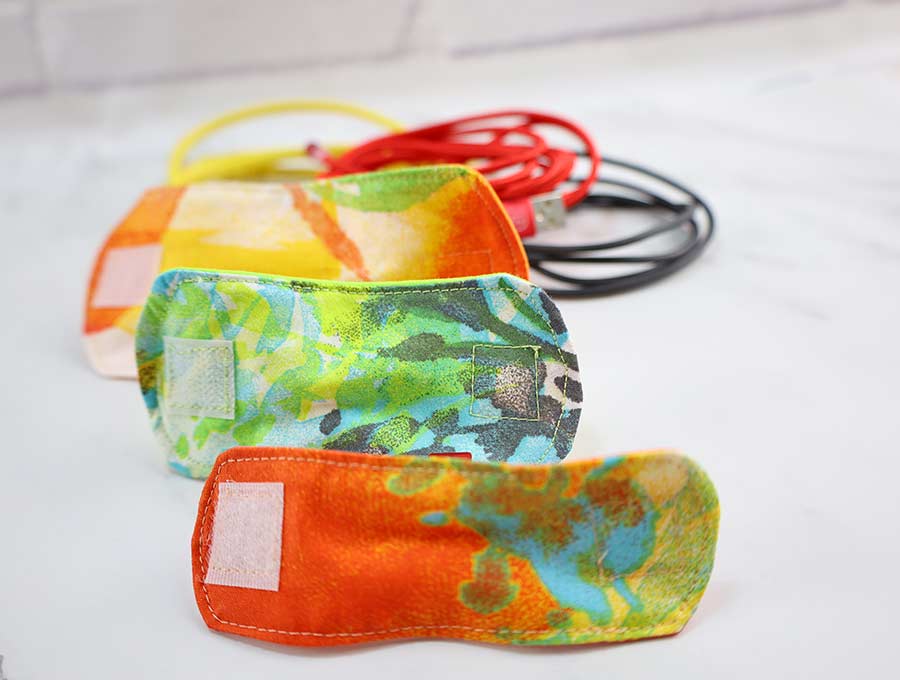
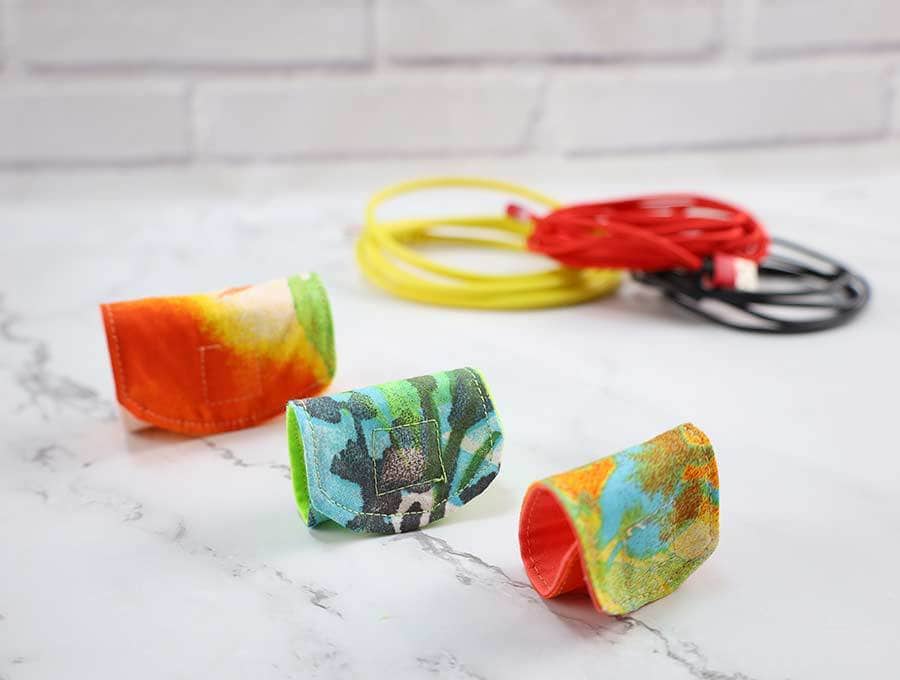
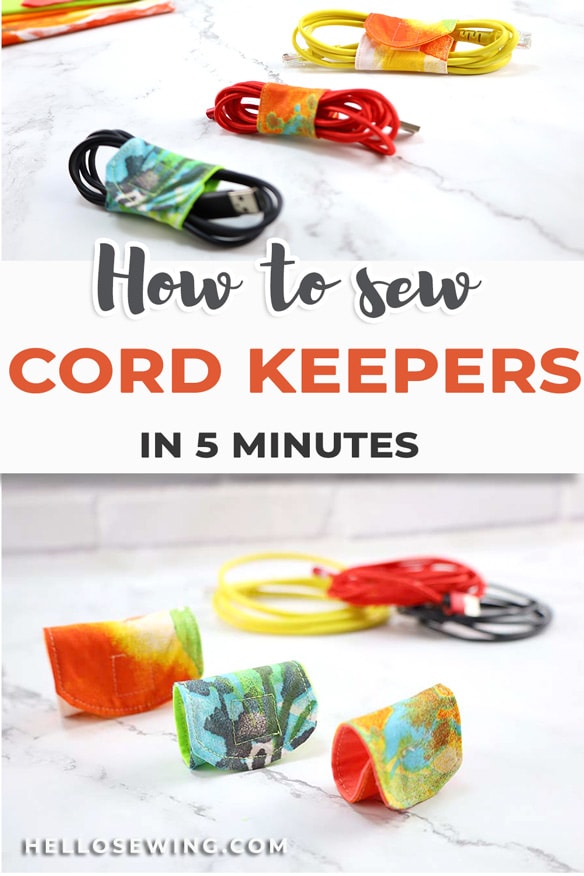
DIY Fabric Cord Keeper – Cord Wrap Template in 3 sizes
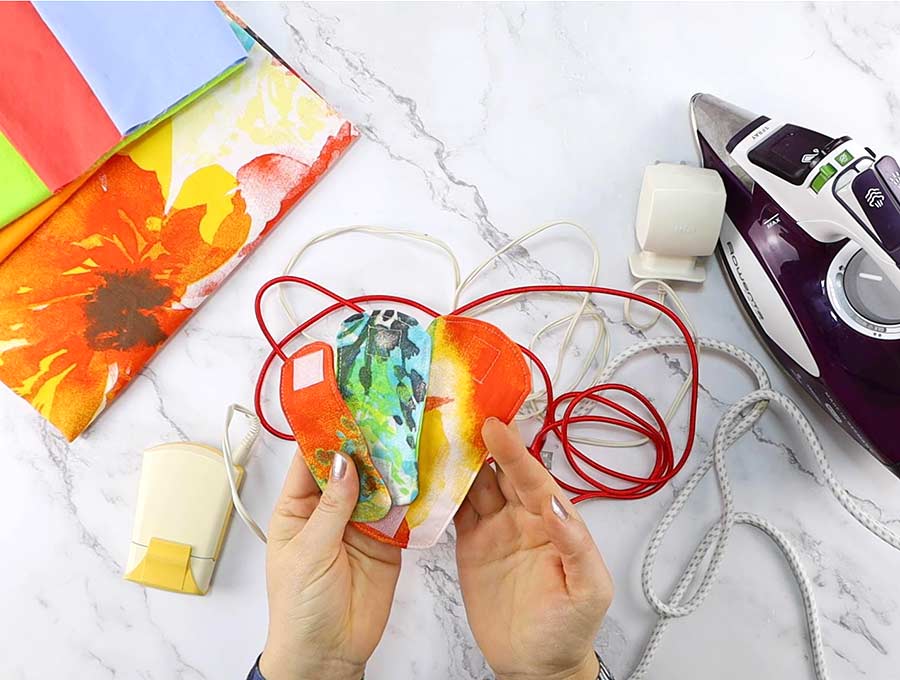
Tame the tangled mess of cords and cables, with these stylish DIY cord keeper wraps. Not only they are super easy to sew and you can whip up a bunch of these in a flash, but they are a great way to put the smallest fabric scraps to good use. The fabric cord wraps are available in three sizes to accommodate cords of various length and size. The smallest cord wrap pattern is designed to fit cellphone or tablet cords as well as earbuds, the large cord keeper template is great for laptop or iron cords, and the medium sized cord keepers are great for everything in between. The cord wraps have Velcro closure to customize the fit of each wrap. These useful cord keepers will help you organize all the cord squabbles in your household.
Don’t you just love quick and easy scrap busting sewing projects that you can put to good use? Not only are these cord keepers super useful in the day-to-day life, but they are much-appreciated gifts for nearly everyone. Yes, even the notoriously difficult to shop for men and teens in your life. If so, let’s dive in the nitty gritty of how to make cord wraps with Velcro closure.
Below you will find my step by step fabric cord keeper written tutorial with VIDEO instructions for all the visual learners.
We occasionally link to goods offered by vendors to help the reader find relevant products. Some of the links may be affiliate meaning we earn a small commission if an item is purchased.
Table of Contents
- 1 How to make a DIY Cord keeper
- 2 Cord Keeper Supplies and tools
- 3 How To Sew a Fabric Cord Wrap
- 3.1 DIY Cord KEEPER VIDEO TUTORIAL
- 3.2 CORD KEEPERS INSTRUCTIONS:
- 3.3 STEP 1: Download and print the cord wrap pattern
- 3.4 STEP 2: Cut fabric according to pattern
- 3.5 STEP 3: Fuse interfacing to the back fabric
- 3.6 STEP 4: Layer and pin fabrics
- 3.7 STEP 5: Stitch
- 3.8 STEP 6: Notch the curves
- 3.9 STEP 7: Turn right side out
- 3.10 STEP 8: Pin the opening
- 3.11 STEP 9: Topstitch
- 3.12 STEP 10: Add velcro
- 3.13 Where can we send your free file?
How to make a DIY Cord keeper
Cord Keeper Supplies and tools
- fabric – 2 small pieces of cotton (you can use scraps)
- fusible interfacing
- matching thread
- scissors (or rotary cutter and a cutting mat)
- ruler or measuring tape
- iron and ironing board
- sewing clips or pins
- sewing machine
DOWNLOAD:
cord keeper template (Free PDF file)
Follow us for free patterns & tutorials! [easy-profiles]
How To Sew a Fabric Cord Wrap
Watch the diy cord wrap video first and then follow the written step by step instructions below.
Please enjoy and don’t forget to Like and SUBSCRIBE over on YouTube to be kept up to date with new videos as they come out.
DIY Cord KEEPER VIDEO TUTORIAL
CORD KEEPERS INSTRUCTIONS:
STEP 1: Download and print the cord wrap pattern
While I recommend you to make a bunch of each cord wrap size, you’ll need to start somewhere.
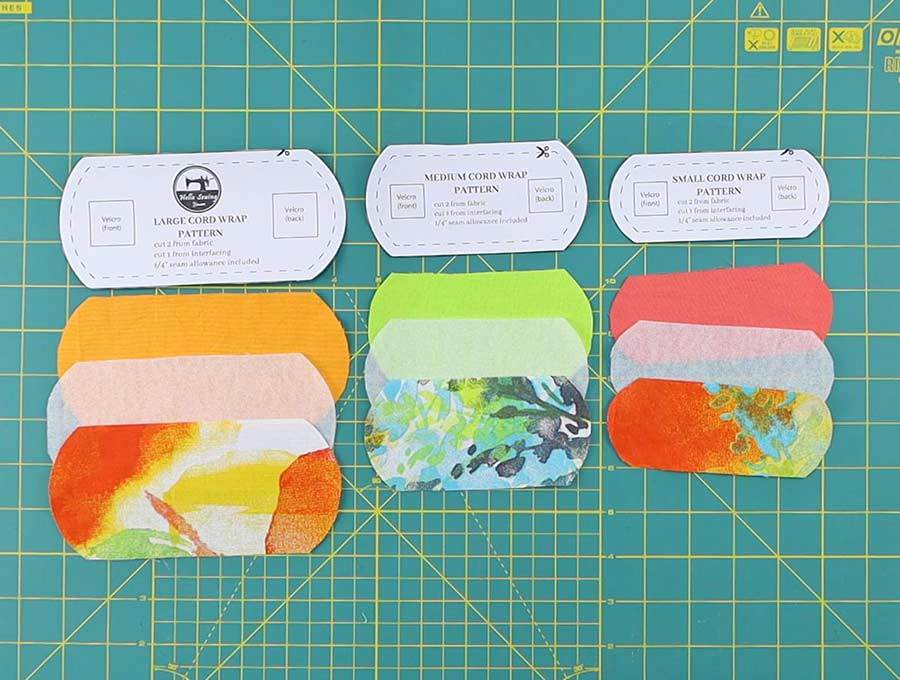
First download and print the free cord keeper template (above). Don’t print it directly from the browser and as it sometimes skews the pattern, but download it on your computer and use a program such as Adobe reader to open and print the pattern. Next choose which cord wrap size you’ll make: small, medium or large and cut it out from the pattern sheet. The seam allowance is ¼ inch (6mm) and is already included.
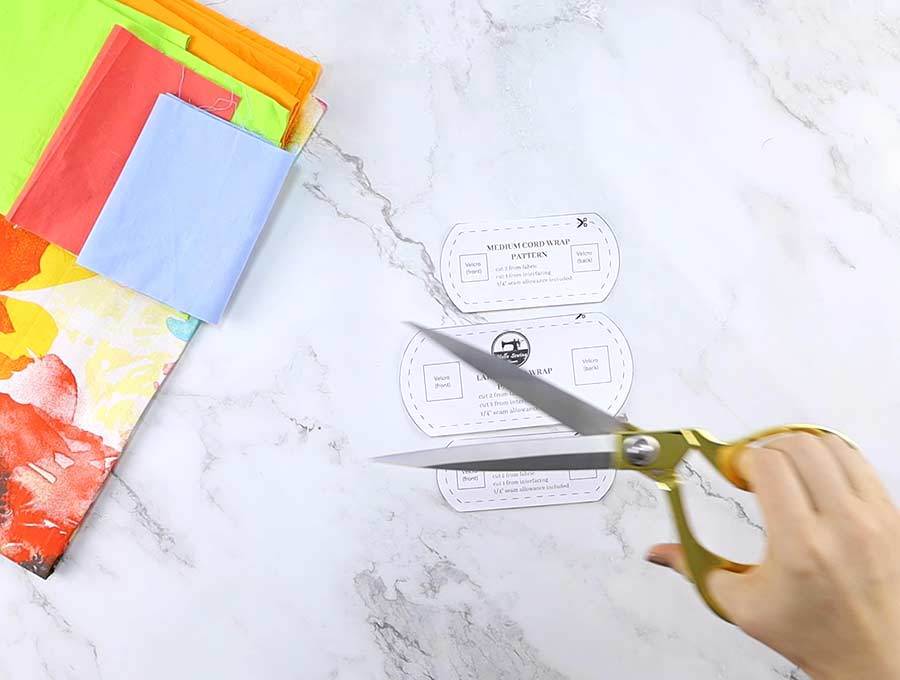
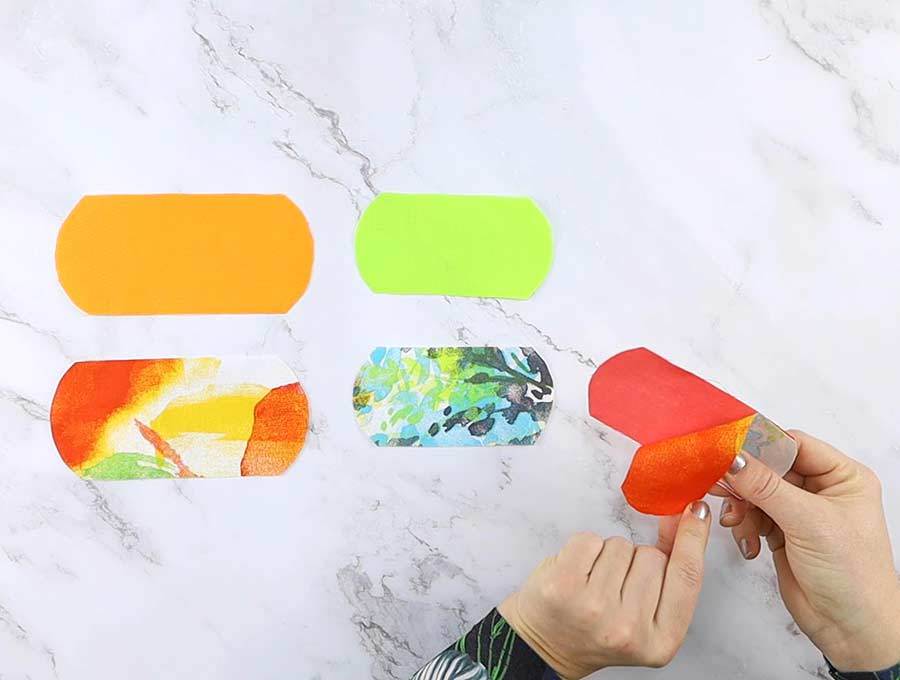
STEP 2: Cut fabric according to pattern
Cut your fabrics according to your chosen cord keeper pattern. You’ll need to cut 2 out fabric (one front, one back) and 1 from the interfacing.
Also cut out one piece of hook and loop fastener.
STEP 3: Fuse interfacing to the back fabric
Place the bumpy side of interfacing on top of wrong side of back fabric. Press with a hot iron to fuse them together.
TIP: Fusible interfacing has a rough (bumpy side with glue, and a smooth side). Use your fingertips to determine which side is which.
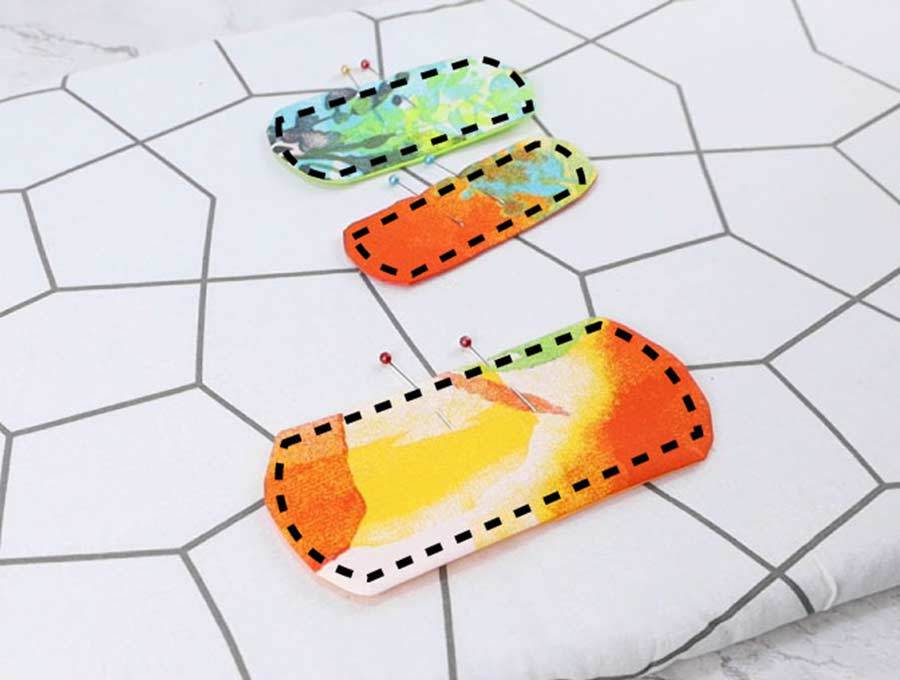
STEP 4: Layer and pin fabrics
Place the front fabric on your work surface, with the right side up. Place the back fabric on top of it, with right sides together.
Pin around the whole thing, and leave a 2 inch opening on one of the longer sides, so you can turn it around later.
STEP 5: Stitch
Stitch around the cord wrap using a ¼ inch seam allowance. Backstitch at the beginning and the end
STEP 6: Notch the curves
Use scissors to make small triangular notches on each of the curved sides to allow the fabric to lay flat. If you have pining shears, use them instead as it’s faster!
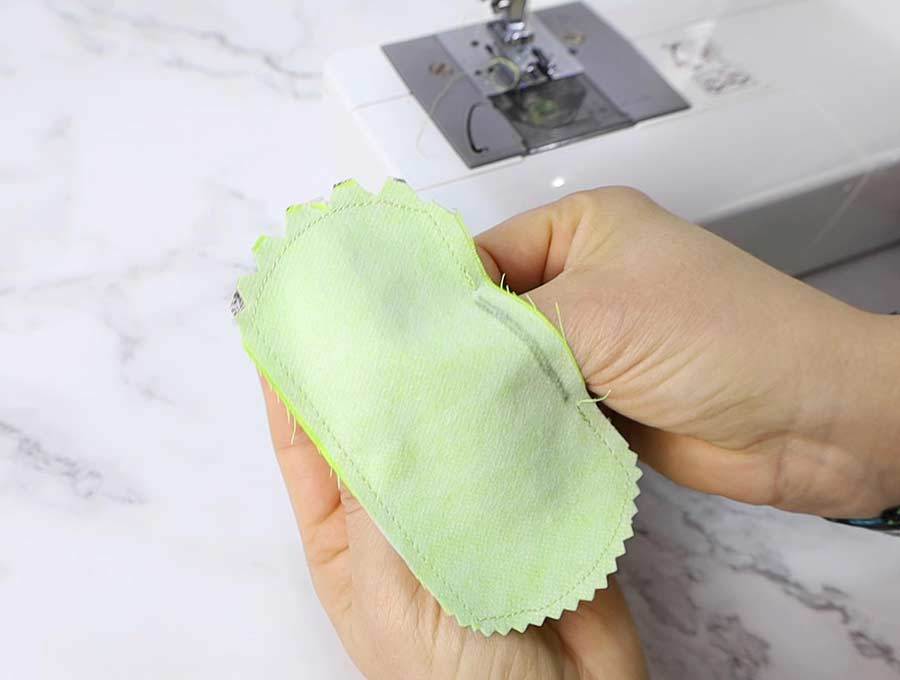
STEP 7: Turn right side out
Turn the DIY cord keeper inside out through the opening and make sure to push out the seams well.
Fold in the raw edges of the opening, so that it’s flush with the long seam.
STEP 8: Pin the opening
Pin the opening. I’d like to press the whole thing at this point as it really makes all the difference to the appearance. It’s such a small thing that otherwise it may bunch up.
STEP 9: Topstitch
Back to your sewing machine, now topstitch around the cord keeper about 1/8” (3mm) from the edge.
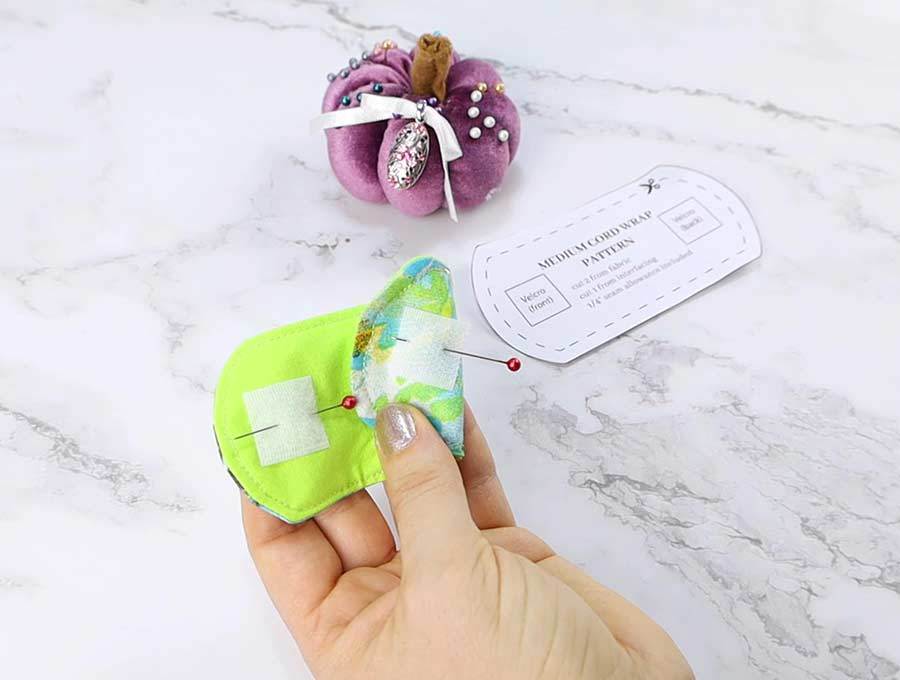
STEP 10: Add velcro
Pin hook and loop fastener – one piece on either side of the cord keeper, so that it fastens when you fold the cord wrap.
Sew around each piece of the veclro, being careful to sew as close to the edges as possible.
Voila! The DIY cord keeper is ready
I hope you enjoyed my cord keeper tutorial – it’s such a rewarding, quick and fun scrapbuster sewing project. Tell me, did you like it? Was it easy to sew? How many cord wraps you need to make?
These cloth cord wraps are so easy, yet so useful that each year a whip up a bunch to give – they make cute little gifts or stocking stuffers, especially for the hard to shop for men or teens in my life. If I’m out of gift ideas, this along with the cellphone holder pillow are my to “go to” solution. It never failed me! Men love their electronics, and appreciate these little thigs in their life.
I’d love to see what you made with this cord keeper pattern. With 3 different sizes of cord wrappers – I’m sure that this will help you organized your household cables better than before.
Share your creations over at social media, and tag me with @hellosewing, so I can see them
Do you like this? Pin for later:
Wanna be friends? Click HERE and follow me on Pinterest
RELATED HOME ORGANIZATION PROJECTS:
MORE SCRAPBUSTERS:
Lip balm holder – clip to your backpack, keychain or your purse