
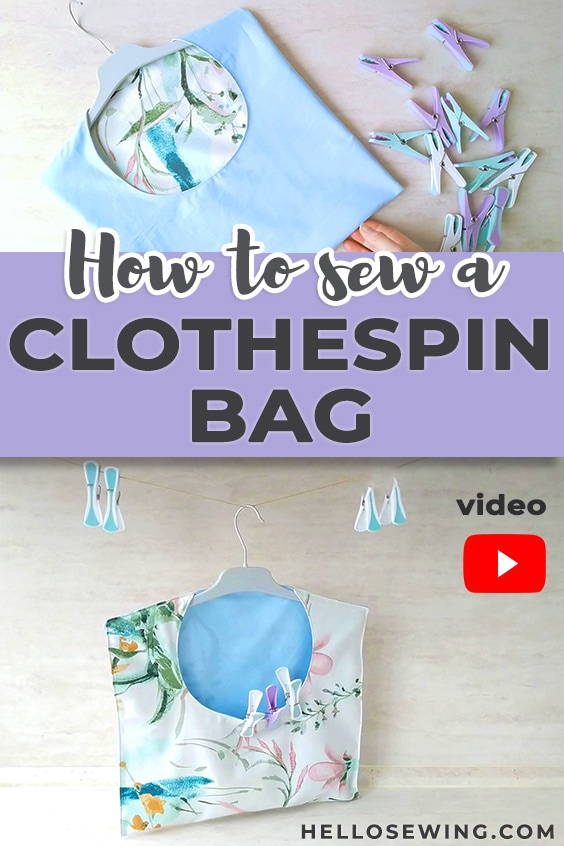
How to Make a Clothespin Bag Pattern and VIDEO Tutorial
My grandmother used to say that drying clothes outside, and even letting them freeze just a bit, is a great way to freshen up the fabrics and to get rid of nasty bacteria. Following her advice, I also dry my clothes naturally whenever I can, although I love the convenience of the tumble dryer.
I’m not sure about the bacteria but it sure does give your stuff that nice, fresh scent that stays a while. But to dry your things that way, you’ll need a neat DIY clothespin bag for easy access to clothespins.
This DIY clothespin holder is easy to make, takes about an hour to complete, and is extremely practical. You can hang it on the line and have the clothespins within reach as you’re setting up the clothes to dry!
If you like how all that sounds, keep reading to learn how to make a clothespin bag! Below you will find my step by step written clothespin bag tutorial with VIDEO instructions for all the visual learners.
We occasionally link to goods offered by vendors to help the reader find relevant products. Some of the links may be affiliate meaning we earn a small commission if an item is purchased.
Table of Contents
- 1 How to make a clothespin bag
- 2 Supplies and tools
- 3 How To Sew a Clothespin bag
- 3.1 DIY Clothespin bag VIDEO TUTORIAL
- 3.2 INSTRUCTIONS:
- 3.3 STEP 1: Prepare the clothespin bag pattern
- 3.4 STEP 2: Measure
- 3.5 STEP 3: Cut out the fabric for the clothespin hanger
- 3.6 STEP 4: Start sewing this adorable vintage clothespin bags
- 3.7 STEP 5: Turn inside out and press
- 3.8 STEP 6: Finish the clothespin bag
How to make a clothespin bag
Learn how to sew up this cute vintage clothesline bag. It is super easy sew.
Supplies and tools
- fabric – 1/2 yard cotton each (one main, one lining)
- matching thread
- scissors (or rotary cutter and a cutting mat)
- ruler or measuring tape
- iron and ironing board
- sewing clips or pins
- sewing machine (it’s an easy sew, every home decor machine can handle it)
DOWNLOAD: clothespin bag pattern (Free PDF file)
Follow us for free patterns & tutorials! [easy-profiles]
How To Sew a Clothespin bag
Watch the diy clothespin holder video first and then follow the written step by step instructions below.
Please enjoy and don’t forget to Like and SUBSCRIBE over on YouTube to be kept up to date with new videos as they come out.
DIY Clothespin bag VIDEO TUTORIAL
INSTRUCTIONS:
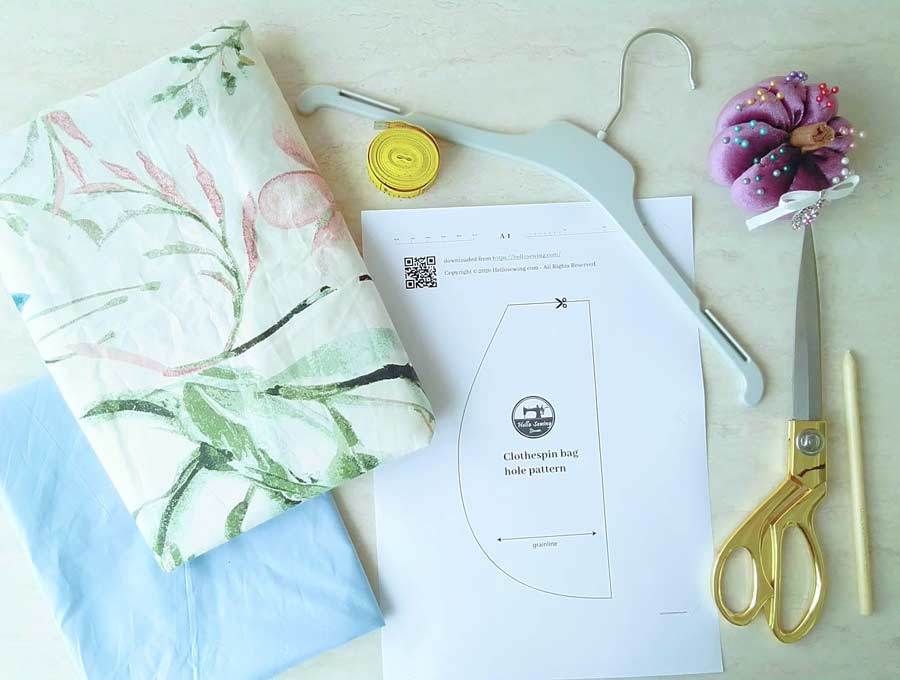
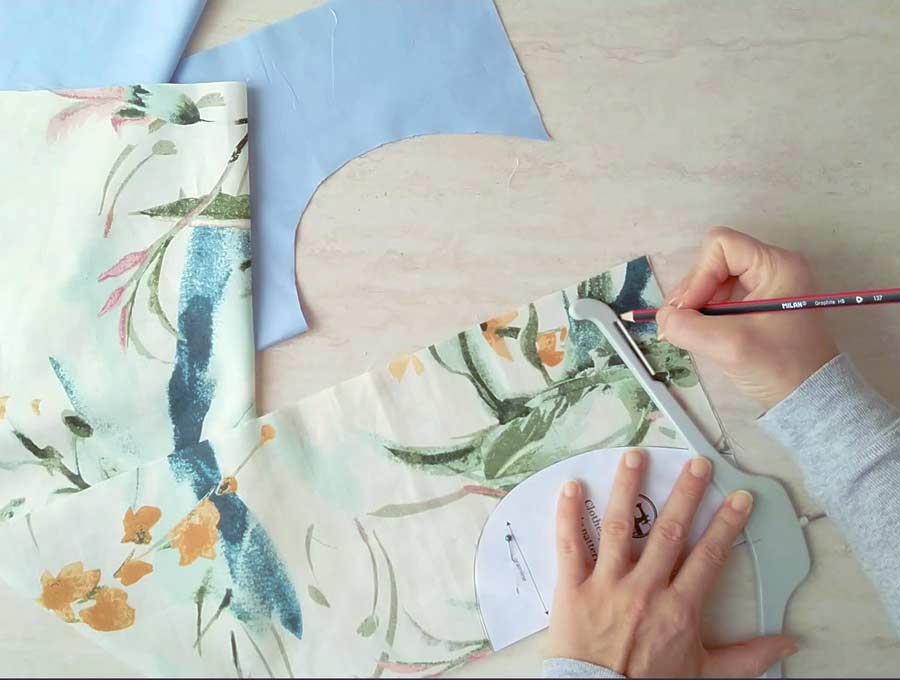
STEP 1: Prepare the clothespin bag pattern
Download the free clothespin bag pattern and print it out in full size (always No scale/100%). Check the measurements by measuring the test line on the pattern.
A tiny mistake in the measurements isn’t terrible, but if they are off for more than an eighth of an inch, it won’t work. In that case, check your printer settings and try again.
If everything seems right, cut off any excess paper. Your pattern for clothespin bag is now ready for use.
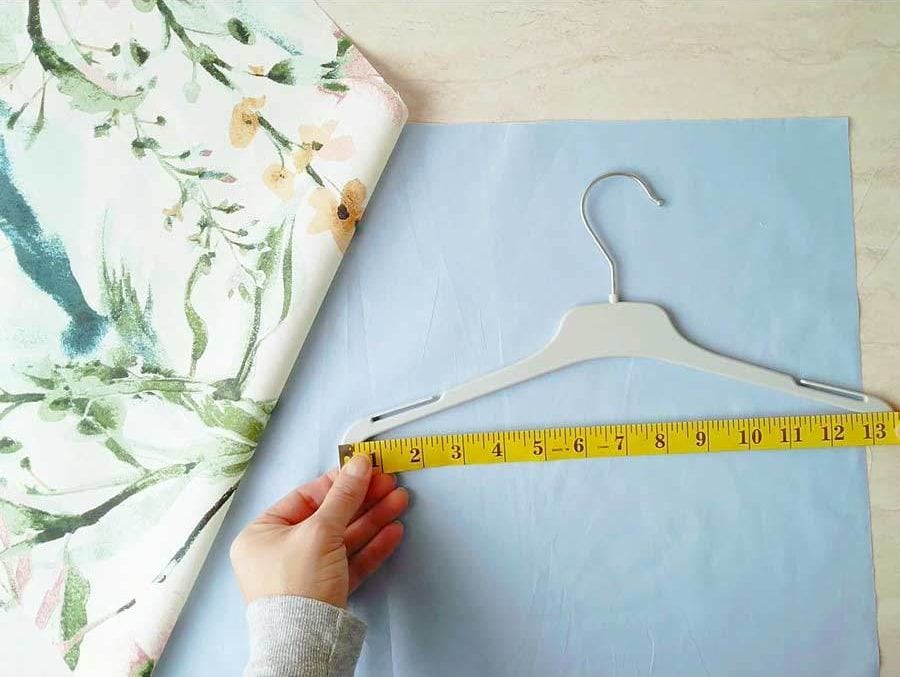
STEP 2: Measure
You’ll be cutting two identical pieces, one from the lining and the other from the main fabric. As hangers differ in size, you’ll need to measure it’s width. My hanger measured 13.5 inches (34cm). Now cut your fabrics:
- The width of each fabric piece should be 1 – 1.5 inches (~3-4cm) more than the width of your hanger to allow for some ease.
- The height of the fabric piece should be twice its width.
I cut my fabrics 15 inches wide and 30 inches height (which is 38 x 76 cm if you are using metric measurements).
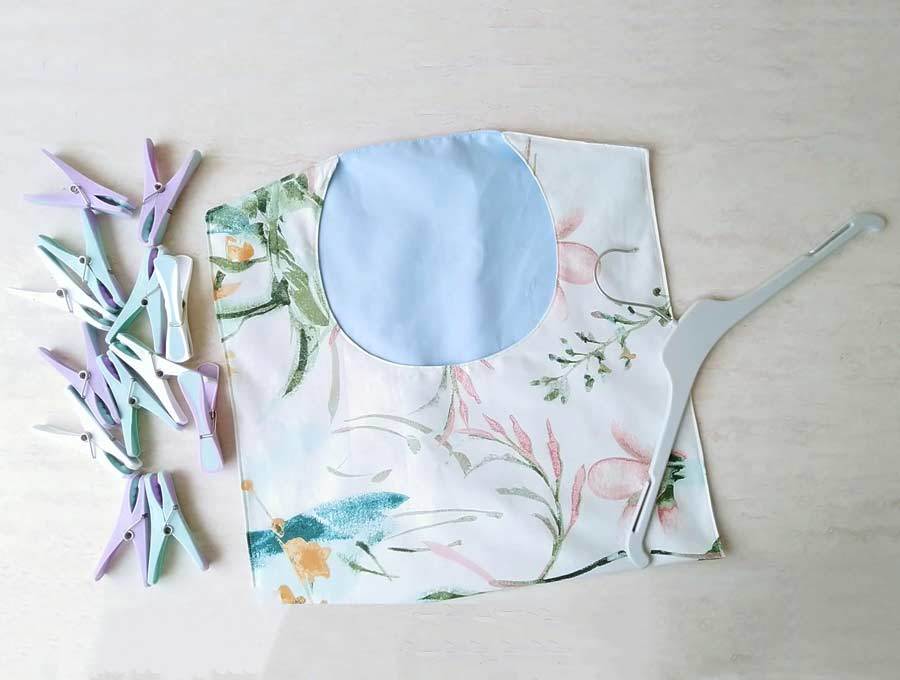
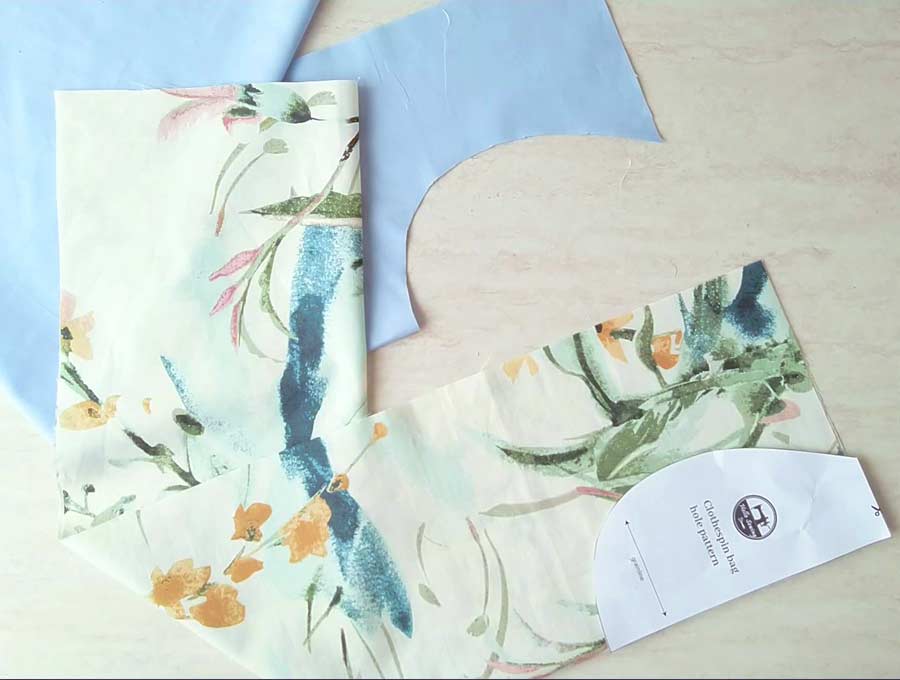
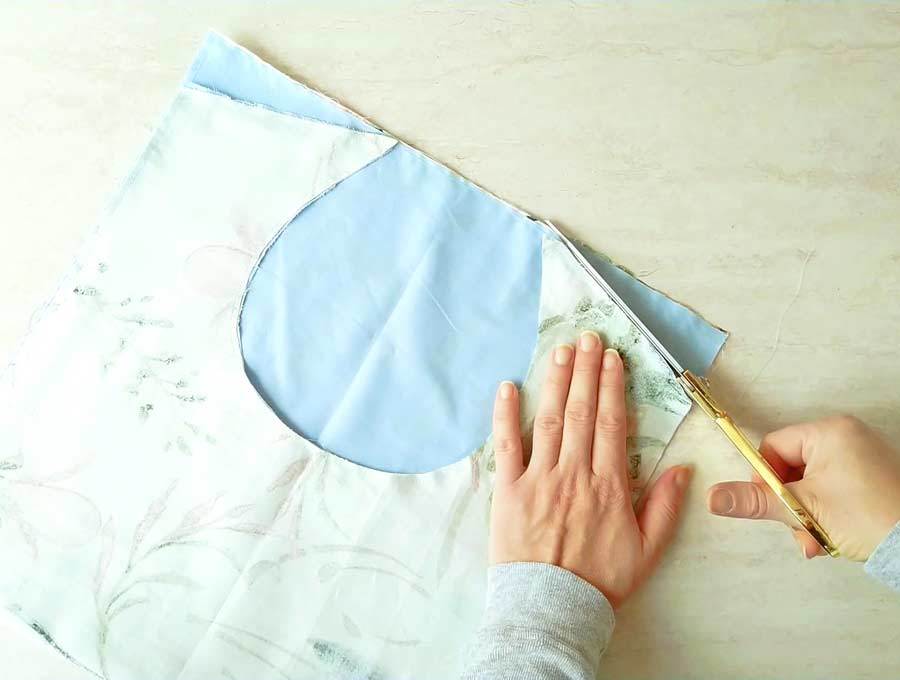
STEP 3: Cut out the fabric for the clothespin hanger
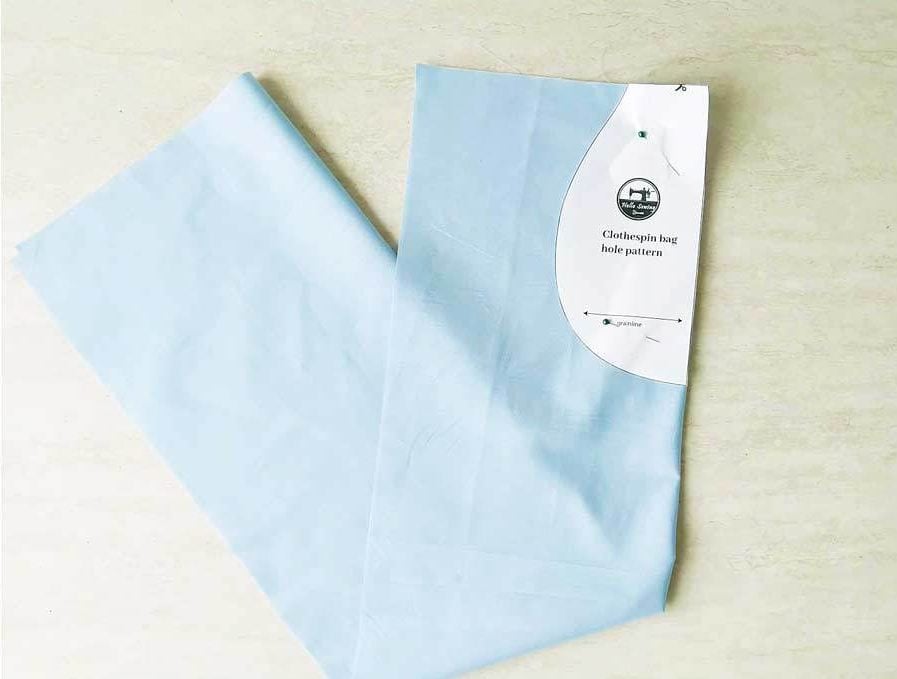
To cut the fabric for the opening of the bag, start by folding the lining and the main fabric in half lengthwise. Put the pattern on top of the fabric and make sure its long straight edge aligned with the fold. Secure the pattern in place with pins or clips. Use the pattern as a guide to cut out the fabric.
In the next step, you’ll see how to sew a clothespin bag.
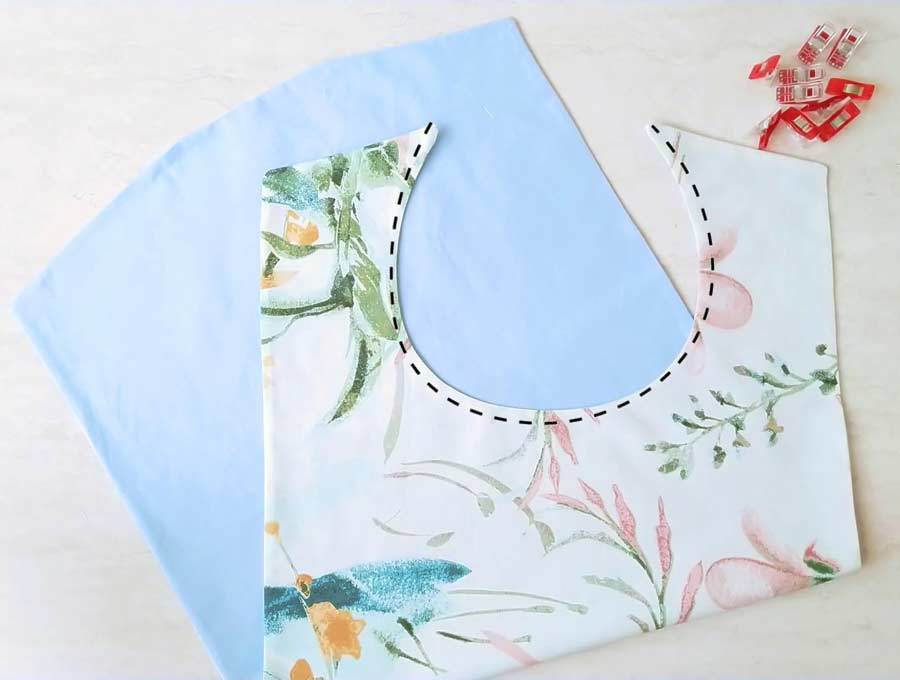
STEP 4: Start sewing this adorable vintage clothespin bags
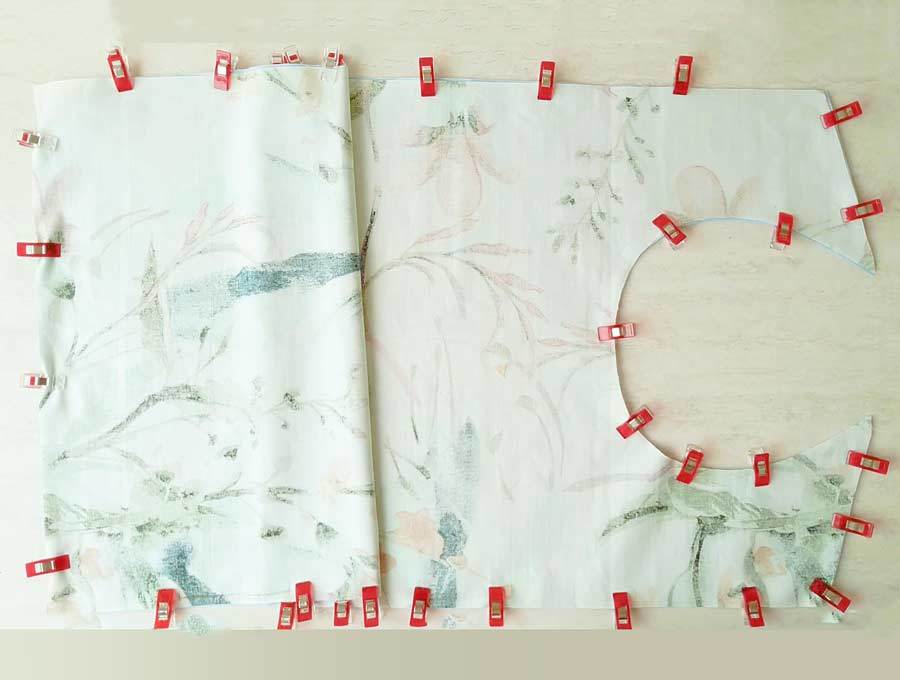
Take the lining piece and the main fabric piece and put them on each other. Make sure to keep the right sides in and to align all the edges. Secure everything in place with pins or clips.
Sew all around the two fabrics with a quarter-inch seam allowance, leaving a small opening unstitched near the bottom of one of the long sides. The opening shouldn’t be bigger than 2 inches.
IMPORTANT: If your hanger is not straight, you’ll need to cut the top left and right corners, as I explain below. If it is straight, you don’t need to do anything so just proceed with the next step
- Mark the middle of your hanger and align this mark with the middle fold of the fabric
- Mark the shoulders of the hanger using a fabric pen

- Sew along these lines
- Cut the left and right corners leaving 1/4 inch seam allowance
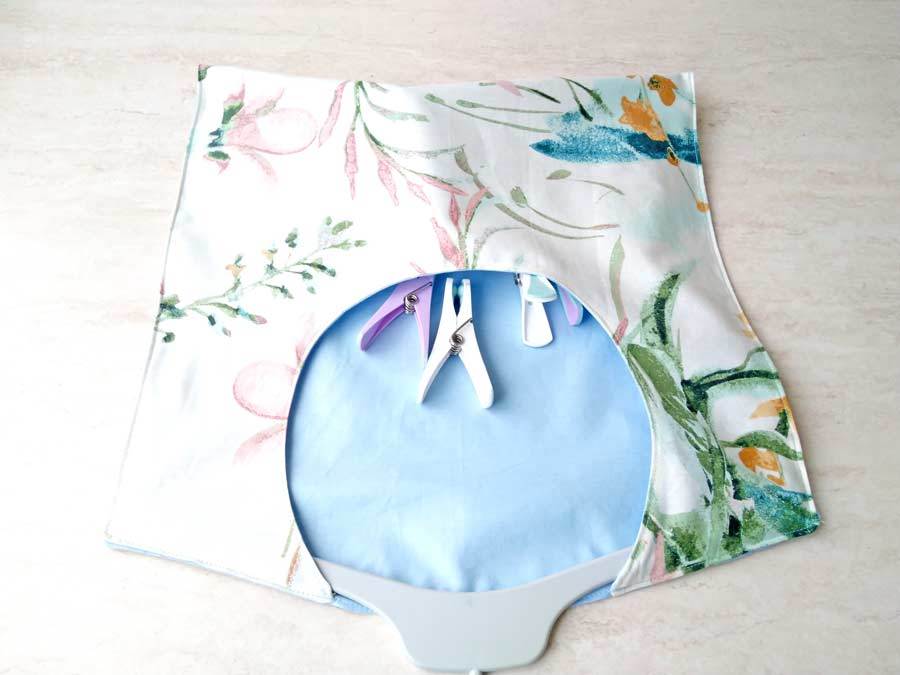
STEP 5: Turn inside out and press
Snip the corners and the clip curved edge. Turn the whole thing inside-out and push out the corners. Press everything flat on the ironing board.
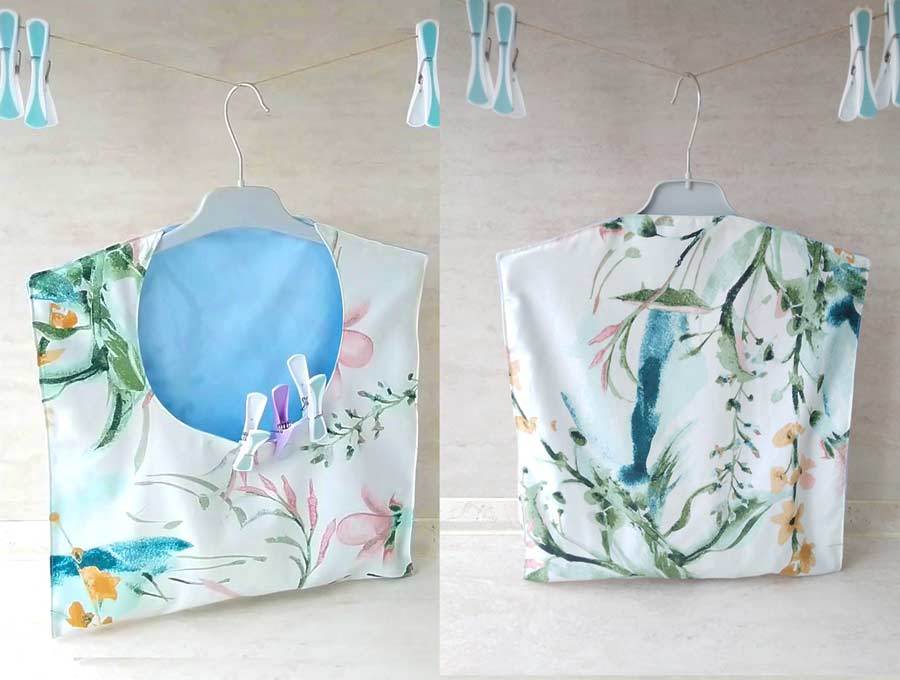
STEP 6: Finish the clothespin bag
Topstitch along the curve as close to the edge as possible. About one-eighth of an inch away from the edge is great.
Fold the bag in half so that its wrong sides are in. Make a stitch along the sides and the top edge. Once again, go about one-eighth of an inch away from the edge.

That’s it, that’s how to make a clothesline bag!
All that remains now is to insert the hanger into your new bag and to fill it up with clothespins.
Did you like this DIY clothespin bag tutorial? Were you able to print the clothesline bag pattern and sew it up the without any difficulties? I’d love to help so if you encounter any issues I’m just an email away!
Make a few of these for your friends and family, they’re not just for clothespins! You can use them to store your kids’ toys, your sewing supplies, or some fashion accessories like hats or scarfs! Enjoy your new practical bag!
Do you like this? Pin How to make a clothesline bag article for later:
Wanna be friends? Click HERE and follow me on Pinterest
OTHER HOME DECOR and ORGANIZATION: