
How to Make Bunting | FREE Bunting Banner Template and VIDEO
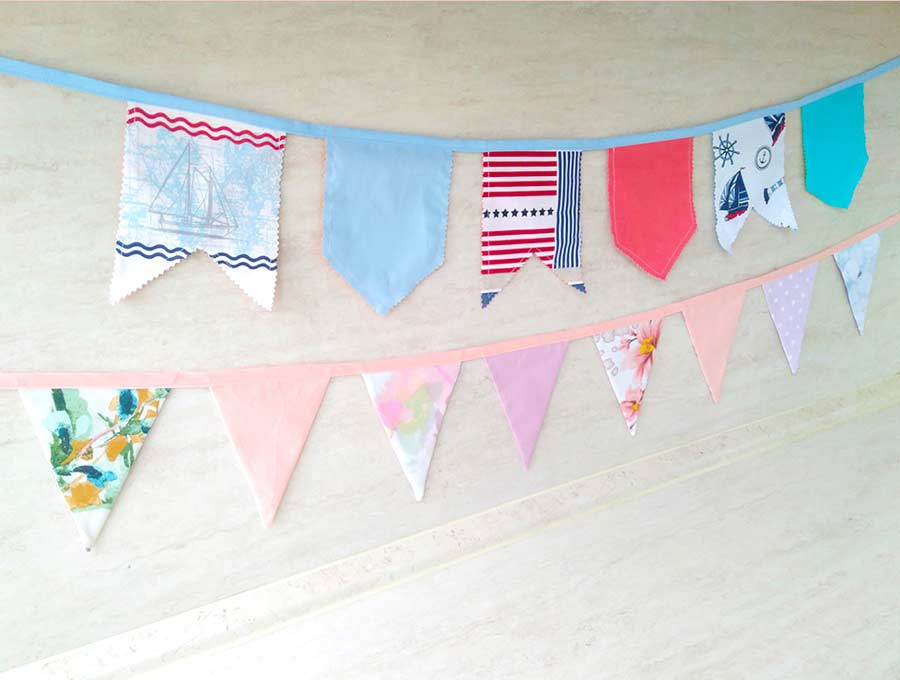
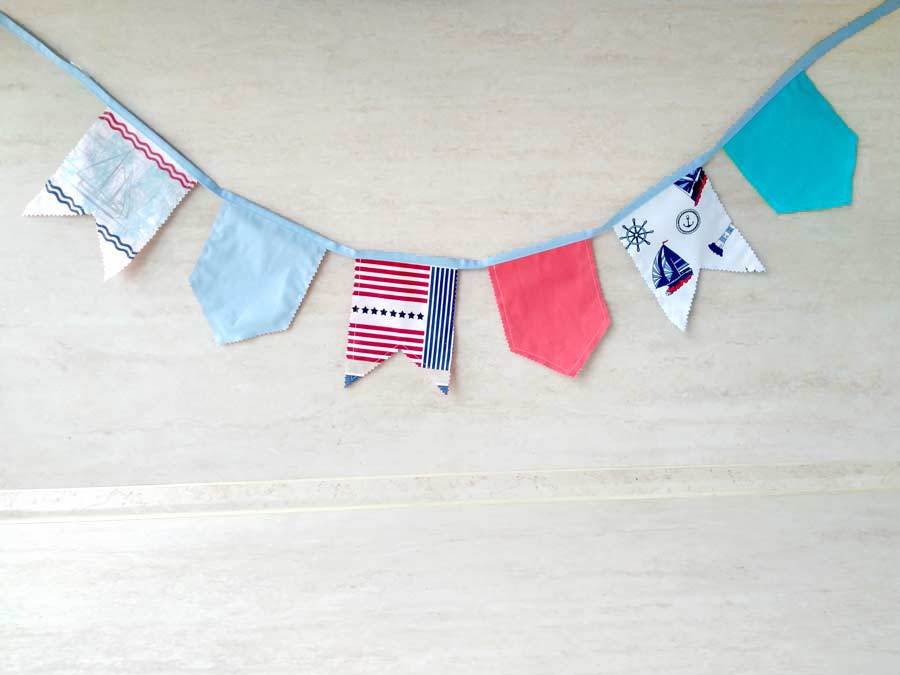
Turn fabrics scraps into stunning bunting banner in less than half an hour! You’ve probably seen a lot of bunting banners on various fairs and markets, or even some outdoor weddings. They are those small fabric triangles that can be placed almost anywhere you’d like, which makes them pretty awesome decorations.
But did you ever want to learn how to make bunting flags? Well, now you can do that, with the help of our tutorial and our free bunting template. And then you can use the DIY bunting you made and give your home that special country vibe.
Sounds nice, right? Here’s the best part, you’ll get to make them in three different shapes!
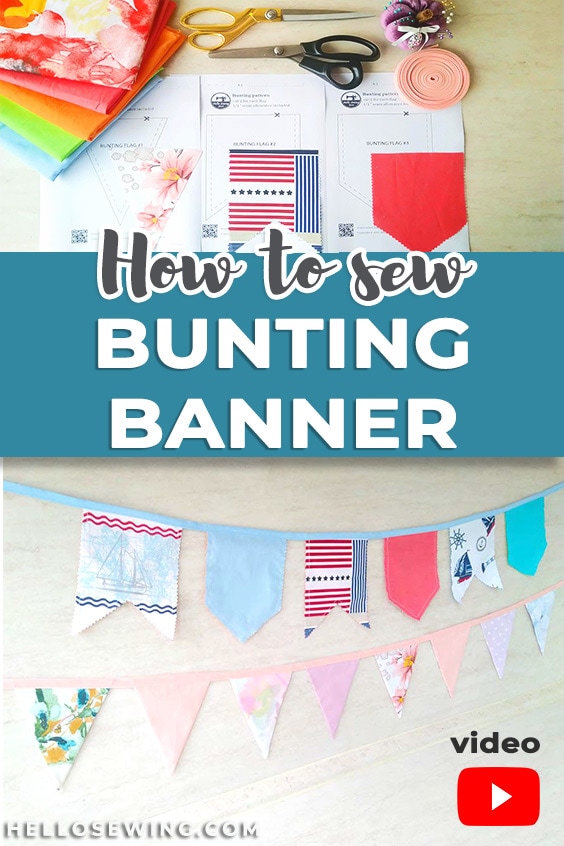
Below you will find my step by step written diy bunting banners tutorial with VIDEO instructions for all the visual learners.
We occasionally link to goods offered by vendors to help the reader find relevant products. Some of the links may be affiliate meaning we earn a small commission if an item is purchased.
Table of Contents
- 1 How to make bunting
- 2 Supplies and tools
- 3 How To Sew Bunting Flags
- 3.1 Fabric Buntings VIDEO TUTORIAL
- 3.2 BUNTING INSTRUCTIONS:
- 3.3 STEP 1: Get the bunting pattern ready for use
- 3.4 STEP 2: Cut the fabric
- 3.5 STEP 3: Start sewing the fabric buntings
- 3.6 STEP 4: Turn the triangles
- 3.7 STEP 5: Decide the distance between segments
- 3.8 STEP 6: Add the tape
- 3.9 STEP 7: Finish the bunting flags
- 4 BONUS 1: How to make buntings with pinking shears LIGHTING FAST
- 5 BONUS 2: Decoration suggestions
How to make bunting
Supplies and tools
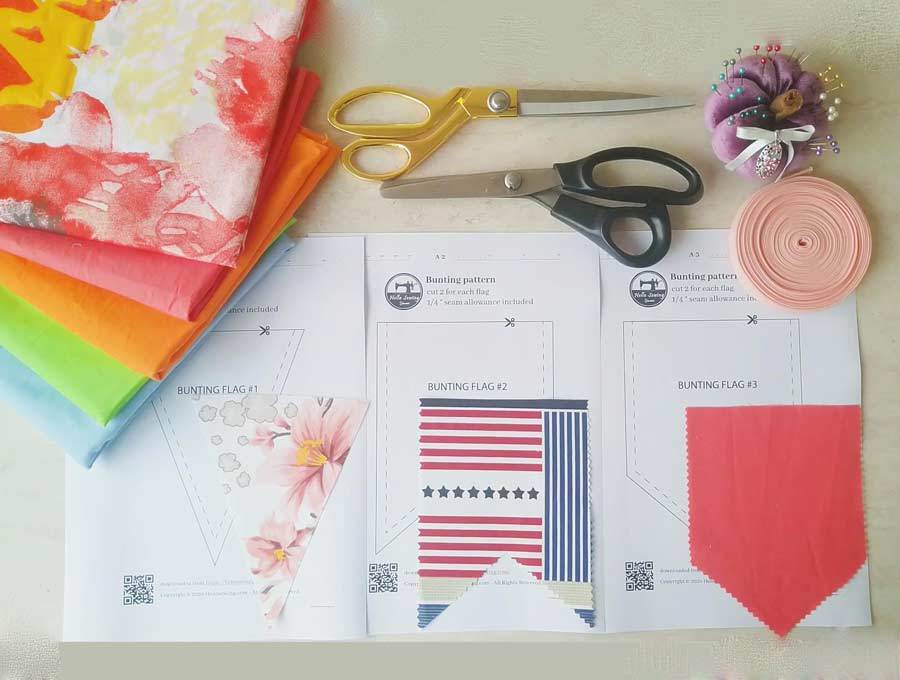
- assorted cotton fabrics for the front – choose fabrics that look good together
- assorted cotton fabrics for the back
- 1/2″ double fold bias tape (or you can make your own bias binding)
- matching thread
- scissors (or rotary cutter and a cutting mat)
- ruler or measuring tape
- iron and ironing board
- sewing clips or pins
- sewing machine (it’s an easy sew, even mini machine can handle this)
DOWNLOAD: Bunting template (Free PDF file) – bunting pattern with 3 different shapes to choose from:
- Flag #1 – Bunting triangle template
- Flag #2 – Double edge pennant template (swallow tail)
- Flag #3 – Spearhead bunting template
Follow us for free patterns & tutorials! [easy-profiles]
How To Sew Bunting Flags
Watch the diy bunting video first and then follow the written step by step instructions how to make bunting below.
Please enjoy and don’t forget to Like and SUBSCRIBE over on YouTube to be kept up to date with new videos as they come out.
Fabric Buntings VIDEO TUTORIAL
BUNTING INSTRUCTIONS:
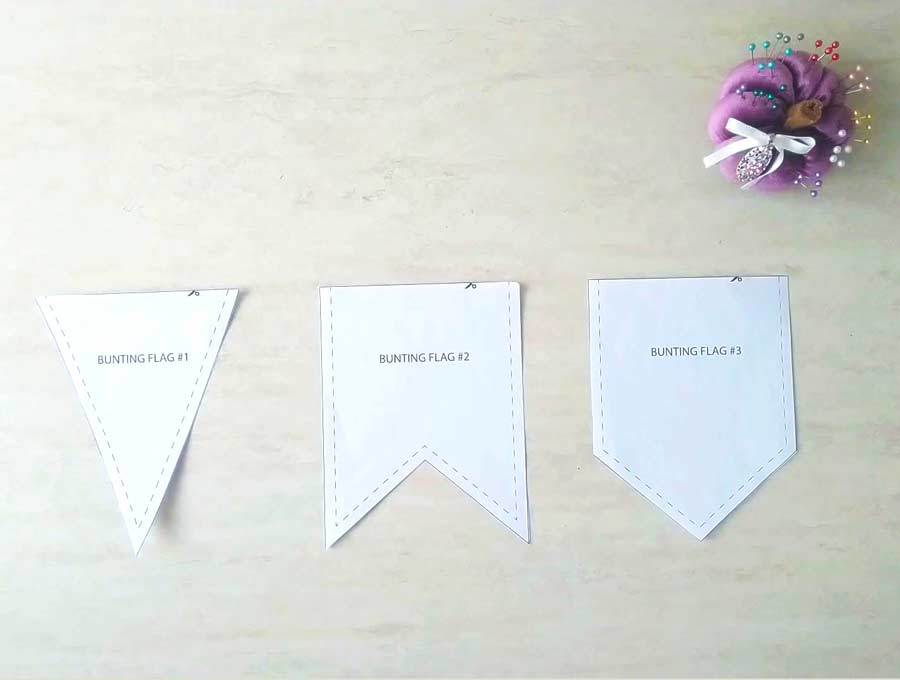
STEP 1: Get the bunting pattern ready for use
Start by downloading and printing our free bunting template that suits your desires the most. You can choose from three different shapes – a triangle and two types of flags. You can mix and match the shapes or use only one of the shapes.
- Flag #1 – Bunting triangle template
- Flag #2 – Double edge pennant template (swallow tail)
- Flag #3 – Spearhead bunting template
Print out the bunting pattern and cut out all excess paper. If you don’t have a printer around, you can trace it from your monitor. Measure the scale to ensure correct sizing and use soft tip pencil to avoid damaging the monitor. You can also just draw the template yourself instead. A simple triangle shape in the dimensions of your choice should be good enough. There is no right or wrong design!
Now let’s get to the instructions on how to make bunting banners.
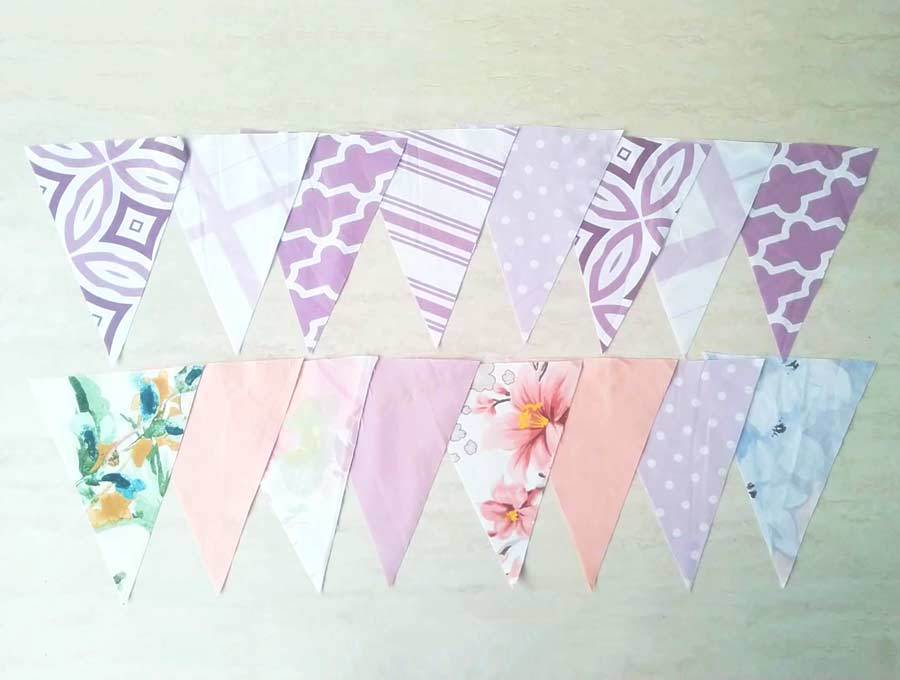
STEP 2: Cut the fabric
Take your bunting banner pattern and use it as a guide to cut out the fabric. Cut out two identical pieces for each flag segment, you need one for the front and one for the back.
Here’s where you need to decide how long you wish your DIY fabric bunting to be. Whether you want it to have 5, 7, 10 or more triangle segments. I suggest you don’t make less than six segments because the bunting would look too short, but that’s just my opinion.
STEP 3: Start sewing the fabric buntings
Take the two triangle fabric pieces that will form one segment and place them on each other. Set them so that their right sides lay on each other.
Align the edges, pin them together, and start sewing. Use a quarter-inch seam allowance and stitch the two triangles together along the two sides (or the sides and the bottom), but leave the top edge unstitched.
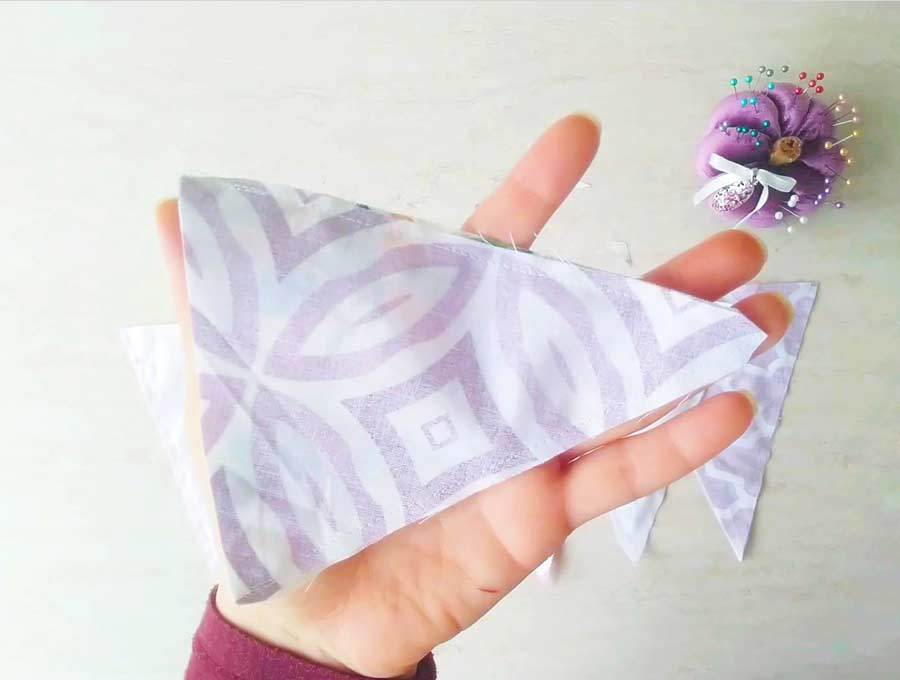
STEP 4: Turn the triangles
Clip the corners as shown with scissors. Then turn each piece inside out. Make sure to push the corners out nicely. You can do that with the back of a pencil or with a chopstick.
If you chose to go with some shapes other than triangles, don’t forget to clip and push out all of the corners.
Use your iron to press the segment flat.
Depending on the type of fabric you decided to use, your triangle segment may not lay flat. If that happens, just topstitch the flag and it will behave!
STEP 5: Decide the distance between segments
This choice is all your, but I will give you a piece of advice.
You can keep the flags about an inch or two away from each other. I suggest you make the distance a bit longer if your bunting is going to be relatively long and you’ll place it somewhere outdoors.
If you mean to keep it indoors, keep the distance between the segments shorter, as well as the overall length of the entire banner.
When you’re done with all that, you can start the final sewing.
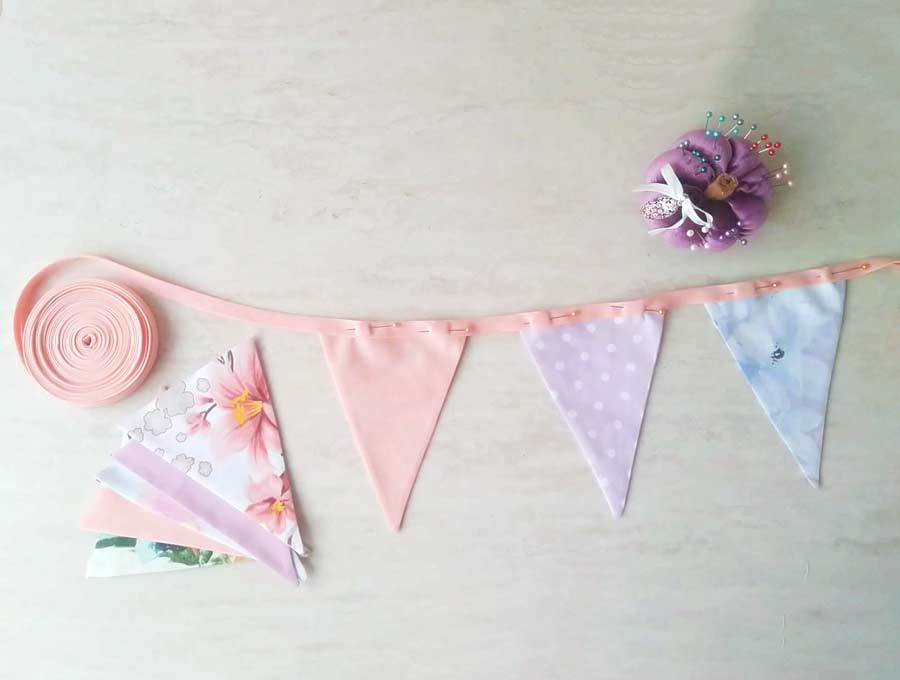
STEP 6: Add the tape
You can do this step in two ways, it’s up to you to decide which kind of tape you’ll use.
The first option is to use a ribbon. Fold it in half lengthwise and press it with your iron. Then insert the triangle’s top edge between the two layers of the ribbon. Start at least 10 inches from the end so you can hang your bunting proudly after you finish it
The second option is to use a double-sided bias tape – you can either buy pre-made or make your own bias binding as I show you in this article. The method is nearly identical. Open the tape and insert the triangle’s top edge inside, all the way to the fold, again at least 10 inches from each end.
Pin everything in place to keep the layers secure.
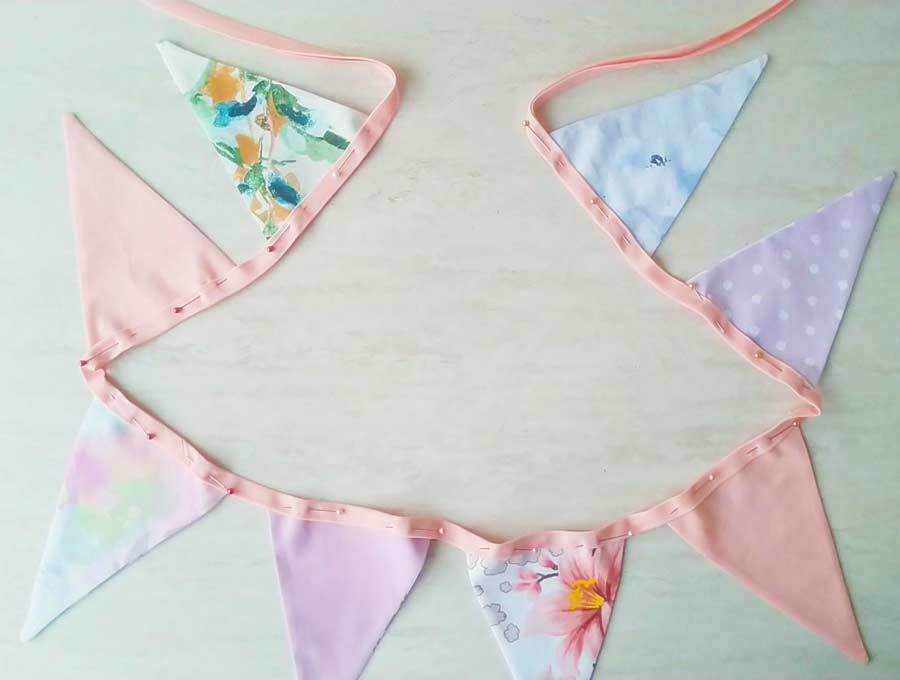
STEP 7: Finish the bunting flags
All that is left now is for you to sew the segments to the tape or the ribbon and your new decorative piece will be finished.
Make a stitch that goes along the entire length of the ribbon or tape. You can use either a straight stitch or a zig-zag stitch to add a bit more flair. Set the width and length of the stitch to 3.0 and sew.

This kind of zig-zag stitch will catch all edges of the tape or ribbon, instead of catching only the middle, as a straight stitch would. Your seam will be stronger and more durable, so you’ll be able to wash the buntings over and over.
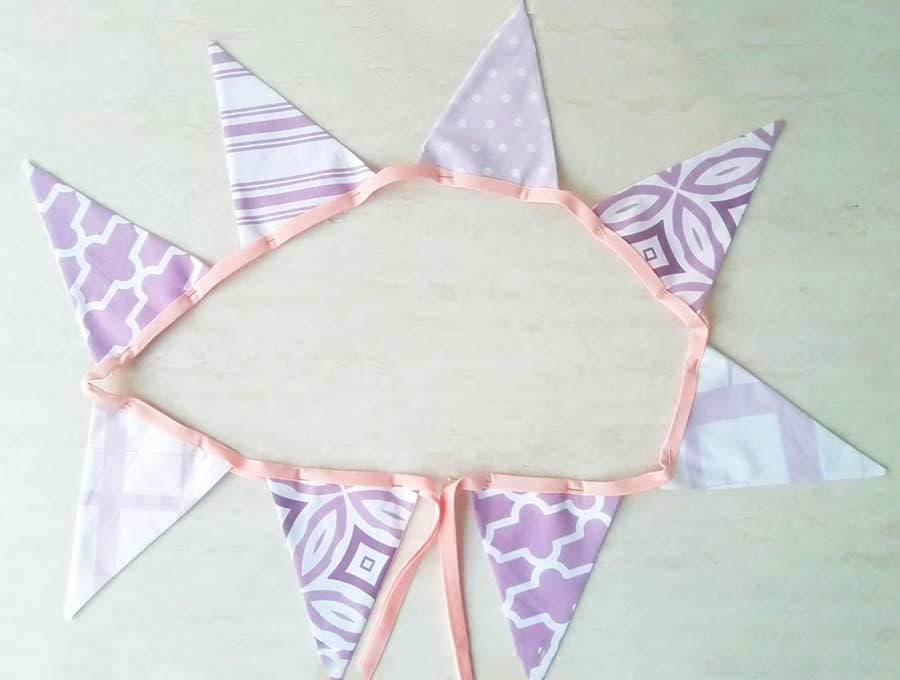
With this, your new bunting flags are complete!
BONUS 1: How to make buntings with pinking shears LIGHTING FAST
Shh.. come closer. Let me tell you a secret. You can make these bunting banners much faster.
If you are making a banner for a wedding or a one-time even and you don’t plan on washing the bunting, you can speed up your banner sewing. Here’s how:
Instead steps 2-4 above do the following:
STEP 2*: Cut the fabric with pinking shears
This will result in a neat zig-zagged edge that won’t fray so easy as when cutting with standard scissors. Cut 2 per flag as per the original instructions.
STEP 3*: Pin the fabrics together
Place the fabrics wrong sides together and pin. If you have clips, I would definitely recommend to use them instead as it the banner comes together much faster.
TIP: After making several banners I can tell you that the end result will be much neater if you cut both front and back pieces at once with the pinking shears.
However, I do have an OCD and even minor inaccuracies drive me nuts. If you don’t have similar issues, you can cut your fabrics any way you want.
omit step 4 – you don’t need to turn anything
Proceed as per the original instructions – insert the flags inside the tape, pin them with clips and sew along the bottom edge of the tape.
Voila! Your bunting banner is done
BONUS 2: Decoration suggestions
If you want to add something more to your new bunting banner, here are a few suggestions that you just might like.
- Make the banner so that every third segment is a different shape, and different in color. This will make it a bit more vibrant.
- Embroider or use a fabric gel pen to write out a letter on each segment to form a creative sign for birthday, weddings, holidays, and more!
- Stitch on small shapes or even miniature fabric toys onto the center of each segment and use the bunting to decorate your children’s room.
Now that you know how to make bunting flags, be sure to try making a few! They make gorgeous home decor and add so much color to every event!
Then tell us how they turned out in the comment section below. If you have some ideas on how to make this project even better, share it with us and everyone else reading this post! Enjoy your new versatile decorative bunting flags!
Do you like this? Pin for later:
Wanna be friends? Click HERE and follow me on Pinterest
RELATED HOME DECOR SEWING PROJECTS: