
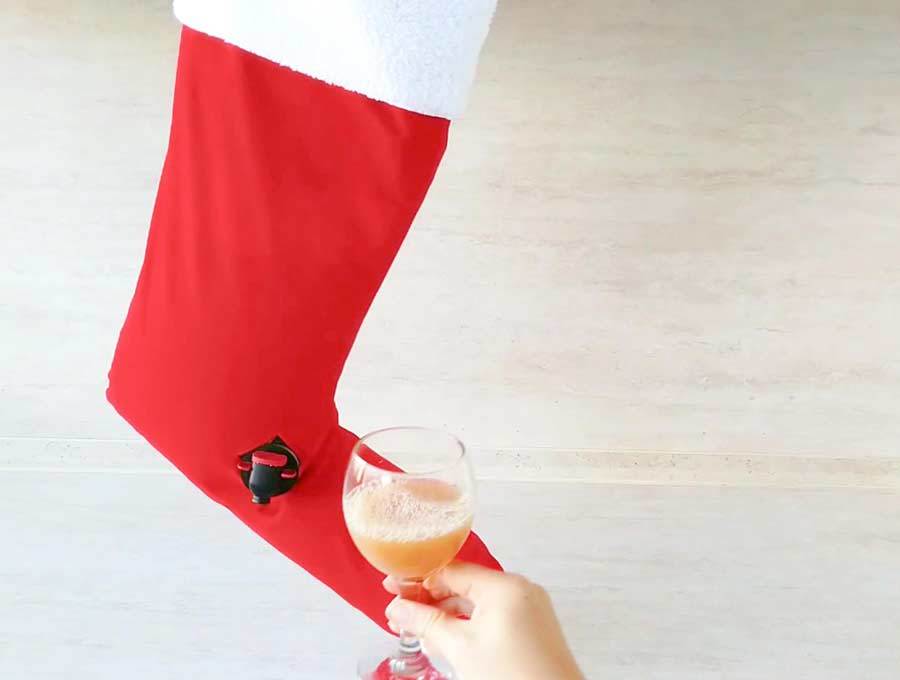
Christmas Stocking Wine Dispenser DIY – a Fun Handmade Gift
When it’s Christmas time and you’re having guests, going back and forth from one person to the other to pour them wine will ruin your mood fast. Luckily, you can prevent that with a classy Christmas stocking wine dispenser!
This DIY wine dispenser combines practical design with that good old holiday spirit vibe. It’s like a Christmas present sock, but the present is wine! And anyone can pour themselves a cup whenever they need a refill. Place it high though, or your kids could become sommeliers.
If you like how all that sounds, this tutorial will be great for you. The best part is the fact that your sewing skills don’t need to be high because this project is beginner-friendly and suitable for almost anyone!
Below you will find my step by step written tutorial with VIDEO instructions for all the visual learners.
We occasionally link to goods offered by vendors to help the reader find relevant products. Some of the links may be affiliate meaning we earn a small commission if an item is purchased.
Table of Contents
- 1 How to Make Wine Dispenser Stocking
- 2 Supplies and tools
- 3 How To Sew a Christmas Stocking Wine Dispenser
- 3.1 Wine Stocking Dispenser VIDEO TUTORIAL
- 3.2 INSTRUCTIONS:
- 3.3 STEP 1: Draw your pattern
- 3.4 STEP 2: Cut the main fabric
- 3.5 STEP 3: Make the pouring hole
- 3.6 STEP 4: Make the boxed wine stocking body
- 3.7 STEP 5: Make the hanging loop
- 3.8 STEP 5: Make the sherpa cuff
- 3.9 STEP 6: Assemble the pieces
- 3.10 STEP 8: Finish the wine dispenser
How to Make Wine Dispenser Stocking
Supplies and tools
Before you can start working on this wine stocking dispenser, you will need to get the following supplies:
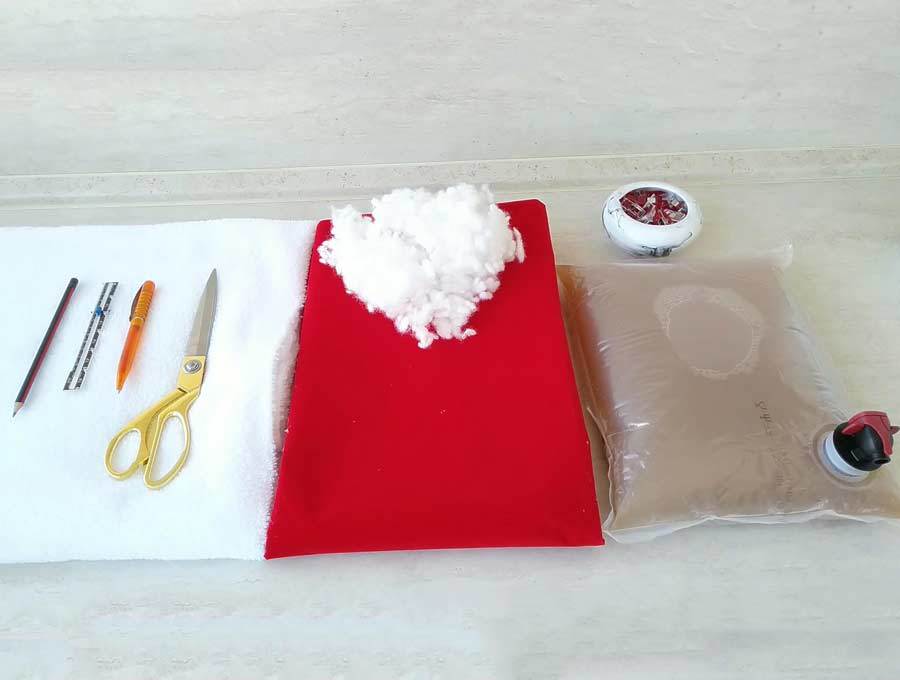
- fabric – 1/2 yd red velour or fleece
- sherpa fabric – 6 x 25″
- stuffing
- fabric pen or sewists chalk
- matching thread thread
- scissors (or rotary cutter and a cutting mat)
- ruler or measuring tape
- iron and ironing board
- sewing clips or pins
- sewing machine
The colors of the fabrics can be the usual Santa style red and white, or you could experiment and try out a different combination like gold and white to give your holidays a bit of a modern, stylish twist.
After you have prepared all that, you can proceed to the next step of the tutorial.
Follow us for free patterns & tutorials! [easy-profiles]
How To Sew a Christmas Stocking Wine Dispenser
Watch the diy wine dispenser video first and then follow the written step by step instructions below.
Please enjoy and don’t forget to Like and SUBSCRIBE over on YouTube to be kept up to date with new videos as they come out.
Wine Stocking Dispenser VIDEO TUTORIAL
INSTRUCTIONS:
STEP 1: Draw your pattern
Place the main fabric on your workspace and fold it in half. Put the boxed or bagged wine you usually drink in the center of the fabric, with its spigot down. Use the washable pen or sewist chalk to trace out the shape of the wine on the fabric.
Add about 6-7 inches of additional height to the drawing, and make it about an inch wider than the wine box. To do that you’ll need to add 1/2 inch on each side to account for the seam allowances.
Put the wine bag or box on one piece of the fabric, again with the spigot down. Then make an X mark where the spigot is. Make the mark as big as the spigot itself.
Here’s how your wine dispenser pattern should look like:

TIP: As with any other sewing projects, wash the fabric thoroughly first to prevent deformations or shrinkage later on. You can either skip the ironing because it could melt the fabric, or place a cotton fabric on top when ironing.
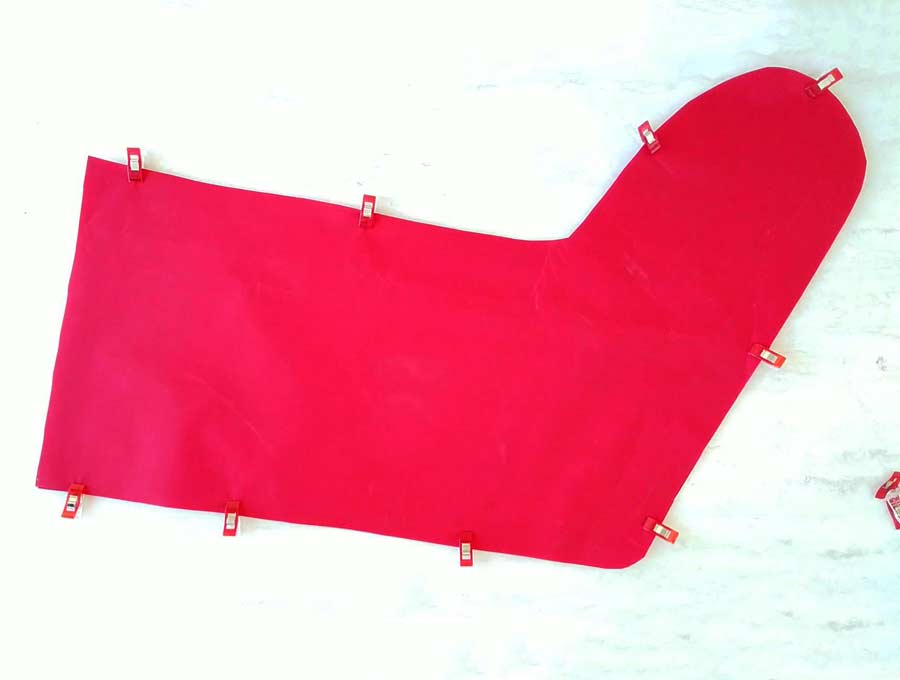
STEP 2: Cut the main fabric
Use clips / pins to secure the two layers of fabric together. Then cut out the fabric along the lines you drew earlier.
TIP: If using velour and pins, make sure to pin inside the seam allowances or the holes will show!
STEP 3: Make the pouring hole
Cut along the X mark with scissors or a rotary cutter.
Fold the flaps of the X cut you made outwards so that you form a square hole. Use clear tape to keep those flaps secure in that position.
Sew around the hole with a straight stitch. Do that twice so that the opening becomes durable enough. Cut off the excess fabric flaps.
STEP 4: Make the boxed wine stocking body
Place the piece of main fabric with the hole on its counterpart without the hole, with their right sides facing each other. Align the edges and pin everything in place.
Sew all around the wine dispenser stocking, except for the upper side, leave that unstitched. Use a 1/2 inch seam allowance.
STEP 5: Make the hanging loop
You’ll need something to hang the dispenser on, otherwise, it won’t be useful at all.
Cut out a 3 x 7 inches big piece of fleece. Fold it in half lengthwise so that the right sides are in. Open it up, and fold each of the long edges towards the middle. Fold it one more time and secure with clips.
Make a stitch along the line where the two long edges meet. Use a quarter-inch seam allowance.
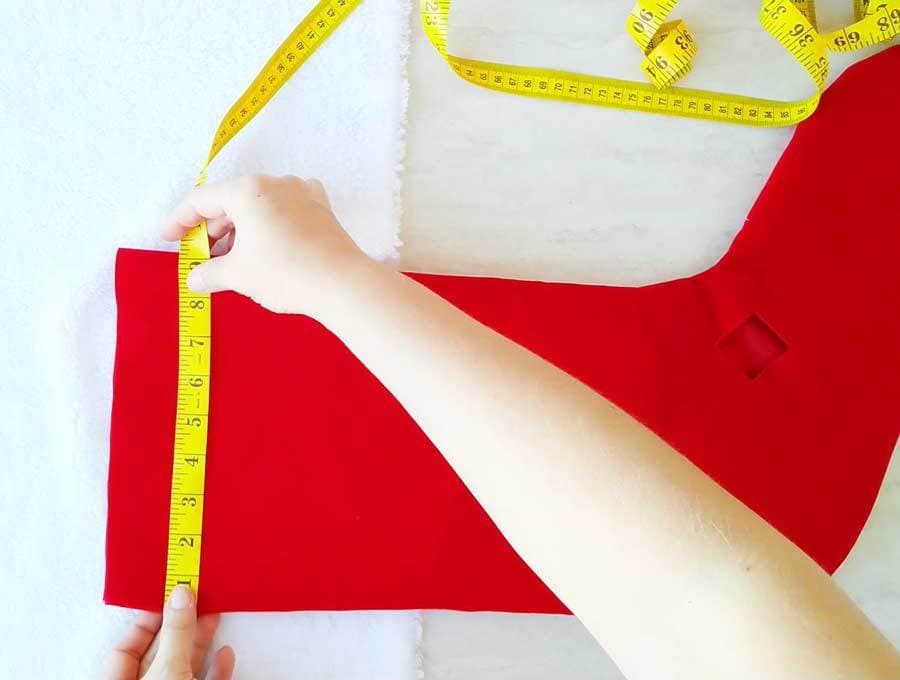
STEP 5: Make the sherpa cuff
Use a measuring tape and measure the width of the upper edge of the fabric piece. Double that and add one inch to it for seam allowance.
Cut out the piece of sherpa fabric that’s 6 inches long and as wide as the number you got after the measuring.
Fold the sherpa fabric piece in half with its right sides together. Sew the two short ends together with a half-inch seam allowance.
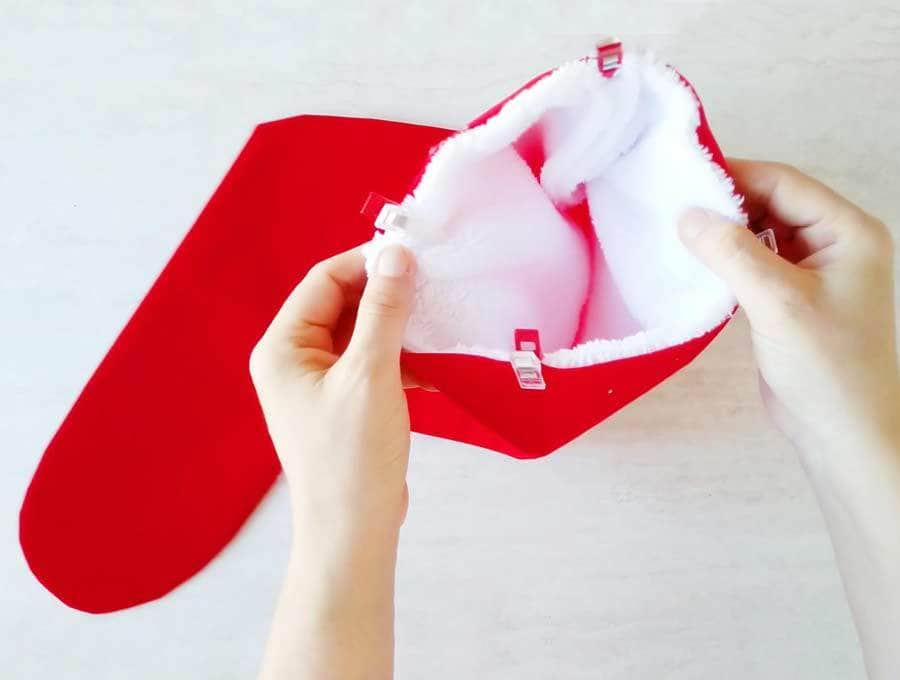
STEP 6: Assemble the pieces
Fold the hanger in half so that the short edges meet. Then place it at the back seam of the main body fabric, aligning the raw edges together. Keep the loop inside facing downward.
Make sure that the sherpa cuff is turned right side out and insert it into the stocking body, aligning their edges together. Pin everything in place.
Use a half-inch allowance and sew all around the top edge of the stocking. This combination of fabrics might be difficult to pierce so go slowly and be patient while you’re stitching. Backstitch over the hanging loop to make it more durable.
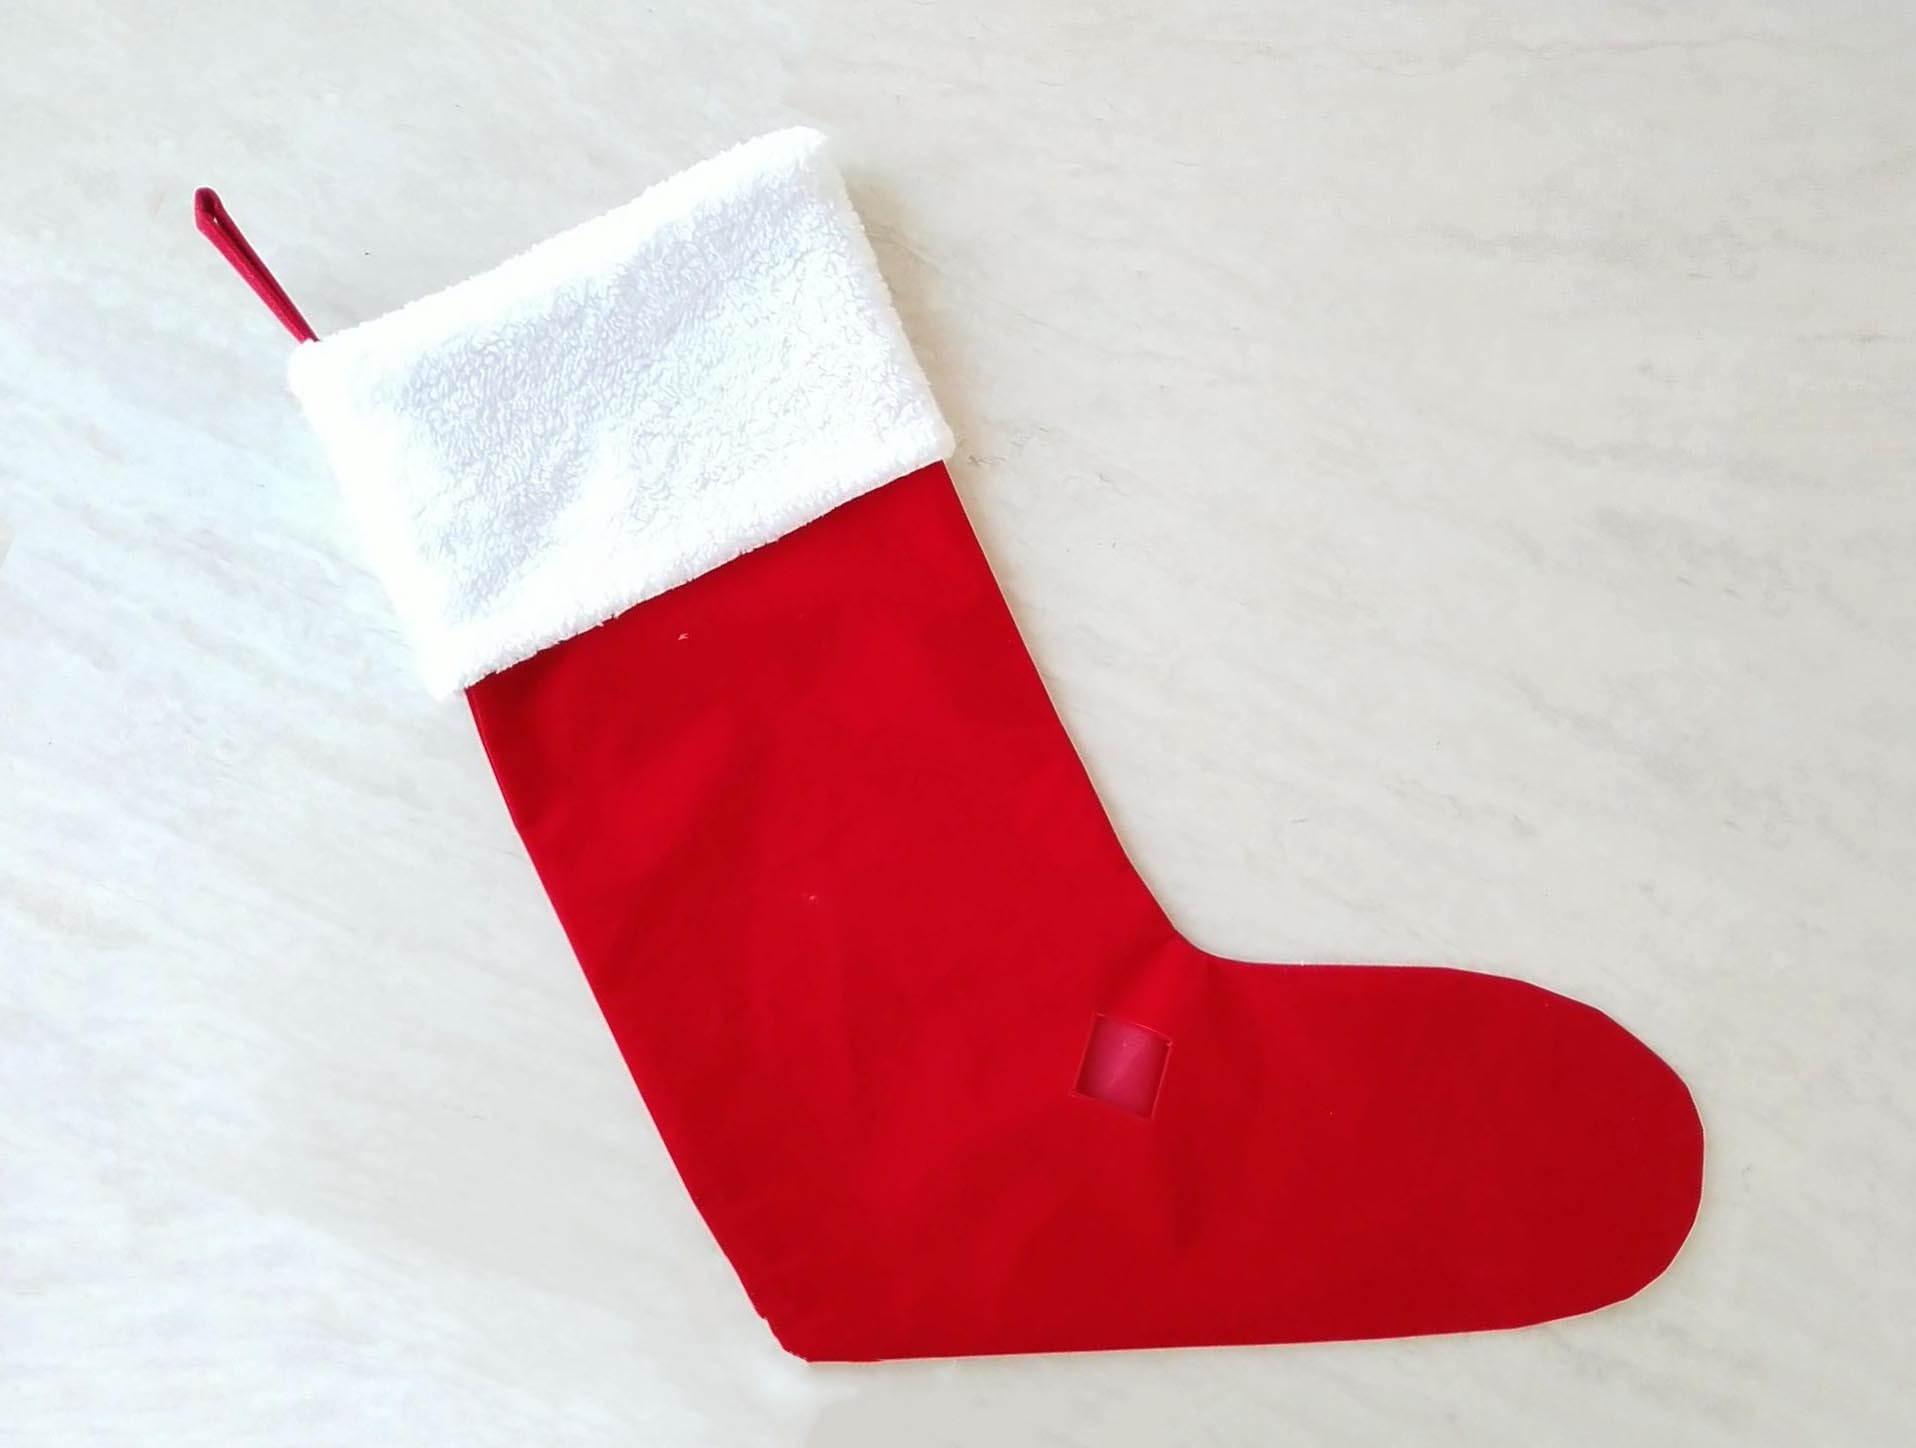
STEP 8: Finish the wine dispenser
Pull the cuff outwards and then fold it over the edges of the main body. This will also reveal the hanger.
Put some fiberfill in the dispenser and push it to the bottom to shape the entire thing. Then place the wine inside, pull the spigot out through the opening and see if it fits well. Insert or remove fiberfill as necessary to adjust the interior and allow the wine to fit as it should. You can add some fiberfill on top of the wine.
Hang the stocking on a sturdy hook and that’s it. You can start pouring wine from the dispenser now, it’s ready for action! Replace the wine as needed!
What do you think about this project? Were you able to make the wine dispenser yourself? Let us know how yours turned out in the comment section below, we appreciate the feedback! Enjoy pouring wine with ease during Christmas!
Do you like this? Pin for later:

Wanna be friends? Click HERE and follow me on Pinterest
RELATED:
- Quilted star ornament
- Tree shaped napkins tutorial
- Upcycle: t-shirts into easy cloth napkins tutorial
- Liven up your space for Christmas with this easy DIY fabric bunting
- DIY fabric rose – great christmas gifts topper or stunning home decoration