
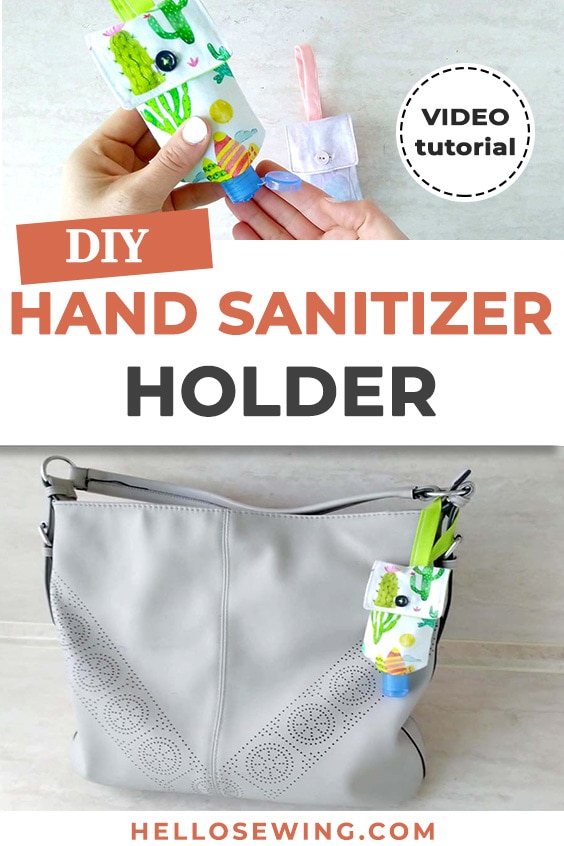
DIY Hand Sanitizer Holder – Free Pattern + VIDEO Tutorial
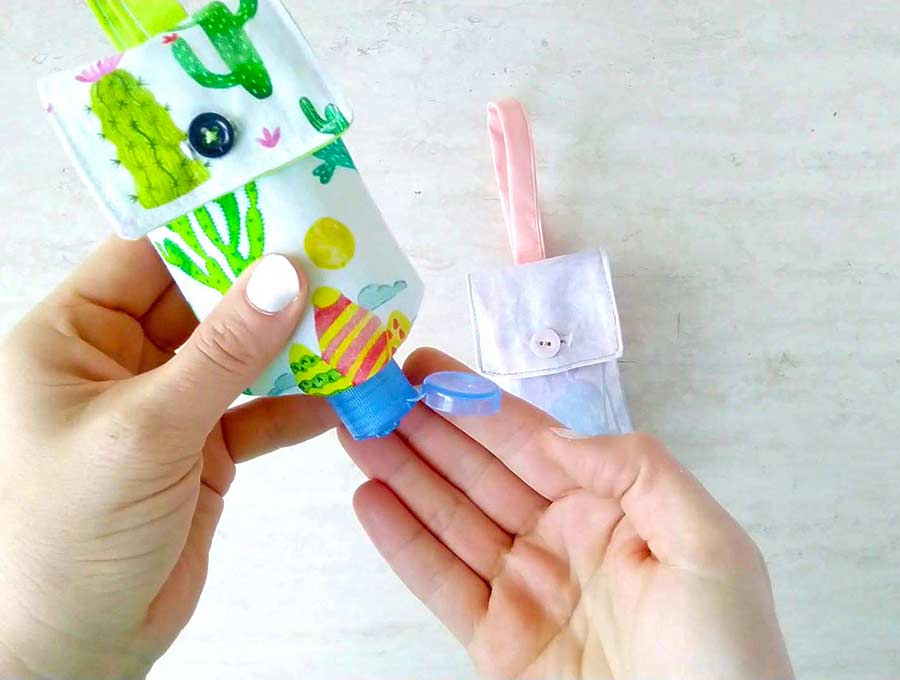
I have a confession to make. Up until recently I was still digging inside my purse to find my hand gel every single time I needed to use it. The digging was usually followed by an eye roll and a sigh as it was the last item to find in my purse. So.. enough was enough and I decided to make a hand sanitizer holder that I can attach on the strap of my purse. I was not impressed by the hand gel pouch patterns and tutorials I found online. Almost all of them used metal hardware all I wanted was a fabric hand sanitizer pouch to strap on my purse or on the kid’s backpack. Long story short, I decided to create my own DIY hand sanitizer sewing pattern and today I’m sharing it with you along with a handy VIDEO tutorial
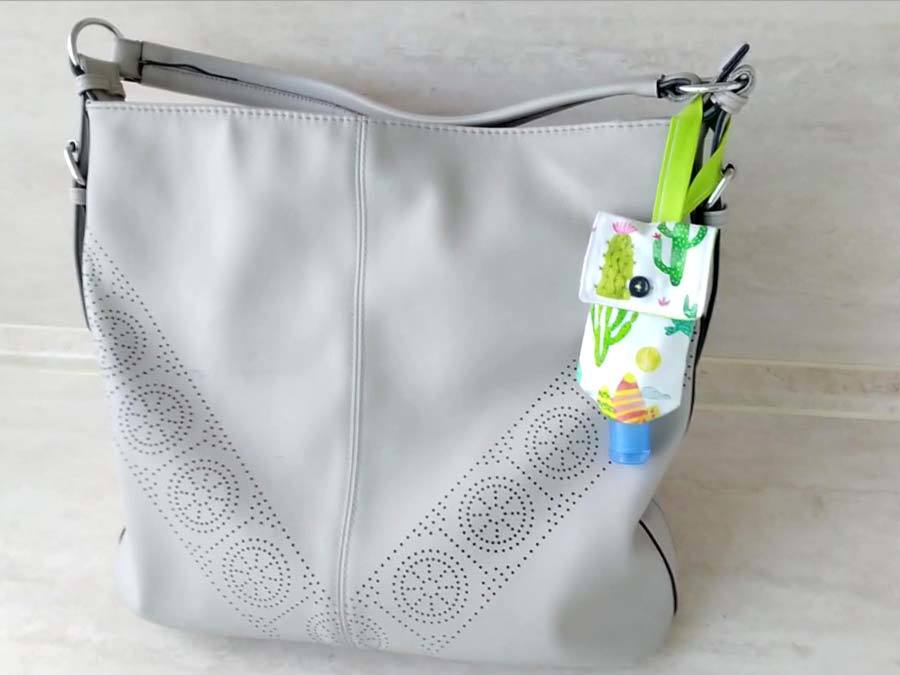
Below you will find my step by step written tutorial with VIDEO instructions for all the visual learners. I show you how to make your own hand gel sanitizer holder template for any small hand gel bottle. It’s great both for ordinary people like us, or for the medical professionals like doctors and nurses who need it on the go.
We occasionally link to goods offered by vendors to help the reader find relevant products. Some of the links may be affiliate meaning we earn a small commission if an item is purchased.
Table of Contents
- 1 How to Make a Hand Gel Pouch
- 2 Hand Sanitizer Holder Supplies and tools
- 3 How To Sew Hand Sanitizer Holder
- 3.1 Fabric Hand Cream Holder VIDEO TUTORIAL
- 3.2 HAND GEL POUCH INSTRUCTIONS:
- 3.3 STEP 1: Draw your hand sanitizer holder pattern
- 3.4 STEP 2: Cut the fabrics for the DIY hand sanitizer holder
- 3.5 STEP 3: Make the handle of the hand gel pouch
- 3.6 STEP 4: Make the front
- 3.7 STEP 5: Sew handle and front
- 3.8 STEP 6: Assembling the back
- 3.9 STEP 7: Topstitching front and back
- 3.10 STEP 8: Lining the back
- 3.11 STEP 9: Adding front cover
- 3.12 STEP 10: Assembling the hand gel holder
- 3.13 STEP 11: Stitch
- 3.14 STEP 12: Clip and trim
- 3.15 STEP 12: Turn around and press
- 3.16 STEP 13: Topstitch the cover
- 3.17 STEP 14: Sew buttonholes
- 3.18 STEP 15: Sew buttons
How to Make a Hand Gel Pouch
Hand Sanitizer Holder Supplies and tools

- travel size hand sanitizer bottle (with No products found.)
- main fabric – 100% cotton (tightly woven cotton, such as quilting cotton or cotton used in quality bed sheets)
- lining fabric – 100% cotton
- matching thread
- scissors (or rotary cutter and a cutting mat)
- ruler or measuring tape
- sewing machine (it’s an easy sew, so even your kids sewing machine will do, or you can even hand sew this, although admittedly it will take you more time)
Follow us for free patterns & tutorials! [easy-profiles]
How To Sew Hand Sanitizer Holder
Watch the diy hand sanitizer holder video first and then follow the written step by step instructions below.
Please enjoy and don’t forget to Like and SUBSCRIBE over on YouTube to be kept up to date with new videos as they come out.
Fabric Hand Cream Holder VIDEO TUTORIAL
HAND GEL POUCH INSTRUCTIONS:
STEP 1: Draw your hand sanitizer holder pattern
Place the hand gel bottle on top of the paper. Hold the pencil straight (don’t tilt it!) and draw around the bottle. Don’t trace the bottle neck. Add 1/2 inch on each side of the bottle (add to the widest and highest points of the bottle) and create a rectangle pattern. You should also add 1/4 inch on each side of the bottle neck pattern to allow some space. At this point the hand sanitizer pouch template should look like this:
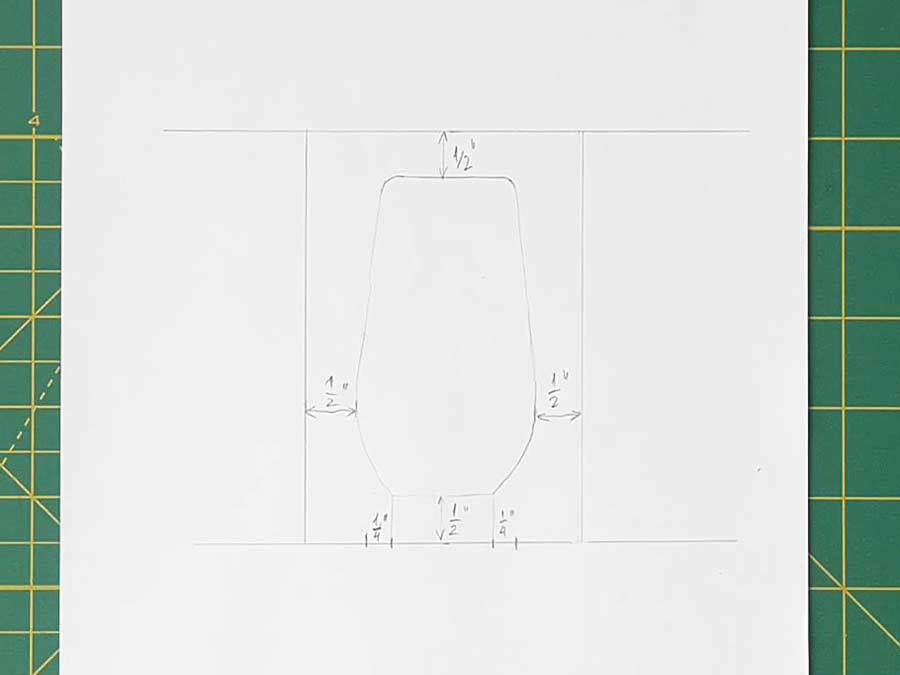
Cut out the paper hand gel pouch pattern.
STEP 2: Cut the fabrics for the DIY hand sanitizer holder
You need to cut 6 pieces of fabric as follows:
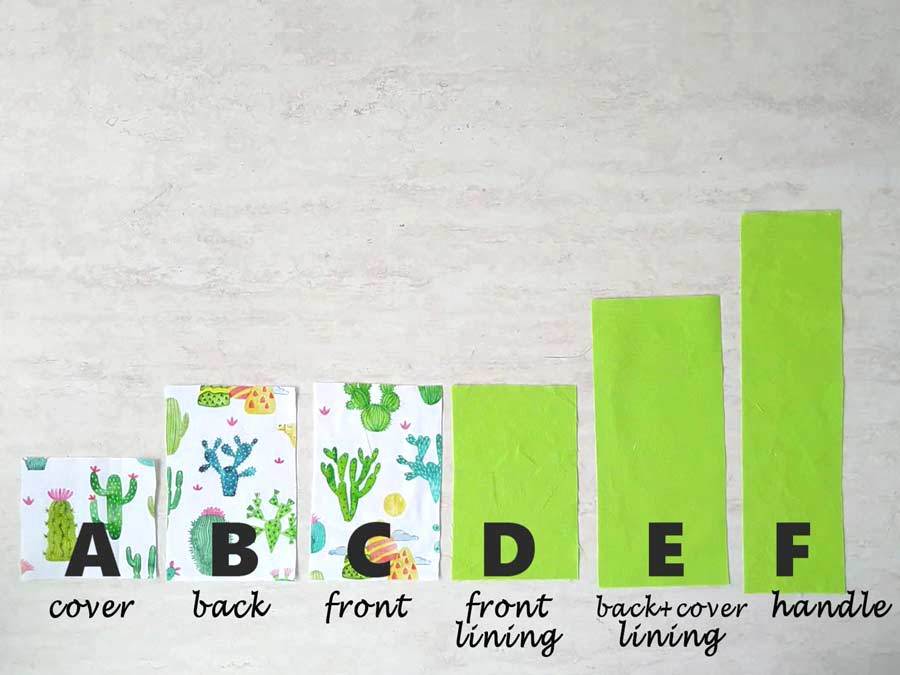
A – cover – 3/4 of the height of the template
B – back – according to template
C – front – according to template
D – front lining – according to template
E – back+cover lining – template + cover
F – handle – 8 x 2.5″
Here’s a handy trick – to save some time place your lining fabric on a flat surface, fold your main fabric in half and place it on top of the lining and then pin the pattern to the fabrics. You’ll cut all three at one go.
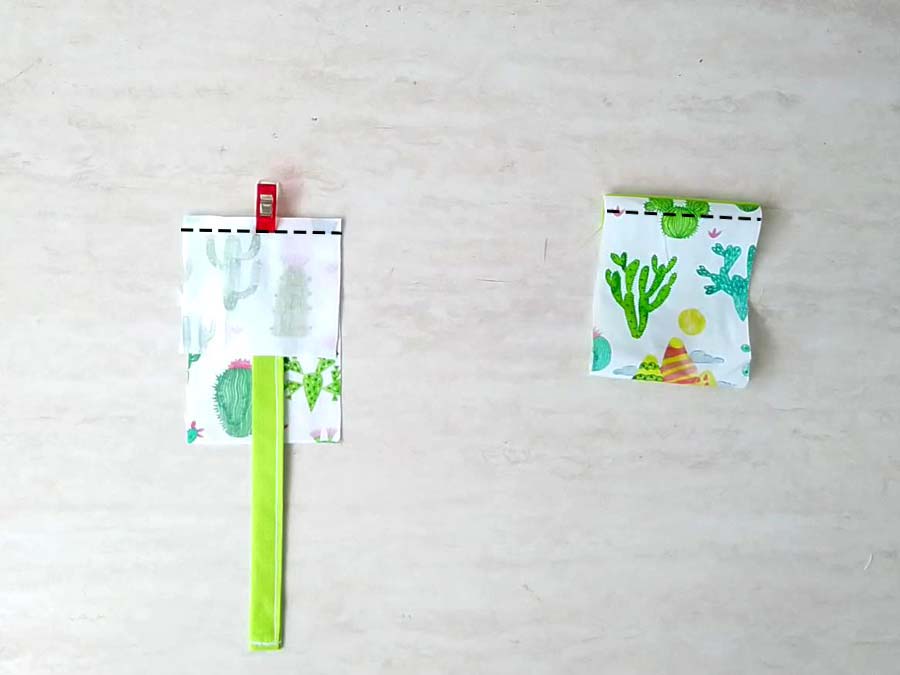
STEP 3: Make the handle of the hand gel pouch
Press one of the shortest sides 1/4″ inches in. Fold in half lengthwise and press again. Open up the handle and press each of the edges towards the middle crease you’ve just created. Press again, and fold the handle. Sew in place both the short and the long side. Leave the other short side unsewn.
STEP 4: Make the front
Place front piece on top of the front lining, right (pretty) sides together. Sew along top and bottom edges using a 1/4″ seam allowance.
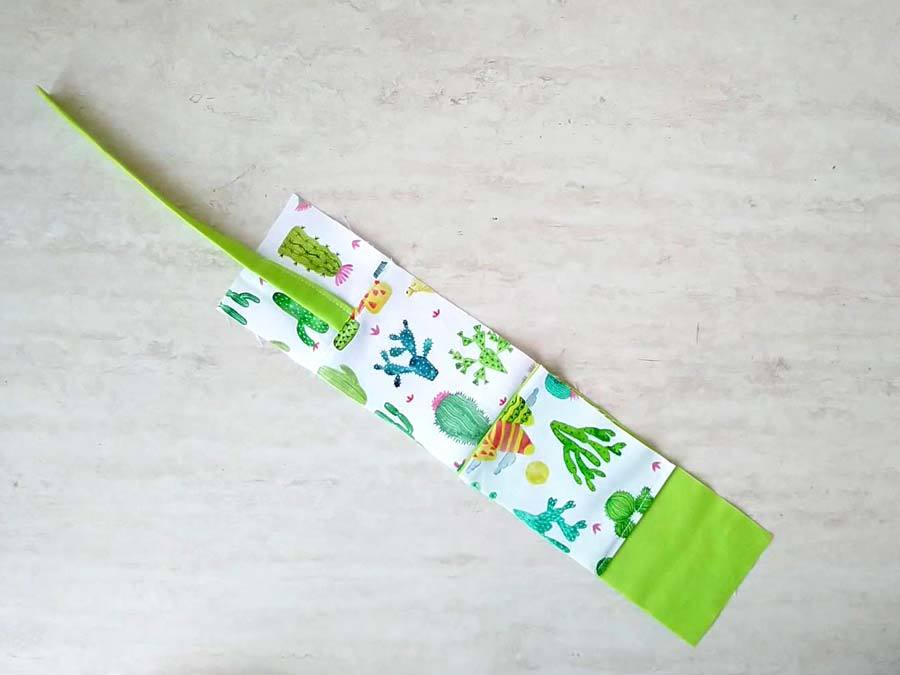
STEP 5: Sew handle and front
Stitch the handle and the front piece.
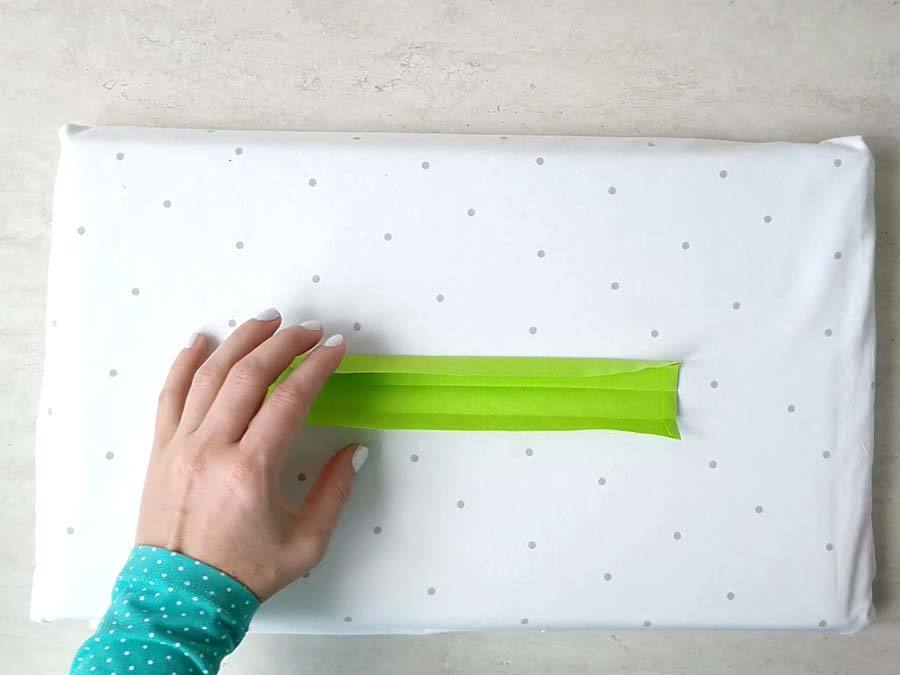
STEP 6: Assembling the back
Place the back (B) on a flat surface, then place the unfinished edge of the handle (F) in the middle of the top edge, and then place the cover (A) on top. Right sides of the pieces should be facing each other. Sew along the top edge.
STEP 7: Topstitching front and back
Turn the front piece around. Topstitch along the top, as close to the edge as possible.
Open up the back piece, and fingerpress the seam allowance towards the backpiece. Topstitch in place to secure it.
STEP 8: Lining the back
Place the back lining (E) on top of the back piece and sew along the bottom edge
STEP 9: Adding front cover
Open up the back you’ve just assembled. Place the front assembly on top of the back lining. Align the unsewn edge to the middle seam.
STEP 10: Assembling the hand gel holder
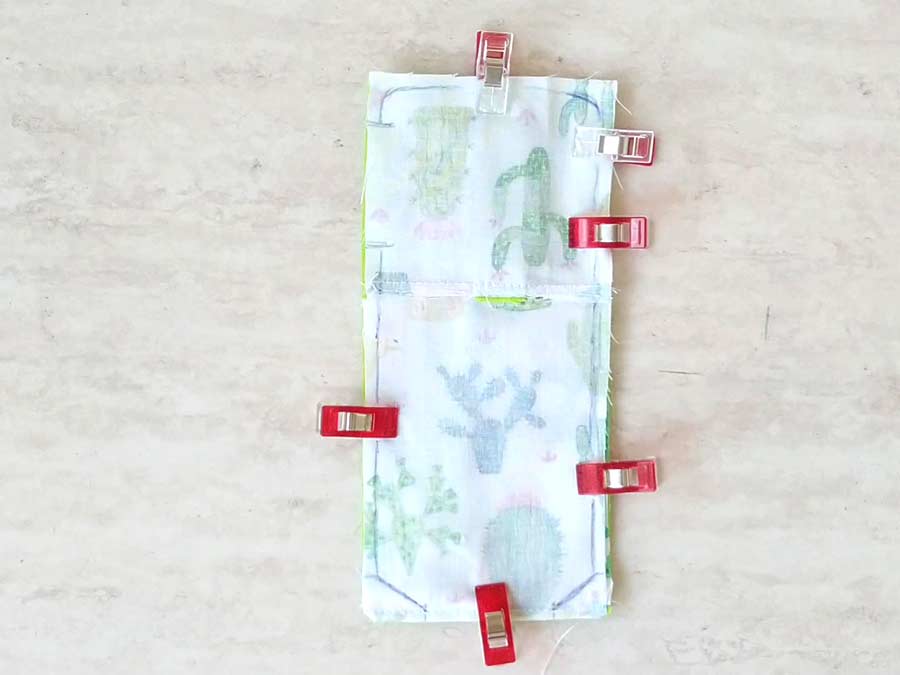
Fold the side with the handle towards the cover. Pin everything in place with pins or clips.
Now mark your stitching lines. Use your template to mark the opening for the hand sanitizer. Draw 1/2 inch markings along the sides near the bottom and join them with the markings for the opening. Mark the stitching line 1/4 inches in around the whole thing, and don’t forget to leave an opening for turning along one of the sides of the cover.
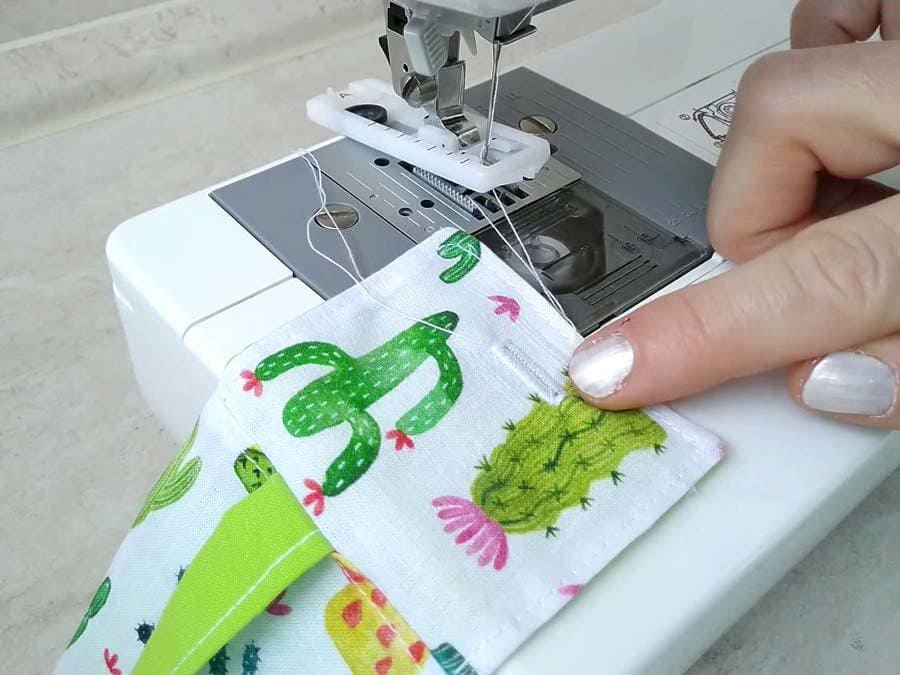
STEP 11: Stitch
Stitch along the lines you’ve drawn. Backstitch at the beginning and the end of each seam.
STEP 12: Clip and trim
Trim the seam allowances and clip the corners to allow them to lay flat.
STEP 12: Turn around and press
Turn the hand gel holder around through the opening. Push the corners out with a point turner or anything pointy (scissors or pen) you have on hand to give them a nice, sharp and professional look.
Don’t skip pressing – I know that many of you might cringe – but believe me. Pressing is VERY important for the overall look of your makes.
STEP 13: Topstitch the cover
This also closes the gap left for turning.
Mark the position of the buttonholes on the cover and on the handle. Sew them up. Use your seamripper and a pin to open them.
Insert the hand sanitizer in the holder and close the cover to mark the placement of the button. Sew the buttons on the cover and on the back.
That’s it. Your DIY hand sanitizer holder it ready to get in action and join the war against the nasty germs!
On a scale from 1 to 5, how easy it was to learn how to make hand sanitizer pouch? Which step you found was most challenging?
Do you have any suggestions for improvements?
Do you like this? Pin for later:
Wanna be friends? Click HERE and follow me on Pinterest
RELATED:
- Face mask carry pouch pattern
- FREE 3d mask template (with VIDEO)
- Printable face mask sewing pattern (contoured model)
- Chapstick holder keychain